Table of Contents
Advertisement
Advertisement
Table of Contents

Related Manuals for Husqvarna Viking Eden Rose


Summary of Contents for Husqvarna Viking Eden Rose
- Page 1 User’s Guide L i m i t e d e d i t i o n K E E P I N G T H E WO R L D S E W I N G...
-
Page 2: Important Safety Instructions
This houshold sewing machine is designed to comply with IEC/EN 60335-2-28 and UL1594 IMPORTANT SAFETY INSTRUCTIONS When using an electrical appliance, basic safety precautions should always be followed, including the following: Read all instructions before using this household sewing machine. DANGER - To reduce the risk of electric shock: • A sewing machine should never be left unattended when plugged in. Always unplug this sewing... - Page 3 Presser Foot Kit A limited edition accessory foot package is packed in the box with your HUSQVARNA VIKING EdEN RoSE™ ® sewing machine. The package contains the following optional presser feet: GatherinG Foot (4127971-45) Gather fabric or gather and attach a ruffle in one step. Suitable for light to medium weight fabrics.
- Page 4 CLear PiPinG Foot (4130971-45) Insert packaged piping into seams and edges for a tailored finish. Cover cord with fabric for specialty piping. The clear view allows you to see the piping placement and see exactly where you are stitching. The clear view enables you to see the first row of stitching and adjust your needle position to stitch next to the original row.
-
Page 5: Table Of Contents
Table of Contents Basic sewing Overview ..............4 Straight Stitch Sewing ........22 Extension Table ............5 Finishing sewing .............23 Standard Accessories and Storage ....6 Seam Guides on the Needle Plate ....24 Getting Ready to Sew Pivoting ..............24 Connecting the Power Supply......7 Utility Sewing Adjusting the Sewing Speed ......8 Basic Zigzag .............25 Speed Control Slide ......8... -
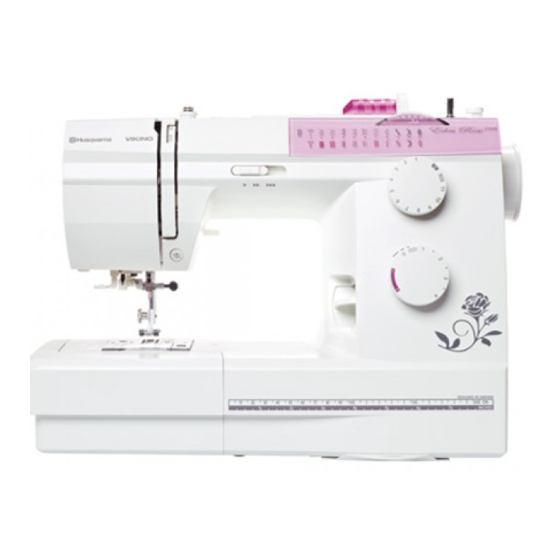
Page 6: Overview
overview 1. Bobbin stop 2. Bobbin spindle 3. Hole for extra spool pin 4. Spool holder 5. Spool pin 6. Thread guide for bobbin winding 7. Thread take-up lever 8. Presser foot pressure dial 9. Face plate 10. Thread cutter 11. -
Page 7: Extension Table
extension taBLe to remove Hook your fingers on the bottom left of the extension table and pull it to the left. Free-arm sewing For stitching sleeves, waistbands, pant legs or any other tubular garments. For darning socks or mending knees or elbows. -
Page 8: Standard Accessories And Storage
standard aCCessories and storaGe 1. Utility Foot A 2. Utility Foot B 3. Buttonhole Foot C 4. Adjustable Blind Hem Foot 5. Zipper Foot E 6. Non-stick Glide Foot H 7. Edging Foot J 8. Automatic Buttonhole Foot R 9. Transparent Foot B 10. -
Page 9: Getting Ready To Sew
Getting Ready to Sew ConneCtinG the Power suPPLY Turn the power switch off. Before plugging in the foot control, check to ensure that it is of type “21361” (see underside of foot control). Insert the foot control plug into the machine socket. -
Page 10: Adjusting The Sewing Speed
adjustinG the sewinG sPeed You can control the sewing speed in two ways; with the speed control slide or with the foot control. speed Control slide With the speed control slide, you can change the sewing speed to suit your needs. -
Page 11: Sewing Guide Reference Chart
sewinG Guide reFerenCe Chart Consult the Sewing Guide Reference Chart for the fast easy way to select the best stitch, stitch length, stitch width, thread tension, presser foot and presser foot pressure for your sewing technique and fabric. Look in the column for your fabric type: : for stable fabrics that woven fabrics have no stretch. -
Page 12: Reverse Lever
reverse Lever When you press the reverse lever downwards, the machine will sew in reverse. The machine will only sew in reverse as long as the reverse lever is pressed down. 1. Reverse lever Presser Foot Pressure diaL Turn the pressure dial to adjust the pressure of the presser foot on the fabric when sewing on different thicknesses of fabric. -
Page 13: Raising And Lowering The Presser Foot
raisinG and LowerinG the Presser Foot The presser foot is raised and lowered with the presser foot lever. The presser foot must be down when sewing. By raising the presser foot lever as far as it goes the lift height of the presser foot can be increased by 1/4”... -
Page 14: Changing The Needle
ChanGinG the needLe Turn off the power switch. Your machine uses standard sewing machine needles. 1. Lower the presser foot. Loosen the screw in the needle clamp by turning it counterclockwise. Remove the needle. 2. Push up the new needle as far as it will go with the flat side away from you. -
Page 15: Placing The Thread Spool On The Spool Pin
PLaCinG the thread sPooL on the sPooL Pin Place the thread spool on the spool pin with the thread coming off as illustrated. With large thread spools, the large holder is placed in front of the thread. If you use narrow thread spools, the small holder is placed in front of the thread. -
Page 16: Bobbin Winding
BoBBin windinG 1. Pull the handwheel out to put the machine in bobbin wind position (the needle will not go up and down). 2. Guide the thread around the bobbin thread tension guide into the tension disk. 3. Thread through the hole in the bobbin from the inside to the outside. -
Page 17: Placing The Bobbin
PLaCinG the BoBBin Turn off the power switch 1. Place the bobbin in the bobbin case with the thread pulling off as illustrated. 2. Guide the thread into the front notch (a) on the front side of the bobbin case. Draw the thread to the left, sliding it between the tension spring blades. -
Page 18: Threading The Machine
threadinG the MaChine Turn off the power switch Make sure the presser foot is raised and the needle is in the up position. 1. Bring the thread from the spool and pass it through the thread guide. Then draw it down along the right slot. -
Page 19: Needle Threader
needLe threader Turn off the power switch 1. Raise the needle to its highest position. Lower the needle threader as far as it will go. The hook comes through the needle eye from behind. 2. Bring the thread from the left around the guide and under the hook. -
Page 20: Bringing Up The Bobbin Thread
BrinGinG uP the BoBBin thread Turn off the power switch. 1. Raise the presser foot and hold the needle thread lightly with your left hand. 2. Turn the handwheel slowly toward you one complete turn. Bring the bobbin thread up by pulling the needle thread as illustrated. -
Page 21: Stitches
stitChes stretCh stitChes stitCh seLeCtion Raise the needle to its highest position. Turn the stitch selection dial to set the desired stitch pattern number at the setting mark. 1. Stitch selection dial 2. Setting mark Note Always raise the needle above the fabric and presser foot before you turn the stitch selction dial. -
Page 22: Adjusting Stretch Stitch Balance
adjustinG stretCh stitCh BaLanCe If the stretch stitches are unbalanced when you sew on a particular fabric, balance them by turning the stitch length dial, within the stretch range. to adjust the distorted stitches: If the stitches are spread out (a), correct them by turning the dial in the “–”... -
Page 23: Balancing Needle Thread Tension
BaLanCinG needLe thread tension The thread tension may be adjusted depending on the sewing materials, layers of fabric and sewing method. Balanced tension: The ideal straight stitch has threads locked between two layers of fabric, as illustrated. For an ideal zigzag stitch, the bobbin thread does not show on the right side (top side) of the fabric, and the needle thread shows slightly on the wrong side... -
Page 24: Basic Sewing
Basic Sewing straiGht stitCh sewinG Machine setting Consult the Sewing Guide Reference Chart for the settings recommended. starting to sew Raise the presser foot and position the fabric next to a seam guide line on the needle plate. Lower the needle to the point where you want to start. -
Page 25: Finishing Sewing
FinishinG sewinG 1. Press the reverse lever and sew several stitches in reverse at the end of the seam, to lock the stitch. 2. Raise the presser foot and remove the fabric, drawing the threads to the back. 3. Draw the threads up and into the thread cutter. -
Page 26: Seam Guides On The Needle Plate
seaM Guides on the needLe PLate The seam guides on the needle plate help you measure seam allowance. The numbers indicate the distance between the center needle position and the seam guide. 1. Seam guides nuMBer sPaCinG (CM) PivotinG Seam along the 5/8” guide. Stop stitching and lower the needle when the fabric edge facing you lines up with the cornering guides as shown. -
Page 27: Utility Sewing
Utility Sewing Consult the Sewing Guide Reference Chart for the fast easy way to select the best stitch, stitch length, stitch width, thread tension, presser foot and presser foot pressure for your sewing technique and fabric. BasiC ZiGZaG Simple zigzag stitching is widely used for overcasting, sewing on buttons etc. -
Page 28: Reinforced Straight Stitch
reinForCed straiGht stitCh Machine setting 1. Stitch pattern: 1 2. Stitch width: 0 or 5 3. Stitch length: stretch 4. Thread tension: 2 – 5 5. Presser foot: Utility foot A This stitch is stronger than regular straight stitch, due to the fact that it is a triple and elastic stitch. -
Page 29: Automatic Buttonhole
autoMatiC ButtonhoLe Machine setting 1. Stitch pattern: 2. Stitch width: 4 – 5 3. Stitch length: 4. Thread tension: 3 – 5 5. Presser foot: Automatic buttonhole foot R Note: The size of buttonhole is automatically set by placing the button in the automatic buttonhole foot R. - Page 30 Pull the buttonhole lever down as far as it will go. a. Buttonhole lever Raise the foot and put the needle thread through the hole and under the foot. Draw both threads to the left. Insert the fabric under the foot and lower the needle at the starting point.
- Page 31 5. Sew slowly. The machine will stitch the complete buttonhole. Stop the machine at the starting point when the buttonhole is completed. The machine sews the front bartack and left column first, then the back bartack and right column. 6. Raise the foot and remove the fabric.Cut both needle and bobbin threads leaving about 10 cm (4”) of thread ends loose.
- Page 32 7. When finished, push the buttonhole lever up as far as it will go. adjusting the Buttonhole stitch density Turn the stitch length dial within the range of to adjust the buttonhole stitch density. Note: If the button is extremely thick, make a test buttonhole.
-
Page 33: Corded Buttonhole
Corded ButtonhoLe Machine setting: 1. Stitch pattern: 2. Stitch width: 4 – 5 3. Stitch length: 4. Thread tension: 3 – 5 5. Presser foot: Automatic buttonhole foot R 1. With the buttonhole foot raised, hook the filler cord on the spur at the back of the buttonhole foot. -
Page 34: Manual Buttonhole
ManuaL ButtonhoLe Consult the Sewing Guide Reference Chart for recommended settings. If the diameter of the button is more than 2.5 cm (1”), make the buttonhole manually as follows: 1. Snap on buttonhole foot C. 2. Pull the buttonhole lever down as far as it will go. - Page 35 4. Sew the front bartack and left column to the desired length then stop sewing. 5. Pull the buttonhole lever toward you. 6. Sew the back bartack and right column and then stop sewing at the starting point. 7. When finished, push the buttonhole lever up as far as it will go.
-
Page 36: Sewing Zipper
sewinG ZiPPer Machine setting 1. Stitch pattern: 1 2. Stitch width: 5 3. Stitch length: 1.5 – 4 4. Thread tension: 3 – 6 5. Presser foot: Zipper foot E to snap on the Zipper Foot Snap on the zipper foot. 1. - Page 37 2. Place right sides of the fabric together. Sew a seam from the bottom 2 cm (5/8”) from the right edge to the end of the zipper opening. Sew a few stitches in reverse to lock. Increase the stitch length to “4”, set needle thread tension to “1”, and baste the length of the zipper opening.
- Page 38 3. Sew through all layers next to the fold. Stop just before the zipper foot reaches the slider on the zipper tape. Lower the needle slightly into the fabric. Raise the zipper foot and open the zipper. Lower the foot and stitch the remainder of the seam.
- Page 39 5. Remove the zipper foot and snap on with pin on left side. Guide the edge of the foot along the zipper teeth and stitch through the fabric and zipper tape, about 1 cm (3/8”) distance from the basting line. Stop about 5 cm (2’’) from the top of the zipper.
-
Page 40: Blind Hem
BLind heM Consult the Sewing Guide Reference Chart for recommended settings. 1. Fold the hem under the fabric as illustrated for fine or medium fabrics. Fold a hem with the wrong side up forming a 0.5 cm (1/8”) allowance. a. Wrong side of the fabric b. -
Page 41: Presser Feet
Presser Feet non-stick Glide Foot h Consult the Sewing Guide Reference Chart for recommended settings. When sewing foam, plastic, plastic coated fabrics, leather and imitation leathers, the Non-stick Glide Foot H feeds over the fabric without sticking. Use it for general sewing and buttonholes on plastic and leather type fabrics. -
Page 42: Quilter's 1/4" Piecing Foot
Quilter’s 1/4” Piecing Foot Sew a scant 1/4” seam allowance. Red lines mark 1/4” and 1/8” pivot points in front of and behind the needle. Straight stitch, length 2.0-2.5. Place to pieces of fabric right sides together. Sew with edge of fabric at edge of foot. -
Page 43: Care And Maintenance
Care and Maintenance Turn off the power switch. Do not dismantle the machine other than as explained in this section. Clean the outside of the machine with a soft cloth and mild soap. CLeaninG the hooK asseMBLY area and Feed teeth 1. -
Page 44: Replacing The Bobbin Case
rePLaCinG the BoBBin Case Turn off the power switch. 1. Insert the bobbin case into the hook assembly area. 2. Make sure the knob of the bobbin case fits next to the stopper in the assembly area. a. Knob b. Stopper 3. -
Page 45: Troubleshooting
Troubleshooting Condition /Cause reFerenCe the needle thread Breaks • The needle thread is not threaded properly. Page 16 • The needle thread tension is too tight. Page 21 • The needle is bent. Page 12 • The needle is incorrectly inserted. Page 12 •... - Page 46 Condition /Cause reFerenCe the Cloth is not Fed smoothly • The feed teeth are packed with lint. Page 41 • The stitchlength is too short. Make stitch longer • The feed teeth are not raised after ”drop feed” sewing. Page 10 Loops on the seams •...
-
Page 47: Intellectual Property
We reserve the right to change the machine equipment and the assort-ment of accessories without prior notice, or make modifications to the performance or design. Such modifications, however, will always be to the benefit of the user and the product. INTELLECTUAL PROPERTY VIKING, KEEPING THE WORLD SEWING & Design, and EDEN ROSE are trademarks of KSIN Luxembourg II, S.ar.l. HUSQVARNA and the “crowned H-mark” are trademarks of Husqvarna AB. All trademarks are used under license by VSM Group AB. SERVICING OF DOUBLE INSULATED PRODUCTS In a double-insulated product, two systems of insulation are provided instead of grounding. No ground means is provided on a double-insulated product, nor should a means for grounding be added to the product. Servicing of a double-insulated product requires extreme care and knowledge of the system and should be done only by qualified service personnel. Replacement parts for a double-insulated product must be identical to those parts in the product. A double-insulated product is marked with the words ‘DOUBLE INSULATION’ or ‘DOUBLE INSULATED’. Please note that on disposal, this product must be safely recycled in accordance with relevant National legislation relating to electrical/ electronic products. If in doubt please contact your retailer for guidance. CE - Authorised Representative VSM Group AB, SVP Worldwide Drottninggatan 2, SE-56184, Huskvarna, SWEDEN... - Page 48 w w w. hus qv ar nav i ki ng .c om...