Table of Contents
Advertisement
Advertisement
Table of Contents

Related Manuals for Contex HD Ultra Series


Summary of Contents for Contex HD Ultra Series
- Page 1 User’s Guide Wide Format Scanners Model: HD Ultra series...
-
Page 2: Table Of Contents
Contents Table of Contents Maintenance About scanner maintenance About This Guide Overview – key maintenance points Overview of Scanner Cleaning the scan area Scanner Front View: Camera Alignment and Calibration Scanner Rear View: Replacing Scanner Parts Replacing the Glass-plate Installation Replacing the White-Background-Platen System requirements Replacing the Scanner Lamp-Unit... -
Page 3: About This Guide
About This Guide About This Guide This guide explains how to operate and maintain your wide format scanner. This user’s guide covers: HD Series Scanner models IMPORTANT: Be sure to use the WIDEsystem TOOLS CD-ROM that came with your scanner or a newer version. Out-of-date versions of The guide assumes basic knowledge of your computer and operating WIDEsystem software may not detect your scanner model. -
Page 4: Overview Of Scanner
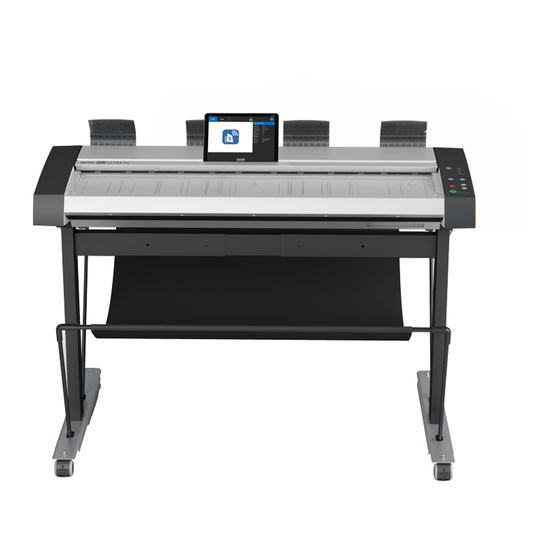
Overview of Scanner Overview of Scanner Scanner Front View: Parts, you need to recognize when installing and using the scanner Paper return guides Release buttons for opening scanner lid (for maintenance) Paper feeding guides Insertion slot – document feeding Power button and indicator Error indicator Operator’s panel Paper ready indicator... -
Page 5: Scanner Rear View
Overview of Scanner Scanner Rear View: Parts you need to recognize when installing and using the scanner Paper Pressure Adjustment lever Paper return guides Main Power switch and power socket Interface connections – USB, Gigabit... -
Page 6: Installation
Installation Installation System requirements PC or supported workstation. Recommended requirements: 1.6GHz Dual Core processor or better, 2 GB RAM, 5 GB of available hard drive space, USB 2.0 interface. Compatible Windows operating system – View the ws/readme.htm file on the WIDEsystem TOOLS CD-ROM. ... - Page 7 Installation Installing scanner software – WIDEsystem, drivers, and Scan/Copy software Install WIDEsystem and scan/copy software on your PC IMPORTANT: WIDEsystem contains your essential scanner drivers. You must install WIDEsystem before you connect the scanner or install any scanner software applications. Insert the WIDEsystem TOOLS CD-ROM into your PC.
- Page 8 Installation Cleaning the scanner Clean the scanner feeding bed Lightly clean the scanner exterior and interior to remove any dust accumulated during transportation. Start with the feeding bed. The feeding bed is the flat surface in front of the insertion slot. Wipe the feeding bed thoroughly so dirt and dust are not dragged into the scan area with the original.
- Page 9 Installation Cleaning the scanner Open the scanner lid – Pull the lid all the way back 1. The lid is on springs and will pop upwards when released.. 2. Hold the lid as you ease it all the way back to expose the scan area. Cleaning the scanner Clean the internal scan area Lightly wipe the internal scan area‟s glass plate free of dust.
- Page 10 Installation Connect power cable Connect the power cable to the scanner Connect the scanner power cable to the scanner„s main power connection socket. The main power connection socket is at the scanner‟s back. Connect power cable Connect the scanner to a power outlet. Connect the power plug end of the scanner power cable to a power outlet.
- Page 11 Installation Power ON the scanner Turn ON scanner power Turn on the main power switch at the back of the scanner Connect Cables Connect the USB interface cable to the scanner Initial installation and activation of the scanner is easiest using the USB connection. This applies also for Gigabit enabled models.
- Page 12 Installation Connect USB cable to PC Connect the USB interface cable to the PC 1. On the PC, verify that WIDEsystem is running – the WIDEsystem icon should be visible in your system tray. 2. If WIDEsystem is not running, locate the WIDEsystem entry under your Programs menu and start it manually.
- Page 13 Installation Scanner installation Windows installs the scanner 1. Click Next and follow the instructions on your screen to install the scanner on your PC. 2. Most of the scanner installation process is automatic. 3. Wait until the completion message appears 4.
- Page 14 Installation Scanner Activation Activate the scanner You must activate your scanner with its licence before you can use it. Please follow the Scanner Activation Wizard’s instructions. NOTE: Your supplier may have pre-activated the scanner for you. If the scanner is pre- activated, the wizard will skip this step and following steps 16a, 16b.
- Page 15 Installation Scanner Activation - Online Online activation Online activation is very easy. You only need your license key. When you choose Online as the activation method, the dialog shown on the top right appears. Enter you license key in the designated field. The key will be authenticated online right after it is entered and if valid, a green tick will appear as shown in the dialog shown on the right-middle.
- Page 16 Installation Scanner Activation - Manual Manual activation Have your license key ready before proceeding. If you don‟t have one, contact you dealer. Manual activation uses an Activation Code. To produce an activation code, you will need your license key and the scanner‟s ID which is a serial number or hardware ID.
- Page 17 Installation Scanner Installation – Change network name Change the scanner’s network name (optional) NOTE: This step only appears with licensed Ethernet supported scanners as detected during activation. You may wish to change the default name of the scanner to comply with your organization.
- Page 18 Installation Scanner Installation Calibrate the scanner – camera alignment Transportation of your scanner could have slightly moved the cameras and they need to be realigned. Press Calibrate to start the wizard. Follow the wizard‟s instructions to perform camera alignment. If you did not clean the internal scan area/glass as instructed in the previous installation steps, then do so now.
- Page 19 Installation Scanner Installation Installation complete The scanner has been installed correctly when you see this message. For models that supports Gigabyte, proceed to the steps for enabling gigabyte on the scanner plus sharing it on the network. For USB only scanners - you can also choose to share the scanner on the network. Instructions for sharing USB scanners on the network follow below.
- Page 20 Installation Enabling Gigabit Interface Enable Gigabit Ethernet Interface (optional) For scanner models with gigabit interface support For gigabit enabled scanners - Optimal speed according to specifications will require you connect the scanner to a gigabit connection. To enable gigabit interfacing: 1.
- Page 21 Installation Set up USB connected scanner for sharing on the network Set USB scanner for sharing on the network (Optional) For USB only (non-gigabit) scanner models You can enable other PCs on the LAN to use the USB connected scanner. This is called “Sharing”. After activating the scanner, You can set it up as a “shared scanner”...
-
Page 22: Turning Power On/Off
Turning the Scanner ON/OFF The scanner’s Self Test Procedure When you turn the main power ON, the scanner runs a Turning Power ON/OFF short self-test procedure. This takes less than one minute. The 3 LEDS on the panel will be on during the self-test procedure. -
Page 23: Wake And Sleep Modes
Turning the Scanner ON/OFF The scanner will go into wake mode: Wake and Sleep modes Automatically: with the Timer (see Automatic Power functions). When you feed a document into the scanner. With the main power switch ON, scanner power can be set in Sleep mode ... -
Page 24: Sleep/Wake Mode Options - Automatic Power Management
Turning the Scanner ON/OFF Timer Function – Scheduling ON/OFF Times Sleep/Wake mode options – automatic power management You can program your whole weekly schedule into the scanner so it powers Automatic power management lets you schedule your scanner‟s up-time ON and OFF (wake – sleep) on its own. You enter your schedule‟s wake- optimally and helps save energy. -
Page 25: Automatic Shut Down After Idle Time
Turning the Scanner ON/OFF To set the Timer: Open WIDEsystem - double--click the WIDEsystem icon in the Automatic shut down after idle time system tray. On delivery, the scanner is set for automatic entry into sleep mode after a Select the Timer Tab. preset default idle time, i.e. - Page 26 Turning the Scanner ON/OFF sleep mode automatically option is selected. Wake - by pressing any button on the panel or inserting a document for scanning. Sleep – by pressing and holding down the power button for 3 seconds. You can choose to disable automatic entry into Sleep mode entirely if you want only manual activation of the sleep mode or, you can leave it enabled and retain both manual and automatic functions.
-
Page 27: Loading Originals Into The Scanner
Loading Loading Originals into the Scanner Load, face down, at the scanner’s right side Load your document with the image side facing downwards. Align the right edge of the document with the right edge paper guide. Adjust the left paper guide against the paper‟s left edge to help Align the document for a straight scan path. -
Page 28: Paper-Guides
Loading Paper-guides Scanning oversize documents The left paper guide can be moved to match the width of the paper You may have a large document that has its content within the scanner‟s scan-width capabilities, yet its physical width, typically due you will load. -
Page 29: Automatic Loading
Loading Automatic loading Using the paper-return guides With automatic loading, the scanner takes the original as soon as you insert it in the paper slot. Automatic loading is reliable for most jobs and The paper-return guides will force the paper to the front after it is scanned especially useful for batch scanning jobs. -
Page 30: Unloading The Original After Scan
Loading Unloading the original after scan Fast-loading Fast-loading is a time-saving loading option designed for batch scanning. Press the Paper Reverse button to eject the original back to the The fast-loading option can be selected in the scanning application. scanner feeding bed. NOTE: The availability of the fast loading option will depend on your scan/copy software and its level of compatibility with the scanner model. -
Page 31: Paper Pressure Adjustment - For Thin Media
Loading Paper Pressure Adjustment – for thin media Setting the input size The Input size defines the scan area. You enter the input size in your When scanning, the document is evenly pressed down to ensure a application‟s input size dialogs. distortion-free scan. -
Page 32: Scanning
Scanning Scanning Batch scanning Software applications for scanning Your scanner is controlled through scan, copy or imaging software installed Batch scanning involves jobs where you want to feed and scan a whole set on your PC. of originals that require equal scan settings. The basic steps are: Optimal full featured scanning functionality is obtainable through scan Set your scan settings (size, type, image adjustments..) for the batch. -
Page 33: Monitoring Your Scanner With Widesystem
Scanning Monitoring your scanner with WIDEsystem With WIDEsystem you can: You installed WIDEsystem with the scanner drivers. WIDEsystem contains View the scanner’s status. Move the mouse over the scanner icon on the an application that monitors the scanner and reports on its functionality. system tray. - Page 34 Scanning Activate and upgrade your scanner. Open the License tab. You will need to have a valid license for the activation/upgrade Launch the scanner calibration wizard. Right click on the scanner icon, select Calibrate. Launch the WIDEsystem on-line help. To find instructions on trouble shooting and using WIDEsystem with your scanner.
-
Page 35: Scanning Thick Media
Scanning Thick Media 1. Press the ATAC Up-key to 2. Press the ATAC Down- raise the pressure platen key to lower the pressure platen and match to the thick original Scanning Thick Media You may need to scan documents and drawings printed or pasted on thick media such as cardboard, foamboards, gatorboards etc. -
Page 36: When Scanning In Thick Media Positions
Scanning Thick Media When Scanning in Thick Media Positions Modifying Stitching Parameters Thick stiff originals will rest on top of the scanner rollers and thus raise a Below are some additional guidelines and facts related to scanning thick small distance over the glass-plate. This can lead to irregularities in relation originals. -
Page 37: Maintenance
Maintenance Maintenance About scanner maintenance NOTE: See the Overview of key maintenance points on the next page Scanner maintenance will ensure optimal performance of your scanner. There are three basic maintenance tasks: Cleaning Keep your scanner clean – the next section describes how to thoroughly clean the internal scan area. -
Page 38: Overview - Key Maintenance Points
Maintenance Overview – key maintenance points The illustration below shows the scanner with its lid open. The illustration indicates the key points (parts and areas) you need to recognize when cleaning the scanner or changing parts. Instructions follow in the next sections. Lid latch lever –... -
Page 39: Cleaning The Scan Area
Maintenance Cleaning the scan area Caution: Before cleaning the scan area, be sure to turn the scanner power off and disconnect the power plug. Follow the steps below for thoroughly cleaning the scanner and scan area. Be sure to clean the scan area when results are not optimal. Even small dust particles in the scan area can cause streaks in your scanned image. - Page 40 Maintenance 1 and 2. Push the two release buttons upwards Cleaning the scan area Open the scanner lid – Press the lid release buttons upwards The internal scan area should be wiped clean for any dust accumulated during packaging and shipping. The scan area is under the scanner lid so you have to open it.
- Page 41 Maintenance Cleaning the scan area Clean the glass-plate Clean the glass with a lint-free cloth and a mild, streak-free, glass cleaner. Apply the cleaner to cloth and wipe the glass-plate. Dry the glass completely using a separate clean, dry lint-free cloth like the one provided with the maintenance kit.
- Page 42 Maintenance Cleaning the scan area Lower Rollers Clean the lower rollers The lower rollers are the black rubber rollers aligned in 2 rows on each side of the glass-platen. Use a lint-free cloth and a mild, streak-free, glass cleaner. Apply the cleaner to cloth and wipe the lower rollers in both rows.
- Page 43 Maintenance Cleaning the scan area Clean the scanner feeding bed Clean the scanner feeding bed surface so dirt and dust are not dragged into the scan area with the original. Cleaning the scan area Cover when not in use Cover the scanner with its plastic dust cover when not in use. Caution: Make sure the scanner power is OFF when using the dust cover.
-
Page 44: Camera Alignment And Calibration
Maintenance Camera Alignment and Calibration Scanner calibration is very easy to perform. Calibration is carried out using the WIDEsystem program you installed with your drivers. After manually cleaning the scan area, you just start the Calibration wizard and let it take over. The wizard will ask you to insert a calibration sheet. Other than that, scanner calibration is completely automatic. - Page 45 Maintenance Calibration Launch the scanner calibration wizard 1. On your PC – Double -click on the WIDEsystem icon in the system tray to open the WIDEsystem program. 2. Press the Calibrate button. Calibration Select the Calibration type Select either Camera Alignment or Full Calibration. ...
- Page 46 Maintenance Calibration Insert the calibration sheet During the process, the wizard will ask you to insert the Calibration Sheet that came with your scanner. The sheet’s printed side must be inserted face up. Align the sheet‟s midpoint arrow with the scanner‟s midpoint arrow and feed the sheet into the scanner.
-
Page 47: Replacing Scanner Parts
Maintenance Replacing Scanner Parts This section describes how to replace those scanner parts that are liable to wear down over long-term use. Changing parts will renew your scanner and reestablish optimal results. WIDEsystem monitors scanner usage and will warn you when it is time for a replacement. The following parts can be replaced: 1. -
Page 48: Replacing The Glass-Plate
Maintenance Replacing the Glass-plate Replacing the glass-plate Turn scanner power off and disconnect 1. Press the main power switch (scanner back) to OFF 2. Disconnect the power plug. Replacing the glass-plate 1 and 2. Push the two release buttons upwards Open the scanner lid –... - Page 49 Maintenance Replacing the glass-plate Open the scanner lid – Pull the lid all the way back The lid is on springs and will pop upwards when released.. Hold the lid as you ease it all the way back to expose the scan area and glass plate.
- Page 50 Maintenance Replacing the glass-plate Tilt the glass plate back At the end of each glass plate lever there is a small hook that rests on a round pin. The hook holds the glass plate in place on the scanner‟s chassis while also letting you un-attach the glass plate from the scanner.
- Page 51 Maintenance Replacing the glass-plate Insert a new glass plate Reverse the above operations to reinsert a new glass-plate – Carefully set Rest the hook on its pin – on each side of the new glass plate down into the scan area. the scanner Fit the new glass-plate‟s lever hooks on to the round pins on each side of the scanner.
-
Page 52: Replacing The White-Background-Platen
Maintenance Replacing the White-Background-Platen Your white-background-platen can become worn and discolored after long periods of use and in such cases; replacement with a fresh white-background-platen is recommended. WIDEsystem monitors scanner usage and will warn you when it is time for a replacement. Replacing the white-background-platen Turn scanner power off and disconnect 1. - Page 53 Maintenance Replacing the white-background-platen Open the scanner lid – Pull the lid all the way back 1. The lid is on springs and will pop upwards when released.. 2. Hold the lid as you ease it all the way back to expose the underside of the lid.
- Page 54 Maintenance Replacing the white-background-platen Remove the red cover strip 1. Grip the flexible edge of the red strip with your fingers. 2. Pull the red strip to free it from the scanner. Replacing the white-background-platen Edge of the white-background-platen Locate the edge of the white- background-platen 1.
- Page 55 Maintenance Replacing the white-background-platen Pull the white-background-platen out of the lid 1. Carefully pull the strip out of the scanner lid. Replacing the white-background-platen Insert a new white-background-platen 1. Reverse the steps to insert your new white-background-platen. 2. Carefully slide in a new white-background-platen while taking care not to bend it.
- Page 56 Maintenance Replacing the white-background-platen Reattach the red strip 1. Reattach the red strip in its place. 2. Close the scanner lid until you hear the locks click shut NOTE: It is recommended to recalibrate after changing the white-background-platen. NOTE: Remember to reset the white-background- replacement warning flag though WIDEsystem‟s “Status”...
-
Page 57: Replacing The Scanner Lamp-Unit
Maintenance Replacing the Scanner Lamp-Unit The lamp‟s effectiveness can gradually weaken over time and this can affect the quality of your scans. A new lamp-unit (lamp, reflector, power connectors) can be obtained through your dealer. WIDEsystem monitors lamp usage and will warn you when it is time for a replacement. Replacing the scanner lamp Turn scanner power off and disconnect the scanner... - Page 58 Maintenance Replacing the scanner lamp Remove the lamp cover 1. Place your finger in the gap at the cover‟s right side and pull gently back to free the lid‟s catch. 2. Pull the cover sideways and off its hinge to completely detach it from the scanner.
- Page 59 Maintenance Replacing the scanner lamp Insert the new lamp-unit Rest the lamp edge on the tracks and push carefully into the scanner Reinsert the new lamp-unit. Rest the lamp edge (power- connector side) on the tracks. Carefully push the lamp-unit into the scanner along the tracks.
- Page 60 Maintenance Replacing the scanner lamp Fit the cover‟s left-side tab into its corresponding notch Replace the lamp cover Fit the cover‟s left-side tab into the corresponding notch on the scanner Snap the cover shut. NOTE:The cover must always be closed before turning scanner power ON.
-
Page 61: Downloading New Firmware
Maintenance Downloading New Firmware How to identify the firmware version running in the scanner? What is Firmware? Start WIDEsystem –double-click on the system tray‟s WIDEsystem Like a computer, your scanner needs an operating system in order to work. This operating system is called "Firmware”. Firmware runs inside the icon. -
Page 62: Trouble Shooting
Trouble Shooting Trouble Shooting This section describes trouble-shooting procedures for the most common issues that can arise with your scanner. Please look for a problem description that matches your actual situation. If found, perform the recommended trouble-shooting procedures before requesting a service call. How are errors reported on your system The scanner panel‟s Error Indicator will blink when the scanner detects an error. -
Page 63: Problems Related To Scanner Installation
Trouble Shooting Problems Related to Scanner Installation Problem Possible Causes and Remedies Your interface is not enabled on the PC or set up correctly. Control that the Windows device manager lists the interface option and that its drivers function correctly. “Unknown device is found“... -
Page 64: Problems Related To Operation Of The Scanner
Trouble Shooting Problems Related to Operation of the Scanner Problem Possible Causes and Remedies Error Indicator LED blinking An error was detected. The error may be reported immediately through a message on your screen. If not, open WIDEsystem (scanner icon on your system tray) and select the Status tab to view additional information about the error. - Page 65 Trouble Shooting You know a Paper jam error has occurred when the scanner stops scanning and the Paper-Ready LED shuts OFF (from blinking) Error message: Paper Jam while the document is still engaged in the drive system. Your software will report the Paper Jam error. To remedy: Eject the document from the scanner.
- Page 66 Trouble Shooting Error message: Correction of Camera X Your scanner is continuously monitoring its cameras. This error message often appears when the internal glass plate or failed white background platen is dirty or smudged. Clean the scanning area, reboot the scanner and then complete the maintenance steps (alignment and calibration) as described in the section Maintenance in this guide.
- Page 67 Trouble Shooting Can’t operate or contact scanner after A power failure could interrupt an ongoing firmware upgrade process. The scanner will not run correctly after an interrupted firmware update process. Only part of the intended firmware may be loaded, rendering the scanner inaccessible. You need reboot Firmware upgrade failure.
-
Page 68: Problems Related To The Scanning Results
Trouble Shooting Problems Related to the Scanning Results Problem Possible Causes and Remedies Check in your scanning application that your size settings are either for Auto detection or correspond to the size of the whole original. Not whole image scanned Check that you are loading the original correctly from the scanner‟s right side. -
Page 69: Appendix B: Important Safety Instructions
B: Safety Instructions Appendix B: Important Safety Instructions Read all of these instructions and save them for later use. Follow all warnings and instructions marked on the scanner. A. Do not place the scanner on an unstable surface, stand, cart or table. Serious damage can be caused if the unit falls. B. -
Page 70: Appendix C: Regulations
C: Regulations Appendix C: Regulations FCC Regulations NOTE: This equipment has been tested and found to comply with the limits for a Class A digital device, pursuant to Part 15 of the FCC Rules. These limits are designed to provide reasonable protection against harmful interference when the equipment is operated in a commercial environment. -
Page 71: Toxic Or Hazardous Substances Or Elements
C: Regulations Toxic or Hazardous Substances or Elements Toxic or hazardous Substances and Elements 有毒有害物质或元素 Part Name Lead Mercury Cadmium Hexavalent Polybrominated Polybrominated 部件名称 (Pb) (Hg) (Cd) Chromium biphenyls diphenyl ethers 铅 汞 镉 (Cr (VI)) (PBB) (PBDE) 六价铬 多溴联苯 多溴二苯醚...