Table of Contents
Advertisement
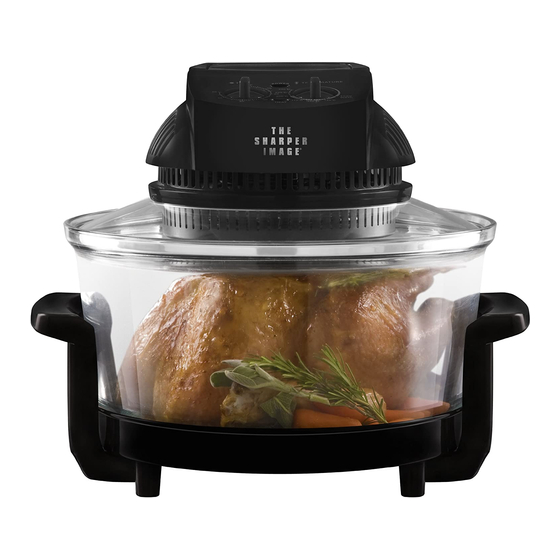
SUPER WAVE OVEN
ROASTS, BAKES, BROILS, AIR FRIES, GRILLS, BOILS & STEAMS
1300 Watt Power/12.5 Quart
Customer Service: 1-800-423-4248
Printed in China
Super Wave Oven ITEM NO.8217SI.
The Sharper Image® name and logo are registered trademarks.
Manufactured and Marketed by EMSON®. New York, NY 10001, USA
Under license.
© The Sharper Image. All Rights Reserved.
I N S T R U C T I O N M A N U A L
Advertisement
Table of Contents

Related Manuals for Sharper Image SUPER WAVE OVEN


Summary of Contents for Sharper Image SUPER WAVE OVEN
- Page 1 1300 Watt Power/12.5 Quart Customer Service: 1-800-423-4248 Printed in China Super Wave Oven ITEM NO.8217SI. The Sharper Image® name and logo are registered trademarks. Manufactured and Marketed by EMSON®. New York, NY 10001, USA Under license. © The Sharper Image. All Rights Reserved.
-
Page 2: Table Of Contents
CONTENTS INTRODUCTION.................. 3 IMPORTANT SAFEGUARDS..............4 UNPACKING/ASSEMBLY..............8 PARTS AND FEATURES ..............9 USAGE ....................11 SUGGESTED COOKING TIMES............15 HELPFUL TIPS................... 16 CLEANING AND CARE............... 17... -
Page 3: Introduction
IMPORTANT SAFEGUARDS Forget about traditional ovens, stove tops and microwaves. Before using the electrical appliance, the following basic precautions should Introducing The Sharper Image Super Wave Oven, a versatile cooker that always be followed including the following: 1. Read all instructions. - Page 4 IMPORTANT SAFEGUARDS IMPORTANT SAFEGUARDS WARNING: 11. Do not touch hot surfaces, use knobs or handles. CAUTION HOT SURFACES: This appliance generates heat 12. Always use the handle to remove the glass lid from the glass bowl. and steam may escape during use. Proper precautions must be taken to prevent 13.
-
Page 5: Unpacking/Assembly
IMPORTANT SAFEGUARDS UNPACKING - ASSEMBLY SAVE THESE INSTRUCTIONS PACKAGE CONTENTS: FOR HOUSEHOLD USE ONLY. MAIN OVEN UNIT (LID, GLASS BOWL AND BASE) COOKING RACKS (2) Do not attempt to repair the appliance, contact a qualified service technician. TONGS (1) A short power supply cord is provided to reduce the hazards resulting from entanglement or tripping over long cord. -
Page 6: Parts And Features
PARTS AND FEATURES PARTS AND FEATURES 1. Glass Lid with Timer and Temperature Controls-features super tight seal 1a-timer controls 1b-temperature controls 2. Safety Handle-automatically turns the unit off when the handle is raised (shown in OFF position). 3. Stainless Steel High Cooking Rack-additional rack for extra food 4. -
Page 7: Usage
USAGE USAGE (Refer to pp. 9 & 10 for Parts Identification) (Refer to pp. 9 & 10 for Parts Identification) COOKING WITH YOUR OVEN: PRIOR TO USE: IMPORTANT: - Place the oven on a stable, heat-proof surface and make sure it is not near the edge of the IMPORTANT: When turning the timer controls, DO NOT rotate the knob counterclockwise, table or countertop. - Page 8 USAGE USAGE (Refer to pp. 9 & 10 for Parts Identification) (Refer to pp. 9 & 10 for Parts Identification) as a guide as the oven cooks faster than conventional ovens, so you may need to allow less CAUTION: Before removing the glass lid always bring the handle to its upright position time to cook the food.
-
Page 9: Suggested Cooking Times
SUGGESTED COOKING TIMES HELPFUL TIPS NOTE: Refer to the below cooking times as a guide only. Time may vary according to the Internal Food Temperatures Guide weight of the food, adjust to your preference. Always make sure to refer to the Internal When cooking poultry, always cook to the internal temperature of 170-180ºF. -
Page 10: Cleaning And Care
CLEANING AND CARE Make sure you turn off and unplug the unit before cleaning it. Always wait until the unit cools down completely. Thoroughly wash the glass bowl, plastic base, cooking racks and tongs in hot soapy water and allow to dry completely. You may also place the glass bowl and cooking racks into the dishwasher.