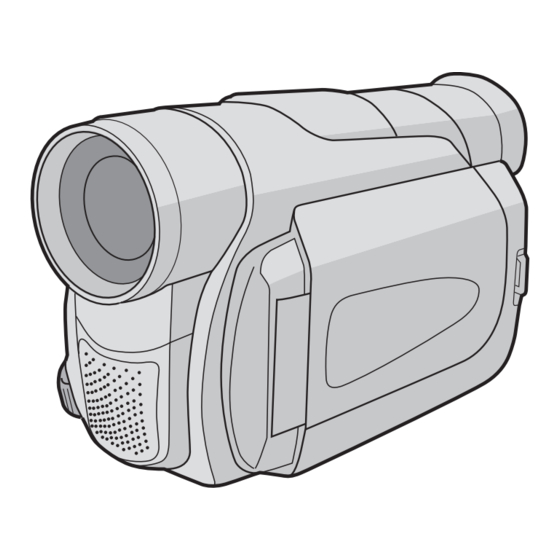
JVC GR-D30UB Service Manual
Digital video camera
Hide thumbs
Also See for GR-D30UB:
- Instructions manual (48 pages) ,
- Instructions manual (56 pages) ,
- Specification (32 pages)
Table of Contents
Advertisement
SERVICE MANUAL
2003
04
86722
GR-D30UB,GR-D30U
GR-D70U
For disassembling and assembling of MECHANISM ASSEMBLY, refer to the SERVICE MANUAL No.86700 (MECHANISM ASSEMBLY).
SPECIFICATION
(The specifications shown pertain specifically to the model GR-D30US, GR-D70US, GR-D90US)
Camcorder
General
Power supply
: DC 11.0 V
DC 7.2 V
Power consumption
LCD monitor off,
viewfinder on
: Approx. 3.4 W
LCD monitor on,
viewfinder off
: Approx. 4.7 W
Dimensions
(W x H x D)
: 76 mm x 94 mm x 143 mm
(3" x 3-3/4" x 5-11/16") (GR-D90)
69 mm x 94 mm x 143 mm
(2-3/4" x 3-3/4" x 5-11/16") (GR-D70/D30)
(with the LCD monitor closed and the viewfinder
pushed back in)
Weight
: Approx. 550 g (1.3 lbs) (GR-D90)
Approx. 525 g (1.2 lbs) (GR-D70/D30)
Operating temperature
: 0°C to 40°C (32°F to 104°F)
Operating humidity
: 35% to 80%
Storage temperature
: -20°C to 50°C (-4°F to 122°F)
Pickup
: 1/6" CCD
Lens
: F 1.6, f = 2.7 mm to 43.2 mm, 16:1 power zoom lens
Filter diameter
: Ø37 mm
LCD monitor
: 3.5" diagonally measured, LCD panel/TFT active
matrix system (GR-D90)
2.5" diagonally measured, LCD panel/TFT active
matrix system (GR-D70/D30)
Viewfinder
: Electronic viewfinder with 0.24" black/white LCD
Speaker
: Monaural
Digital Video Camera
Format
: DV format (SD mode)
Signal format
: NTSC standard
Recording/Playback format : Video: Digital component recording
: Audio: PCM digital recording,
32 kHz 4-channel (12-bit),
Specifications shown are for SP mode unless otherwise indicated. E & O.E. Design and specifications subject
to change without notice.
GR-D30UB,GR-D30US,GR-D31US,GR-D70US,GR-D90UB,GR-D90US,GR-D91US M3D123,M3D143,M3D127,M3D147
DIGITAL VIDEO CAMERA
,GR-D90UB,GR-D90U
S
(Using AC Adapter)
(Using battery pack)
COPYRIGHT © 2003 VICTOR COMPANY OF JAPAN, LTD.
,GR-D31U
S
,GR-D91U
S
48 kHz 2-channel (16-bit)
Cassette
: Mini DV cassette
Tape speed
: SP : 18.8 mm/s
LP : 12.5 mm/s
Maximum recording time
: SP : 80 min.
(using 80 min. cassette)
LP : 120 min.
Digital Still Camera Function
Storage media
: SD Memory Card/MultiMediaCard
Compression system
: JPEG (compatible)
File size
: 2 modes (1024 x 768 pixels, 640 x 480 pixels)
Picture quality
: 2 modes (FINE/STANDARD)
Approximate number of
storable images
: pg. 18.
Connectors
S-Video
: Y : 1 V (p-p), 75 Ω, analog
Output
C : 0.29 V (p-p), 75 Ω, analog
: Y : 0.8 V (p-p) -1.2 V (p-p), 75 Ω, analog
Input*
C : 0.2 V (p-p) -0.4 V (p-p), 75 Ω, analog
AV
: 1 V (p-p), 75 Ω, analog
Video output
: 0.8 V (p-p) -1.2 V (p-p), 75 Ω, analog
Video input*
Audio output
: 300 mV (rms), 1 kΩ, analog, stereo
Audio input*
: 300 mV (rms), 50 kΩ, analog, stereo
DV
Output
: 4-pin, IEEE 1394 compliant
Input
: 4-pin, IEEE 1394 compliant
USB*
: 5-pin
* GR-D90/D70 only
AC Adapter
Power requirement
U.S.A and Canada
: AC 120 V ~, 60 Hz
Other countries
: AC 110 V to 240 V ~, 50 Hz/60 Hz
Output
: DC 11 V
,
S
S
, 1 A
No.86722
2003/04
Advertisement
Table of Contents

Related Manuals for JVC GR-D30UB


Summary of Contents for JVC GR-D30UB
-
Page 1: Digital Video Camera
: DC 11 V , 1 A 32 kHz 4-channel (12-bit), Specifications shown are for SP mode unless otherwise indicated. E & O.E. Design and specifications subject to change without notice. GR-D30UB,GR-D30US,GR-D31US,GR-D70US,GR-D90UB,GR-D90US,GR-D91US M3D123,M3D143,M3D127,M3D147 No.86722 COPYRIGHT © 2003 VICTOR COMPANY OF JAPAN, LTD. 2003/04... -
Page 2: Table Of Contents
PARTS LIST ..............3-8 MODEL NUMBER GR-D30UB GR-D30US... -
Page 3: Precautions
SECTION 1 PRECAUTIONS 1.1 SAFTY PRECAUTIONS Prior to shipment from the factory, JVC products are strictly in- quently, when servicing these products, replace the cathode spected to conform with the recognized product safety and elec- ray tubes and other parts with only the specified parts. Under trical codes of the countries in which they are to be no circumstances attempt to modify these circuits.Unautho-... - Page 4 1.1.2 Safety Check after Servicing Examine the area surrounding the repaired location for damage (4) Leakage current test or deterioration. Observe that screws, parts and wires have been Confirm specified or lower leakage current between earth returned to original positions, Afterwards, perform the following ground/power cord plug prongs and externally exposed ac- tests and confirm the specified values in order to verify compli- cessible parts (RF terminals, antenna terminals, video and...
-
Page 5: Specific Service Instructions
SECTION 2 SPECIFIC SERVICE INSTRUCTIONS 2.1 BEFORE ASSEMBLY AND DISASSEMBLY 2.1.1 Precautions 2.1.4 Disconnection of connectors (Wires) 1. Be sure to disconnect the power supply unit prior to mount- Pull both ends of the connector in the arrow direction, remove the ing and soldering of parts. -
Page 6: Assembly And Disassembly Of Cabinet Parts
1.Torque driver 2.2.2 Disassembly method Be sure to use to fastening the mechanism and exterior parts STEP Fig. because those parts must strictly be controlled for tightening PART POINT NOTE torque. Fig.C1 S1,2(L1) TOP COVER ASSEMBLY 2.Bit UPPER ASSEMBLY Fig.C2-1 S2a,2(S2b),3(S2c) This bit is slightly longer than those set in conventional torque (Inc. - Page 7 (S1) CN8a NOTE 8b (S8) NOTE 8a (S8) Fig.C1 Fig.C2-2 BOTTOM SIDE (S2a) (S2b) (S2b) (S2c) (S2c) REAR SIDE (S2d) (S2d) ([8]-[12]) (S2e) TOP SIDE CN2b CN2a (S2c) (S2c) Fig.C2-1 (No.86722)1-7...
- Page 8 L.CASE SIDE COVER (JACK) NOTE 10a (S10b) (S10a) (S3) (S10b) (S10a) [10] NOTE 10b ([4]) (S9) (S3) (S4) CN10a (S9) OP BLOCK ASSEMBLY NOTE 3 0.147N m(1.5kgf Fig.C2-3 Fig.C3 (S11a) (S11b) (S11a) BKT(HINGE) (S11b) NOTE11c [11] KNOB(SLIDE) [12] NOTE11b (S11c) (S11c) 26(S11c) (S11c)
- Page 9 (S5a) (S7b) (S5b) (S5b) (S5b) (S7a) CN7b CN7a (S7b) (S6) (S7b) Fig.C4 (No.86722)1-9...
-
Page 10: Assembly And Disassembly Of Camera Section And Board Assembly
2.3 ASSEMBLY AND DISASSEMBLY OF CAMERA SECTION AND BOARD ASSEMBLY 2.3.1 Disassembly flow chart This flowchart indicates the disassembly step for the cabinet parts and board assembly in order to gain access to item(s) to be serviced. When reassembling, perform the step(s) in reverse or- der. - Page 11 PREMDA BOARD ASSEMBLY CN3d CN3c CN3e CN3b CN3a CN3f BKT(MECHA) (S3c) (S3c) (S3b) SHIELD COVER (PR) (S3c) (S3a) (S3b) 0.069N m (0.7kgf (S3a) 0.078N m (0.8kgf Fig.D3 (No.86722)1-11...
-
Page 12: Assembly And Disassembly Of [8]Vf Assembly
2.4 ASSEMBLY AND DISASSEMBLY OF [8]VF ASSEMBLY 2.4.1 Disassembly of VF ASSEMBLY (1) Remove the EYE CUP. (S8a) COVER(VF) (2) Remove the four screws (1 to 4) and then remove the COV- (S8a) ER (VF). (3) Remove the two screws (5 and 6) and then remove the (S8a) FPC BOARD from the hook attaching the FPC BOARD. -
Page 13: Assembly And Disassembly Of [10]Monitor Assembly (Cabinet Parts)
2.5 ASSEMBLY AND DISASSEMBLY OF [10]MONITOR ASSEMBLY (CABINET PARTS) 2.5.1 Disassembly of MONITOR ASSEMBLY (2.5 INCH) NOTE: Be careful in removing or handling the monitor assembly, es- MONITOR COVER pecially not to soil or scratch the monitor screen during the dis- ASSEMBLY assembly procedure. - Page 14 2.5.2 Disassembly of MONITOR ASSEMBLY (3.5 INCH) NOTE: Be careful in removing or handling the monitor assembly, es- MONITOR COVER pecially not to soil or scratch the monitor screen during the dis- (S10a) ASSEMBLY assembly procedure. L10d (1) While removing the four screws (1 to 4) in numerical order (S10a) and then disengaging the four hooks (L10a-L10d) in alpha- L10a...
-
Page 15: Assembly And Disassembly Of [2]Op Block Assembly / Ccd Board Assembly (Camera Section And Board Assembly)
2.6 ASSEMBLY AND DISASSEMBLY OF [2]OP BLOCK ASSEMBLY / CCD BOARD ASSEMBLY (CAMERA SECTION AND BOARD ASSEMBLY) 2.6.1 Precautions 2.6.3 Assembly of CCD BASE ASSEMBLY and CCD (1) Take care in handling the CCD IMAGE SENSOR, OP LPF BOARD ASSEMBLY and lens components when performing maintenance etc., (1) Set the OP LPF to the OP BLOCK ASSEMBLY so that the especially with regard to surface contamination, attached... -
Page 16: Service Note
2.7 SERVICE NOTE Use the following chart to manage screws 1-16 (No.86722) -
Page 17: Take Out Cassette Tape
2.8 TAKE OUT CASSETTE TAPE NOTE : (4) Apply DC 3V to the electrode on the top surface of the The following procedure describes a simplified method of LOADING MOTOR ASSEMBLY to set the MECHANISM ejecting the cassette tape in case it is not possible to eject it, ASSEMBLY to the EJECT mode. -
Page 18: Emergency Display
2.9 EMERGENCY DISPLAY Example (in case of the error number E01): Whenever some abnormal signal is input to the syscon CPU, an error number (E01, as an example) is displayed on the LCD mon- itor or (in the electronic view finder). UNIT IN REMOVE AND In every error status, such the message as shown below alter... -
Page 19: Adjustment
INF adjustment lens personal computer is setup and it adjusts using a service YTU94087 YTU92001B support system. Please contact to JVC Service for detail in- formation. • OP BLOCK ASSEMBLY • EEP ROM (IC1005 of MAIN board) • MONITOR / VF ASSEMBLY... - Page 20 1. Alignment tape 13.Service support system To be used for check and adjustment of interchangeability of To be used for adjustment with a personal computer. Software the mechanism. can be downloaded also from JS-net. 2. Guide driver (Hexagonal) 14.Cleaning cloth To be used to turn the guide roller to adjustment of the linarity Recommended the Cleaning cloth to wipe down the video of playback envelope.
- Page 21 3.3 JIG CONNECTOR CABLE Nine wires have been soldered to the JIG CONNECTOR CABLE (YTU93106B). Solder another nine wires to the JIG CONNECTOR CABLE (YTU93106B) to use in this set. See the JIG CONNECTOR SCHEMATIC DIAGRAM and JIG CONNECTOR BOARD to solder the nine wires. 3.3.1 JIG CONNECTOR SCHEMATIC DIAGRAM BEFORE AFTER...
-
Page 22: Jig Connector Cable
3.4 MECHANISM COMPATIBILITY ADJUSTMENT 3.4.1 Tape pattern check (1) Connect the JIG CONNECTOR CABLE to the set. As for the connection procedure, JIG CONNECTOR ENV_OUT BOARD and see 3.5 ELECTRICAL ADJUSTMENT. (2) Remove the COVER(ADJUST) (3) Play back the compatibility adjustment tape. (4) While triggering the HID1, observe the waveform of ENV_OUT. -
Page 23: Electrical Adjustment
3.5 ELECTRICAL ADJUSTMENT 3.5.1 Electrical adjustment with personal computer • Electrical adjustmentis performed by using PERSONAL COMPUTER. As for the connection of cables, see Fig. 3-5-1. Read README.TXT file to use the software for SERVICE SUPPORT SYSTEM properly. • Remove the COVER (JIG) to perform adjustment. COMMUNICATION CABLE JIG CONNECTOR TO JLIP_RX... - Page 24 JVC SERVICE & ENGINEERING COMPANY OF AMERICA DIVISION OF JVC AMERICAS CORP. www.jvcservice.com(US Only) JVC CANADA INC. Head office : 21 Finchdene Square Scarborough, Ontario M1X 1A7 (416)293-1311 (No.86722) Printed in Japan 200304WPC...