Razor E200 Series Owner's Manual
Hide thumbs
Also See for E200 Series:
- Owner's manual (13 pages) ,
- Troubleshooting manual (13 pages) ,
- Manual (16 pages)
Table of Contents
Advertisement
Advertisement
Table of Contents

Related Manuals for Razor E200 Series


Summary of Contents for Razor E200 Series
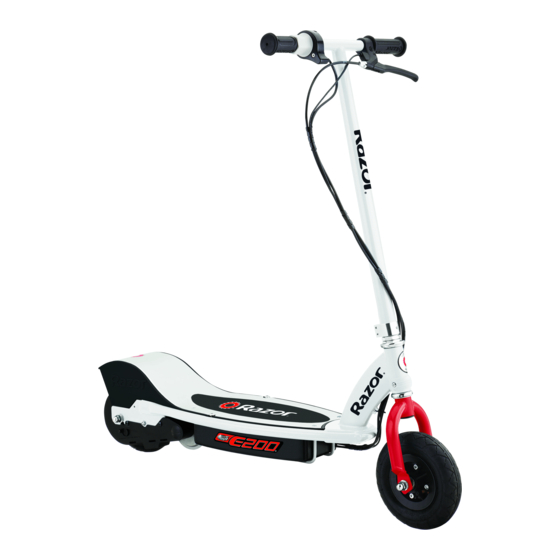
- Page 1 OWNER’S MANUAL Read and understand this entire manual before riding! DO NOT RETURN TO STORE! NOTE: Manual illustrations are for demonstration purposes only. Illustrations may not reflect exact appearance of actual product. Specifications subject to change without notice.
-
Page 2: Safety Warnings
SAFETY WARNINGS WARNING: Riding an electric scooter does present potential risks and The normal powered top speed of this scooter will be approximately 12 mph caution is required. Like any riding product, an electric scooter has inherent (19 kmh), which can be affected by conditions, such as rider weight, inclines, hazards associated with its use (for example, falling off or riding it into a tire inflation and battery charge level. -
Page 3: Before You Begin
WARNING: during shipping. Inspect the contents of the box for scratches in the paint, dents or kinked cables that may DO NOT USE NON-RAZOR have occurred during shipping. Because the scooter is 95 percent assembled and packed at the factory, PARTS WITH YOUR RAZOR there should not be any problems, even if the box has a few scars or dents. -
Page 4: Assembly And Set-Up
ASSEMBLY AND SET-UP q Attaching the Handlebars Note: Make sure the cables/ wires are out of the way before Tools required: 5 mm Allen wrench. inserting the stem in the fork. WARNING: Failure to properly tighten the collar clamp may allow the handlebars to dislodge while riding and may cause you to lose control and fall. -
Page 5: Starting The Scooter
ASSEMBLY AND SET-UP q Attaching the Seat (E200S Only) Tools required: Two (2) 4 mm Allen wrenches and Phillips screwdriver. Remove the four screws on Attach the seat to the seat Place the seat post on the the middle of the deck with the post with two (2) 4mm Allen deck and secure using the same 4 mm Allen wrench and the... -
Page 6: Charging Battery
CHARGING BATTERY WARNING: q Charging the Battery Rechargeable batteries are Charge the battery prior to use. only to be charged under adult supervision. Always disconnect • Initial charge time: 12 hours • To ensure long battery life, never store the product your scooter from the charger in freezing or below freezing temperatures! • Recharge time: up to 12 hours, even if the light... -
Page 7: Repair And Maintenance
Turn power switch “OFF” before beginning repair or maintenance: WARNING: • Read the instructions • Secure the unit under repair • Contact Razor customer The brake is capable of skidding • Remove Charger Plug • Exercise caution around the rear tire and throwing an service if unsure about • Turn the power switch off... - Page 8 REPAIR AND MAINTENANCE Cable Guide Reassembly Bracket Frame Spacer Front wheel hardware Note: sequence. Bolt Washer Brake Plate Install the chain onto the rear Verify chain is properly Install the cable guide E300 wheel sprocket. Slip wheel axle installed on each sprocket and bracket to the frame and brake into the frame slots.
-
Page 9: Battery Care And Disposal
CONTAINS SEALED NON-SPILLABLE LEAD BATTERIES. BATTERIES MUST BE RECYCLED. skin or eyes, flush with cool water Disposal: Your Razor product uses sealed lead-acid batteries which must be recycled or disposed of in for at least 15 minutes and contact an environmentally sound manner. Do not dispose of a lead-acid battery in a fire. The battery may explode a physician. -
Page 10: Troubleshooting Guide
*Unit(s) should be turned off and fully charged prior to doing any Troubleshooting NOTE: All troubleshooting steps should be performed by an adult only TROUBLESHOOTING GUIDE Problem Possible Cause Solution Does Not Work Out Of The Box Loose connection(s) Check for loose connections/wires No Longer Works Loose connection(s) Check for loose connections/wires... - Page 11 E200 / E200S SCOOTER PARTS 1 Handlebar Grip (right/left) 8 Front Fork 17 Rear Wheel Complete (See page 6 for hardware sequence) 1-1 Handlebar End Cap 9 Front Wheel Complete (See page 7 for hardware sequence) 18 Chain Tensioner 1-2 Valve Extender 10 Control Module 19 Chain 2 Single Speed Twist Grip Throttle...
- Page 12 SB 1918 (CALIFORNIA) DECLARATION YOUR INSURANCE POLICIES MAY NOT PROVIDE COVERAGE FOR ACCIDENTS INVOLVING THE USE OF THIS SCOOTER/ELECTRIC VEHICLE. TO DETERMINE IF COVERAGE IS PROVIDED, YOU SHOULD CONTACT YOUR INSURANCE COMPANY OR AGENT.
-
Page 13: Warranty
WARRANTY Razor Limited Warranty Razor does not offer an extended warranty. If you have purchased an extended warranty, it must be honored by the store at which it was The manufacturer warranties this product to be free of manufacturing defects purchased.