LG HECTO Owner's Manual
Laser tv
Hide thumbs
Also See for HECTO:
- Specifications (2 pages) ,
- Owner's manual (24 pages) ,
- Owner's manual (90 pages)

Related Manuals for LG HECTO


Summary of Contents for LG HECTO
- Page 1 OWNER'S MANUAL Laser TV Please read the safety information carefully before using the product. HECTO www.lg.com...
-
Page 2: License
LICENSE LICENSE Manufactured under license from Dolby Laboratories. "Dolby" and the double-D symbol are trademarks of Dolby Laboratories. ABOUT DIVX VIDEO: DivX® is a digital video format created by DivX, LLC, a subsidiary of Rovi Corporation. This is an official DivX Certified® device that plays DivX video. Visit divx. com for more information and software tools to convert your files into DivX videos. -
Page 3: Safety Instructions
SAFETY INSTRUCTIONS SAFETY INSTRUCTIONS Please take note of the safety instructions to prevent any potential accident or misuse of the Laser TV. Safety precautions are given in two forms, i.e. Warning and Caution as detailed below. WARNING: Failure to follow the instructions may cause serious injury and even death. -
Page 4: Indoor Installation
SAFETY INSTRUCTIONS Read these instructions. of the product and the wall should Keep these instructions. be more than 30 cm for ventilation Heed all warnings. purposes. Follow all instructions. - Otherwise, this may cause the internal temperature of the product Indoor Installation to rise and cause fire. -
Page 5: Power
SAFETY INSTRUCTIONS Power CAUTION • When installing the product on a table WARNING or shelf, be careful not to place it near • The grounding wire should be the edge. connected. - This may fall causing injury to persons or the product malfunction. - Be sure to connect the grounding wire to avoid damage to the product Make sure that you use the cabinet... -
Page 6: When In Use
The • Only use the official power cord strong light may damage your eyes. provided by LG Electronics. Do not • When the product is on or has just use other power cords. been turned off, avoid touching the - This may cause fire or electric air vent because it will be very hot. - Page 7 SAFETY INSTRUCTIONS • Never touch the product or power CAUTION cord during thunder or lightning. • Do not place a heavy object on the - This may cause electric shock. product. • Do not use the product near - It may fall down and cause physical electronic devices that generate a injury.
-
Page 8: Cleaning
SAFETY INSTRUCTIONS Cleaning • Do not block the light emitted from the product's lens with a book or a cover. Long exposure to the light WARNING may melt or burn the object, possibly • Do not spray water directly to the causing fire. -
Page 9: Others
• Do not throw or disassemble the battery. - This may cause fire or explosion due to damage to the battery. • Always use batteries approved and certified by LG Electronics.Failure to do so may cause fire or explosion. -
Page 10: Antenna
SAFETY INSTRUCTIONS Antenna Eye Care Sensor WARNING WARNING • If you are using an outdoor antenna, • Do not poke the sensor with a sharp please install it away from electrical object. wires to make sure it does not touch - This can damage the sensor and any nearby wires even when it falls cause it to malfunction. -
Page 11: Laser
SAFETY INSTRUCTIONS Laser WARNING • This product contains a laser module. Do not disassemble or modify the Viewing direction product as this could be dangerous. Screen • You risk being exposed to laser radiation if you manipulate or alter the product in a way not specified in the user manual. - Page 12 SAFETY INSTRUCTIONS LASER RADIATION FCC NOTICE Federal Communications DO NOT STARE INTO BEAM Commission (FCC) Statement CLASS 2 LASER PRODUCT You are cautioned that changes or modifications not expressly approved - This laser Laser TV is a Risk Group 2 by the part responsible for compliance device that meets safety standard IEC could void the user’s authority to operate...
- Page 13 SAFETY INSTRUCTIONS 1) this device may not cause harmful Disposal of your old appliance interference, and 2) this device must accept any interference received, including interference that may cause undesired operation of the device of the device. FCC Caution 1. When this crossed-out wheeled bin symbol is attached to a product it Any changes or modifications not means the product is covered by the...
- Page 14 Your old batteries/ resources and protecting the accumulators, please contact Your environment. city office, waste disposal service or For more information about the LG the shop where You purchased the Recycling Policy, please visit our product. global site at http://www.lg.com/global/sustainability/...
-
Page 15: Table Of Contents
Table of contents Table of contents LICENSE Checking the Laser TV Functions - Home Menu Additional Options SAFETY INSTRUCTIONS - Adjusting the Aspect Ratio - Indoor Installation - Using the Edge Adj Function - Power - Using the Input List - When in Use To use SIMPLINK - Cleaning... - Page 16 Table of contents SERIAL COMMUNICATION Using SmartShare™ - Watching the Videos FUNCTION - Viewing the Photos Using Serial Communication - Listening to Music Establishing Serial Communication 89 Using the Magical Mirroring Function Communication Protocol Running Magical Mirroring MAINTENANCE - MirrorOp Sender Cleaning - Cleaning Cover Glass CUSTOMIZING SETTINGS...
-
Page 17: Preparation
PREPARATION PREPARATION Accessories Check the accessories provided with the product. The picture may be different from the actual product. Accessories are subject to change without prior notice in order to improve the performance of the product. New accessories may be added or old ones may be removed. -
Page 18: Optional Accessories
HDMI Cable PC Audio Port Cables for Connecting Optical Cable Connection Cable External Devices Ceiling Bracket (AJ-CB100) Accessories Shipped with Product These accessories are shipped with the product when you purchase it. Hecto Laser TV Projection Ez Bracket Screen (AJ-BB100) (SC100) -
Page 19: Parts And Components
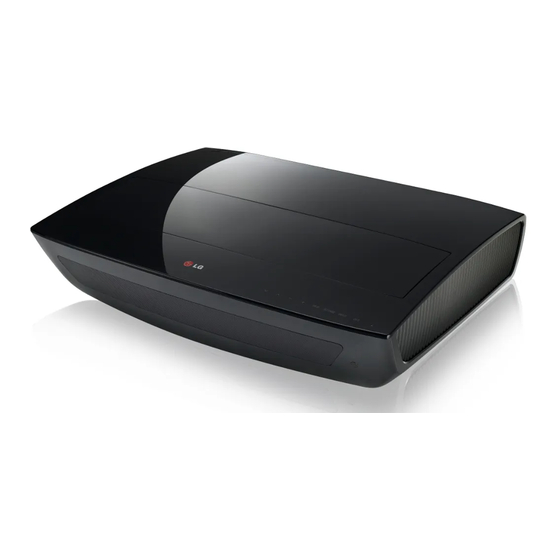
PREPARATION Parts and Components Front * This Laser TV is manufactured using high-precision technology. You may, however, see tiny black dots and/or bright spots that continuously appear on the screen. This is a normal result of the manufacturing process and does not indicate a malfunction. * Ceiling light glare depends on the light levels in a room and the distance between the product and the ceiling. -
Page 20: Back
PREPARATION Back ❹ ❺ ❻ ❼ ❽ ❾ ❿ ❸ ❷ ❶ RS-232C IN ⓫ ⓬ Component IN Port ❶ TRIGGER(12 V) Port ❷ Connect an external device (e.g., roll screen) to this port. USB IN1 Port ❸ ❹ H/P OUT Port AV IN Port ❺... -
Page 21: Status Indicator
PREPARATION Status Indicator Operation/Status Indicator Operation/ Power standby state (Power is off.) Status Indicator Power standby state White Warm stand-by (Power standby state) White (Brightness The Laser TV is in the process of turning changes slowly.) on or off. In operation Red (blinking) High temperature warning Red (blinking) +... -
Page 22: Installation
PREPARATION Installation Installation Precautions • Do not place the product in a hot or • Place the product in a well-ventilated humid environment. environment. - Do not place the product in a hot, - To prevent the internal heat from cold, or humid environment. -
Page 23: Projection Distance Per Screen Size
PREPARATION Projection Distance per Screen Size Place the Laser TV on a sturdy level surface, together with the computer or audio/ video source. Place the Laser TV at an appropriate distance away from the screen. The distance between the Laser TV and the screen determines the actual size of the image. Position the Laser TV so that the lens is perpendicular to the screen. -
Page 24: Kensington Security System
PREPARATION Kensington Security System • This the Laser TV has a Kensington Security Standard connector to prevent theft. Connect a Kensington Security System cable as shown below. • For more information on installation and use of the Kensington Security System, refer to the user guide provided with the Kensington Security System. -
Page 25: Remote Control
REMOTE CONTROL REMOTE CONTROL Open the battery cover on the back of the remote control and insert the batteries which is specified in the battery room with poles pointing in the correct direction. The new and same type of batteries (1.5 V AAA) must be used. - Page 26 HOME REMOTE CONTROL SETTINGS Displays or closes the Settings menu. HOME Displays the Home menu. MY APPS/Q.MENU MY APPS: Displays the list of my apps. Q.MENU: Changes the settings easily. Up/Down/Left/Right buttons Switches between menu functions. Shows the current mode and saves changes to the settings.
-
Page 27: Magic Remote Control
MAGIC REMOTE CONTROL MAGIC REMOTE CONTROL If the battery low message appears while using the Laser TV, replace the batteries. As shown in the figure, press the top of the battery cover and slide it down the cover. Insert two new and identical alkaline batteries (1.5V, AA type) with + and - poles pointing in the correct direction in the remote control. -
Page 28: Pairing The Magic Remote Control
MAGIC REMOTE CONTROL Pairing the Magic Remote Control You must pair the Magic remote control with the Laser TV to use it. Pair the Magic remote control prior to use as follows: Turn on the Laser TV and press the Wheel (OK) button towards the Laser TV. -
Page 29: Setting Up The Tv
Setting Up the TV Setting Up the TV Connecting the Antenna NOTE or Cable • Be careful not to bend the copper wire when connecting the coaxial To watch TV using an indoor/outdoor cable (75Ω). antenna, connect a wall terminal and the Fasten the cable connection antenna port of the Laser TV using an terminal by turning it clockwise. -
Page 30: Setting Up The Tv
Setting Up the TV Setting Up the TV Initial Setup Connect the antenna and power cord correctly. After waiting for a moment, press the POWER button on the remote control or the control panel. When you turn on the Laser TV for the first time, a setting screen appears as shown below. - Page 31 Setting Up the TV * [Store] is the mode for exhibition in the store. The picture mode is automatically reset after a certain period of time. You can select [Home] to use the product at home.
- Page 32 Setting Up the TV...
- Page 33 Setting Up the TV...
-
Page 34: Watching Tv
Setting Up the TV Watching TV When in Standby mode, press the POWER button to turn the Laser TV Press the INPUT button and select the input signal you want. Control the Laser TV using the following buttons while watching the screen. -
Page 35: Checking The Laser Tv Functions
Setting Up the TV Checking the Laser TV Functions The menu screen display in this owner's manual is an example to help users understand how to operate the product and may look different from the actual screen. Home Menu Press the HOME button of the remote control. ❶... -
Page 36: Additional Options
Setting Up the TV Additional Options - 4:3: Resizes images to the aspect ratio. Adjusting the Aspect Ratio You can adjust the aspect ratio of the picture by pressing RATIO while - Zoom: Enlarges an image to fit the watching Laser TV. screen width. -
Page 37: Using The Edge Adj Function
Setting Up the TV Using the Edge Adj Function Using the Input List To prevent the screen image from Using the Input List becoming trapezoidal, Edge Adj adjusts the top and bottom width of the image Press the INPUT button to display if the Laser TV is not set up at a right the input selection screen. -
Page 38: To Use Simplink
Setting Up the TV To use SIMPLINK NOTE SIMPLINK allows users to control and • This function works only on manage multiple multimedia devices devices with the SIMPLINK logo using the convenient Laser TV remote control and SIMPLINK menu. • Make sure that the external device has a SIMPLINK logo. -
Page 39: Explanation On Simplink Features
Setting Up the TV Explanation on Using the Quick Menu SIMPLINK features You can customize frequently used menus. Menu Description Press the MY APPS button to select Direct Play Play the multimedia the Q.MENU. device on the Laser TV Press the button to select a instantly without extra menu and press OK. -
Page 40: Network Features
Network Features Network Features NETWORK Settings Expert Settings for Network Connection To use the smart functions, the wired or It is used in a specific environment such wireless Internet must be connected. as office (where fixed IP, etc. is used). Once the Internet is connected, you can use premium contents or DLNA Press the SETTINGS button. -
Page 41: Wireless Network Connection
Network Features Wireless Network Connection You can use a wireless network by using the built-in wireless network module as shown below. A wireless router must be installed and operating at this time. Refer to the wireless router's user manual to see how to install it. The network settings and connection may be different depending on the network environment. -
Page 42: Tips For Network Setup
It will be manufacturer whether the router working normally. supports wireless connection. • LG Electronics is not responsible for • To connect to a wireless router, verify any Internet connection problems, or the SSID and security settings of any failure, error or malfunction due the wireless router. -
Page 43: Using The Wi-Fi Screen Share Function
Set Wi-Fi Screen Share to On. (If you don't want to use this function, program ( set to Off.) The nearby LG Laser TVs supporting Enable Wi-Fi Direct on the device WiDi are searched. In the list, select that you want to connect to. -
Page 44: Using Media Link
Plex program suitable to your PC or The folders appear as set up in the laptop from the website (http://www. PLEX Media Manager. lg.com). After installing the program, select the Plex icon from the tray at the bottom of the PC screen and click the right button of the mouse. -
Page 45: System Requirements For Plex Installation
Network Features System Requirements for Cautions when Using Media PLEX installation Link • Minimum requirements • Only the 0.9.1.14 or higher version of PC with 1.6 GHz Intel Core Duo PLEX media server can be installed Processor and Windows XP SP3 or on a Mac or PC. -
Page 46: Using The Premium Service
Network Features Using the Premium Service This service gives you easy access to a wide variety of content, such as news and UCC at any time, as long as you are connected to the network. In addition to global contents, the premium contents specialized for each country are provided considering each country's characteristics. -
Page 47: Smartshare
SmartShare™ SmartShare™ Removing a USB Device Click the MY APPS button. Before Using Select Q.MENU. Use the button to move to USB Device and press the OK Connecting a USB Device button. Connect a USB device (external HDD, Remove the USB device. USB memory) to the USB port of Laser TV to enjoy the content files stored in NOTE... - Page 48 SmartShare™ Tips for Using a USB Device Supported Files for SmartShare™ • A USB device which has a built-in • Maximum data transmission rate: automatic recognition program or 20 Mbps (Megabit per second) uses its own driver might not be •...
-
Page 49: Connecting Dlna
SmartShare™ Connecting DLNA Connecting DLNA DMR (Digital Media Renderer) Digital Living Network Alliance (DLNA) allows you to enjoy videos, music and With the Windows 7 or Window 8 PC photos saved on your PC or server operating system or DLNA-certified using the Laser TV through a home device (e.g. - Page 50 SmartShare™ Connecting DLNA DMP (Digital When DLNA is Malfunctioning Media Player) • Check your network settings when the DLNA option does not work With a PC having SmartShare PC properly. Software, music/video/photo files may • To watch the 1080p video through be replayed on the Laser TV by linking DLNA, a router that uses 5 GHz them via home networking.
-
Page 51: Connecting Internet
SmartShare™ Connecting Internet Types URL manually on TV or visits websites added to Favourite. ❶ ❷ ❹ ❸ Description Types in the web address. ❶ Add the current page to favorites. ❷ Moves to a website that you have visited. ❸... -
Page 52: Using Smartshare
SmartShare™ Using SmartShare™ Press the HOME button of the remote control. Select SmartShare. You can watch the photo, music and video on the Laser TV by connecting a USB or home network (DLNA, Media Link). It shows all the photos, music and videos in the device connected to the Laser TV. -
Page 53: Watching The Videos
SmartShare™ Watching the Videos In the Movie List, you can watch movies stored on the connected USB device. Tips for Playing Videos • Some subtitles created by a user may not work. • A video file and its subtitle file must be located in the same folder. - Page 54 SmartShare™ Video Codec Maximum supported resolution: 1920 x 1080 @ 30p Extension Codec Video VC-1 Advanced Profile, VC-1 Simple and Main Profile .asf .wmv Audio WMA Standard, WMA 9 Professional DivX3.11, DivX4, DivX5, DivX6, XViD, H.264/AVC, Video Motion Jpeg .divx .avi MPEG-1 Layer I, II, MPEG-1 Layer III (MP3), Audio...
- Page 55 SmartShare™ Controlling the Video Playback You can control playback using the following buttons. Option List Item Description Shows the current playing position. You can use the button to move forward or backward. Stops playing and returns to Movie List. Resumes normal playback. Pauses the media player.
-
Page 56: Viewing The Photos
SmartShare™ Viewing the Photos You can view photos stored on a connected device. Photo File File Format Item Information SOF0: baseline Supported SOF1: Extend Sequential format SOF2: Progressive Min. 64 x 64 (jpeg, jpg, jpe) Size Max. Normal Type: 15360 (W) x 8640 (H) Progressive Type: 1920 (W) x 1440 (H) Controlling the Photo Playback You can control playback using the following buttons. -
Page 57: Listening To Music
SmartShare™ Listening to Music You can play audio files stored on the connected device. Audio File File Format Item Information Bit rate 32 Kbps - 320 Kbps Sample freq. 16 kHz - 48 kHz Support MPEG1, MPEG2, Layer2, Layer3 Controlling Music Playback You can control playback using the following buttons. -
Page 58: Using The Magical Mirroring Function
(PC) to the Laser TV. To use this function, MirrorOp Sender, an application for PC, should be installed in the user's laptop (PC). You can download this PC program from www.mirrorop.com/products_support/LG/. (To obtain a full-featured MirrorOp Sender program, a user should purchase one.) System Requirements Dual core 1.8 GHz or higher (excluding Atom processor) - Page 59 SmartShare™ After running Magical Mirroring, execute the MirrorOp Sender program in the PC on a standby screen as follows. In the Remote Device IP field of the MirrorOp Sender, enter the IP which is the same as the host IP of the Magical Mirroring and press Connect. <PC Screen>...
- Page 60 SmartShare™ If MirrorOp Sender is connected normally, the connected PCs are displayed in Device List of Magical Mirroring as shown below. (All connected PCs are displayed.) If MirrorOp Sender does not run, Device List of Magical Mirroring is shown as follows.
-
Page 61: Mirrorop Sender
SmartShare™ MirrorOp Sender Changing MirrorOp Mode Move the button to this position to change the transfer mode to application mode. Move the button to this position to change the transfer mode to movie mode. Mode Description Application Mode When MirrorOp is set to this mode, the software will transfer images with greater quality. - Page 62 SmartShare™ Configuring MirrorOp - Search Host Device • Searches the devices available for connection on the local network. - Projection Quality • Changes the quality of the projected image. If the network speed is high, select 'Best'; if not, select 'Normal'. - Remote Cursor Size •...
- Page 63 SmartShare™ - TV Offset Compensation • Adjusts the size of screen projected to the Laser TV. Adjust the horizontal and vertical offset, and click the Apply button. - Auto Power Management • Choose this option when you run the MirrorOp application on your laptop. This option enables your Wi-Fi network to always work at an optimum level.
-
Page 64: Customizing Settings
CUSTOMIZING SETTINGS CUSTOMIZING SETTINGS SETTINGS Press the SETTINGS button. button to select a desired item and press the OK button. Use the Use the button to set the desired item and press the OK button. Press the EXIT button when completed. Menu Description PICTURE... -
Page 65: Picture Settings
CUSTOMIZING SETTINGS PICTURE Settings Press the SETTINGS button. PICTURE Use the button to select PICTURE and ︿ press the OK button. • ꕊ Energy Saving : Medium • Picture Mode : Vivid • Contrast Use the button to set up the •... - Page 66 CUSTOMIZING SETTINGS Item Description Picture Restores each mode's options to the factory default. Reset Aspect Resizes the picture. Ratio Picture By following the instructions, you can easily adjust the picture quality Wizard II to technical standards using the remote control without needing an expensive pattern device or a picture quality expert.
- Page 67 CUSTOMIZING SETTINGS Item Description Color Gamut Selects the range of colors to display. Standard: Displays the original colors of an input signal regardless of the display features. Wide: Sets to use the rich colors of the display. Available options may differ depending on the input signal or video mode, etc. Expert Control Item Description...
- Page 68 CUSTOMIZING SETTINGS Item Description Color Adjusts Red/Green/Blue/Cyan/Magenta/Yellow colors. Allows an Management expert to adjust the tint using a test pattern. Six colors (Red/Green/ system Blue/Cyan/Magenta/Yellow) can be selectively adjusted without affecting other colors. You may not see colors change on a normal picture even after adjustment.
-
Page 69: Sound Settings
CUSTOMIZING SETTINGS SOUND Settings Press the SETTINGS button. SOUND Use the button to select SOUND and press the OK button. • Sound Mode : Standard • User EQ Use the button to set up the • Volume Mode • Virtual Surround : Off desired item and press the OK button. - Page 70 CUSTOMIZING SETTINGS Item Description Sound Balances the sound. Setting Mode ARC Mode External audio devices can be connected via High-Speed HDMIⓇ cable without an extra optical audio cable to output SPDIF. It interfaces with SIMPLINK. For an external device that supports ARC (Audio Return Channel), connect it to the HDMI(ARC) port.
-
Page 71: Channel Settings
CUSTOMIZING SETTINGS CHANNEL Settings Press the SETTINGS button. CHANNEL Use the button to select CHANNEL and • Auto Tuning press the OK button. • Manual Tuning • Channel Edit Use the button to set up the desired item and press the OK button. - To return to the previous menu, press the button. -
Page 72: Time Settings
CUSTOMIZING SETTINGS TIME Settings Press the SETTINGS button. TIME Use the button to select TIME and • Clock press the OK button. • Off Time : Off • On Time : Off Use the button to set up the • Sleep Timer : Off desired item and press the OK button. -
Page 73: Lock Settings
CUSTOMIZING SETTINGS LOCK Settings Press the SETTINGS button. LOCK Use the button to select LOCK and ︿ • Set Password press the OK button. • Lock System : Off • Block Channel Use the button to set up the • Movie Rating desired item and press the OK button. - Page 74 CUSTOMIZING SETTINGS Setting Description TV Rating- Blocks the TV programs that you want based on the ratings by using General the Parental Control Function (V-Chip). NOTE • The V-Chip electronically reads TV program ratings and allows parents to block program that are unsuitable for children. Rating Applies to TV-G, TV-PG, TV-14, TV-MA.
-
Page 75: Option Settings
CUSTOMIZING SETTINGS OPTION Settings Press the SETTINGS button. OPTION Use the button to select OPTION and ︿ • Language press the OK button. • Caption : Off • Pointer Use the button to set up the • Set ID desired item and press the OK button. •... - Page 76 CUSTOMIZING SETTINGS Item Description Auto Power Makes the Laser TV turn on automatically when the power cord is connected. Item When the power cord is connected to the Laser TV, it turns on automatically. When the power cord is connected to the Laser TV, it goes into standby mode.
- Page 77 CUSTOMIZING SETTINGS Item Description Eye Care Change the eye care sensor settings. Sensor NOTE • If a user gets closer to the product while the eye care sensor is turned on, the sensor detects it and reduces the light intensity automatically to protect the user's eyes. •...
- Page 78 CUSTOMIZING SETTINGS Item Description Eye Care Item Sensor Sensor Turn the eye care sensor on/off. Sensitivity Set the sensitivity of the eye care sensor. The default is medium, but set it higher for better sensitivity or lower for less sensitivity. Balloon Help Enables/disables the balloon help.
-
Page 79: Network Settings
CUSTOMIZING SETTINGS NETWORK Settings Press the SETTINGS button. NETWORK Use the button to select NETWORK and press the OK button. • Network Connection • Network Status Use the button to set up the • Wi-Fi Screen Share • Smart Share Setting desired item and press the OK button. -
Page 80: Support Settings
CUSTOMIZING SETTINGS SUPPORT Settings Press the SETTINGS button. SUPPORT Use the button to select SUPPORT and • Software Update press the OK button. • Picture Test • Sound Test Use the button to set up the • Product/Service Info. desired item and press the OK button. •... -
Page 81: Connecting External Devices
CONNECTING EXTERNAL DEVICES CONNECTING EXTERNAL DEVICES You can connect various external devices to Laser TV. Computer/Laptop Video Digital Device HDMI - Page 82 Component - Page 85 Input(AV) - Page 85 RGB - Page 83 USB Devices - Page 47 Game Console Headphones - Page 86 Headphones... -
Page 82: Connecting An Hd Receiver, Dvd Player, Or Vcr
CONNECTING EXTERNAL DEVICES Connecting an HD Receiver, DVD Player, or VCR HDMI connection Connect an HD receiver, DVD, or VCR player to Laser TV and select an With an HDMI cable, you can enjoy high appropriate input mode. quality picture and sound. Connect the HDMI input port of Laser TV to the HDMI NOTE output port. -
Page 83: Hdmi To Dvi Connection
CONNECTING EXTERNAL DEVICES Connecting a PC HDMI to DVI Connection Use the HDMI to DVI cable to connect This Laser TV supports the Plug & Play the HDMI input port of the Laser TV to function. Your PC will automatically the DVI output port. -
Page 84: Hdmi To Dvi Connection
CONNECTING EXTERNAL DEVICES HDMI to DVI Connection RGB to DVI Connection Use the HDMI to DVI cable to connect Connect the Laser TV's video (PC) input the HDMI input port of the Laser TV to port to the DVI output port. the DVI output port. -
Page 85: Connecting External Devices
CONNECTING EXTERNAL DEVICES Connecting External Component Devices Connection You can enjoy more vivid images when AV Connection you connect an external device with a component port to the component input Connect the output ports of an external port of the Laser TV. Press the INPUT device and the AV input ports of the button on the remote control to select Laser TV using AV connection cables. -
Page 86: Connecting Headphones
CONNECTING EXTERNAL DEVICES Connecting Connecting a Laptop Headphones You can connect the Laser TV to a laptop to use various functions. Headphone Connection RGB Connection You can listen to the sound from Laser You can connect it to the video (PC) TV using headphones. -
Page 87: Hdmi Connection
CONNECTING EXTERNAL DEVICES HDMI connection The table below shows examples of switching the output. For more Connect the HDMI input port of Laser information, refer to the "External TV to the HDMI output port. Output", "Connecting to an External Monitor", or similar sections of the owner's manual of your computer. -
Page 88: Using The Trigger Port
CONNECTING EXTERNAL DEVICES Using the TRIGGER Port Motor screen connection Connect an external device (e.g., roll screen) to the TRIGGER (12V) port using a mini jack cable (3.5 mm). Ready 3(PC) 1(ARC) HDMI TRIGGER (12V) Ready 3(PC) 1(ARC) HDMI TRIGGER (12V) NOTE •... -
Page 89: Serial Communication Function
Serial Communication Function Serial Communication Function Using Serial Communication If the Laser TV is connected to a PC through an RS-232C cable, you can use the PC to control functions of the Laser TV such as power On/Off or input selection, etc. This function may not be available for a particular menu or input mode. -
Page 90: Communication Protocol
Serial Communication Function 2. OK Acknowledgement Communication Parameter Setup Baud Rate: 9600 bps(UART) [Command2] [ ] [Set ID] [ ] [OK] [Data] [x] Data Length: 8 bit * The set transmits ACK (acknowledgement) based Parity: none on this format when receiving normal data. At this Stop bit: 1 bit time, if the data is data read mode, it indicates Flow Control: none... - Page 91 Serial Communication Function Command Reference List Command 1 Command 2 Data (Hexadecimal) 01. POWER 00 - 01 02. Aspect Ratio 03. Blank Image 00 - 01 04. Contrast 00 - 64 05. Brightness 00 - 64 06. Color 00 - 64 07.
- Page 92 Serial Communication Function 01. Power (Command: ka) 02. Aspect Ratio (Command: kc) ⇒ Powers the set on/off. ⇒ Adjusts the aspect ratio. Transmission Transmission [k][a][][Set ID][][Data][Cr] [k][c][][Set ID][][Data][Cr] Data 00: Power Off Data 01: 4:3 01: Power On 02: 16:9 04: Zoom 06: Set By Program 09: Just scan...
- Page 93 Serial Communication Function 04. Contrast (Command: kg) 06. Color (Command: ki) ⇒ Adjusts the screen contrast. ⇒ Adjusts the screen color. Transmission Transmission [k][g][][Set ID][][Data][Cr] [k][i][][Set ID][][Data][Cr] Data Min: 0H - Max: 64H Data Min: 0H - Max: 64H (* Transmitted in hexadecimal code) (* Transmitted in hexadecimal code) * See the data structure.
-
Page 94: Color Temperature
Serial Communication Function 08. Sharpness (Command: kk) 10. Key Lock (Command: km) ⇒ To Set the function of locking the remote ⇒ Adjusts screen sharpness. control and front panel control on the Laser Transmission Transmission [k][k][][Set ID][][Data][Cr] [k][m][][Set ID][][Data][Cr] Data Min: 0H - Max: 32H (* Transmitted in hexadecimal code) Data 00: Disables the key lock. - Page 95 Serial Communication Function 12. Black Level (Command: nm) 14. Auto Configure (Command: ju) ⇒ Adjusts the value of black level. ⇒ Optimizes the screen automatically in PC input mode. Transmission Transmission [n][m][][Set ID][][Data][Cr] [j][u][][Set ID][][Data][Cr] Data 00: Low 01: High Data 01: To set (* Transmitted in hexadecimal code)
- Page 96 Serial Communication Function 16. Key (Command: mc) 18. Mute (Command: ke) ⇒ Enables/disables the mute function. ⇒ Sends a key code of the IR remote control. Transmission Transmission [k][e][][Set ID][][Data][Cr] [m][c][][Set ID][][Data][Cr] Data 00: Mute On (volume off) Data Key Code see Page 98 01: Mute Off (volume on) (* Transmitted in hexadecimal code) [e][] [Set ID][][OK][Data][x]...
- Page 97 Serial Communication Function 20. Channel Add/Del (Command: mb) ⇒ To add and delete the channels. Transmission [m][b][ ][Set ID][ ][Data][Cr] Data 00: Channel Delete 01: Channel Add [b][ ][Set ID][ ][OK/NG][Data][x] Data 00: Channel Delete 01: Channel Add...
- Page 98 Serial Communication Function <Key Code> Key Name Key Code Key Name Key Code ∧ 0x40 HOME 0x7C ∨ 0x41 MUTE 0x09 CH ∧ > 0x06 0x00 CH ∨ < 0x07 0x01 POWER 0x08 STILL 0xBC INPUT 0x0B EXIT 0x5B SETTINGS 0x43 0x10 (BACK)
-
Page 99: Maintenance
MAINTENANCE MAINTENANCE Clean your Laser TV to keep it in optimal condition. Cleaning Cleaning Cover Glass To remove dust or stains on the cover glass, use an air spray or use a swab or soft cloth to wipe the glass gently. Cleaning the Laser TV Case To clean the case of Laser TV, first unplug the power cord. -
Page 100: Updating The Software
100 MAINTENANCE Updating the Software When a software update is required, run the software update to obtain the latest software version. You can manually check for and download any software updates. On the HOME screen, press the SETTINGS button. Select SUPPORT and go to Software Update. Item Description Software Update... -
Page 101: Frequently Asked Questions About Smart Tv
MAINTENANCE Frequently Asked Questions about Smart TV Problem Troubleshooting Whenever I enter a The 'Initializing' message indicates the CPU and menu, the 'Initializing' hardware booting time, network communication setup, or message is always communication time with SDP (device authorization and displayed. -
Page 102: Wireless Specifications
102 Wireless Specifications Wireless Specifications As the wireless device may cause electromagnetic interferences, the manufacturer and installer may not provide the safety or medical services. Wireless LAN Module (TWFM-B003D) Specifications Standard IEEE802.11a/b/g/n 2400 MHz to 2483.5 MHz Frequency Range 5150 MHz to 5250 MHz 5725 MHz to 5850 MHz Modulation CCK / OFDM / MIMO... -
Page 103: Wireless Specifications
Wireless Specifications Bluetooth Module (BM-LDS302) Specifications Standard Bluetooth Version 3.0 Frequency Range 2400 MHz - 2483.5 MHz Output Power (Max.) 10 dBm or lower Data rate (Max.) 3 Mbps Communication Line of Open Sight approx. 10 m Distance • FCC ID of Bluetooth module inside Laser TV FCC ID: BEJLDS302... -
Page 104: Specifications
104 SPECIFICATIONS SPECIFICATIONS MODELS HECTO(HECTO-NA) Resolution (Pixel) 1920 (Horizontal) × 1080 (Vertical) Aspect ratio 16:9 (Horizontal:Vertical) Panel size (mm) 14.515 (Horizontal), 8.1648 (Vertical) Projection distance 0.53 m (2.54 m) (Video size) Ratio of upward 123 % projection POWER AC 100 - 240 V, 50/60 Hz... - Page 105 SPECIFICATIONS Supported Monitor Display Supported HDMI/DVI-DTV Mode Horizontal Vertical Horizontal Vertical Resolution Frequency Frequency Resolution Frequency Frequency (kHz) (Hz) (kHz) (Hz) 720 x 400 31.469 70.08 720 x 480 31.47 31.47 59.94 640 x 480 31.469 59.94 31.5 800 x 600 37.879 60.31 1280 x 720...
- Page 106 1080p disclaimers and copyright notices are (60 Hz only) available for download. LG Electronics will also provide open source code to you on CD-ROM for a charge covering the cost of performing such distribution (such as the cost of media, shipping and handling) upon email request to opensource@lge.com.
- Page 107 The model and serial number of the LG Customer Information Center projector are located on the back or on the side of the Laser TV. Record them below For inquires or comments, visit www.lg.com or call; should you ever need service. 1-800-243-0000 USA, Consumer User...