Yamaha DTX700 Owner's Manual
Drum trigger module
Hide thumbs
Also See for DTX700:
- Data list (20 pages) ,
- Reference manual (69 pages) ,
- Firmware update manual (4 pages)
Table of Contents
Advertisement
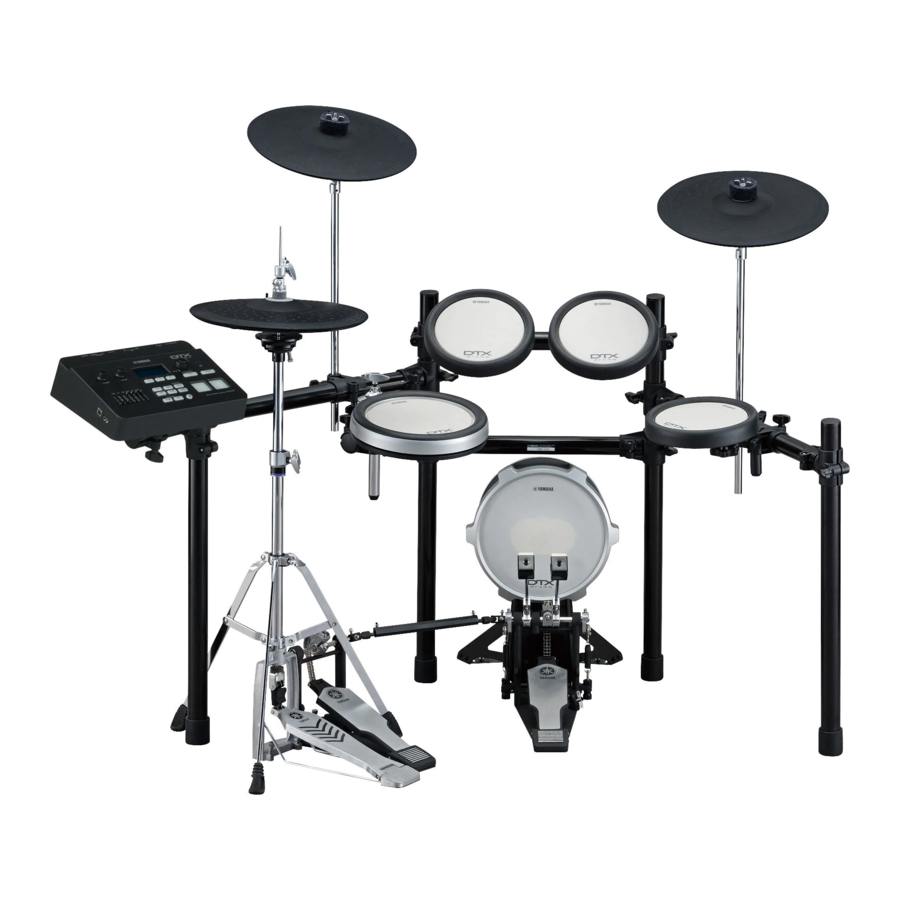
DRUM TRIGGER MODULE
DTX700
Owner's Manual
(Setup / Basic Operation)
Read on paper
(see page 6 for Table of Contents)
Owner's Manual
Read first
This booklet
Read when
Data List :
Separate booklet
necessary
Read on your computer
(PDF file)
Read when
Reference Manual
necessary
Please download from this web page:
http://www.yamaha.co.jp/manual/
:
(Setup / Basic Operation)
(Detailed Operation)
EN
Advertisement
Table of Contents

Related Manuals for Yamaha DTX700


Summary of Contents for Yamaha DTX700
- Page 1 DRUM TRIGGER MODULE DTX700 Owner’s Manual (Setup / Basic Operation) Read on paper (see page 6 for Table of Contents) Owner’s Manual (Setup / Basic Operation) Read first This booklet Read when Data List : Separate booklet necessary Read on your computer...
- Page 2 This product should be used only with the components supplied or; a When installing batteries, never mix old batteries with new ones, and cart, rack, or stand that is recommended by Yamaha. If a cart, etc., is never mix different types of batteries. Batteries MUST be installed cor- used, please observe all safety markings and instructions that accom- rectly.
- Page 3 AC outlet. • Only use the voltage specified as correct for the instrument. The Then have the instrument inspected by qualified Yamaha service required voltage is printed on the name plate of the instrument.
-
Page 4: Saving Data
Yamaha cannot be held responsible for damage caused by improper use or modifications to the instrument, or data that is lost or destroyed. Always turn the power off when the instrument is not in use. -
Page 5: Welcome
The Reference Manual provides a description of all of the functions that can be accessed by pressing the [MENU] button on the DTX700’s control panel. This PDF manual is not bundled with the drum trigger module. If you wish to learn more about your DTX700 using the Reference Manual, please download it from the Yamaha Manual Library web page: http://www.yamaha.co.jp/manual/... -
Page 6: Table Of Contents
Changing the Cursor Value ........17 Expanding with a PCY135 Cymbal Pad..... 50 Moving the Cursor ............. 17 Connecting Your DTX700 to a Computer ..52 [-/DEC] and [+/INC] Buttons ........18 Making Connections..........52 [F1], [F2] & [F3] Function Buttons......18 Making Music with a Computer ......... -
Page 7: First Steps
• Connect your pads to the DTX700 using the correct cables. m Refer to the assembly manuals that came with your pad sets (DTX700K, DTX750K, etc.). • Plug the power adaptor into the DTX700 and turn it on. m See page 13 of this booklet. Play your kit. -
Page 8: Quick Start Guide
Press the [SONG] button. w Turn the dial to select a new song. e Press the [F3] button to start the song. You can press the [F2] button to silence the song’s drum part (page 38 of Basic Operation). DTX700 Owner’s Manual... - Page 9 When you have finished playing, press the [>/ ] button once again to stop recording. You can also use the [>/ ] button to start and stop playback of your recorded perfor- mance (page 48 of Basic Operation). DTX700 Owner’s Manual...
-
Page 10: Setup
(Standby/On) button (page 14) This knob controls the volume of audio output from the Use this switch to turn your DTX700 on and off. [PHONES] jack. Turn clockwise to increase the volume y [F1], [F2], and [F3] function buttons (page 18) or counter-clockwise to decrease it. -
Page 11: Side Panel
[USB TO HOST] port (page 52) w [USB TO DEVICE] port (page 21) This port is used to connect the DTX700 to a computer This port is used to plug in a USB memory device via a USB cable. -
Page 12: Rear Panel
MIDI cable. When con- thermore, you can use the input jack on its rear sur- nected in this way, you can play the DTX700’s internal face to connect an additional mono-type pad. tone generator and control many of its parameters Meanwhile, you could also use a Y-shaped cable (sold using another MIDI device. -
Page 13: Setting Up For Sound
Setting Up for Sound Connecting the Adaptor Connecting Speakers or Headphones Your DTX700 does not come with built-in speakers. In order to Ensure that your DTX700 is turned off (i.e., hear it, therefore, you will need to connect headphones or a the screen is not lit). -
Page 14: Turning On
(Standby/On) button. The display will turn off. NOTICE • If you turn off the DTX700 without storing any changes you have made to settings, those changes will be lost. For details on how to store changed set- tings, see page 21. - Page 15 To disable the Auto Power-Off function when turning on the Press the dial. DTX700, hold down the [>/ ] button when you press the The cursor will zoom out to select the entire row. (Standby/On) button. (This action sets the AutoPower- Off parameter to “Off”.)
-
Page 16: Basic Operation
Basic Operation Playing Demo Songs Your DTX700 comes pre-programmed with demo songs. Press the [F3] button once again to stop the Played as described below, these songs allow you to fully appre- ciate the quality of the sound produced by the built-in tone gen- demo song. -
Page 17: Basic Dtx700 Operations
Basic Operation Basic DTX700 Operations Dial (with integrated button) Moving the Cursor When a page contains more than one editable value, you can Dial press the dial to toggle between inverted text and underlined text at the cursor position. Example: After pressing the [SONG] button... -
Page 18: [-/Dec] And [+/Inc] Buttons
Basic Operation Basic DTX700 Operations [-/DEC] and [+/INC] Buttons [F1], [F2] & [F3] Function Buttons These buttons are used to change the currently selected value. Press the [+/INC] button to increase the value by one; the [-/ DEC] button to decrease by one. If you hold down either button, the value will change continuously. -
Page 19: Adjusting The Volume
[PHONES] jack on the rear panel. Turn clockwise to increase the volume or counter-clockwise to decrease it. Adjusting Display Contrast Using the [LCD CONTRAST] knob on the rear panel, you can adjust the contrast level of the DTX700 display. [LCD CONTRAST] knob DTX700 Owner’s Manual... - Page 20 Pages Accessed Using the [MENU] Button The pages of your DTX700’s Menu area provide access to a wide range of highly-useful settings. To access this area, simply press the [MENU] button. This manual introduces some of the pages from the Menu area. For a complete description, please download the DTX700 Reference Manual from this web page: http://www.yamaha.co.jp/manual/...
-
Page 21: Storing Settings
Precautions when using the [USB TO Make sure that the [STORE] button is lit. DEVICE] port Whenever connecting a USB device to your DTX700 via the [USB TO DEVICE] port, be sure to observe the following important precautions. NOTICE •... -
Page 22: Restoring Default Settings
USB cables. Such action should, therefore, be avoided. • Data stored on the DTX700 or within the USB mem- ory device may be corrupted if they are disconnected or turned off at the wrong time. Be sure, therefore, to... -
Page 23: Playing Drum Pads
Hitting the outside edge of the pad produces an edge shot sound. Closed rim shot (Cross sticking) Hitting the closed-rim zone produces a closed rim-shot sound. Hi-hat splash Pressing the hi-hat controller pedal and then immediately releasing it produces a hi-hat splash sound. DTX700 Owner’s Manual... -
Page 24: Cymbal
Edge shot Hitting the outside edge of the pad produces an edge shot sound. Bell shot Hitting the cup produces a bell shot sound. DTX700 Owner’s Manual... -
Page 25: Performing On Many Different Kits
Basic Operation Performing on Many Different Kits In terms of the DTX700, the word “kit” is used to refer to a col- Selecting a Kit lection of related sounds, such as acoustic drums or percussion instruments. By selecting different kits, you can conveniently change the entire sound of this drum trigger module. -
Page 26: Selecting A Sensitivity For The Entire Kit
The Trigger Setup page will open. Press the dial to store your new setting. Turn the dial to choose a trigger setup. Playing your DTX700’s pads as you turn the dial makes it easier to notice the differences in sensitivity levels. DTX700 Owner’s Manual... -
Page 27: Adjusting Tone
Simply choose different equalizer presets as described below to see how they change your drum sounds. NOTE • For a full list of DTX700 EQ presets, see the Data List document. If you do not wish to store your setting, press the [EXIT] button to return to the previous page. -
Page 28: Turning Off Effects
Turning Off Effects Initializing a Kit Each kit on the DTX700 is set up with reverb or another sound By initializing a kit as described below, you can quickly restore effect applied by default. You can, however, easily turn off this its default settings. -
Page 29: Switching The Display Mode
Performing on Many Different Kits Switching the Display Mode Press the [STORE] button. Normally, your DTX700’s display shows the name of the kit and an artist’s impression of what it might look like. As described below, however, you can change the display mode to show just the kit name. -
Page 30: Building Your Own Kit
Basic Operation Building Your Own Kit With the DTX700, you can assign a different sound to each of Turn the dial to select the sound you wish to the connected pads. And once you have assembled all of the sounds you wish to use, you can store them together. The fol- use. -
Page 31: Adjusting An Instrument's Sound
This function adjusts the height of the hi-hat clutch – or in other words, the height of the top hi-hat. • Decay: This function allows the amount of decay to be adjusted. Turn the dial to adjust the sound. DTX700 Owner’s Manual... -
Page 32: Playing With A Double Bass Drum
• Your DTX700 can import WAV and AIFF audio files. If you do not wish to store your new setting, press the • Only 16-bit audio files can be used with your DTX700. [EXIT] button. The display will return to the previous page. - Page 33 Press the [F3] button. NOTE • Whenever you import an audio file, your DTX700 will automatically store it. Turn the dial to select the audio file you wish to import.
-
Page 34: Naming An Original Kit
. If you do not wish to store your new kit name, press the [EXIT] button. The display will return to the previous page. Press the dial to store your new kit name. Press the dial. DTX700 Owner’s Manual... -
Page 35: Adjusting The Snare Wire
Hold down the [SHIFT] button and press the [F2] button. With the DTX700, you can easily adjust the snare wire for the snare pad (i.e., the pad plugged into the [qSNARE] trigger input jack). In the case of pads featuring a pad controller, simply turn the controller to adjust the snare wire setting. -
Page 36: Playing With Songs For Practice
You can stop playback by pressing the [F3] button once again. Press the [EXIT] button to return to the Song page, and then press the [F3] button to start the song. If the volume is not yet correct, repeat the above process. DTX700 Owner’s Manual... -
Page 37: Adjusting The Volume Of A Song's Drums
If the volume is not yet correct, repeat the above process. Press the [F1] button. Press the dial to switch to the outline cursor. Turn the dial to move the cursor to the DRUM fader, and then press the dial. DTX700 Owner’s Manual... -
Page 38: Muting The Drum Part
[F2] button once again. Press the [F2] button. All accompaniment parts other than the bass will be muted (i.e., silenced). Press the [F3] button. The drum part will also be muted. DTX700 Owner’s Manual... -
Page 39: Locking A Kit
Press the [EXIT] button to return to the Song page, and then press the [F3] button to start When you select a new song, your DTX700 normally chooses the song. the best kit for that song automatically. You can, however, use You should now hear only the song’s bass part. - Page 40 Playing with Songs for Practice Turn the dial to select a new song. NOTE • To unlock the kit, repeat Steps 1 through 3 above. After doing so, the lock icon will disappear from beside the kit number. DTX700 Owner’s Manual...
-
Page 41: Turning On The Click-Track
• Use [MENU] m [Click] m [Voice] to change the click- track sounds. For full details, refer to the Reference Manual PDF document. Press the [F1] button. : Accent (start of measure) : Quarter notes : Eighth notes : Sixteenth notes : Eighth-note triplets DTX700 Owner’s Manual... - Page 42 To adjust the volume of other elements of the click-track, repeat Steps 3 through 6 above. Press the [STORE] button. If you do not wish to store your new settings, press the [EXIT] button. The display will return to the previous page. DTX700 Owner’s Manual...
-
Page 43: Setting The Time Signature
The cursor will switch to an underline. Turn the dial to move the cursor to the time signature. Press the dial. The cursor will switch to reversed text. Turn the dial to set the click-track time signa- ture. DTX700 Owner’s Manual... -
Page 44: Using The Timer
Using the Timer Tap Tempo – Setting the Tempo by Playing Pads Your DTX700’s timer can be used to specify how long the click-track is to play. This function is useful when you want to practice for a set period of time. -
Page 45: Using Dtx700 Training Functions
Using DTX700 Training Functions Press the [F1] button to access the Groove Check page. (You may need to press more Your DTX700 features three different types of training function. than once.) • The Groove Check function can be used to examine your playing for inaccurate or inconsistent timing. - Page 46 ] button once again. The click-track will stop. NOTE • You can also use the Rhythm Gate function with your DTX700’s built-in songs. Press the [F1] button to access the Rhythm Gate page. (You may need to press more than once.) Press several times if necessary.
- Page 47 When you have finished practicing, press the [ ] button once again. The click-track will stop. Press the [F1] button to access the Measure Break page. (You may need to press more than once.) Press several times if necessary. DTX700 Owner’s Manual...
-
Page 48: Recording Your Performances
Deleting a Recorded Performance You can record your own drum performances using the Press the [REC] button. DTX700’s built-in recorder. To do so, proceed as follows. The button will light in red. Press the [REC] button. The button will light in red. -
Page 49: Recording Performance & Song Together
The [REC] button and the [>/ ] button will both turn off. Press the [F2] button to mute that song’s drum part. icon will switch to Press the [REC] button. The [REC] button will light in red. DTX700 Owner’s Manual... -
Page 50: Integrating Accessories
If you own an HH65 Hi-hat Controller (sold separately), you up as part of your drum set. can connect it to your DTX700’s [!2 H H-KICK] trigger input jack in order to play kick drum sounds. To do so, proceed as fol- Use the cable that came with your PCY135 lows. - Page 51 “Pad11” will be shown in the top right corner of the display. Turn the dial to select a sound for your newly- added pad. Press the [STORE] button to store the assigned sound. If the following message is displayed, press the dial to pro- ceed. DTX700 Owner’s Manual...
-
Page 52: Connecting Your Dtx700 To A Computer
NOTICE NOTE • Use a USB A-B cable of no more than 3 meters in • As the DTX700 has no built-in speakers, you will need to length. connect headphones or an external amplifier and speakers • Before connecting to your computer via the [USB TO in order to hear it. -
Page 53: Making Music With A Computer
Track 3, the DAW application will return the perfor- Local Control Settings mance data to the DTX700 on MIDI Channel 1 as it is being recorded, and the instrument’s internal tone generator will Most DAW applications allow MIDI Thru to be turned on, sound as if it is being played directly. -
Page 54: Setting Up Cubase Remote Control
Hold down the [SHIFT] button and press the [MENU] button. Using a special feature, the DTX700 can operate as a remote The message “Cubase Remote” will be displayed to confirm controller for Cubase. For example, you can operate the Cubase that the function has been activated. -
Page 55: On-Screen Messages
File not found. This message is displayed if no file of the selected type exists. This message is displayed if the file selected for loading is unsuitable for use with your DTX700 or is unsuitable for the Illegal file. current mode. -
Page 56: Troubleshooting
DTX700 is turned on. The kit changes whenever a new By default, your DTX700 always chooses the best kit for each song. To prevent it from doing so, song is selected. turn on the Kit Lock function. (See page 39.) Song parts (i.e., non-drum... -
Page 57: Specifications
4, DVD (for bundled software) * Specifications and descriptions in this owner’s manual are for information purposes only. Yamaha Corporation reserves the right to modify products or specifications at any time without prior notice. Since specifications, equipment, and options may not be the same in every locale, please check with your Yamaha dealer. -
Page 58: Index
Cubase remote ........54 Muting ..........24 Cursor ..........17 Wave (audio files) ........31 Cym (cymbals) ........31 Cymbal .......... 24 Open ............23 Zone ........12 Open rim shot ........23 Orch (orchestral percussion) ....31 Data list ........5 DAW application ......... 53 DTX700 Owner’s Manual... -
Page 59: List Of Dtx700 Functions
List of DTX700 Functions For more details, refer to the Reference Manual PDF document. See page page 5 for details on downloading this manual. Common MIDI Volume Kit Volume Tempo Kit Selection Tempo Other TrgSetupLink Trigger Setup Link Transmit Transmit... - Page 60 List of DTX700 Functions Utility General PadCtrlType Pad Control Type MasterVolume Master Volume HH Func Hi-hat Function MasterTune Master Tune HH MIDI Ch Hi-hat MIDI Channel PanDepth Pan Depth HH MIDI Type Hi-hat MIDI Type AuxOutSel Auxiliary Output SnareOn/Off Snare On/Off...
- Page 61 List of DTX700 Functions Trigger Click Name Voice Click-track Voice Name Trigger Setup Name OutputSel Click-track Output MIDI In Click-track MIDI In MIDI Out Click-track MIDI Out Curve MIDI NoteAcc Click-track Beat Volume (Accents) VelCurve Velocity Curve MIDI Note Click-track Beat Volume (Notes)
- Page 62 DTX700 Owner’s Manual...
- Page 63 • Copying of the software or reproduction of this manual in whole or in part by any means is expressly forbidden without the written con- sent of the manufacturer. • Yamaha makes no representations or warranties with regard to the use of the software and documentation and cannot be held respon- sible for the results of the use of this manual and the software.
- Page 64 Yamaha Vertragshändlern in den jeweiligen Bestimmungsländern erhältlich. Pour plus de détails sur les produits, veuillez-vous adresser à Yamaha ou au Para detalles sobre productos, contacte su tienda Yamaha más cercana o el distributeur le plus proche de vous figurant dans la liste suivante.