Table of Contents

Related Manuals for Denon CEOL carino


Summary of Contents for Denon CEOL carino
- Page 1 Contents Connections Playback Setting procedure Tips Appendix CEOL carino Computer Audio System N-2 Owner’s Manual You can print more than one page of a PDF onto a single sheet of paper. Rear panel Front panel Display Remote Index...
-
Page 2: Table Of Contents
Contents Contents Connections Playback Setting procedure Tips Appendix Playback Accessories Before using the remote control unit Basic operation Operating range of the remote control unit Turning the power on Features Selecting the input source Part names and functions Adjusting the master volume Front panel Playing a device Display... - Page 3 Contents Connections Playback Setting procedure Tips Appendix Tips Tips Troubleshooting Resetting to factory settings Appendix Types of playable digital audio input signals Audio signals that can be input to USB-DAC Playing back Bluetooth devices Bluetooth communications Explanation of terms Trademark information Specifications Index Rear panel...
-
Page 4: Ceol Carino Base
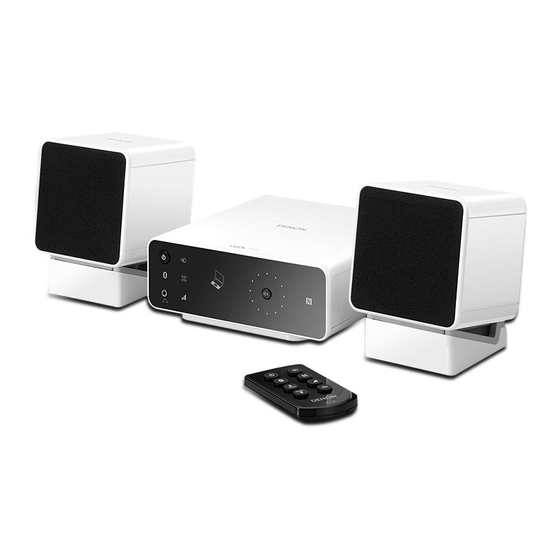
Setting procedure Tips Appendix Thank you for purchasing this Denon product. To ensure proper operation, please read this owner’s manual carefully before using the product. After reading this manual, be sure to keep it for future reference. Accessories Check that the following parts are supplied with the product. -
Page 5: Display
Contents Connections Playback Setting procedure Tips Appendix Before using the remote control unit NOTE The remote control unit has a built-in lithium battery. 0 When inserting the lithium battery, be sure to do so in the proper direction, following the F and G marks in the battery compartment. Pull out the insulation sheet before use. -
Page 6: Rear Panel
Contents Connections Playback Setting procedure Tips Appendix Operating range of the remote control unit Point the remote control unit at the remote sensor when operating it. Approx. 7 m 30° 30° Rear panel Front panel Display Remote Index... -
Page 7: Playback
Contents Connections Playback Setting procedure Tips Appendix Features Wireless connection with Bluetooth enabled devices (v p. 26) Powerful sound with a compact body (25W + 25W high power) You can connect Bluetooth enabled devices such as smartphones and You can enjoy music and games with more powerful sound on a tablets with this unit to listen to music while browsing email and Web computer, smartphone, or tablet. -
Page 8: Front Panel
Contents Connections Playback Setting procedure Tips Appendix Part names and functions Front panel A Power button/display (X) C Wide Sound key (S) This turns the power on/to standby. (v p. 21) This switches the Wide Sound function on/off. (v p. 32) The power status is indicated as follows. - Page 9 Contents Connections Playback Setting procedure Tips Appendix G Display This displays various pieces of information. H Remote control sensor This receives signals from the remote control unit. (v p. 6) I Volume adjustment wheel This adjusts the volume level. (v p. 22) o Q0 Q1 The wheel is lit when touched.
- Page 10 Contents Connections Playback Setting procedure Tips Appendix Display A Input source indicator B Wide Sound indicator The following is displayed depending on the selected input source. Lit when the Wide Sound function is on. C Auto Volume Adjust indicator USB-DAC ANALOG IN Bluetooth Lit when the Auto Volume Adjust function is on.
- Page 11 Contents Connections Playback Setting procedure Tips Appendix Rear panel SPEAKER ANALOG IN USB-DAC OPTIMIZATION SPEAKERS OFF ON SUB WOOFER AC IN IMPEDANCE 6 16 A Speaker terminals (SPEAKERS) D USB digital audio input terminal (USB-DAC T) Used to connect speakers. (v p. 17) Used to connect to a computer with a USB port.
- Page 12 Contents Connections Playback Setting procedure Tips Appendix Remote control unit A Power operation button (X) This turns the power on/to standby. (v p. 21) B Bluetooth button (V) This switches the input to Bluetooth. This is also pressed during the paring operation.
-
Page 13: Installing Horizontally
Installing this unit This unit can be installed in two ways - horizontally or vertically. You can o How to attach the CEOL carino base (for select how to install this unit according to the installation place and your horizontal placement) preference. - Page 14 Connections Playback Setting procedure Tips Appendix o How to attach the CEOL carino base (for Installing vertically vertical placement) This orientation is suitable for placing a narrow place such as a place next to a laptop computer. When placing this unit vertically, install as follows with the power button placed on the lower part.
-
Page 15: Speaker Base
Contents Connections Playback Setting procedure Tips Appendix Speaker installation You can use the speaker base to place the speaker in three angles. Adjust NOTE to your desired angle for placement. 0 You cannot remove the speaker net. 0 Place the speaker and speaker base so that they do not rattle. Speaker (supplied) 10°... -
Page 16: Connecting The Speaker Cables
Contents Connections Playback Setting procedure Tips Appendix Connecting the speaker cables Connect the speaker cable with a rubber tube (red) to the + speaker NOTE terminal (red), and the other cable to the - speaker terminal (black). Ensure that only the core wire part of the speaker cable is inserted. If the covered part is inserted, sound may not be output. - Page 17 Contents Connections Playback Setting procedure Tips Appendix Storing speaker cables in the speaker base You can use the cable winder to wind up the loose speaker cable for NOTE organized connections. Cable winders are stored under the speaker 0 When using the supplied speakers, turn on the SPEAKER OPTIMIZATION switch bases at the time of shipment.
-
Page 18: Subwoofer Cable
Contents Connections Playback Setting procedure Tips Appendix Connecting devices o Computer (recommended system) Windows ® Vista, Windows 7, and Windows 8 Mac OS X 10.6.3 or later USB cable (supplied) SPEAKER ANALOG IN USB-DAC OPTIMIZATION SPEAKERS OFF ON SUB WOOFER AC IN IMPEDANCE 6 16 Subwoofer cable... -
Page 19: Connecting The Power Cord
Contents Connections Playback Setting procedure Tips Appendix Connecting the power cord After completing all the connections, insert the power cord into the power outlet. SPEAKER ANALOG IN USB-DAC OPTIMIZATION OFF ON SUB WOOFER AC IN 6 16 To household power outlet (230V, 50/60 Hz) Power cord (supplied) NOTE... -
Page 20: Turning The Power On
Contents Connections Playback Playback Setting procedure Tips Appendix o Contents Basic operation Convenient function menu Turning the power on Wide Sound function Selecting the input source Auto Volume Adjust function Adjusting the master volume Playing a device Playing music on a computer (USB-DAC) Listening to music via a analog connection (ANALOG IN) Listening to music on a Bluetooth device Rear panel... -
Page 21: Basic Operation
Contents Connections Playback Setting procedure Tips Appendix Basic operation Turning the power on Display Volume adjustment wheel Press X to turn on power to this unit. The power indicator is lit. o Switching power to the standby mode Press X. The power indicator is turned off. -
Page 22: Selecting The Input Source
Contents Connections Playback Setting procedure Tips Appendix Selecting the input source Adjusting the master volume o Selecting USB-DAC or ANALOG IN Turn the volume adjustment wheel to adjust the volume level. Touch W to select the input source for playback. The volume level appears on the display. -
Page 23: Playing A Device
Turn on power to the computer. [Windows] A Select “CEOL carino” in the sound menu screen on the computer Press X to turn on power to this unit. and click “Set Default”. The power indicator is lit. - Page 24 Contents Connections Playback Setting procedure Tips Appendix [Mac OS] B Click “Output” and select “CEOL carino” for “Select a device for A Select “System Preferences” in the Apple menu and click sound output”. “Sound”. Rear panel Front panel Display Remote...
-
Page 25: Listening To Music Via A Analog Connection (Analog In
Contents Connections Playback Setting procedure Tips Appendix Listening to music via a analog Plays back audio on the computer. connection (ANALOG IN) The speakers output music from the computer. NOTE Press X to turn on power to this unit. 0 Perform operations such as playback and stop by using the player software on the The power indicator is lit. -
Page 26: Setting Procedure
Contents Connections Playback Setting procedure Tips Appendix o How to establish a Bluetooth connection Listening to music on a Bluetooth device There are three types of Bluetooth connection methods. Use an appropriate type depending on your environment. You can listen to music wirelessly by connecting this unit to a Bluetooth Case 1 Paring with this unit for the first time device via Bluetooth. - Page 27 Contents Connections Playback Setting procedure Tips Appendix o Case 1: Paring with this unit for the first time Turn on the Bluetooth function on the Bluetooth device. Touch V for 3 seconds or longer. For details, see the owner’s manual for your Bluetooth device. indicator and V on the display flash fast and this enters the paring mode.
- Page 28 0 This unit cannot perform paring against a Bluetooth device with a pass key other than “0000”. 0 When “CEOL carino” is not displayed in the screen on the Bluetooth device, search for devices on the Bluetooth device. 0 When you are prompted for a pass key in the screen on the Bluetooth device, enter “0000”.
- Page 29 Case 2: Connecting a Bluetooth device that this unit performed paring for before Turn on the Bluetooth function on the Bluetooth device. Select “CEOL carino” from the list of devices displayed in the screen on the Bluetooth device. For details, see the owner’s manual for your Bluetooth device.
- Page 30 Contents Connections Playback Setting procedure Tips Appendix o Case 3: Connecting a Bluetooth device with the NFC function via NFC You can just touch this unit with a Bluetooth device to turn on power to Play back music on the Bluetooth device. this unit and perform paring or establish a connection between this unit and the Bluetooth device.
- Page 31 Contents Connections Playback Setting procedure Tips Appendix o Simultaneously connecting multiple Bluetooth o Switching the playback device devices (multi point function) Stop or pause the device that is currently played back. This unit can only output music from one connected Bluetooth device, but up to 3 Bluetooth devices can simultaneously be connected.
-
Page 32: Wide Sound Function
Contents Connections Playback Setting procedure Tips Appendix Convenient function menu Wide Sound function Auto Volume Adjust function You can use the Wide Sound function to enjoy more spatial sound. Music sources on the Internet such as streaming music distribution services and YouTube have various volume levels. It is troublesome to adjust the volume level each time you switch the source. -
Page 33: Setting The Auto Standby Mode
Contents Connections Playback Setting procedure Setting procedure Tips Appendix Setting the auto standby mode Turning the display on/off You can configure this unit to automatically switch to standby when you do You can turn off the display. not operate this unit for approx. 15 minutes with no audio input. At time of purchase, this mode is set to “On”. -
Page 34: Tips
Contents Connections Playback Setting procedure Tips Tips Appendix o Contents Tips Troubleshooting I want to turn on power to this unit from a Bluetooth device Power does not turn on / Power is turned off I want to switch the connection to a different Bluetooth device No sound comes out I want to connect to an NFC enabled device via NFC Sound is distorted or interrupted, or noise occurs... - Page 35 Contents Connections Playback Setting procedure Tips Appendix Tips I want to turn on power to this unit from a Bluetooth device Once you perform paring between this unit and a Bluetooth device, you can turn on power to this unit by operating the Bluetooth device. Select “CEOL carino”...
-
Page 36: Troubleshooting
Contents Connections Playback Setting procedure Tips Appendix Troubleshooting 1. Are the connections correct? 2. Is the set being operated as described in the owner’s manual? 3. Are the other devices operating properly? If this unit does not operate properly, check the corresponding symptoms in this section. If the symptoms do not match any of those described here, consult your dealer as it could be due to a fault in this unit. - Page 37 Contents Connections Playback Setting procedure Tips Appendix o No sound comes out Symptom Cause / Solution Page Audio is not output. Check the connections for all devices. Check the sound settings on the computer. Insert connection cables all the way in. -...
- Page 38 Contents Connections Playback Setting procedure Tips Appendix o Sound is distorted or interrupted, or noise occurs Symptom Cause / Solution Page Sound is distorted or Adjust to an appropriate volume level on this unit and the connected devices. interrupted, or noise Place the device connected via Bluetooth closer to this unit.
- Page 39 Contents Connections Playback Setting procedure Tips Appendix o The input source does not switch Symptom Cause / Solution Page Even when I touch the input Touch the input source switching key (W) with your finger properly. source switching key (W), Use the input source switching button (W) on the remote control unit to switch the input source.
-
Page 40: Operations Cannot Be Performed Through The Remote Control Unit
Contents Connections Playback Setting procedure Tips Appendix o Operations cannot be performed through the remote control unit Symptom Cause / Solution Page Operations cannot be Batteries are worn out. Replace with new batteries. performed through the Operate the remote control unit within a distance of about 7 m from this unit and at an angle of within 30°. remote control unit. -
Page 41: Resetting To Factory Settings
Contents Connections Playback Setting procedure Tips Appendix Resetting to factory settings Perform this when this unit does not operate properly. Various settings are reset to the factory default values. Make settings again. When this unit is in the standby mode, press X while holding :. -
Page 42: Types Of Playable Digital Audio Input Signals
Contents Connections Playback Setting procedure Tips Appendix Appendix Types of playable digital audio Playing back Bluetooth devices input signals This unit supports the following Bluetooth profiles. A2DP (Advanced Audio Distribution Profile) : Audio signals that can be input to USB- When a Bluetooth device that supports this specification is connected, you can perform high quality streaming distribution of monaural and stereo audio data. -
Page 43: Explanation Of Terms
Contents Connections Playback Setting procedure Tips Appendix Explanation of terms Bluetooth Protection circuit This is a function to prevent damage to devices within the power supply Technology for near field wireless communications. This unit can connect when an abnormality such as an overload, excess voltage occurs or over to Bluetooth devices wirelessly. -
Page 44: Trademark Information
Contents Connections Playback Setting procedure Tips Appendix Trademark information The N Mark is a trademark or registered trademark of NFC Forum, Inc. in The Bluetooth ® word mark and logos are registered trademarks owned the United States and in other countries. by Bluetooth SIG,Inc. -
Page 45: Specifications
Contents Connections Playback Setting procedure Tips Appendix Specifications o Audio section Rated output: 2-channel 20 W+20 W (6 Ω/ohms, 1 kHz, T.H.D. 0.7 %) Maximum effective output power: 25 W+25 W (6 Ω/ohms, 1 kHz, T.H.D. 10 %) Output connectors: Speaker: 6-16 Ω/ohms (impedance) Headphones: Φ3.5 mm jack Total harmonic distortion rate... -
Page 46: Index
Contents Connections Playback Setting procedure Tips Appendix o Bluetooth section Communication system: Bluetooth version 3.0 Transmission power: Maximum 2.5 mW (Class2) Maximum communication range: Approx. 10 m in line of sight * Frequency band: 2.4 GHz band Modulation method: FHSS (Frequency-Hopping Spread Spectrum) Supported profiles: A2DP 1.3/AVRCP 1.5 Supported codecs:... -
Page 47: Remote Index
Setting procedure Tips Appendix o Dimensions Unit : mm This unit (PMA-N2) Speakers (SC-N2) o Weight This unit (including the CEOL carino base): 1.6 kg Speakers (including speaker bases and cable winders): 0.8 kg Rear panel Front panel Display Remote Index... - Page 48 Listening to music via a analog connection Subwoofer cable ..........18 (ANALOG IN) ..........25 Cable winder ..........17 CEOL carino base ........13, 14 Troubleshooting ..........34 Computer (recommended system) ....18 Multi point function ......... 31 Turning the power on ........21 Connecting a computer ........
- Page 49 D&M Holdings Inc. 3520 10326 00AD...