Table of Contents
Advertisement
Advertisement
Table of Contents

Related Manuals for Draytek Vigor130


Summary of Contents for Draytek Vigor130
- Page 1 Vigor130 Series User’s Guide...
- Page 2 Vigor130 Series VDSL2/ADSL2/2+ Modem User’s Guide Version: 1.0 Firmware version: V3.7.1 (For future update, please visit DrayTek web site) Date: 5/06/2013 Vigor130 Series User’s Guide...
-
Page 3: Copyright Information
Web registration is preferred. You can register your Vigor modem via Owner http://www.draytek.com. Firmware & Tools Due to the continuous evolution of DrayTek technology, all modems will be regularly Updates upgraded. Please consult the DrayTek web site for more information on newest firmware, tools and documents. - Page 4 No. 26, Fu Shing Road, HuKou Township, HsinChu Industrial Park, Hsin-Chu, Taiwan 303 Product: Vigor130 DrayTek Corp. declares that Vigor130 is in compliance with the following essential requirements and other relevant provisions of R&TTE Directive 1999/5/EEC. The product conforms to the requirements of Electro-Magnetic Compatibility (EMC) Directive 2004/108/EC by complying with the requirements set forth in EN55022/Class B and EN55024/Class B.
-
Page 5: Table Of Contents
3.1.4 MPoA /Static or dynamic IP .................... 28 3.1.5 IPv6..........................31 3.1.6 Multi-PVCs........................36 3.1.7 Multi-VLAN........................40 3.2 LAN ............................42 3.2.1 Basics of LAN ......................... 42 3.2.2 General Setup......................... 44 3.2.3 Static Route ........................49 Vigor130 Series User’s Guide... - Page 6 3.9.3 ARP Cache Table ......................124 3.9.4 IPv6 Neighbour Table ....................124 3.9.5 DHCP Table........................125 3.9.6 NAT Sessions Table ..................... 126 3.9.7 Ping Diagnosis......................127 3.9.8 Data Flow Monitor......................128 3.9.9 Trace Route ........................130 3.9.10 TSPC Status ....................... 131 Vigor130 Series User’s Guide...
- Page 7 5.3 Pinging the Modem from Your Computer................138 5.4 Checking If the ISP Settings are OK or Not ................ 139 5.5 Backing to Factory Default Setting If Necessary ..............139 5.6 Contacting Your Dealer ....................... 140 Vigor130 Series User’s Guide...
-
Page 9: Introduction
Vigor130 Series is a VDSL2/ADSL2/2+ modem. The object-based design used in SPI (Stateful Packet Inspection) firewall allows users to set firewall policy with ease. It is flexible and makes your network be safe. By the way, DoS/DDoS prevention and URL content filter strengthen the security outside and control inside. -
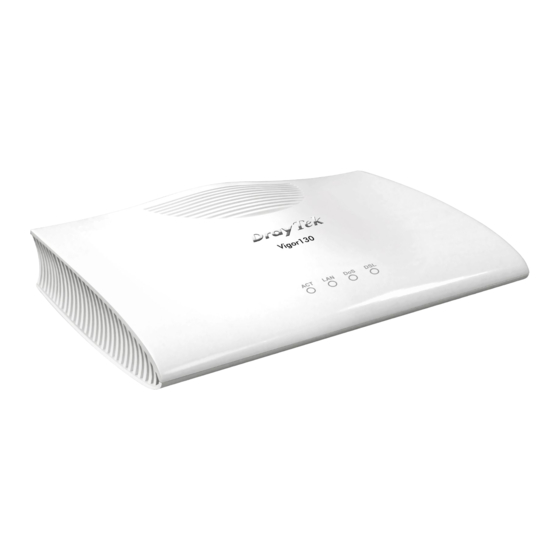
Page 10: Led Indicators And Connectors
A normal connection is through its corresponding port. LAN is disconnected. Blinking Data is transmitting (sending/receiving). The DoS/DDoS function is active. Blinking It will blink while detecting an attack. DSL connection synchronized. Blinking DSL connection is synchronizing. Vigor130 Series User’s Guide... - Page 11 Restore the default settings. Usage: Turn on the modem. Press the button and keep for more than 10 seconds. Then the modem will restart with the factory default configuration. ON/OFF: Power switch. Connecter for a power adapter. Vigor130 Series User’s Guide...
-
Page 12: Hardware Installation
Power on the modem. Check the POWER, ACT, LAN, DSL and INTERNET LEDs to assure network connections. (For the detailed information of LED status, please refer to section 1.2.) Vigor130 Series User’s Guide... -
Page 13: Basic Configuration
Please type “admin/admin” as the username and password. Then click Login. Notice: If you fail to access to the web configuration, please go to “Trouble Shooting” for detecting and solving your problem. Vigor130 Series User’s Guide... -
Page 14: Changing Password
Please change the password for the original security of the modem. Access into the web user interface of Vigor130. The Main Screen will appear as below. Go to System Maintenance page and choose Administrator Password/User Password. Enter the login password (the default is blank) on the field of Old Password. Type New Password. -
Page 15: Quick Start Wizard
If your ISP provides you the PPPoE connection, please select PPPoE for this modem. Click Quick Start wizard. The first screen of Quick Start Wizard is entering login password of the web user interface. After typing the password, please click Next. Vigor130 Series User’s Guide... - Page 16 IP. If you choose No, the following IP Address, Subnet Mask and Default Gateway will not be changed. IP Address Assign an IP address for the protocol that you select. Subnet Mask Assign a subnet mask value for the protocol of Vigor130 Series User’s Guide...
- Page 17 Assign a specific valid user name provided by the ISP. It will be used to access Internet. Password Assign a valid password provided by the ISP. It will be used to access Internet. Confirm Password Retype the password. Vigor130 Series User’s Guide...
-
Page 18: Setting Mpoa/Static Or Dynamic Connection
Click Finish. The Quick Start Wizard Setup OK page will be displayed. Click Quick Start wizard. The first screen of Quick Start Wizard is entering login password of the web user interface. After typing the password, please click Next. Vigor130 Series User’s Guide... - Page 19 IP. If you choose No, the following IP Address, Subnet Mask and Default Gateway will not be changed. IP Address Assign an IP address for the protocol that you select. Subnet Mask Assign a subnet mask value for the protocol of Vigor130 Series User’s Guide...
- Page 20 Assign an IP address to the primary DNS. Second DNS Assign an IP address to the secondary DNS. Click Next for viewing summary of such connection. Click Finish. The Quick Start Wizard Setup OK page will be displayed. Vigor130 Series User’s Guide...
-
Page 21: Introducing Dashboard
LED (left side) Black It means the modem or the function is not working. Green It means the modem or the function is working. For detailed information about the LED display, refer to 1.2 LED Indicators and Connectors. Vigor130 Series User’s Guide... -
Page 22: Name With A Link
) icon located on the left side of LAN. Click it to review the LAN connection(s) used presently. Host connected physically to the modem via LAN port(s) will be displayed with green circles in the field of Connected. Vigor130 Series User’s Guide... -
Page 23: Gui Map
The functions/settings modified under Web Console also can be reviewed on the web user interface. Click the Web Console icon on the top of the main screen to open the following screen. Vigor130 Series User’s Guide... -
Page 24: Config Backup
System Maintenance>>Configuration Backup. Simply click the icon on the top of the main screen and a pop up dialog will appear. Click Save to store the setting. Click the Logout icon to exit the web user interface. Vigor130 Series User’s Guide... -
Page 25: Online Status
TX Packets-Display the total transmitted packets at the LAN interface. RX Packets-Display the total received packets at the LAN interface. WAN Status Enable – Yes in red means such interface is available but not connected. Yes in green means such interface is connected. Vigor130 Series User’s Guide... - Page 26 Ready, HANDSHAKING, SHOWTIME and so on. Up Speed – Display the upstream rate. Down Speed – Display the downstream rate. SNR Margin – Display number of SRR Margin. Loop Att .- Display the number of Loop Attenuation. Vigor130 Series User’s Guide...
-
Page 27: Virtual Wan
(WAN1) is not ready for accessing Internet. Such page displays the virtual WAN connection information. Virtual WAN are used by TR-069 management, VoIP service and so on. The Application field will list the purpose of such WAN connection. Vigor130 Series User’s Guide... -
Page 28: Saving Configuration
Now it is the time to register your Vigor modem to MyVigor website for getting more service. Please follow the steps below to finish the modem registration. Again, login the web configuration interface of Vigor modem by typing “admin/admin” as User Name / Password. Vigor130 Series User’s Guide... - Page 29 And click Login. If not, please click Create an account now link first to create a new account. Then, back to this setting page. The following page will be displayed after you logging in MyVigor. From this page, please click Add or Product Registration. Vigor130 Series User’s Guide...
- Page 30 When the following page appears, your modem information has been added to the database. Now, you have finished the product registration. After clicking OK, you will see the following page. Your modem has been registered to myvigor website successfully. Vigor130 Series User’s Guide...
-
Page 31: Advanced Configuration
NIC has reserved certain addresses that will never be registered publicly. These are known as private IP addresses, and are listed in the following ranges: From 10.0.0.0 to 10.255.255.255 From 172.16.0.0 to 172.31.255.255 From 192.168.0.0 to 192.168.255.255 Vigor130 Series User’s Guide... -
Page 32: General Setup
ISP. Below shows the menu items for Internet Access. This section will introduce some general settings of Internet. Available settings are explained as follows: Item Description Display Name Type the description for such WAN interface. Vigor130 Series User’s Guide... - Page 33 Tag value – Type the value as the VLAN ID number. The range is form 0 to 4095. Priority – Type the packet priority number for such VLAN. The range is from 0 to 7. After finished the above settings, click OK to save the settings. Vigor130 Series User’s Guide...
-
Page 34: Pppoe/Pppoa
Internet Access – Multi PVCs. VPI - Type in the value provided by ISP. VCI - Type in the value provided by ISP. Encapsulating Type - Drop down the list to choose the type Vigor130 Series User’s Guide... - Page 35 Always On - If you want to connect to Internet all the time, check the Always On box. Idle Timeout – Set the timeout for breaking down the Internet after passing through the time without any action. This setting Vigor130 Series User’s Guide...
-
Page 36: Mpoa /Static Or Dynamic Ip
LANs to send packets to each other via an ATM backbone. For static IP mode, you usually receive a fixed public IP address or a public subnet, namely multiple public IP addresses from your DSL or Cable ISP service providers. In most cases, a Vigor130 Series User’s Guide... - Page 37 VPI - Type in the value provided by ISP. VCI - Type in the value provided by ISP. Encapsulating Type - Drop down the list to choose the type provided by ISP. Protocol - Drop down the list to choose the protocol, PPPoE or Vigor130 Series User’s Guide...
- Page 38 WAN IP Alias. You can set up to 8 public IP addresses other than the current one you are using. Notice that this setting is available for WAN1 only. Type the additional WAN IP address and check the Enable box. Then click OK to exit the dialog. Vigor130 Series User’s Guide...
-
Page 39: Ipv6
Vigor modem through IPv6CP. Later, use DHCPv6 or Accept RA to acquire the IPv6 prefix address (such as: 2001:B010:7300:200::/64) offered by the ISP. In addition, PCs under LAN also can have the public IPv6 address for Internet access by means of the generated prefix. Vigor130 Series User’s Guide... - Page 40 After getting the IPv6 prefix and starting modem advertisement daemon (RADVD), the PC behind this modem can directly connect to IPv6 the Internet. Vigor130 Series User’s Guide...
- Page 41 Confirm Password Tunnel Broker Type the address for the tunnel broker IP, FQDN or an optional port number. After finishing all the settings here, please click OK to save the configuration. Available settings are explained as follows: Vigor130 Series User’s Guide...
- Page 42 Choose Prefix Delegation or Non-temporary Address as the identify association. IAID Type a number as IAID. After finishing all the settings here, please click OK to save the configuration. This type allows you to setup static IPv6 address for WAN interface. Vigor130 Series User’s Guide...
- Page 43 Current IPv6 Address Display current interface IPv6 address. Table Static IPv6 Gateway IPv6 Gateway Address - Type your IPv6 gateway address here. Configuration After finishing all the settings here, please click OK to save the configuration. Vigor130 Series User’s Guide...
-
Page 44: Multi-Pvcs
Internet Access. Type in the value provided by your ISP. Type in the value provided by your ISP. QoS Type Select a proper QoS type for the channel. Vigor130 Series User’s Guide... - Page 45 WAN link for Channel 3, 4 and 5 are provided for modem-borne application such as TR-069 and VoIP. The settings must be applied and obtained from your ISP. For your special request, please contact with your ISP and then click WAN link of Channel 3 or 4 to configure your modem. Vigor130 Series User’s Guide...
- Page 46 After finishing all the settings here, please click OK to save the configuration. For other settings, refer to 3.1.3 PPPoE/PPPoA. Such configuration is applied to upstream packets. Such information will be provided by ISP. Please contact with your ISP for detailed information. Vigor130 Series User’s Guide...
- Page 47 It represents Peak Cell Rate. The default setting is “0”. It represents Sustainable Cell Rate. The value of SCR must be smaller than PCR. It represents Maximum Burst Size. The range of the value is 10 to 50. Vigor130 Series User’s Guide...
-
Page 48: Multi-Vlan
WAN link for Channel 3, 4 and 5 are provided for router-borne application such as TR-069. The settings must be applied and obtained from your ISP. For your special request, please contact with your ISP and then click WAN link of Channel 3, 4 or 5 to configure your modem. Vigor130 Series User’s Guide... - Page 49 Web configuration/telnet/TR069. IPTV - It can be specified for IPTV only. If you choose IPTV, the configuration for this VLAN will be effective for IPTV data transmitting and receiving. For other settings, refer to 3.3.3 PPPoE/PPPoA. Vigor130 Series User’s Guide...
-
Page 50: Lan
IP address. As a part of the public subnet, the Vigor modem will serve for IP routing to help hosts in the public subnet to communicate with other public hosts or servers outside. Therefore, the modem should be set as the gateway for public hosts. Vigor130 Series User’s Guide... - Page 51 When you have several subnets in your LAN, sometimes a more effective and quicker way for connection is the Static routes function rather than other method. You may simply set rules to forward data from one specified subnet to another specified subnet without the presence of RIP. Vigor130 Series User’s Guide...
-
Page 52: General Setup
2nd Subnet Mask - An address code that determines the size of the network. (Default: 255.255.255.0/ 24) 2nd Subnet DHCP Server - You can configure the modem to serve as a DHCP server for the 2nd subnet. Vigor130 Series User’s Guide... - Page 53 DHCP server if you do not have a DHCP server for your network. If you want to use another DHCP server in the network other than the Vigor Router’s, you can let Relay Agent help Vigor130 Series User’s Guide...
- Page 54 For example, Option number:100 Data: abcd When such function is enabled, the specified values for DHCP option will be seen in DHCP reply packets. Option Number – Type a number for such function. Vigor130 Series User’s Guide...
- Page 55 There are two configuration pages for LAN1, Ethernet TCP/IP and DHCP Setup (based on IPv4) and IPv6 Setup. Click the tab for each type and refer to the following explanations for detailed information. Below shows the settings page for IPv6. Vigor130 Series User’s Guide...
- Page 56 DHCPv6 Server Enable Server –Click it to enable DHCPv6 server. Configuration DHCPv6 Server could assign IPv6 address to PC according to the Start/End IPv6 address configuration. Vigor130 Series User’s Guide...
-
Page 57: Static Route
Destination Address Displays the destination address of the static route. Status Displays the status of the static route. Clear all of the settings and return to factory default Set to Factory Default settings. Vigor130 Series User’s Guide... - Page 58 Before setting Static Route, user A cannot talk to user B for Modem A can only forward recognized packets to its default gateway Main Modem. Go to LAN page and click General Setup, select 1st Subnet as the RIP Protocol Control. Then click the OK button. Vigor130 Series User’s Guide...
- Page 59 Return to Static Route Setup page. Click on another Index Number to add another static route as show below, which regulates all packets destined to 211.100.88.0 will be forwarded to 192.168.1.3. Go to Diagnostics and choose Routing Table to verify current routing table. Vigor130 Series User’s Guide...
- Page 60 Set to Factory Default Clear all of the settings and return to factory default settings. Displays the routing table for your reference. Viewing IPv6 Routing Table Click any underline of index number to get the following page. Vigor130 Series User’s Guide...
-
Page 61: Bind Ip To Mac
If you modified the binding IP or MAC address, it might cause you not access into the Internet. Click LAN and click Bind IP to MAC to open the setup page. Vigor130 Series User’s Guide... - Page 62 Vigor130 Series User’s Guide...
-
Page 63: Nat
When you finish the configuration, click OK to save the settings. Usually, the modem serves as an NAT (Network Address Translation) modem. NAT is a mechanism that one or more private IP addresses can be mapped into a single public one. Vigor130 Series User’s Guide... -
Page 64: Port Redirection
IP address/port, the goal of Port Redirection function is to forward all access request with public IP address from external users to the mapping private IP address/port of the server. Vigor130 Series User’s Guide... - Page 65 Each item is explained as follows: Item Description Index Display the number of the profile. Display the description of the specific network service. Service Name WAN Interface Display the WAN IP address or interface used by the profile. Vigor130 Series User’s Guide...
- Page 66 IP and Port of the internal host. If you choose Range as the port redirection mode, you will see two boxes on this field. Simply type the required number on the first box. The second one will be assigned automatically later. Vigor130 Series User’s Guide...
-
Page 67: Dmz Host
LAN. Regular web surfing and other such Internet activities from other clients will continue to work without inappropriate interruption. DMZ Host allows a defined internal user to be totally exposed to the Internet, which usually helps some special applications such as Netmeeting or Internet Games etc. Vigor130 Series User’s Guide... - Page 68 Active True IP selection is available for WAN1 only. Private IP Enter the private IP address of the DMZ host, or click Choose PC to select one. Choose PC Click this button and then a window will automatically pop Vigor130 Series User’s Guide...
- Page 69 Aux. WAN IP for your selection. Available settings are explained as follows: Item Description Enable Check to enable the DMZ Host function. Private IP Enter the private IP address of the DMZ host, or click Choose PC to select one. Vigor130 Series User’s Guide...
-
Page 70: Open Ports
Available settings are explained as follows: Item Description Index Indicate the relative number for the particular entry that you want to offer service in a local host. You should click the appropriate index number to edit or clear the corresponding entry. Vigor130 Series User’s Guide... - Page 71 IP addresses of local hosts will automatically pop up. Select the appropriate IP address of the local host in the list. Protocol Specify the transport layer protocol. It could be TCP, UDP, or ----- (none) for selection. Vigor130 Series User’s Guide...
-
Page 72: Firewall
It will check packets according to the filter rules. If legal, the packet will pass the modem. The following illustrations are flow charts explaining how modem will treat incoming traffic and outgoing traffic respectively. Vigor130 Series User’s Guide... - Page 73 It’s very common that malicious codes conceal in the executable objects, such as ActiveX, Java Applet, compressed files, and other executable files. Once downloading these types of files from websites, you may risk bringing threat to your system. Vigor130 Series User’s Guide...
-
Page 74: General Setup
So here you assign the Start Filter Set only. Also you can configure the Log Flag settings, Apply IP filter to VPN incoming packets, and Accept incoming fragmented UDP packets. Click Firewall and click General Setup to open the general setup page. Vigor130 Series User’s Guide... - Page 75 (pass or block) for these packets, then the modem’s firewall will block the packets directly. Such page allows you to choose filtering profiles including QoS, Load-Balance policy, WCF, APP Enforcement, URL Content Filter, for data transmission via Vigor modem. Vigor130 Series User’s Guide...
- Page 76 For troubleshooting needs, you can specify to record information for URL Content Filter by checking the Log box. It will be sent to Syslog server. Please refer to section Syslog/Mail Alert for more detailed information. Vigor130 Series User’s Guide...
- Page 77 However, if the network is not stable, small value will be proper. Session timeout – Setting timeout for sessions can make the best utilization of network resources. After finishing all the settings here, please click OK to save the configuration. Vigor130 Series User’s Guide...
-
Page 78: Filter Setup
Set the link to the next filter set to be executed after the current filter run. Do not make a loop with many filter sets. To edit Filter Rule, click the Filter Rule index button to enter the Filter Rule setup page. Vigor130 Series User’s Guide... - Page 79 Filter is only applied to outgoing traffic. Note: RT means routing domain for 2nd subnet or other LAN. Source/Destination IP Click Edit to access into the following dialog to choose the source/destination IP or IP ranges. Vigor130 Series User’s Guide...
- Page 80 To set the service type manually, please choose User defined as the Service Type and type them in this dialog. In addition, if you want to use the service type from defined groups or objects, please choose Group and Objects as the Service Type. Vigor130 Series User’s Guide...
- Page 81 The default setting is 60000. Strict –Make the MAC address and IP address settings MAC Bind IP configured in IP Object for Source IP and Destination IP Vigor130 Series User’s Guide...
- Page 82 URL will be processed. Please use the drop-down list to choose a codepage. If you do not have any idea of choosing suitable codepage, please open Syslog. From Codepage Information of Setup dialog, you will see the recommended codepage listed on the dialog box. Vigor130 Series User’s Guide...
- Page 83 TCP protocol only; session timeout is configured for the data flow which matched with the firewall rule. DrayTek Banner – Please uncheck this box and the following screen will not be shown for the unreachable web page. The default setting is Enabled.
- Page 84 Each filter set is composed by 7 filter rules, which can be further defined. After that, in General Setup you may specify one set for call filter and one set for data filter to execute first. Vigor130 Series User’s Guide...
-
Page 85: Dos Defense
10 seconds. Enable UDP flood defense Check the box to activate the UDP flood defense function. Once detecting the Threshold of the UDP packets from the Internet has exceeded the defined value, the Vigor modem Vigor130 Series User’s Guide... - Page 86 Check the box to activate the Block SYN fragment function. The Vigor modem will drop any packets having SYN flag and more fragment bit set. Block Fraggle Attack Check the box to activate the Block fraggle Attack function. Vigor130 Series User’s Guide...
- Page 87 All the warning messages related to DoS Defense will be sent to user and user can review it through Syslog daemon. Look for the keyword DoS in the message, followed by a name to indicate what kind of attacks is detected. Vigor130 Series User’s Guide...
- Page 88 Vigor130 Series User’s Guide...
-
Page 89: Objects Settings
Display the profile number that you can configure. Index Name Display the name of the object profile. To set a new profile, please do the steps listed below: 1. Click the number (e.g., #1) under Index column for configuration in details. Vigor130 Series User’s Guide... - Page 90 IP address. Select Any Address if this object contains any IP address. Select Mac Address if this object contains Mac address. Type the MAC address of the network card which will be MAC Address controlled. Vigor130 Series User’s Guide...
-
Page 91: Ip Group
3. After finishing all the settings here, please click OK to save the configuration. Below is an example of IP objects settings. This page allows you to bind several IP objects into one IP group. Available settings are explained as follows: Item Description Set to Factory Default Clear all profiles. Vigor130 Series User’s Guide... - Page 92 Selected IP Objects Click >> button to add the selected IP objects in this box. After finishing all the settings here, please click OK to save the configuration. Vigor130 Series User’s Guide...
-
Page 93: Ipv6 Object
Display the name of the object profile. To set a new profile, please do the steps listed below: 1. Click the number (e.g., #1) under Index column for configuration in details. 2. The configuration page will be shown as follows: Vigor130 Series User’s Guide... - Page 94 Invert Selection If it is checked, all the IPv6 addresses except the ones listed above will be applied later while it is chosen. After finishing all the settings, please click OK to save the configuration. Vigor130 Series User’s Guide...
-
Page 95: Ipv6 Group
To set a new profile, please do the steps listed below: 1. Click the number (e.g., #1) under Index column for configuration in details. 2. The configuration page will be shown as follows: Available settings are explained as follows: Vigor130 Series User’s Guide... -
Page 96: Service Type Object
You can set up to 96 sets of Service Type Objects with different conditions. Available settings are explained as follows: Item Description Set to Factory Default Clear all profiles. Index Display the profile number that you can configure. Name Display the name of the object profile. Vigor130 Series User’s Guide... - Page 97 (>) – the port number greater than this value is available. (<) – the port number less than this value is available for this profile. Vigor130 Series User’s Guide...
-
Page 98: Service Type Group
This page allows you to bind several service types into one group. Available settings are explained as follows: Item Description Set to Factory Default Clear all profiles. Index Display the profile number that you can configure. Name Display the name of the group profile. Vigor130 Series User’s Guide... - Page 99 Objects Setting>>Service Type Object will be shown in this box. Selected Service Type Click >> button to add the selected IP objects in this box. Objects After finishing all the settings, please click OK to save the configuration. Vigor130 Series User’s Guide...
-
Page 100: Keyword Object
Web Content Filter Profile. Available settings are explained as follows: Item Description Set to Factory Default Clear all profiles. Index Display the profile number that you can configure. Name Display the name of the object profile. Vigor130 Series User’s Guide... - Page 101 Contents. When you browse the webpage, the page with gambling information will be watched out and be passed/blocked based on the configuration on Firewall settings. After finishing all the settings, please click OK to save the configuration. Vigor130 Series User’s Guide...
-
Page 102: Keyword Group
To set a new profile, please do the steps listed below: 1. Click the number (e.g., #1) under Index column for configuration in details. 2. The configuration page will be shown as follows: Available settings are explained as follows: Vigor130 Series User’s Guide... -
Page 103: File Extension Object
Available settings are explained as follows: Item Description Set to Factory Default Clear all profiles. Index Display the profile number that you can configure. Name Display the name of the object profile. Vigor130 Series User’s Guide... -
Page 104: Csm Profile
You may imagine URL Content Filter as a well-trained convenience-store clerk who won’t sell adult magazines to teenagers. At office, URL Content Filter can also provide a job-related only environment hence to increase the employee work efficiency. How can Vigor130 Series User’s Guide... -
Page 105: Url Content Filter Profile
Default Message - Click this button to apply the default message offered by the modem. You can set eight profiles as URL content filter. Simply click the index number under Profile to open the following web page. Vigor130 Series User’s Guide... - Page 106 Control and Web Feature below, such function can determine the priority for the actions executed. For this one, the modem will process the packages with the conditions set below for web feature first, then URL second. Vigor130 Series User’s Guide...
- Page 107 In addition, the maximal length of each frame is 32-character long. After specifying keywords, the Vigor modem will decline the connection request to the website whose URL string matched to any user-defined keyword. It Vigor130 Series User’s Guide...
- Page 108 Upload – Check the box to block the file upload by way of web page. File Extension Profile – Choose one of the profiles that you configured in Object Setting>> File Extension Objects previously for passing or blocking the file downloading. Vigor130 Series User’s Guide...
-
Page 109: Applications
Assume you have a registered domain name from the DDNS provider, say hostname.dyndns.org, and an account with username: test and password: test. In the DDNS setup menu, check Enable Dynamic DNS Setup. Available settings are explained as follows: Vigor130 Series User’s Guide... - Page 110 Service Provider Select the service provider for the DDNS account. Service Type Select a service type (Dynamic, Custom or Static). If you choose Custom, you can modify the domain that is chosen in the Domain Name field. Vigor130 Series User’s Guide...
-
Page 111: Schedule
The clock will reset once if you power down or reset the modem. There is another way to set up time. You can inquiry an NTP server (a time server) on the Internet to synchronize the Vigor130 Series User’s Guide... - Page 112 Click any index, say Index No. 1. The detailed settings of the call schedule with index 1 are shown below. Available settings are explained as follows: Item Description Enable Schedule Check to enable the schedule. Setup Vigor130 Series User’s Guide...
- Page 113 Assign these two profiles to the PPPoE Internet access profile. Now, the PPPoE Internet connection will follow the schedule order to perform Force On or Force Down action according to the time plan that has been pre-defined in the schedule profiles. Vigor130 Series User’s Guide...
-
Page 114: Upnp
The NAT Traversal of UPnP enables the multimedia features of your applications to operate. This has to manually set up port mappings or use other similar methods. The screenshots below show examples of this facility. Vigor130 Series User’s Guide... - Page 115 Some Microsoft operating systems have found out the UPnP weaknesses and hence you need to ensure that you have applied the latest service packs and patches. Non-privileged users can control some modem functions, including removing and adding port mappings. Vigor130 Series User’s Guide...
-
Page 116: Igmp
Click this link to renew the working multicast group status. Group ID This field displays the ID port for the multicast group. The available range for IGMP starts from 224.0.0.0 to 239.255.255.254. It indicates the LAN port used for the multicast group. Vigor130 Series User’s Guide... -
Page 117: System Maintenance
Build Date/Time Display the date and time of the current firmware build. MAC Address - Display the MAC address of the LAN Interface. IP Address - Display the IP address of the LAN interface. Subnet Mask Vigor130 Series User’s Guide... - Page 118 Scope - Display the scope of IPv6 address. For example, IPv6 Link Local could only be used for direct IPv6 link. It can't be used for IPv6 internet. Internet Access Mode – Display the connection mode chosen for accessing into Internet. Vigor130 Series User’s Guide...
-
Page 119: 111
Port – Sometimes, port conflict might be occurred. To solve such problem, you might change port number for CPE. Periodic Inform Settings The default setting is Enable. Please set interval time or schedule time for the modem to send notification to CPE. Vigor130 Series User’s Guide... -
Page 120: Administrator Password
Type in new password in this field. Confirm Password Type in the new password again. When you click OK, the login window will appear. Please use the new password to access into the Web User Interface again. Vigor130 Series User’s Guide... -
Page 121: Configuration Backup
Click Backup button to get into the following dialog. Click Save button to open another dialog for saving configuration as a file. In Save As dialog, the default filename is config.cfg. You could give it another name by yourself. Vigor130 Series User’s Guide... - Page 122 Click Browse button to choose the correct configuration file for uploading to the modem. Click Restore button and wait for few seconds, the following picture will tell you that the restoration procedure is successful. Vigor130 Series User’s Guide...
-
Page 123: Syslog/Mail Alert
SMTP Server - The IP address of the SMTP server. Mail To - Assign a mail address for sending mails out. Return-Path - Assign a path for receiving the mail from outside. Vigor130 Series User’s Guide... - Page 124 From the Syslog screen, select the modem you want to monitor. Be reminded that in Network Information, select the network adapter used to connect to the modem. Otherwise, you won’t succeed in retrieving information from the modem. Vigor130 Series User’s Guide...
-
Page 125: Time And Date
Enable Daylight Saving Check the box to enable the daylight saving. Such feature is available for certain area. Automatically Update Select a time interval for updating from the NTP server. Interval Click OK to save these settings. Vigor130 Series User’s Guide... -
Page 126: Management
List IP - Indicate an IP address allowed to login to the modem. Subnet Mask - Represent a subnet mask allowed to login to the modem. Management Port Setup User Defined Ports - Check to specify user-defined port numbers for the Telnet, HTTP and FTP servers. Vigor130 Series User’s Guide... - Page 127 You could specify that the system administrator can only login from a specific host or network defined in the list. A maximum of three IPs/subnet masks is allowed. IPv6 Address /Prefix Length- Indicate the IP address(es) Vigor130 Series User’s Guide...
-
Page 128: Reboot System
Note: When the system pops up Reboot System web page after you configure web settings, please click OK to reboot your modem for ensuring normal operation and preventing unexpected errors of the modem in the future. Vigor130 Series User’s Guide... -
Page 129: Firmware Upgrade
Note that this example is running over Windows OS (Operating System). Download the newest firmware from DrayTek's web site or FTP site. The DrayTek web site is www.draytek.com (or local DrayTek's web site) and FTP site is ftp.draytek.com. -
Page 130: Diagnostics
(e.g., PPPoE, PPPoA, etc) is triggered by a package sending from the source IP address. Available settings are explained as follows: Item Description Decoded Format It shows the source IP address (local), destination IP (remote) address, the protocol and length of the package. Refresh Click it to reload the page. Vigor130 Series User’s Guide... -
Page 131: Routing Table
Click Diagnostics and click Routing Table to open the web page. Available settings are explained as follows: Item Description Refresh Click it to reload the page. Vigor130 Series User’s Guide... -
Page 132: Arp Cache Table
The table shows a mapping between an Ethernet hardware address (MAC Address) and an IPv6 address. This information is helpful in diagnosing network problems, such as IP address conflicts, etc. Click Diagnostics and click IPv6 Neighbour Table to open the web page. Available settings are explained as follows: Vigor130 Series User’s Guide... -
Page 133: Dhcp Table
It displays the IP address assigned by this modem for specified PC. MAC Address It displays the MAC address for the specified PC that DHCP assigned IP address for it. Leased Time It displays the leased time of the specified PC. Vigor130 Series User’s Guide... -
Page 134: Nat Sessions Table
It indicates the temporary port of the modem used for NAT. Peer IP:Port It indicates the destination IP address and port of remote host. Interface It displays the representing number for different interface. Refresh Click it to reload the page. Vigor130 Series User’s Guide... -
Page 135: Ping Diagnosis
Type the IP address of the Host/IP that you want to ping. Ping IPv6 Address Type the IPv6 address that you want to ping. Click this button to start the ping work. The result will be displayed on the screen. Vigor130 Series User’s Guide... -
Page 136: Data Flow Monitor
Click this link to refresh this page manually. Display the number of the data flow. Index IP Address Display the IP address of the monitored device. TX rate (kbps) Display the transmission speed of the monitored device. Vigor130 Series User’s Guide... - Page 137 Peak means the highest peak value detected by the modem in data transmission. Speed means line speed specified in WAN>>General Setup. If you do not specify any rate at that page, here will display Auto for instead. Vigor130 Series User’s Guide...
-
Page 138: Trace Route
Available settings are explained as follows: Item Description IPv4 / IPv6 Click one of them to display corresponding information for Protocol Use the drop down list to choose the protocol that you want to ping through. Vigor130 Series User’s Guide... -
Page 139: Tspc Status
If TSPC has configured properly, the modem will display the following page when the user connects to tunnel broker successfully. Available settings are explained as follows: Item Description Refresh Click this link to refresh this page manually. Vigor130 Series User’s Guide... -
Page 140: Application And Examples
DHCP server is enabled so it assigns every local NATed host an IP address of 192.168.1.x starting from 192.168.1.10. You can just set the settings wrapped inside the red rectangles to fit the request of NAT usage. Vigor130 Series User’s Guide... - Page 141 To use another DHCP server in the network rather than the built-in one of Vigor Modem, you have to change the settings as show below. Vigor130 Series User’s Guide...
- Page 142 Vigor130 Series User’s Guide...
-
Page 143: Trouble Shooting
Power on the modem. Make sure the ACT LED and LAN LED are bright. If not, it means that there is something wrong with the hardware status. Simply back to “1.3 Hardware Installation” to execute the hardware installation again. And then, try again. Vigor130 Series User’s Guide... - Page 144 Go to Control Panel and then double-click on Network Connections. Right-click on Local Area Connection and click on Properties. Select Internet Protocol (TCP/IP) and then click Properties. Vigor130 Series User’s Guide...
- Page 145 Select Obtain an IP address automatically and Obtain DNS server address automatically. Double click on the current used MacOs on the desktop. Open the Application folder and get into Network. On the Network screen, select Using DHCP from the drop down list of Configure IPv4. Vigor130 Series User’s Guide...
-
Page 146: Pinging The Modem From Your Computer
Open the Application folder and get into Utilities. Double click Terminal. The Terminal window will appear. Type ping 192.168.1.1 and press [Enter]. If the link is OK, the line of “64 bytes from 192.168.1.1: icmp_seq=0 ttl=255 time=xxxx ms” will appear. Vigor130 Series User’s Guide... -
Page 147: Checking If The Isp Settings Are Ok Or Not
Go to System Maintenance and choose Reboot System on the web page. The following screen will appear. Choose Using factory default configuration and click OK. After few seconds, the modem will return all the settings to the factory settings. Vigor130 Series User’s Guide... -
Page 148: Contacting Your Dealer
If the modem still cannot work correctly after trying many efforts, please contact your dealer for further help right away. For any questions, please feel free to send e-mail to support@draytek.com. Vigor130 Series User’s Guide...