
Related Manuals for Xerox Phaser 3320DN


Summary of Contents for Xerox Phaser 3320DN
- Page 1 Version 1.0 February 2012 ® Xerox Phaser 3320DN/3320DNI System Administrator Guide...
- Page 2 ©2012 Xerox Corporation. XEROX® and XEROX and Design® are trademarks of Xerox Corporation in the United States and/or other countries. Document version 1.0: February 2012...
-
Page 3: Table Of Contents
Installing the Printer Setting Utility ........... 43 Xerox Phaser 3320DN/3320DNI... - Page 4 Security @ Xerox........
- Page 5 Management Information Base (MIB) ..........107 Xerox Phaser 3320DN/3320DNI...
- Page 6 Xerox Phaser 3320DN/3320DNI System Administrator Guide...
-
Page 7: Introduction
Introduction Welcome to the Xerox Phaser 3320DN/3320DNI System Administrator Guide. This chapter includes: • Who should use this Guide? on page 8 • Machine Overview on page 9 • Control Panel Overview on page 10 Xerox Phaser 3320DN/3320DNI System Administrator Guide... -
Page 8: Who Should Use This Guide
To use the procedures in this guide effectively, System Administrators must have previous experience working in a network environment and must possess Supervisor, Administrator, Account Operator, or equivalent rights to the network. They must also have prior knowledge of how to create and manage network user accounts. Xerox Phaser 3320DN/3320DNI System Administrator Guide... -
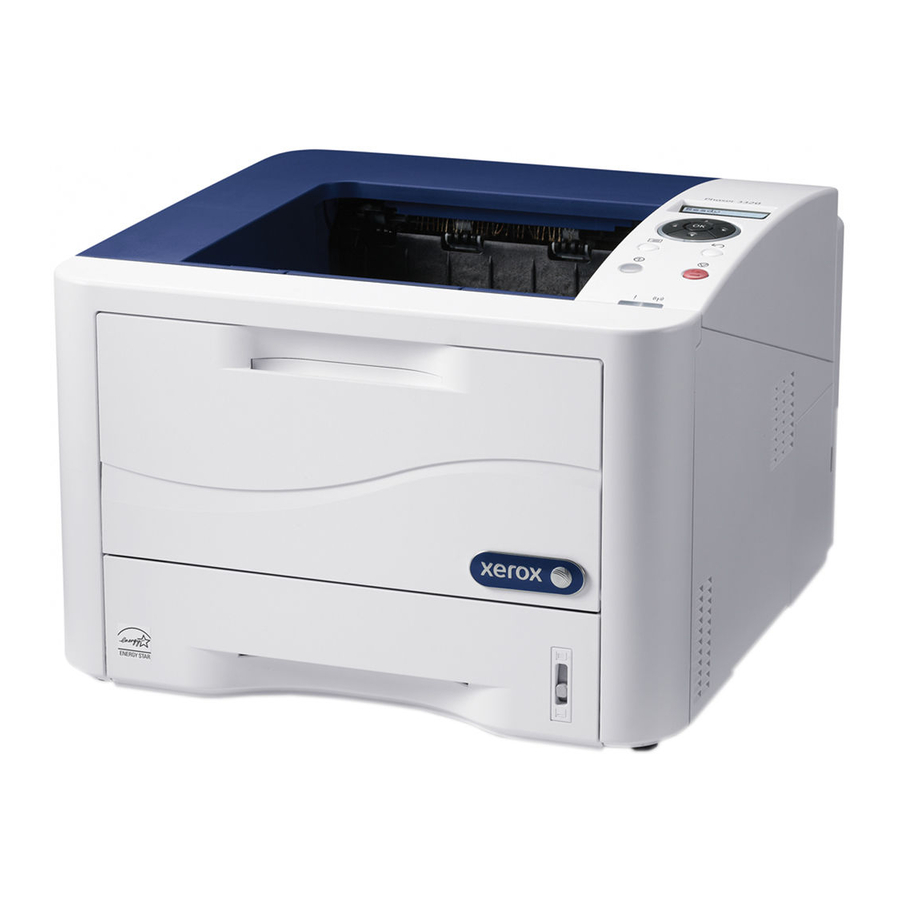
Page 9: Machine Overview
Machine Overview Machine Overview The Xerox Phaser 3320DN/3320DNI are environmentally friendly printing machines providing excellent quality and speed. The features and functions available on your machine depend on the model you have purchased. Product Configurations Component Phaser 3320DNI Phaser 3320DN... -
Page 10: Control Panel Overview
Status / Wireless LED: The color of the LEDs indicates the machine’s current status. For more information refer to the User Guide supplied with your machine. Note: The Wireless LED applies to the Phaser 3320DNI only. Xerox Phaser 3320DN/3320DNI System Administrator Guide... -
Page 11: Machine Connection
This chapter shows you how to connect your machine to a network and configure the Ethernet settings and includes: • Machine Parts and Connection Ports on page 12 • CentreWare Internet Services on page 18 Xerox Phaser 3320DN/3320DNI System Administrator Guide... -
Page 12: Machine Parts And Connection Ports
Machine Parts and Connection Ports Front View Output Tray Paper Tray 1 Control Panel Bypass Tray Control Board Cover Bypass Tray Extension Front Cover Bypass Tray Width Guides Paper Level Indicator Output Tray Support Paper Tray 2 (Optional) Xerox Phaser 3320DN/3320DNI System Administrator Guide... -
Page 13: Rear View
Connect the Network Cable if required. The Phaser 3320DNI will also connect to a wireless network, if available, when powered on. Note: If you choose a wireless connection for your Phaser 3320DNI printer, you cannot use a wired connection at the same time. Xerox Phaser 3320DN/3320DNI System Administrator Guide... -
Page 14: Administrator Access
802.11 Ethernet Bridge. The location where the machine is installed must be covered by an 802.11 wireless network. This is typically provided by a nearby wireless access point or router, which is physically connected to the wired Ethernet that serves the building. Xerox Phaser 3320DN/3320DNI System Administrator Guide... -
Page 15: Configure Ethernet Settings
100M Half • 1 Giga Full Set the Ethernet speed on the machine to match the speed set on your hub or switch: Setting the Ethernet Speed at the Machine Press the Menu button. Xerox Phaser 3320DN/3320DNI System Administrator Guide... -
Page 16: Print A Configuration Report
The machine has a dual in-line memory module (DIMM). Use this memory module slot to install additional memory. Turn the machine off and unplug all cables from the machine. Grasp the control board cover and remove it. Remove the new memory module from its bag. Xerox Phaser 3320DN/3320DNI System Administrator Guide... - Page 17 Do not press the memory module strongly or the module may be damaged. If the module does not seem to fit into the slot properly, carefully try the previous procedure again. Replace the control board cover. Reconnect the power cord and machine cable and turn the machine on. Xerox Phaser 3320DN/3320DNI System Administrator Guide...
-
Page 18: Centreware Internet Services
There are two ways to access Internet Services with the administrator login: • Select Login at the top of the screen • Select the Properties icon Enter the Administrator User Name (admin) and Password (1111) and select Login. Click Properties. Xerox Phaser 3320DN/3320DNI System Administrator Guide... -
Page 19: Change The Administrator Password
Change the Administrator Password It is recommended that you change the default administrator password to a more secure password, so this Xerox machine is not compromised. To change the Administrator password: At your workstation, open the web browser and enter the IP Address of the machine in the Address Bar. - Page 20 Select Apply to save the changes. Setting the Ethernet Speed Using Internet Services At your workstation, open the web browser and enter the IP Address of the machine in the Address Bar. Press Enter. Xerox Phaser 3320DN/3320DNI System Administrator Guide...
- Page 21 1 Gbps (Full Duplex) Select on Apply to save the changes. The change to the Ethernet Speed rate will take effect after the System Reboot screen appears. When the Acknowledgement screen displays, select OK. Reboot the machine. Xerox Phaser 3320DN/3320DNI System Administrator Guide...
- Page 22 CentreWare Internet Services Xerox Phaser 3320DN/3320DNI System Administrator Guide...
-
Page 23: Network Installation
Network Installation This chapter covers the following topics: • TCP/IP on page 24 • Unix on page 29 Xerox Phaser 3320DN/3320DNI System Administrator Guide... -
Page 24: Tcp/Ip
Enter details for Subnet Mask using the arrow buttons; press OK. 10. Enter details for Gateway using the arrow buttons; press OK. 11. The Saved screen will display and return to the TCP/IP (IPv4) menu. Xerox Phaser 3320DN/3320DNI System Administrator Guide... -
Page 25: Configure Dynamic Ipv4 Addressing At The Machine
Press the OK button. Press the arrow buttons to scroll to TCP/IP (IPv4); press OK. Press the arrow buttons to select DHCP; press OK. The Saved screen will display and return to the Network Setup menu. Xerox Phaser 3320DN/3320DNI System Administrator Guide... -
Page 26: Configure Tcp/Ip Settings Using Internet Services
At your workstation, open the web browser and enter the IP Address of the machine in the Address Bar. Press Enter. Select Properties. If prompted, enter the Administrator User Name (admin) and Password (1111), and select Login. Click Properties. Xerox Phaser 3320DN/3320DNI System Administrator Guide... -
Page 27: Test Access
If you have changed the port number from the default port number “80”, append the number to the Internet address as follows. In the following examples, the port number is 8080. Domain name: http://myhost.example.com:8080 IPv4: http://xxx.xxx.xxx.xxx:8080 Xerox Phaser 3320DN/3320DNI System Administrator Guide... - Page 28 Verify that the home page of Internet Services is displayed. The Internet Services installation process is now completed. Note: When your access to Internet Services is encrypted, enter “https://” followed by the Internet address, instead of “http://”. Xerox Phaser 3320DN/3320DNI System Administrator Guide...
-
Page 29: Unix
Select Printers and Plotters. Select Actions: Add Remote Printer/Plotter..Enter the following information into the Add Remote Printer/Plotter form: Printer Name: printer name. Where printer name is the name of the queue being created. Xerox Phaser 3320DN/3320DNI System Administrator Guide... -
Page 30: Solaris 2.X
Before starting please ensure that the following items are available and/or the tasks have been performed: • Existing operational network utilizing the TCP/IP protocol. • Ensure that the machine is connected to the network. • Static IP Address for the machine. • Subnet Mask Address for the machine. Xerox Phaser 3320DN/3320DNI System Administrator Guide... - Page 31 Where hostname is the machine hostname from the /etc/hosts file. Create the queue, by entering the command: lpadmin -p queuename -s hostname -T unknown -I any where queuename is the name of the queue being created. Enter Exit to exit the Bourne shell. Xerox Phaser 3320DN/3320DNI System Administrator Guide...
-
Page 32: Sco
Where hostname is the machine Host Name from the /etc/hosts file. Printer: name of the queue being created. For example: dc xxxq. Select OK to complete the form. Select OK in the Message window. Select Host:Exit. Xerox Phaser 3320DN/3320DNI System Administrator Guide... -
Page 33: Linux Cups
The latest version of CUPS is available at cups.org. Open the web browser from your workstation. For example, enter http://127.0.0.1:631/printers in the Address Bar. Press Enter. Select Add Printer. The Authorization dialog box will appear. Enter the root and the root password. Xerox Phaser 3320DN/3320DNI System Administrator Guide... -
Page 34: Linux Lpr Via Printtool
11. In the Machine menu, select Internet Printing Protocol. 12. Select Continue. 13. Enter ipp://hostname/ipp/printername. Where hostname is the hostname of the Xerox machine and printername is the printer name of the Xerox machine. 14. Select Continue. 15. Select Xerox in the Make menu. -
Page 35: Linux Lprng
/var/spool/lpd. Add the name of the print queue to the end of the subdirectory path. 12. Ensure that the File Limit reads 0. 13. In the Remote Host area, enter the IP Address of the Xerox machine. 14. In the Remote Queue area, enter the Print Queue Name from step 9. -
Page 36: Dynamic Addressing
The spool directory is the directory where print jobs are stored and is a subdirectory of /var/spool/lpd. Add the name of the print queue to the end of the subdirectory path. In the Hostname/IP of Printer area, enter the hostname or IP Address of the Xerox machine. Select OK. -
Page 37: Printer Drivers
Unix - Installing Drivers on page 45 • Sharing your Machine Locally on page 47 • Windows Printing on page 49 • Configure the Windows Printer Driver on page 56 • Apple Mac on page 58 Xerox Phaser 3320DN/3320DNI System Administrator Guide... -
Page 38: Overview
Windows 7 • Windows 2008 Server R2 • Macintosh • Mac OS X 10.3 ~ 10.4 • Mac OS X 10.5 • Mac OS X 10.6 • Mac OS X 10.7 • Linux • Unix Xerox Phaser 3320DN/3320DNI System Administrator Guide... -
Page 39: Windows - Installing Driver
The program will install the printer driver files. The Setup Completed message displays • with the I’d like to print a test page checkbox. If you choose to print a test page, select the checkbox. • Select Finish. Verify the test page prints at your machine. Xerox Phaser 3320DN/3320DNI System Administrator Guide... - Page 40 For windows follow the steps below to uninstall the driver. Make sure that the machine is connected to your computer and powered on. From the Start menu, select Programs or All Programs > Xerox Printers > your printer driver name > Maintenance.
-
Page 41: Macintosh - Installing Driver
For Mac OS X10.4, select Default Browser and find the USB connection. • For Mac OS X 10.5~10.6, select Default and find the USB connection. 13. For Mac OS X 10.3, if Auto Select does not work properly, select Xerox in Printer Model and your machine name in Model Name. •... - Page 42 Select the MAC_Installer folder. Select the Installer icon. Enter the password and select OK. The Xerox Installer window opens. Select Continue. Select Uninstall and click Uninstall. When the message which warns that all applications will close on your computer appears, select Continue.
-
Page 43: Linux - Installing Drivers
Linux - Installing Drivers Linux - Installing Drivers You need to download the Linux software package from the Xerox website to install the printer software. Procedure for Installing the Linux Unified Driver Make sure that the machine is connected to your computer and powered on. - Page 44 You must log in as a super user (root) to uninstall the printer driver. If you are not a super user, ask your system administrator. Select the icon at the bottom of the desktop. When the Terminal screen appears, type in: root@localhost root#cd /opt/Xerox/mfp/uninstall/ root@localhost uninstall#./uninstall.sh Select Uninstall. Select Next. Select Finish. Xerox Phaser 3320DN/3320DNI System Administrator Guide...
-
Page 45: Unix - Installing Drivers
Enter any description corresponding to the type of printer in the Type field. This is optional. Specify any printer description in the Description field. This is optional. Specify the printer location in the Location field. Xerox Phaser 3320DN/3320DNI System Administrator Guide... -
Page 46: Uninstalling The Printer Driver Package
Click Delete to delete the printer from the system. Execute the “./install-d” command to uninstall the whole package. To verify removal results, execute the “./install-c” command. To re-install it, use the command “./install” to reinstall the binaries. Xerox Phaser 3320DN/3320DNI System Administrator Guide... -
Page 47: Sharing Your Machine Locally
Select the printer icon you want to share and select Connect. If a set up complete message appears, select OK. Open the file you want to print and start printing. Xerox Phaser 3320DN/3320DNI System Administrator Guide... -
Page 48: Macintosh
41. Open the Applications folder, select System Preferences and select Print & Fax. Press the “+” icon. A display window showing the name of your shared printer appears. Select your machine and select Add. Xerox Phaser 3320DN/3320DNI System Administrator Guide... -
Page 49: Windows Printing
Check the Print Services for Unix checkbox. If Print Services for Unix is not installed, refer to instructions from Microsoft to install this service. When you are finished, return to this page. Select the OK button. Xerox Phaser 3320DN/3320DNI System Administrator Guide... -
Page 50: Install Printer Driver
For Windows 2008 - select Control Panel then select Printers. From the File drop-down menu select Run as administrator. For: Windows XP/2000/2003: Select Add Printer in the far left column. Select the Next button. Xerox Phaser 3320DN/3320DNI System Administrator Guide... - Page 51 If you want to set this printer as your default printer, select Set as default. For Windows Vista users, go to step 25. 20. Select the Next button. 21. The Printer Sharing Screen appears. If you will be sharing this printer with other clients, then: Select: Xerox Phaser 3320DN/3320DNI System Administrator Guide...
-
Page 52: Internet Printing Protocol (Ipp) Port
If you have selected Basic or Digest, select the Add button. Enter the user name for the printer in the User Name field. Enter the password in the Password and Confirm Password fields. Xerox Phaser 3320DN/3320DNI System Administrator Guide... - Page 53 In the Local or Network Printer, ensure that A network printer, or a printer attached to another computer is selected and select the Next button. The following screen will appear: • Locate Your Printer for Windows 2000/2003. • Specify a Printer for Windows XP. Xerox Phaser 3320DN/3320DNI System Administrator Guide...
-
Page 54: Raw Tcp/Ip Printing (Port 9100)
Select Apply to save the changes or Undo to return the settings to their previous values. Note The settings are not applied until you restart the machine. Install Printer Driver Refer to Windows - Installing Driver on page 39. Xerox Phaser 3320DN/3320DNI System Administrator Guide... -
Page 55: Usb Printing
The program will install the printer driver files. The Setup Completed message displays with the I’d like to print a test page checkbox. If you choose to print a test page, select the checkbox. • Select Finish. Verify the test page prints at your machine. Xerox Phaser 3320DN/3320DNI System Administrator Guide... -
Page 56: Configure The Windows Printer Driver
Select each tab and change any default printer settings as required. Select Apply. Select OK. For further printing options refer to the Phaser 3320DN/3320DNI User Guide. Bi-Directional Support Follow the steps below that are specific to your operating system: Select the Windows Start menu. - Page 57 Bi-directional communication automatically updates the printer driver with the printer's installed options. The driver’s Printing Preferences will report information about the printer's operational status, active jobs, completed jobs and paper status. Select Apply, then OK. Xerox Phaser 3320DN/3320DNI System Administrator Guide...
-
Page 58: Apple Mac
21. Select Internet Protocol Printing or LPD/LPR Printing from the next menu. 22. Enter the IP Address of the printer. 23. Enter the Print Queue Name. (You may leave this blank.) 24. Select Xerox from the Printer Model list. Xerox Phaser 3320DN/3320DNI System Administrator Guide... -
Page 59: Configure Your Apple Mac Printer Driver
Reverse Page Orientation - this option allows you to rotate the page180 degrees. Graphics The Graphics tab provides options for selecting Resolution. Select Graphics from the Orientation drop-down menu to access the graphic features: Xerox Phaser 3320DN/3320DNI System Administrator Guide... - Page 60 Long-Edge Binding - this option is the conventional layout used in book binding. • Short-Edge Binding - this option is the type often used with calendars. • Select Layout from the Orientation drop-down menu. Select a binding orientation from Two Sided Printing option. Xerox Phaser 3320DN/3320DNI System Administrator Guide...
-
Page 61: Security
75 • Display Network Settings on page 77 Security @ Xerox For the latest information on securely installing, setting up and operating your machine see the Xerox Security Information web site located at www.xerox.com/security. Xerox Phaser 3320DN/3320DNI System Administrator Guide... -
Page 62: Security Settings
The Feature Management screen allows you to access the Firmware Upgrade, Physical Ports and Network Protocols controls that are available on the machine. At your workstation, open the web browser and enter the IP Address of the machine in the Address Bar. Xerox Phaser 3320DN/3320DNI System Administrator Guide... -
Page 63: Restart Device
To reboot the machine select the required Restart Now button The Do you really want to restart the device screen appears. Click Yes. The machine will reboot. Internet Services may be unavailable for several minutes while the machine reboots. Xerox Phaser 3320DN/3320DNI System Administrator Guide... -
Page 64: Machine Digital Certificate Management
A certificate from a Certificate Authority or a server functioning as a Certificate Authority (for example Windows 2000 running Certificate Services) can be uploaded to the machine. Note A separate request is required for each Xerox machine. Information Checklist Ensure that the machine is configured with the following items: •... - Page 65 Click the Close button. The certificate displays in the Certificate Management area. Follow the steps in Enable Secure Connection on page 67. Install a CA Signed Device Certificate In the Install/Create New Certificate area, select Install CA Signed Device Certificate. Select Next. Xerox Phaser 3320DN/3320DNI System Administrator Guide...
- Page 66 Send the file to your Certificate Authority for digital signing. When you receive the signed certificate back from the Certificate Authority, upload the certificate to the machine: Return to the Digital Certificate screen in the Internet Services Network Security menu. Xerox Phaser 3320DN/3320DNI System Administrator Guide...
- Page 67 In the Secure HTTP area, select the required option in the HTTPs menu. Select Both HTTP and HTTPs to enable Secure IPP or select HTTPs Only. 10. If you selected Both HTTP and HTTPs, select On from the IPPs menu if required. 11. Select Apply to save the changes. Xerox Phaser 3320DN/3320DNI System Administrator Guide...
- Page 68 Select the box next to the Friendly Name of the certificate that you want to edit or delete. • Select the Edit button to edit the certificate. Make the required changes and click Apply. • Select the Delete button to delete the certificate, and click Yes to confirm. Xerox Phaser 3320DN/3320DNI System Administrator Guide...
-
Page 69: Snmp
From the SNMP page, in the Community Names or SNMP Traps area select the name or address you want to edit. Select Edit. Change the required options and select Apply to save the changes. Xerox Phaser 3320DN/3320DNI System Administrator Guide... - Page 70 Changes made to the GET or SET community names for this machine will require corresponding GET or SET community name changes for each application which uses the SNMP protocol to communicate with this machine (e.g. Xerox CentreWare Web, any third party network management applications, etc.).
-
Page 71: Snmpv3
Enter a password in the Privacy Password field. Enter the password in the Confirm Password field. The Privacy Algorithm displays. Select Apply to save the changes. 10. Select OK when the acknowledgement message displays. Xerox Phaser 3320DN/3320DNI System Administrator Guide... -
Page 72: Ip Sec
14. To clear IP Sec connections, click the Clear All IPSec Connections button. The 'Do you really want to clear all IPSec connections' message appears. Click Yes. The 'All IPSec connections have been cleared' message appears. Click OK to close. Xerox Phaser 3320DN/3320DNI System Administrator Guide... -
Page 73: Ip Filtering
19. Select the options that you want to allow access to in Services to Accept. 20. Select the required Priority. 21. Select Apply to save the changes. 22. Select OK when the acknowledgement message displays. Xerox Phaser 3320DN/3320DNI System Administrator Guide... - Page 74 In the MAC Address to Filter Out area select the Add button. 10. Enter the MAC address that you want to filter out. 11. Select Apply to save the changes. 12. Select OK when the acknowledgement message displays. Xerox Phaser 3320DN/3320DNI System Administrator Guide...
-
Page 75: 802.1X Authentication
75 Overview The Xerox machine supports IEEE 802.1X Authentication via Extensible Authentication Protocol (EAP). IEEE 802.1X ensures all machines on the network are authenticated and authorized to use the network. 802.1X can be enabled for machines connected through wired Ethernet networks. - Page 76 10. If you select TLS, the Device Validation option appears. Click the Select Certificate button and select the required certificate to provide device validation. 11. Select the Apply button to accept the changes. 12. Select OK when the acknowledgement message displays. Xerox Phaser 3320DN/3320DNI System Administrator Guide...
-
Page 77: Display Network Settings
In the Options area, select one of the following options: • Hide Network Information • Show IPV4 Address • Show HostName Select Apply to save the changes. 10. Select OK when the acknowledgement message displays. Xerox Phaser 3320DN/3320DNI System Administrator Guide... - Page 78 Display Network Settings Xerox Phaser 3320DN/3320DNI System Administrator Guide...
-
Page 79: Centreware Internet Services
The following topics are covered in this chapter: • Overview on page 80 • Status on page 81 • Jobs on page 82 • Print on page 83 • Properties on page 84 • Support on page 95 Xerox Phaser 3320DN/3320DNI System Administrator Guide... -
Page 80: Overview
Address is 192.168.100.100, enter the following into the URL field: http://192.168.100.100. Press Enter to view the Home page. Select an icon to access the desired page, or select the Index icon at the top of the machine web page to access the index list. Xerox Phaser 3320DN/3320DNI System Administrator Guide... -
Page 81: Status
Active Alerts: shows current issues reported by the machine and the skill level required to fix them. • Supplies: shows the status of the Xerox Black Print Cartridge. • Usage Counters: shows the Machine Serial Number and the number of impressions completed by the machine. -
Page 82: Jobs
Jobs Jobs The Jobs tab is not present on the Phaser 3320DN/3320DNI unless RAM disk is enabled. The Job Management page provides information about active, stored and secure print jobs. Click the links in the left hand menu to see your jobs. The options are: •... -
Page 83: Print
Select the required option for 2-Sided printing. In the Print-Ready File area, select the Browse button. The File Download page displays. Select the print-ready document and select OK. Select Apply to print the document. Xerox Phaser 3320DN/3320DNI System Administrator Guide... -
Page 84: Properties
Earth Smart - allows you to set features to save energy and paper on the machine. • Input Tray - allows you to set the input tray information. • RAM Disk - Enables/disables RAM disk to manage jobs. Xerox Phaser 3320DN/3320DNI System Administrator Guide... -
Page 85: Earth Smart
In the Machine Settings link select the System link. Select Setup. The General page displays. In the Host Name, Location, Contact, Xerox Asset Tag Number and Customer Asset Tag Number areas enter the required information for the device. Select the required language from the Language drop-down menu. -
Page 86: Printer
Select the required size (16 - 32)MB. Select Apply to save the changes. Printer The Printer screens allow you to set the options for: • Graphic • Layout • • PostScript • EPSON/IBM • Font and Macro Download Xerox Phaser 3320DN/3320DNI System Administrator Guide... - Page 87 Select Apply to save the settings. PostScript To access the PostScript settings: In the Machine Settings link select the Printer link. Select PostScript. In the PostScript area, select Enable to select Print PostScript Error. Xerox Phaser 3320DN/3320DNI System Administrator Guide...
-
Page 88: E-Mail Notification
The E-mail Notification page allows you to set up e-mail alerts to notify users or operators of problems as they occur on the machine. At your workstation, open the web browser and enter the IP Address of the machine in the Address Bar. Xerox Phaser 3320DN/3320DNI System Administrator Guide... -
Page 89: Network Settings
The Network Settings screens allow you to set the properties for the following options: • General, which includes Ethernet Speed • TCP/IPv4 • TCP/IPv6 • Raw TCP/IP, LPR, IPP • Telnet • • • UPnP • mDNS • SNMP • Outgoing Mail Server (SMTP) • Wireless Xerox Phaser 3320DN/3320DNI System Administrator Guide... - Page 90 The WSD page allows you to enable the WSD protocol on the device. In the Network Settings link select the WSD link. Select Enable to enable the WSD Protocol. Select Apply to save the settings. Xerox Phaser 3320DN/3320DNI System Administrator Guide...
- Page 91 Protocol) settings on the device. In the Network Settings link select the Outgoing Mail Server (SMTP) link. In the Simple Mail Transfer Protocol (SMTP) area: Enter the IP or host name of the SMTP Server. Xerox Phaser 3320DN/3320DNI System Administrator Guide...
-
Page 92: Security
The Security screens allow you to view and set the properties for the following options: • Security Summary • System Security • Network Security Security Summary The Security Summary page allows you to view the settings for: • System Security Xerox Phaser 3320DN/3320DNI System Administrator Guide... -
Page 93: Network Security
The Restart Device screen allows you to reboot the machine remotely from your desktop. For instructions, refer to Restart Device on page 63. Network Security The Network Security pages allow you to configure security settings on the device for: • Digital Certificate Xerox Phaser 3320DN/3320DNI System Administrator Guide... - Page 94 62. Display Network Settings The Display Network Settings screen allows you to control the network information that displays on the machine control panel. For further information, refer to Display Network Settings on page 77. Xerox Phaser 3320DN/3320DNI System Administrator Guide...
-
Page 95: Support
The Support tab provides details of the machine Version Information and allows you to perform a Firmware Upgrade. You can also configure Contact Information for the System Administrator and Xerox support information. The Support tab provides Support Links to pages on www.xerox.com that provide helpful information, for example drivers and documentation. -
Page 96: Support Links
Support Support Links To view Support Links or to register your device on www.xerox.com: At your workstation, open the web browser and enter the IP Address of the machine in the Address Bar. Press Enter. Select the Support icon. Select Support Links within the Support tab. -
Page 97: Software Upgrade
Software Upgrade This chapter explains how to upgrade the machine software when requested by a Xerox Customer Support Centre Representative and includes the following topics. • Overview on page 98 • Software Upgrade using Internet Services on page 99 Xerox Phaser 3320DN/3320DNI... -
Page 98: Overview
When should I upgrade the software? Xerox is continually seeking to improve its products and a software revision may become available to improve the functionality of the machine. Your Customer Support Centre Representative will instruct you to upgrade your machine when it is necessary. -
Page 99: Software Upgrade Using Internet Services
• Obtain the new software upgrade file for your machine from the www.xerox.com web site or from your Xerox Customer Support Representative. The upgrade file will have an extension of .hd. Download the upgrade file to a local or network drive. You will be able to delete the file after the upgrade procedure. - Page 100 The upgrade should take no longer than 30 minutes. 16. Once the machine has completed the upgrade it will reboot automatically. The configuration report will print (if enabled). Check the configuration report to verify that the software level has changed. Xerox Phaser 3320DN/3320DNI System Administrator Guide...
-
Page 101: Troubleshooting
Troubleshooting This chapter contains procedures and actions to resolve problems you may encounter with your printer. • Problem Solving Procedure on page 102 • Printing on page 103 • Connectivity on page 104 Xerox Phaser 3320DN/3320DNI System Administrator Guide... -
Page 102: Problem Solving Procedure
Check that the software application being used to send print jobs is set up correctly. If printing is not available from a workstation, re-install a printer driver on the workstation. Call the local Xerox Welcome Center, where a representative will assist in the diagnosis and solution of the problem. -
Page 103: Printing
I cannot print to the machine. Ensure that there are no network connectivity problems with the Xerox machine. Print a Test Page from the Xerox printer driver to the machine to verify connectivity. Ensure that the print server is functional. -
Page 104: Connectivity
IP Address, check the network cables at the machine and the computer that you are using to ping the machine. Configure the Xerox machine with an Ethernet speed that matches the speed set on your hub or switch. - Page 105 If the machine is configured with a static IP Address, it will not use AutoIP. I cannot access Internet Services. Ensure that the Xerox machine is configured with a valid IP Address. Ensure HTTP Activate is enabled within the Menu > Network Setup area at the machine control panel.
- Page 106 Connectivity Xerox Phaser 3320DN/3320DNI System Administrator Guide...
-
Page 107: Management Information Base (Mib)
CentreWare Internet Services. This includes e-mail addresses, phone numbers and passwords as they are being entered. If this presents a security concern, Xerox recommends enabling the SNMPv3 and the IP Filtering security feature in order to control remote access to the device. - Page 108 Xerox Phaser 3320DN/3320DNI System Administrator Guide...
- Page 109 Print, 83 Configuration Report, 16 HP-UX Client (Version 10.x), 29 Configure HTTP Apple Mac Printer Driver, 59 Enable SSL, 67 Solaris 2.x Client GUI Method, 31 tty Method, 31 IEEE 1284 Parallel Connector (Optional), 13 Xerox Phaser 3320DN/3320DNI System Administrator Guide...
- Page 110 Printer Setting Utility, 43 Overview, 64 Product Configurations, 9 Machine Overview, 9 Machine Parts, 12 Machine Timer Values, 107 Macintosh, 48 Rear Door, 13 Installing Driver, 41 Manual Printer Driver Configuration, 56 Menu button, 10 Xerox Phaser 3320DN/3320DNI System Administrator Guide...
- Page 111 SCO, 32 Who should use this Guide?, 8 Security, 61 Windows Security @ Xerox, 61 Installing Driver, 39 Security Settings, 62 Sharing a Machine Locally, 47 Self Signed Certificate, 65, 66 Windows Printer Drivers Setup Configure, 56 Unix Windows Printing, 49...
- Page 112 Xerox Phaser 3320DN/3320DNI System Administrator Guide...