Table of Contents
Advertisement
Instructions for
Installation and Use
GB
English, 2
DH53B S
DH53CK S
DH53K S
DH53W S
DH53X S
DHS53CX S
DHS53X S
DD53X
Contents
Warnings, 2
Introduction, 3
Controls, 8
Convection Oven, 13
Care and Cleaning, 19-21
Installation, 22-24
If something goes wrong..., 25-26
Build-in Electric
double oven
GB
Advertisement
Table of Contents

Related Manuals for Hotpoint DH53B S


Summary of Contents for Hotpoint DH53B S
-
Page 1: Table Of Contents
The Cooking Systems in your Double Oven, 6 Temperature Conversion Chart, 7 Controls, 8 The electronic programmer, 9 Grill Pan and Handle, 10 DH53B S DH53CK S Operation when using the Top Oven for Grilling, 11 DH53K S DH53W S... -
Page 2: English
Warnings •WARNING: The appliance and its accessible parts become hot during use. •Care should be taken to avoid ! VERY HOT SURFACES ! VERY HOT SURFACES ! VERY HOT SURFACES touching heating elements. FOOD OR GREASE ON THESE •Children less than 8 years of SURFACES COULD CAUSE SMOKE AND POSSIBLY EVEN BURN age shall be kept away unless... -
Page 3: Introduction
Introduction To the Installer: * The guarantee is subject to the provisions that the Before installation, fill in the product details on the back appliance: cover of this book. The information can be found on the rating plate. (a) Has been used solely in accordance with the Users Instruction Book. -
Page 4: Safety Information
Safety Information When used properly your appliance is completely 3. LEAVE THE PAN TO COOL FOR AT LEAST 60 safe but as with any electrical product there are MINUTES BEFORE MOVING IT. Injuries are often certain precautions that must be observed. caused by picking up a hot pan and rushing PLEASE READ THE PRECAUTIONS BELOW outside with it. -
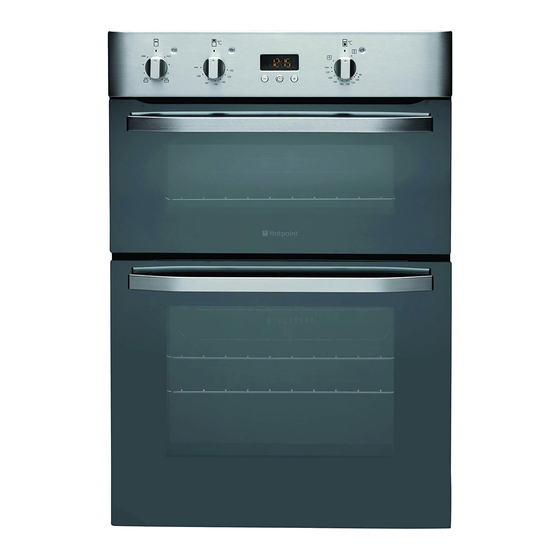
Page 5: The Main Parts Of Your Double Oven
The main parts of your Double Oven WARNING: DO NOT TOUCH THE GLASS DOORS WHEN THE OVEN IS IN USE AS THESE AREAS CAN BECOME HOT TOP OVEN Main Oven PILOT LIGHT Temperature Selector Top Oven Temperature Control GRILL MAIN OVEN PILOT LIGHT Timer PILOT LIGHT... -
Page 6: The Cooking Systems In Your Double Oven
The Cooking Systems in your Double Oven Your new oven is equipped with three different cooking systems: Conventional Heating (Top Oven) - with upper and lower heat. This system is particularly suitable for roasting and baking on one shelf only. Grilling (Top Oven) - Has a full width, fully con- trollable grill. -
Page 7: Temperature Conversion Chart
Temperature Conversion Chart The chart below gives details of comparisons of oven settings for gas conventional ovens and fan oven in degrees °F and °C Conventional Oven Fan Oven Gas Mark °F °C °C ½ PLEASE PHONE US TO REGISTER YOUR APPLIANCE AND ACTIVATE YOUR PARTS GUARANTEE ON 08448 24 24 24... -
Page 8: Controls
Controls GRILL TOP OVEN PILOT PILOT LIGHT MAIN OVEN PILOT LIGHT LIGHT Grill Top Oven Timer Main Oven Temperature Setting Temperature And Function Control Control Control Control Description Function Knob Selects the heat at which the grill will cook the food. Grill Setting Control Grill Control Settings: 1 = Low, 4 = High *... -
Page 9: The Electronic Programmer
The electronic programmer Programming cooking ! A cooking mode must be selected before DISPLAY programming can take place. •• •• END OF CLOCK icon Programming the cooking duration COOKING icon DURATION TIMER icon 1. Press the button several times until the icon icon and the three digits on the DISPLAY begin to flash. -
Page 10: Grill Pan And Handle
Grill Pan and Handle Top Oven Shelf Positioning for Grilling will cancel all the settings selected previously, ENSURE SHELVES ARE including timer settings. FITTED CORRECT WAY UP. Using the grill pan kit The grill pan handle is detachable from the pan to facilitate cleaning and storage. -
Page 11: Operation When Using The Top Oven For Grilling
Operation when using the Top Oven for Grilling GRILL TOP OVEN PILOT PILOT LIGHT LIGHT Grill Top Oven Timer Setting Temperature Control Control Ensure oven timer is set to manual. Place Step 1 the shelf in the correct position (see Gril- ling Guide). -
Page 12: Guide To Grilling
Guide to Grilling PREHEAT SHELF FOR 5 SETTING POSITION FROM APPROXIMATE PAN TO BE MINUTES (depending on FOOD THE BASE OF COOKING TIME USED (depending Model) THE OVEN on Model) Toasting of Bread Grill pan and food 3 or 2 Setting MAX Setting 4 or MAX... -
Page 13: Using The Top Oven As A Convection Oven
Using the Top Oven as a Convection Oven The top oven should be used to cook small quantities of food. The oven is designed so that the grill element operates at a reduced heat output, this is combined with a heating element situated underneath the floor of the oven. To ensure even cooking of the food it is important that cooking utensils are positioned correctly on the oven shelf so that the element is directly above. -
Page 14: Oven Temperature Charts - Baking
Oven Temperature Charts - Baking Top Oven Cooking Baking Pre-heat Temperature °C Time in mins. Position in Oven Scones 210/220 10-15 Runner 2 from bottom of oven Small Cakes 180/190 20-25 Runner 2 from bottom of oven Victoria Sandwich 170/180 20-30 Runner 2 from bottom of oven Sponge Sandwich (fatless) -
Page 15: Oven Temperature Chart - Meat
Oven Temperature Charts - Meat Top Oven Cooking Meat Pre-heat Temperature °C Time (approx.) Position in Oven Beef/ Lamb 170/180 35 mins per 450g (1lb) + 35 mins over. (slow roasting) Beef/ Lamb 190/200 35-40 mins per 450g (1lb) (foil covered) Pork 170/180 40 mins per 450g (1lb) + 40 mins over... -
Page 16: Using The Main Oven For Fan Cooking
Using the Main Oven for Fan Cooking Since a circulaire fan oven heats up more quickly and generally cooks food at a lower temperature than a DO NOT allow young children near to the appliance conventional oven, pre-heating is often unnecessary. when the main oven is in use as the surfaces get For guides on „pre-heating”, „cooking temperatures”... -
Page 17: Using The Main Oven For Other Functions
Using the Main Oven for Other Functions FAN ONLY SETTING LIGHT ONLY SETTING When the Main Oven Temperature & Function Control DEFROSTING FROZEN MEAT & POULTRY Joints of meat and whole birds should be defrosted (C) is turned clockwise to the setting, the main slowly, preferably in a refrigerator (allowing 5-6 hours oven light only will illuminate. - Page 18 Using the Main Oven for Other Functions ‚S’ SLOW COOK SETTING POINTS TO CONSIDER WHEN PREPARING FOOD This is used for slow cooking, keeping food warm and FOR SLOW COOKING 1. Make sure that the dishes to be used will fit into the warming plates for short periods.
-
Page 19: Care And Cleaning
Care and Cleaning Warning: Before cleaning, please ensure that the electricity supply to the appliance is switched off DO NOT use biological washing powder, harsh and the appliance is fully cold. abrasives or chemical oven cleaners of any kind as this could damage the „Stayclean”... - Page 20 Care and Cleaning (b) Inner Door Panels & Glass Open the door fully. The glass panel may now be washed. Stubborn stains can be removed by using a well soaped, fine steel wool soap pad. (c) Stainless trims Regularly wipe with a clean, damp cloth and polish with a clean dry cloth.
- Page 21 Care and Cleaning CLEANING THE DOORS NEVER OPERATE THE COOKER WITHOUT THE Take particular care not to damage the inner INNER DOOR GLASS IN POSITION. surface of the door inner glass that is coated with a heat reflective layer. Do not use scouring pads, Refit the door inner glass as follows.
-
Page 22: Installation
Installation Electrical Requirements For your own safety, we recommend that your cooker 1. General is installed by a competent person such as one who is The appliance is designed for mounting at a safe level registered with NICEIC (National Inspection Council for into an oven housing which must be secured to the Electrical Installation Contracting). -
Page 23: Tall Cabinet Ventilation
Tall Cabinet Ventilation Fig. 1 Ventilation Slot required here if cabinet does not fit to ceiling - 51mm x 457mm min. area Ventilation Slot required here if the cabinet does not fit to the ceiling - 51mm x 457mm min. 50 mm area Air Gap... -
Page 24: Please Phone Us To Register Your Appliance And Activate Your Parts Guarantee On 08448 24 24
562mm Viewed down through cabinet Cabinet No. 6x25mm screw (4 supplied) Fig. 3 870mm Oven Door Fig. 2 882mm, 870mm if cooker trim is to overlap Connector top edge of shelf Cable if hob fitted Cable to Hob if if fitted Cable Fig. -
Page 25: If Something Goes Wrong
If something goes wrong... Before calling a Service Engineer, please check through the following lists. THERE MAY BE NOTHING WRONG. Problem Check Slight odour or small amount of smoke when grill / This is normal and should cease after a short period. oven used for first time If you find that the timer display is blank, then it is likely that there is no electricity supply to... -
Page 26: Disposal Of The Appliance
If something goes wrong... Problem Check Grilling is uneven. Ensure that Grill pan has been positioned as stated in the Grilling section of this book. The oven lamp is not covered by the guarantee. The part is easily changed (see the section Oven lamp does on oven lamp replacement) A new lamp may be obtained from our Genuine Parts &... -
Page 27: Guarantee Information
90 days of ownership. Simply call our Hotpoint Service Hotline on 08448 224 224 (ROI 0818 313 413) for telephone assistance, or, where necessary, to arrange for an engineer to call. -
Page 28: Service Information
06/2013 - 195102598.02 XEROX FABRIANO After Sales Service No one is better placed to care for your Hotpoint appliance during the course of its working life than us - the manufacturer. Essential Contact Information Hotpoint Service We are the largest service team in the country offering you access to 400 skilled telephone advisors and 1100 fully qualified engineers on call to ensure you receive fast, reliable, local service.