Table of Contents
Advertisement
Advertisement
Chapters
Table of Contents

Related Manuals for Kodak ScanMate i1150


Summary of Contents for Kodak ScanMate i1150
-
Page 2: User Precautions
• The product packaging is recyclable. • Parts are designed for reuse and recycling. • The Kodak ScanMate i1150/i1180 Scanners are Energy Star compliant and are shipped from the factory with the default time set to 15 minutes. European Union This symbol indicates that when the last user wishes to discard this product, it must be sent to appropriate facilities for recovery and recycling. -
Page 3: Accessories
EMC statements United States: This equipment has been tested and found to comply with the limits for a Class B digital device pursuant to Part 15 of the FCC rules. These limits are designed to provide reasonable protection against harmful interference in a residential installation. - Page 4 OVERVIEW INSTALLATION SCANNING MAINTENANCE TROUBLESHOOTING APPENDICES A & B...
- Page 5 (e.g., start scanning or scroll through Smart Touch options) without actually pressing the Start/Scroll buttons. • Kodak ScanMate i1150 Scanner — duplex scanner that scans 25 pages per minute at 200 and 300 dpi in black and white, color and grayscale with “burst”...
-
Page 6: What's In The Box
Keep this guide close to the scanner so you can use it as an easy reference. Accessories • Kodak A3 Size Flatbed Accessory — the Kodak A3 Size Flatbed adds scanning capability for exception documents up to 11 x 17-inch (A3) size paper. CAT No. 179 6747 •... -
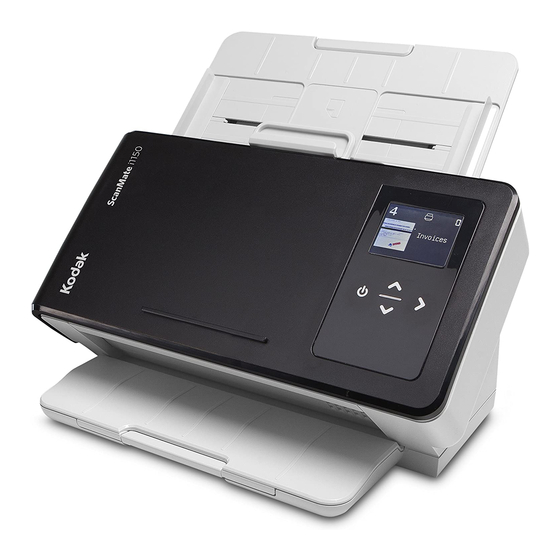
Page 7: Scanner Components
) and can be extended to accommodate documents up to legal size (14 inches). Side guides — the side guides on the Kodak ScanMate i1180 Scanner can be moved in and out to accommodate the size of the documents you are scanning. The side guides on the Kodak ScanMate i1150 Scanner are not adjustable. - Page 8 Indicates that no documents are in the input tray. If your scanner is connected to an optional Kodak A3 or Legal Flatbed Accessory, and there are documents in the input tray, the scanner will scan from the input tray.
- Page 9 Back view 1 Security lock port — connects a security lock to the scanner. You can purchase a standard security lock at an office supply store. Refer to the instructions provided with the security lock for installation procedures. 2 Power port — connects the power supply to the scanner. 3 USB port —...
- Page 10 Inside view 1 Paper present sensor — detects the presence of documents in the input tray. 2 UDDS and IDP sensor — used to detect multifeeds and document edges. 3 Pre-separation pad — pull this pad out of position when cleaning or changing the separation roller.
-
Page 11: Table Of Contents
NOTE: If you have already performed all of the steps in the Installation Guide, skip this section. Installing the Kodak Driver 1. Insert the Kodak ScanMate i1150/i1180 Scanners Installation disk in Software: Windows the disk drive. The installation program starts automatically. -
Page 12: Installing The Kodak Driver Software: Linux
• Depending on the operating system you are installing on (Ubuntu, Fedora, or SUSE) the installation procedures may be slightly different. • Kodak Scanner software requires QT3. Verify that your system has these installed (e.g., Fedora: Applications>Add/Remove Software). • You must be a super user to install the software. - Page 13 Connecting the power When the drivers have been installed, connect the power adapter and adapter and USB cable USB cable to the scanner. Refer to the illustration below for making proper connections. Make sure the power outlet is located within 1.52 metres (5 feet) of the scanner and is easily accessible.
-
Page 14: Turning The Scanner Off
5. Attach the other end of the USB cable to the proper USB port on your PC. Your scanner will automatically power up and be ready to use. ‘Waking up’ the scanner If the scanner is not already powered on, touch any button on the scanner (i.e., Up, Down, Start or Power). -
Page 15: Getting Your Scanner Ready To Scan
3 Scanning Contents Getting your scanner ready to scan ..........3-1 Getting your documents ready to scan ........... 3-2 Scanning with Smart Touch ............3-4 Getting your scanner 1. Be sure the scanner is on and ready to scan (Power button will be green and constant). -
Page 16: Getting Documents Ready To Scan
3. If necessary, adjust the input and output trays to accommodate your scanning needs. The output tray can be extended to accommodate documents up to 35.56 cm (14 inches) in length. An end stop is available to accommodate document stacking. Lift this end stop as needed for scanning documents up to A4 (11.7 inches). - Page 17 When in a batch, you need to place the small document first in the batch. Smart Touch — the Smart Touch application may have been installed when you installed the Kodak Driver Software. Kodak provides Smart Touch functionality which allows you to quickly and easily perform common scanning tasks;...
-
Page 18: Scanning With Smart Touch
Output folder in the Smart Touch directory under “My Documents”. NOTE: If you have a Kodak ScanMate i1150 Scanner and you are scanning 10 documents or less, your scanner will scan these documents at 40 pages a minutes (burst mode). Anything over... -
Page 19: Maintenance
4 Maintenance Contents Opening the scanner cover............. 4-1 Cleaning procedures............... 4-2 Cleaning the rollers ..............4-2 Cleaning the separation roller ............ 4-3 Cleaning the feed rollers ............4-5 Cleaning the imaging area ............4-8 Running a transport cleaning sheet..........4-8 Replacement procedures ............... -
Page 20: Cleaning Procedures
“Supplies and consumables” at the end of this chapter provides a listing of the supplies required to clean your scanner. IMPORTANT: Only use cleaners such as those provided through Kodak Parts Services. Do not use household cleaners. Allow surfaces to cool to ambient temperature before use. -
Page 21: Cleaning The Separation Roller
Cleaning the separation The separation roller should be removed from the scanner for best roller cleaning results. 1. Remove the pre-separation pad by grasping it and pulling it straight out. 2. Grasp the separation roller and pull it straight out. 3. - Page 22 5. Insert the separation roller by aligning the tab with the slot and snapping it into position. 6. Re-install the pre-separation pad by aligning the slots with the holes on the pre-separation pad and snapping it into place. A-61816 April 2014...
-
Page 23: Cleaning The Feed Rollers
Cleaning the feed rollers NOTE: Be careful not to damage the paper present sensor when removing or cleaning around the feed roller. 1. Remove the input tray. 2. Grasp the top edge of the feed roller cover and lift it out of position. 3. - Page 24 4. Rotate the lower feed roller so the pin is positioned with the open slot,. then lift the roller out of position. 5. Wipe the top and lower feed roller tires with a roller cleaning pad. A-61816 April 2014...
- Page 25 6. Inspect the feed rollers. If the feed roller tires show signs of wear or damage, replace the feed roller. See the “Replacement procedures” for more information. 7. Reinstall the lower feed roller by aligning the pin with the open slot and fitting it into position.
-
Page 26: Cleaning The Imaging Area
Cleaning the imaging area 1. Wipe the upper and lower imaging area using a Brillianze Detailer wipe (Step 1) or Staticide wipe. Be careful not to scratch the imaging area when cleaning. IMPORTANT: Staticide wipes contain isopropanol which can cause eye irritation and dry skin. -
Page 27: Replacement Procedures
Replacement Kodak Scanners use replaceable feed roller modules that can feed a wide range of document types, sizes and thicknesses. Module life and procedures performance will vary based on the customer’s document set, the frequency of cleaning the paper path and tires, and following the recommended schedule for changing the module. -
Page 28: Replacing The Pre-Separation Pad
Replacing the pre- 1. Remove the pre-separation pad by grasping it and pulling it out of separation pad position. 2. Discard the worn pre-separation pad. 3. Install the new pre-separation pad by aligning the slots with the holes on the pre-separation pad and snapping it into place. 4-10 A-61816 April 2014... -
Page 29: Replacing The Feed Roller
Replacing the feed roller NOTE: Be careful not to damage the paper present sensor when removing or cleaning around the feed roller. 1. Remove the input tray. 1. Pull on the edge of the feed roller cover and lift it out of position. 2. - Page 30 3. Rotate the lower feed roller so the pin is positioned with the open slot, then lift the roller out of position. 4. Install a new lower feed roller and top feed roller by aligning the pins with the open slots and fitting each roller into position. Be sure the gears are aligned and the roller snaps into place.
-
Page 31: Supplies And Consumables
Kodak Digital Science Roller Cleaning Pads (qty 24) 853 5981 Kodak Digital Science Transport Cleaning Sheets (qty 50) 169 0783 Staticide Wipes for Kodak Scanners (qty 6 boxes of 24) 896 5519 Brillianize Detailer Wipes / for Kodak Scanners 826 6488... -
Page 32: Troubleshooting
5 Troubleshooting Contents Problem solving ................5-1 Indicator lights................. 5-2 Contacting Service................5-2 Problem solving Occasionally you may encounter a situation with your scanner where it may not function properly. Use the chart below as a guide to check possible solutions to help you resolve the situation before calling Technical Support. -
Page 33: Indicator Lights
Problem Possible Solution Make sure that: Scanner will not scan/feed documents • the power adapter is plugged securely into the back of scanner and the wall outlet. • the wall outlet is not defective (call a licensed electrician). • the PC was restarted after installing the software. •... -
Page 34: Specifications
This appendix provides scanner specifications and system requirements. Scanner Type/Speed Kodak ScanMate i1150 Scanner — a duplex scanner that scans 25 pages per minute at 200 and 300 dpi in black and white, color and grayscale with “burst” (throughput speeds may vary... -
Page 35: System Requirements
Operating: less than 64 dB(A) (Sound Pressure level) Idle mode: less than 40 dB(A) Bundled Software TWAIN, ISIS, WIA Drivers, Smart Touch and Kodak Capture Pro Software Limited Edition TWAIN Drivers available from: www.kodakalaris.com/go/scanners System requirements Following is the recommended system configuration to run the Kodak i1150/i1180 Scanner: •... - Page 36 (including breakage of a connector, cover, glass, pins, or seal); (c) from service, modification or repair not performed by Kodak or a service provider authorized by Kodak or by tampering, use of counterfeit or other non-Kodak components, assemblies, accessories, or modules;...
-
Page 37: How To Obtain Limited Warranty Service
Warranty Service descriptions Kodak offers a range of service programs to support its Limited Warranty and to assist with the use and care of the Kodak Scanner (“Service Methods”). A Kodak Scanner represents an important investment. Kodak Scanners provide the productivity needed to stay competitive. -
Page 38: Depot Service
Scanners must obtain a Return Material Authorization number (“RMA”) by calling (800) 822-1414, and within ten (10) business days from the date of issuance of the RMA must return the Kodak Scanner to the address designated in the RMA at the end user’s own expense and risk. - Page 39 Website: www.kodakalaris.com/go/docimaging For U.S. Service, Repair and Technical Assistance by Telephone: Telephone technical support is available Monday-Friday between the hours of 5 a.m. to 5 p.m. excluding Kodak holidays. Phone: (800) 822-1414 For Technical Documentation and FAQ’s available 24 hours a day: Website: www.kodakalaris.com/go/docimaging...