Kodak ScanMate i1120 User Manual
Hide thumbs
Also See for ScanMate i1120:
- User manual (34 pages) ,
- Setting up (9 pages) ,
- Specifications (2 pages)
Table of Contents
Advertisement
Advertisement
Table of Contents

Related Manuals for Kodak ScanMate i1120


Summary of Contents for Kodak ScanMate i1120
- Page 1 ScanMate i1120 Scanner User’s Guide A-61602 Part No. 9E8497...
-
Page 2: Table Of Contents
Installing the scanner ......... . 5 Installing the Kodak Driver Software ......6 Assembling the scanner . - Page 3 Selecting Device settings ........42 The main Kodak Scanner window ....... 43 The Image Settings window .
-
Page 4: Introduction
The TWAIN Datasource is also bundled with the scanner for all of your image processing needs. This User’s Guide provides information and procedures for the Kodak ScanMate i1120 Scanner using the TWAIN Datasource. Product features • Easy to use. -
Page 5: Safety Information
USA, visit the Electronics Industry Alliance website: www.eiae.org. • The product packaging is recyclable. • The Kodak ScanMate i1120 Scanner is Energy Star compliant and is shipped from the factory with the default time set to 15 minutes. EMC statements... -
Page 6: Japan
This symbol indicates that when the last user wishes to discard this product, it must be sent to appropriate facilities for recovery and recycling. Please contact your local Kodak representative or refer to www.kodak.com/go/recycle for additional information on the collection and recovery programs available for this product. -
Page 7: Getting Started
- Quick Tips Guide - Miscellaneous flyers System requirements Following is the recommended system configuration to run the Kodak ScanMate i1120 Scanner. • Intel Pentium IV, 2.8 GHz processor, 512 RAM Minimum: Intel Pentium III, 1 GHz processor, 128 RAM •... -
Page 8: Installing The Scanner
7. Install other supplied applications (optional). IMPORTANT: • Install the Kodak Driver Software on the host PC before you connect the scanner. • Some operating systems will only support USB 2.0, and others only support USB 1.1. For best performance, use USB 2.0 when possible. -
Page 9: Installing The Kodak Driver Software
Install the driver software before connecting the scanner to your PC. Driver Software 1. Insert the Kodak ScanMate i1120 Scanner Installation CD in the CD-ROM drive. The installation program starts automatically. NOTE: If the CD does not start automatically, open the My Computer icon on your desktop. - Page 10 The Welcome window will be displayed. 5. Click Next. The Software License Agreement window will be displayed. 6. After reading the agreement, click I Agree. NOTE: You may be prompted to enter your Name and Company. If so, enter the information on the displayed screen and click Next. A-61602 January 2008...
- Page 11 The following screen may be displayed. 7. Click Continue Anyway, The installation will begin. 8. When the installation is complete, the following window will be displayed. 9. Click Finish. A-61602 January 2008...
-
Page 12: Assembling The Scanner
Assembling the scanner The input tray snaps into place. Attaching the input tray 1. Attach the two input tray pieces by aligning the slots and snapping them together. 2. Open the scanner cover. 3. Locate and align the four tabs on the input tray with the slots on the scanner. - Page 13 Attaching the output tray 1. Locate the output tray slots on the scanner. 2. Align the output tray pins with the slots and lower the output tray into place. NOTE: The output tray can be folded up when not in use for easy storage.
-
Page 14: Verifying For A Usb Port
Verifying for a USB port After you install the Kodak Driver Software, check for the presence of a USB port. • Select USB Test. The USB verification tool will check your operating system and hardware capability to determine if you need to install the USB card. -
Page 15: Connecting The Power Cord To The Scanner
Connecting the power When the drivers have been installed, connect the power supply and cord to the scanner power cord to the scanner. Make sure that the power outlet is located within 1.52 metres (5 feet) of the scanner and is easily accessible. 1. -
Page 16: Connecting The Usb Cable
Connecting the USB IMPORTANT: If you have not installed the Kodak Driver Software, cable do that now before proceeding. The following instructions explain the connection of the USB cable between your scanner and PC. You need to identify the USB port on your PC. -
Page 17: Turning On The Scanner And Finalizing Kodak Driver Software Installation
Turning on the scanner When the USB cable and power connections have been made, and the and finalizing Kodak Kodak Software Drivers have been properly installed, the installation will be complete when the scanner is turned on. Driver Software installation 1. - Page 18 The Hardware Update Wizard screen will be displayed. 4. Click Finish. When the installation process is complete and ready to scan, the LED indicator will stop flashing and stay green and the number 1 will be displayed in the function window. NOTES: •...
-
Page 19: Installing Application Software
During the final installation process, this screen may be displayed: 5. If the above screen is displayed, select Yes. The installation of the Kodak device driver for the scanner is complete. To test the scanner, refer to the section entitled, “Verifying your scanner installation”... -
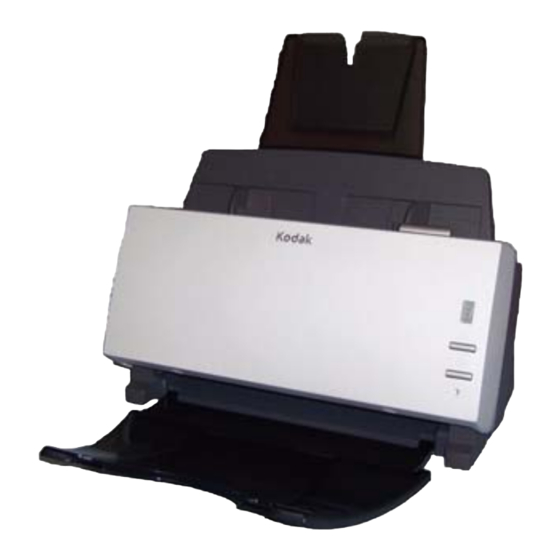
Page 20: Scanner Components
Scanner components Front view Input tray Scanner cover release button Scanner cover Function window Arrow button Output tray Start button Output tray Indicator LED light extension Input tray — holds up to 50 documents in place. Adjusts to fit the document size. - Page 21 Inside view Rollers Pre-separation pad Calibration guide Calibration guides — for optimum image quality, keep the calibration guides clean. Pre-separation pad — provides smooth document feeding and separation of various sizes, thicknesses and textures of documents. Rollers — provides smooth document feeding of various sizes, thicknesses and textures of documents.
-
Page 22: Using The Scanner
3 Using the Scanner Turning the scanner • Press the button on the back of the scanner to turn the scanner on (I) or off (O). on and off After you turn on the scanner, wait for it to complete the self-test. When completed, the green indicator light will remain on and constant. -
Page 23: Start And Stop Scanning
Start and stop Before you start scanning, make sure the scanner is on and ready for operation, which is indicated by the green indicator light being on and scanning constant. Scanning is controlled by software developed for your application. To start and stop scanning, refer to the documentation provided with your application software. -
Page 24: Verifying Your Scanner Installation
Validation Tool or click the Scan Validation Tool icon. The Scan Validation Tool dialog box will be displayed. 2. Select TWAIN for the Driver Types and Kodak Scanner: i1120 as the driver. The Scan Validation Tool dialog box will be displayed. - Page 25 The main Kodak Scanner window will be displayed. 5. Select the Default Setting Shortcut. 6. Click OK. This resets the software to the factory-installed default settings. The factory default settings are set to capture black and white images. The Scan Validation Tool dialog box will be displayed.
-
Page 26: Viewing Test Images
The documents will be scanned and displayed in the Scan Validation Tool dialog box. NOTE: If the scanner is in power saver mode, a message will be displayed that the lamps need sufficient time to warm up. Scanning will proceed when the lamps are ready. After the images have been displayed, your scanner installation verification is completed. -
Page 27: Smart Touch Functionality
Smart touch Smart touch functionality allows you to quickly and easily perform common scanning tasks. Nine different functions can be assigned and functionality performed. You can perform any of the functions by pressing the Start button on the scanner or by selecting the function from the smart touch function listing. -
Page 28: Configuring Dialog Box
Administrator rights are required to change this setting. The software can be started from the Program group by selecting Start>Programs>Kodak>Document Imaging>i1120>Smart touch. The software will also start automatically if you scan documents using the Start button on the scanner. -
Page 29: Scan To Settings
Scan To settings Destination — allows you to select one of the following options: • File: creates an electronic file from the scanned documents and saves it in the location specified in the Folder path. • Application: creates an electronic file from the scanned documents and launches the application program for the saved file. - Page 30 File Type — select one of these options based on how you want to save or send the scanned image(s). Available formats are: • PDF: Adobe PDF files (Portable Document Files) look exactly like original documents and preserve the fonts, images, graphics and layout of the source files regardless of the application and platform used to create it.
-
Page 31: Scan As Settings
Scan As settings Settings Shortcut — displays the name of a group of scanner settings currently defined for use by the Kodak Scanner. This named group of scanner settings is called a shortcut and is described in more detail in Chapter 4. -
Page 32: Configuring Function Numbers
Configuring function 1. Click the smart touch icon on the system tray to display the smart numbers touch function listing and select Configure. The Configuration dialog box will be displayed. 2. Select the Task shortcut you want to configure from the Task Shortcut drop-down list. - Page 33 9. If desired, select a different scanner Settings Shortcut based on the type of document you are scanning by selecting the Settings button on the Kodak Scanner window. 10. If you want to select your scanner Settings Shortcut before scanning, check Display settings prior to scanning from the smart touch Configuration dialog box.
-
Page 34: Third Party Applications
Third party applications If installed, the PaperPort, OmniPage, and BizCard applications provided with the scanner can be selected as a destination for scanned documents. This allows easy access to the applications via a button press on the scanner. To configure a task shortcut to one of the application programs, just select it from the Destination list box as you would any other choice. - Page 35 4. Select Save As and provide a new name for the shortcut, i.e, Business Cards. 5. Select Save and OK to return to the Configuration dialog box. 6. Select Apply in the Configuration dialog box. Your complete task shortcut settings may look as follows: A-61602 January 2008...
-
Page 36: Smart Touch Edit Window
Smart touch Edit window The smart touch Edit window allows you to view the scanned images before sending them to the final destination. As documents are scanned, the images will be displayed in the Edit window. From this window you can perform common editing tasks such as, rotating and deleting blank pages, etc. - Page 37 These icons are available on the Edit window. To use a tool, click on the icon to select the tool, then apply it to the desired image. Start — allows you to scan additional documents and append them to the current images. Stop —...
-
Page 38: Using Function Numbers
Using function numbers When you have assigned the function numbers, they can be easily launched by using the Start button on the scanner or from the smart touch function listing. Launching from the scanner: 1. Use the arrow button to scroll through the function numbers and select the desired function. -
Page 39: Image Processing
Starting the Scan 1. Select Start>Programs>Kodak>Document Imaging>Scan Validation Tool. Validation Tool 2. Select TWAIN for the Driver Type and the Kodak Scanner: i1120 as the Driver. The Scan Validation Tool dialog box will be displayed. A-61602 January 2008... -
Page 40: Scan Validation Tool Dialog Box
Scan Validation Tool The Scan Validation Tool (SVT) is a diagnostic application provided by Kodak. The SVT user interface allows access to all the features of the dialog box scanner and is a good way to verify that the scanner is working properly. -
Page 41: Using The Twain Datasource
Last File displays the full path and file name for the last stored image. Using the TWAIN The Kodak ScanMate i1120 Scanner provides a wide variety of electronic images. This can be done by using the TWAIN datasource datasource Kodak provides in concert with your scanning application. -
Page 42: How Do I Begin
The procedures that follow describe how to configure a customized Setting Shortcut. Complete descriptions of the features and options on the main Kodak Scanner window and tabs are found in the section entitled, “The main Kodak Scanner window”. NOTE: Setting Shortcuts can sometimes be overridden by your scanning application. -
Page 43: Selecting Image Settings
Selecting Image settings From the main Kodak Scanner window: 1. Select a predefined Setting Shortcut from the Setting Shortcuts list. Choose a Setting Shortcut that describes as closely as possible the image output you desire. 2. Determine if you want to capture an electronic image of the front of... - Page 44 Steps 3 - 5 to until you get the desired results. 6. If you made any changes to a predefined default Setting Shortcut, click Save As on the main Kodak Scanner window. The Save As dialog box will be displayed.
-
Page 45: Selecting Device Settings
6. On each tab, select the appropriate options or action you want the scanner to perform. 7. When finished: • Click Home to return to the main Kodak Scanner window and click Save to save your selections to your custom Setting Shortcut, or •... -
Page 46: The Main Kodak Scanner Window
The main Kodak The main Kodak Scanner window is the home window of the scanner’s user interface. You can scan by simply selecting a Setting Shortcut and Scanner window then selecting OK/Scan. Setting Shortcuts — provides a listing of the Setting Shortcuts currently set up. - Page 47 • If you have made changes to a Setting Shortcut and have not saved your changes, the Setting Shortcut will be appended with the text <changed>, and the name will be displayed in italics (e.g., *Default<changed>). Input document is — allows you to select which sides of the document has information that you want an electronic image of.
- Page 48 NOTE: If this button is OK, any unsaved changes will remain in effect for the current scan session. Cancel — closes the main Kodak Scanner window without saving any changes. Information Icons About: displays the scanners’ version and copyright information.
-
Page 49: The Image Settings Window
The Image Settings From this window you can define image processing options by using the available tabs. The values used in Image Settings are saved in the window selected Setting Shortcut. The Image Settings window includes the following tabs: General, Size, Adjustments and Enhancements. Side —... -
Page 50: Preview Area
OK/Scan — when selected, you will be prompted to save any unsaved changes. NOTE: If this button is OK, any unsaved changes will remain in effect for the current scan session. Cancel — closes the main Kodak Scanner window without saving any changes. A-61602 January 2008... -
Page 51: General Tab
General tab The General tab contains the commonly used image options. In most cases, you will not have to change options on other tabs. Scan as — allows you to select the electronic image format. • Color (24-bit): produces a color version of your document. •... - Page 52 Compression — allows you to reduce your electronic image size. • Type: the scanner will produce a color version of your document. - (none): no compression, which may produce a large image size. - Group-4: uses a CCITT standard to compress a black and white image, often used in conjunction with TIFF files.
-
Page 53: Size Tab
Size tab The Size tab allows you to define values relating to the image output (i.e., cropping values, paper size, etc.). Document — allows you to select how the scanner will detect your document as it is being fed through the scanner. •... - Page 54 Outline — allows you to select the location and size of your electronic image. The preview area will show the outline. • Origin (x, y): - if you select Document: Manually Select, (x) is the distance from the left edge of the scanner’s paper path and (y) is the distance from the first portion of the document detected by the scanner.
- Page 55 Post-scan rotation options — allows you to select any rotation to be applied to the electronic image after it has been scanned. • (none) • 90, 180, 270 degrees — the amount of rotation that will be performed. The following example shows how these settings effect a document that was fed landscape: Landscape Feed Orientation...
-
Page 56: Adjustments Tab: Black And White
Adjustments tab: black The options available on the Adjustments tab depend on the Scan as and white selection on the General tab. The following options are based on a Scan as selection of Black and White. Conversion quality — these settings effect how the scanner analyzes a grayscale version of the document which is used to produce the black and white electronic image. - Page 57 Threshold — aids in controlling the level at which a pixel is considered black or white. Decreasing this setting will make the image appear lighter, and can be used to subdue background noise. Increasing this setting will make the image appear darker, and can be used to help pick up light information.
-
Page 58: Adjustments Tab: Color
Adjustments tab: color The options available on the Adjustments tab depend on the Scan as or grayscale selection on the General tab. The following options are based on a Scan As selection of Color or Grayscale. Brightness — changes the amount of white in the color or grayscale image. -
Page 59: Enhancements Tab
Enhancements tab The options on the Enhancements tab depend on the Scan as selection on the General tab. Image Edge Fill — fills the edges of the final electronic image by covering the area with the specified color. • Color: allows you to select the color to fill the edges with. - (none) - White - Black... - Page 60 Blank Image Detection — allows you to configure the scanner to not include blank images. • On: turns Blank Image Detection on and makes the rest of the Blank Image Detection options available. • Delete if file size is less than: allows you to select the minimum image size that the scanner will consider to be non-blank.
-
Page 61: Advanced Image Setup
Advanced Image Setup The Advanced tab The Advanced Image Setup icon is located at the top of the Image Settings window next to the Side drop-down box. When you select the Advanced Image Setup icon, the Advanced tab will be displayed. Input document is —... - Page 62 NOTE: The Different settings per side option is only available for duplex scanner models. Images per side — indicates how many images the scanner will create for a side, based on you imaging selections. • One: indicates you want the scanner to create one image. •...
- Page 63 Images to Configure — indicates which electronic images you need to configure. NOTE: This is only available if you select anything other than One from the Images per side option. For procedures on how to configure advanced options, see the sections that follow, entitled: •...
-
Page 64: Creating Multiple Images For Each Side Of A Document, Example 1
Example 1 side of each document. 1. Select a Setting Shortcut from the main Kodak Scanner window that closely describes your desired output. 2. Select Settings to display the Image Settings window. - Page 65 NOTE: Make any other adjustments to the black and white image settings on the rest of the tabs on the Image Settings window. 11. When finished, select Home to return to the main Kodak Scanner window and then select Save to save your selections to the shortcut.
-
Page 66: Creating Different Settings For Each Side Of A Document, Example 2
Example 2 1. If you are not already on the Advanced tab: • Select a Setting Shortcut from the main Kodak Scanner window that closely describes your desired output. • Select Settings to display the Image Settings window. - Page 67 NOTE: Make any other adjustments to the back side settings on the rest of the tabs on the Image Settings window. 10. When finished, select Home to return to the main Kodak Scanner window and then select Save to save your selections to the shortcut.
-
Page 68: Creating A New Setting Shortcut
Creating a new 1. From the main Kodak Scanner window, select a Setting Shortcut from the list. It is recommended that you select a shortcut that most Setting Shortcut closely describes the desired image output. 2. Determine if you want to capture an electronic image of the front of your document, back of your document or both sides of your document and make the selection from the Input document is field. - Page 69 8. Review each tab and select the appropriate options or actions you want the scanner to perform. 9. Select Home to return to the main Kodak Scanner window. 10. Select Save As to display the Save As window. 11. Enter a new shortcut name that is meaningful to you and select Save.
-
Page 70: Changing Image Settings
Changing Image 1. Select a Setting Shortcut from the main Kodak Scanner window that closely describes your desired output. settings 2. Select an Input document is option from the main Kodak Scanner window. 3. Select Settings to display the Image Settings window. -
Page 71: The Device Settings Window
NOTE: If this button is OK, any unsaved changes will remain in effect for the current scan session. Cancel — closes the main Kodak Scanner window without saving any changes. Information Icons About: displays the scanners’ version and copyright information. -
Page 72: Device - General Tab
Device - General tab The General tab allows you to set scanner-specific transport control options. Paper Source • Document Feeder: when you are scanning documents from the input tray. Power Saver — allows you to set the amount of time the scanner has to be inactive before going into power saver mode. -
Page 73: Device - Multifeed Tab
Device - Multifeed tab Multifeed detection aids in document processing by detecting documents that may go through the feeder overlapped. Multifeeds can happen due to stapled documents, adhesives on documents, or electrostatically charged documents. Length Detection — allows you to select the maximum length of the documents in your job set. -
Page 74: Changing Device Settings
Changing Device 1. Select a Setting Shortcut from the main Kodak Scanner window that closely describes your desired output. settings 2. Select Settings to display the Image Settings window. 3. Select Device to display the Device Settings window. 4. Before making any adjustments, browse through the tabs on the Device Settings window to get familiar with options that are available. -
Page 75: The Diagnostics Window
The Diagnostics From this window you can access the diagnostic functions of the scanner. The Diagnostics window includes the following tabs: General, window Debug and Logs. The Diagnostics window can be accessed via the Diagnostics button which is located on the General tab of the Device Settings window. -
Page 76: Diagnostics - Debug Tab
Click the drop-down box to select from Off (the default), On or Custom. It is suggested that you do not use the Custom setting unless directed to do so by Kodak support personnel. -
Page 77: Diagnostics - Logs Tab
Toolbar buttons Save As — saves all the logs for viewing by Kodak support personnel. When selected, you will be prompted for the location to save the logs along with the option of including any debug images. -
Page 78: Maintenance
“Supplies and consumables” at the end of this chapter provides a listing of the supplies required to clean your scanner. IMPORTANT: Use only non-flammable cleaners such as those provided through Kodak Parts Services. Do not use household cleaners. Do not use cleaners in confined areas, use with adequate ventilation. -
Page 79: Cleaning The Rollers
3. Wipe the NFR rollers from side to side. Rotate the NFR rollers to clean the entire surface. NOTE: For easier cleaning of the NFR rollers, you may want to order Kodak ScanMate i1120 Scanner Cleaning Swabs. For ordering information see the section entitled, “Supplies and Consumables” later in this chapter. -
Page 80: Cleaning The Pre-Separation Pad
Cleaning the pre- 1. Open the scanner cover. separation pad 2. Squeeze the plastic clamps that hold the pre-separation pad in place and lift the pre-separation pad out of position. 3. Wipe the pre-separation pad from top to bottom with a roller cleaning pad. -
Page 81: Cleaning The Calibration Area
Cleaning the calibration 1. Open the scanner cover. area 2. Remove dust and debris from this area by using a Staticide wipe or a small brush. Be careful not to scratch the glass (may cause image quality problems) or bend the white tabs on the front calibration guide (bending the tabs may cause paper feeding problems) when cleaning the calibration area. -
Page 82: Replacement Procedures
Replacement procedures Replacing the pre- Degradation of feeder performance, multiple feeds, stoppages, etc. separation pad indicate a need to change the pre-separation pad. Certain paper types such as carbonless paper or newsprint, or failure to clean regularly, and/or use of non-recommended cleaning solvents can shorten the pre- separation pad life. -
Page 83: Replacing The Feed Roller Assembly
Replacing the feed roller 1. Open the scanner cover. assembly 2. Remove the input tray by pulling it forward and lifting it out of position. Set it aside. 3. Rotate the orange tab upward to release the feed roller assembly. 4. - Page 84 5. Install the new feed roller assembly by aligning the shaft end of the assembly in position. 6. With the orange tab in the upward position, snap the feed roller assembly in place. 7. Rotate the orange tab down. If the tab is not in the down position, you will not be able to reinstall the input tray.
-
Page 85: Supplies And Consumables
Kodak ScanMate i1120 Scanner Cleaning Swabs 824 5862 Kodak Digital Science Roller Cleaning Pads 853 5981 Kodak Digital Science Transport Cleaning Sheets (qty 50) 169 0783 Staticide Wipes for Kodak Scanners 896 5519 NOTE: Items and catalog numbers are subject to change. -
Page 86: Troubleshooting
6 Troubleshooting Occasionally you may encounter a situation with your scanner where it may not function properly. Refer to the information in this chapter to help you resolve the situation before calling Technical Support. Indicator lights and The indicator lights provide information on the current state of the scanner. -
Page 87: Problem Solving
Problem solving Use the chart below as a guide to check possible solutions to problems you may encounter when using the Kodak ScanMate i1120 Scanner. Problem Possible Solution Make sure that: Scanner will not scan/feed documents • the power cord is plugged securely into the back of scanner and the wall outlet. - Page 88 If you are scanning a document with a reflective area (such as a Image appears to be cut off hologram on a credit card), and this reflective area is fed “face up” and off-center such that it passes over the left-edge sensor, the sensor will be triggered as if it were the end of the page and will result in a cut-off image.
-
Page 89: Scanner Not Working
2. Click on the Hardware tab and select Device Manager. 3. From the Device Manager screen, select Imaging devices. If the Kodak ScanMate i1120 Scanner appears, with a ? before the name, you need to reinstall the driver software. A-61602 January 2008... - Page 90 4. Double-click on the Kodak ScanMate i1120 Scanner. The Scanner Properties dialog box will be displayed. Select the Driver tab. 5. Click Update Driver. The Upgrade Device Driver Wizard will be displayed. 6. Click Next. A-61602 January 2008...
- Page 91 7. Click Next. 8. Insert the Installation CD in the CD-ROM drive and locate the kdssti.in file. 9. Click Open and proceed with the prompts to install the driver. A-61602 January 2008...
-
Page 92: Testing For A Usb Connection
Testing for a USB When the Kodak device drivers for the Kodak ScanMate i1120 Scanner connection is installed, a copy of the USB test software will also be installed. It will be located in this folder (by default) along with the Kodak Scan Validation Tool software: C:\program files\Kodak\Document Imaging\usbtst.exe... -
Page 93: Usb Connection Issues
Your operating system only supports USB 1.1 There are some host PC operating systems that will not support USB 2.0, but support USB 1.1. The Kodak ScanMate i1120 Scanner is rated and designed to operate with USB 2.0, but will function in a USB 1.1 port, however, the scanner will only perform at a USB 1.1 speed. - Page 94 You do not need to install any additional USB card(s) The host PC operating system will only support USB 1.1 and will not support USB 2.0, but did find a USB port. The Kodak ScanMate i1120 Scanner is rated and designed to operate with USB 2.0, but will function in a USB 1.1 port, however, the scanner will only perform at a...
-
Page 95: Appendix A Specifications
Appendix A Specifications Scanner Type/Speed Duplex color scanner with an automatic document feeder, 20 pages per minute (landscape) Scanning Technology CCD type, 600 dpi optical resolution Grayscale output bit depth is: 8 Color capture bit depth is: 24 Color output bit depth is: 24 Output Resolutions 75, 100, 150, 200, 240, 300, 400, 600 and 1200 dpi File Format Output... - Page 96 Eastman Kodak Company 343 State Street Rochester, NY 14650 U.S.A. © Kodak, 2007. All rights reserved. TM: Kodak, ScanMate...