Table of Contents
Advertisement
Quick Links
Advertisement
Table of Contents

Related Manuals for Mitsubishi LDT323V


Summary of Contents for Mitsubishi LDT323V
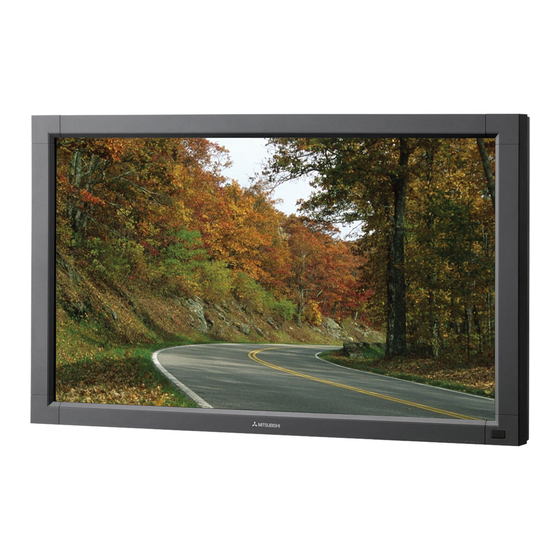
- Page 1 USER S MANUAL...
-
Page 2: Table Of Contents
Index Features ....................................English-2 Important Information ................................English-3 Declaration ....................................English-5 Safety Precautions, Maintenance & Recommended Use ....................... English-6 Contents ....................................English-7 Parts Name and Functions ............................... English-8 Buttons, Switch, and Indicator ..........................English-8 Connectors and Terminals ............................English-9 Wireless Remote Control ............................English-10 How to Use the Wireless Remote Control ........................ -
Page 3: Features
Features Wide-range Co lo r Temperature Adjustment Page 34 The display color temperatures can be adjusted from 2,600 K to 10,000 K. Such a wide range adjustment is important for industries such as broadcasters and food retailers where color accuracy and esh tones are critical. Tiling Capability with Frame c o mpensatio n Page 39 Up to 25 panels (5 wide x 5 high) can be combined to create a single large image (i.e., video wall) or other high-impact signage. -
Page 4: Important Information
(2) this device must ac cept any interference rec eived, including interference that may c ause undesired operation. U.S. Respo nsible Party: Mitsubishi Digital Elec tro nic s Americ a, Inc . Address: 9351 Jero nimo Ro ad, Irvine, Califo rnia 92618 U.S.A. - Page 5 Important Info rmation (c o ntinued) WARNING TO PREVENT FIRE OR SHOCK HAZARDS, DO NOT EXPOSE THIS UNIT TO RAIN OR MOISTURE. ALSO, DO NOT USE THIS UNIT S POLARIZED PLUG WITH AN EXTENSION CORD RECEPTACLE OR OTHER OUTLETS UNLESS THE PRONGS CAN BE FULL Y INSERTED. REFRAIN FROM OPENING THE CABINET AS THERE ARE HIGH VOL TAGE COMPONENTS INSIDE.
-
Page 6: Declaration
Dec laratio n Dec laration of the Manufac turer We hereby certify that the color monitor LDT323V (BH030) and marked with is in c ompliance with Council Direc tive 2006/95/EC: EN 60950-1 Counc il Direc tive 2004/108/EC: EN 55022 Mitsubishi Electric Corporation... -
Page 7: Safety Precautions, Maintenance & Recommended Use
Safety Precautions, Maintenance & Recommended Use FOR OPTIMUM PERFORMANCE, PLEASE NOTE THE FOLLOWING WHEN SETTING UP AND USING THE LCD COLOR MONITOR: CAUTION: DO NOT REMOVE MONITOR BACK COVER. There are Immediately unplug your monitor from the wall outlet and refer no user serviceable parts inside and opening or removing servicing to quali ed service personnel under the following covers may expose you to dangerous shock hazards or... -
Page 8: Contents
Contents Your LCD monitor (LDT323V) comes with the following: 31.5" LCD Display Mo nito r USER S MANUAL Video Signal Cable (Mini D-SUB 15-pin to Mini D-SUB 15-pin Cable) User s Manual LCD Monitor Screw (M4x8) x 2 (For Clamper) -
Page 9: Parts Name And Functions
Parts Name and Func tions Buttons, Switc h, and Indic ator Button Location Main Power Switc h INPUT butto n Switches the main power on/off. Displays the OSD menu to switch the video input. You can select [RGB1], [RGB2], [RGB3], [RGB4], [DVD/HD], Remo te c o ntro l senso r and Power indic ato r [VIDEO<S>], or [VIDEO] using the UP ( ) or DOWN (... -
Page 10: Connectors And Terminals
Connects with the supplied power cord. IN connector: Connects with the RS-232C OUT connector of a computer or EXTERNAL SPEAKER TERMINAL other connected LDT323V . Connects with the special stereo speakers (option). OUT connector: AUDIO IN Connects with the RS-232C IN connector of other connected Connects with the audio output connector of external LDT323V . -
Page 11: Wireless Remote Control
Parts Name and Func tions (c o ntinued) Wireless Remote Control AUDIO INPUT butto ns Select the audio input from [AUDIO1], [AUDIO2], [AUDIO3], and [HDMI]. However, note that [VIDEO<S>] and [VIDEO] use common settings. You can select [HDMI] only when the video input source is [RGB1]. -
Page 12: How To Use The Wireless Remote Control
Parts Name and Func tions (c o ntinued) How to Use the Wireless Remote Control Ope rating Rang e o f the Wire le s s Re mo te Ins talling the Wire le s s re mo te c o ntro l Control batteries Point the wireless remote control toward the LCD monitor s... -
Page 13: Preparation For Use
Preparation for use Flow of preparation Preparatio n fo r installation Page 13 - Determine the installation location - Ventilation requirements for enclosure mounting Carry out as necessary Installing the monito r Pages 14 to 15 - Installing and removing the stands (The stands are optionally available.) - Installing the main switch cover - Using the wall mount or ceiling mount - Installing in the portrait position... - Page 14 CAUTION: pillar using rope (commercially available) strong enough to bear DO NOT ATTEMPT TO INST ALL THE LCD MONITOR BY the weight of the monitor. [LDT323V: approximately 14.5 kg (with YOURSELF . the optional stands)] Installing your LCD monitor must be done by a quali ed Use of screw hooks (with opening) is recommended.
-
Page 15: [P-2] Installing The Monitor
Use M6 screws (having a length 10 mm longer than the thickness of the mounting bracket) and tighten them securely. Prevent the screws from loosening using spring washers, etc. MITSUBISHI ELECTRIC recommends using mounting interface Option stand x 2 that comply with T V-GS and/or UL 1678 standard in North (Longer portion comes to the front.) -
Page 16: Installing In The Portrait Position
Installing the mo nitor (c o ntinued) Carry o ut as nec essary Installing in the portrait position Co nditio ns: LDT323V can be installed in the portrait position, under the following conditions: CAUTION: Portrait position is available only when the monitor is wall- mounted or ceiling-mounted. -
Page 17: [P-3] Installing The Speakers
Installing the speakers Carry o ut as nec essary Before c o nnec ting the signal c able to PC and Video Optional speakers can be installed. Please refer to user s guide of the optional speakers for the detailed installation procedure. How to install the o ptio nal speakers 1. -
Page 18: P-4] Connection Procedure
Connec tion pro c edure Befo re making c o nnec tions First turn off the power of all the connected equipment before making connections. Refer to the user manual of each piece of equipment. NOTE: Please use the audio cable without resistance when the audio output terminal of the audio device and PC is stereo mini-Jack. When the audio cable with resistance is used, the audio level may not be increased or no audio may be output. -
Page 19: Connecting With A Computer (Analog Connection)
Connec tio n proc edure (c o ntinued) Connec ting with a c omputer (analog c onnec tion) Analog c onnec tio n: Co nnec tio n via RGB3 IN (D-SUB) c o nnec tor (1) Connect an RGB cable (mini D-SUB 15-pin mini D-SUB 15-pin) (accessory) to the RGB3 IN connector. (2) Select [RGB3] using the INPUT button on the monitor or the D-SUB button on the wireless remote control. -
Page 20: Connecting With A Computer (Digital Connection)
Connec tio n proc edure (c o ntinued) The monitor automatically distinguishes the timings shown in the table below and sets the screen information. When a PC or other device is connected, it automatically displays images properly. <Fac to ry preset timing> Frequency Frequency Resolution... -
Page 21: Connecting A Video Device (Component Video/Hdmi Device)
Connec tio n proc edure (c o ntinued) Connec ting a video devic e (c omponent video/HDMI devic e) This monitor can be connected to a video device equipped with component output such as a DVD player. Refer to the user s manual of the connected device for details. (Cables shown in the gure below are commercially available.) To connect a DVD player equipped with component output to the DVD/HD IN connector (YPbPr or YCbCr) on the monitor, use a BNC cable (BNC x 3 BNC x 3) and a BNC-RCA adaptor (commercially available), or a signal cable (BNC x 3 D connector). -
Page 22: Connecting A Video Device (Composite Video/S Video Device)/Stereo Ampli Er
Connec tio n proc edure (c o ntinued) Connec ting a video devic e (c omposite video/S video devic e)/stereo ampli er This monitor can be connected to a stereo ampli er. Refer to the user s manual of the stereo ampli er for details. (Cables shown in the gure below are commercially available.) To connect a video device to the VIDEO IN connector (VIDEO IN or S-VIDEO IN) on the monitor, use a BNC cable or an S video cable. -
Page 23: P-5] Connecting The Power Cord To The Monitor
Connec ting the power c ord to the monitor Connec ting the power sourc e The power outlet socket should be installed as near the equipment as possible and should be easily accessible. Fully insert the prongs into the power outlet socket. Loose connection may cause noise. -
Page 24: How To Use
How to Use Flow of How to Using Turning o n all the c onnec ted devic es Page 24 Selec ting the video input Page 25 Co ntro lling the external devic es Page 26 RGB3 and RGB4 only Auto -setup Page 26 U- 4... -
Page 25: U-1] Turning On All The Connected Devices
Turning on all the c onnec ted devic es Turning on external devic es Power Indic ato r Status Power ON Green 1. Turn on the c onnec ted devic es suc h as Power OFF the c omputer and VCR. Power Standby when Red On SCHEDULE is enable... -
Page 26: Selec Ting The Video Input
Selec ting the video input You can select the desired video input using the wireless remote control or the INPUT button on the monitor. 1. Selec t using the INPUT buttons on the wireless remote c ontrol. You can select the desired video input by pressing the corresponding INPUT button on the wireless remote control. Selectable video inputs are [RGB1] (HDMI), [RGB2] (DVI-D), [RGB3] (D-SUB), [RGB4] (BNC), [DVD/HD] (YPbPr), [VIDEO<S>], and [VIDEO]. -
Page 27: Controlling The External Devic Es
Controlling the external devic es You can control the externally connected devices to display images supplied from them. VCR, etc. Personal computer Auto -setup Analog inputs o nly The AUTO SETUP button on the wireless remote control or AUTO SETUP in the OSD menu automatically adjusts the screen size, horizontal/vertical position, clock, clock phase, white level, and black level. -
Page 28: Sc Reen Adjustment
Sc reen adjustment When images aren t displayed properly even after the auto setup, you can alternatively adjust the screen by pressing the MENU button on the wireless remote control or the control buttons on the bottom of the monitor to display the OSD menu. Using the SCREEN settings in the OSD menu, you can adjust the horizontal/vertical position, clock, clock phase, CUSTOM ZOOM, horizontal resolution, vertical resolution, and input resolution. -
Page 29: [U-10] Remote Control
Volume c ontro l Carry o ut as nec essary When outputting audio from the option stereo speakers, you can control the volume level using the VOL button on the wireless remote control. In addition, you can adjust the volume by pressing the MENU button on the wireless remote control or the control buttons on the bottom of the monitor to display the OSD menu. -
Page 30: Sc Hedule Setting Pages 28 To
Sc hedule setting (c ontinued) Carry o ut as nec essary Check box Radio button When the cursor is on any of the check boxes showing the program numbers 1 to 7 on the left side of the screen, pressing the UP ) or DOWN ( ) button moves the cursor vertically and pressing the PLUS (+) or MINUS (-) buttons moves it horizontally. -
Page 31: Rs-232C Remote Control
U-10 Remote c ontrol Carry o ut as nec essary RS-232C Remote c ontrol By connecting multiple LCD monitors and a computer using RS-232C cables (commercially available), you can control the monitors from the computer for the following operations: Power ON or OFF Switching between input signals Volume control and mute Auto setup... -
Page 32: Remote C Ontro L Pages 30 To
U-10 Remote c ontrol (c ontinued) Carry o ut as nec essary 3) Control sequence (1) A command is sent from the computer to the monitor. (Commands should be sent at intervals of at least 600 ms.) (2) The monitor sends a return command within 600 ms* after receiving and encoding the command. If the monitor fails to receive the command, it doesn t send any return command. -
Page 33: Con Guration And Basic Operation Of Osd Screen
Con guration and basic operation of OSD sc reen Con guration of OSD sc reen This monitor is equipped with the OSD (On Screen Display) function for easy screen adjustment. The OSD function allows you to control the menus displayed on the screen for brightness setting and other settings. The OSD screen is con gured as shown below. -
Page 34: Basic Operation Of Osd
Co n guration and basic operation of OSD sc reen (c ontinued) Basic operation of OSD When the MENU button on the wireless remote control or the EXIT button on the monitor is pressed, the OSD screen is displayed. Select a main menu by pressing the button. -
Page 35: Osd Screen Functions
OSD sc reen func tions BRIGHTNESS COLOR You can adjust the brightness. * For the RGB1, DVD/HD, VIDEO<S>, and VIDEO inputs only. Press the PLUS (+) button to increase the brightness. Press the MINUS (-) button to decrease the brightness. When you select COLOR by pressing the SET button on the wireless remote control, the COLOR screen appears and CONTRAST... - Page 36 OSD sc reen func tions (c ontinued) SCREEN REAL: The image is displayed without being stretched AUTO SETUP or reduced. * For the RGB3 and RGB4 inputs only. NOTE : In the DYNAMIC mode, the top and the bottom of Press the SET button to automatically adjust the screen the image may be cropped.
- Page 37 OSD sc reen func tions (c ontinued) AUDIO BALANCE You can adjust the balance of the right and left volumes. Press the PLUS (+) button to decrease the left volume. Press the MINUS (-) button to decrease the right volume. TREBLE You can adjust the high frequency sound.
- Page 38 OSD sc reen func tions (c ontinued) PIP (PICTURE IN PICTURE) NOTE: The PIP and POP functions don t work in the CUSTOM and REAL picture size modes. Refer to PIP, POP function for details. (See page 43.) PIP MODE PIP RESET You can select the PIP mode from PIP, POP, SBS ASPECT, You can reset all the PIP settings to the factory defaults.
- Page 39 OSD sc reen func tions (c ontinued) CONFIGURATION1 OFF TIMER CONFIGURATION1 RESET You can select the OFF TIMER mode. You can reset all the CONFIGURATION1 settings to the Select the time period to automatically turn off the power factory defaults. from 1 to 24 hours.
- Page 40 The time is selectable from OFF and 2, 4, 6, 8, 10, 20, 30, ID numbers for wireless remote control are assigned to 40, and 50 seconds. LDT323V monitors that are multi-connected via RS-232C. CLOSED CAPTION ID numbers 1 to 26 are selectable.
- Page 41 OSD sc reen func tions (c ontinued) CONFIGURATION3 NOTE : When you select a time period in the MOTION POWER SAVE setting, the monitor enlarges the image and moves When the power saver in the OSD menu is turned ON, the it horizontally and vertically.
- Page 42 OSD sc reen func tions (c ontinued) ADVANCED OPTION INPUT CHANGE SCAN MODE You can select the time for input switching from QUICK and * For the RGB1 (HDMI), DVD/HD, VIDEO<S>, and VIDEO inputs only. NORMAL. NOTE : When you select QUICK, slight noise may appear. You can select the image display area.
-
Page 43: Other Functions
Other func tions Pic ture size Audio input c hange RGB1, 2, 3, 4 RGB1 FULL NORMAL CUSTOM REAL HDMI AUDIO1 AUDIO2 AUDIO3 DVD/HD Other inputs FULL NORMAL DYNAMIC CUSTOM REAL AUDIO1 AUDIO2 AUDIO3 VIDEO, VIDEO<S> FULL NORMAL DYNAMIC CUSTOM REAL OSD information NORMAL... -
Page 44: Pip, Pop Function
Other func tions (c ontinued) PIP, POP func tion The following table shows the combinations of signal inputs with which the PIP and POP modes function. However, these modes do not function when the screen size is CUSTOM or REAL . Sub screen RGB1 RGB2... -
Page 45: Troubleshooting
NOTE: As with all display devices, MITSUBISHI ELECTRIC recommends displaying moving images and using a moving screen saver at regular intervals whenever the screen is idle or turning off the monitor when not in use. -
Page 46: Speci Cations
Spec i c atio ns Orientation Landsc ape / Portrait Dimension (Unit: mm) Diagonal (inch) 31.5 (800 mm) Display Mode Panel Pitch 0.511 mm Resolution pixels (Full HD) LCD Module Color Over 16 million colors Brightness (typ.) 450 cd/m Contrast ratio 3000 : 1 Response time 6.5 ms (Gray to Gray) -
Page 47: Pin Assignment
Pin Assignment 1) Analog RGB input (Mini D-SUB 15-pin): RGB3 Pin No Name Pin No Name Mini D-SUB 15-pin Video Signal Red +5V (DDC) Video Signal Green SYNC-GND Video Signal Blue DDC-SDA DDC-GND H-SYNC Red-GND V-SYNC Green-GND DDC-SCL Blue-GND 2) Digital RGB input (HDMI): RGB1 Pin - Assignment of HDMI connector:... - Page 48 Indication following Controlling Pollution by Electronic Information Products for (Product Name: LCD monitor) (Model Name: LDT323V) (1) Mark for Prevention and Control of Pollution by Electronic Information Products Note: This symbol mark is China only. This mark is the environmental friendly usage life of electronic information products applied to electronic information products sold in China, and is based on the Prevention and Control of Pollution by Electronic Information Products Law announced on February 28, 2006.
- Page 49 MITSUBISHI Contac t Information Mitsubishi Electric Air-Conditioning & Visual Information Systems (Shanghai) Ltd. 15/F, Henderson Metropolitan, No.300 East Nanjing Road, Shanghai 200001, China Tel: +86(21)23123030 Fax: +86(21)23123000 Printed in China AW-P...