Table of Contents
Advertisement
Quick Links
Advertisement
Table of Contents
Troubleshooting

Related Manuals for MULTIQUIP Whiteman WM70SH8C


Summary of Contents for MULTIQUIP Whiteman WM70SH8C
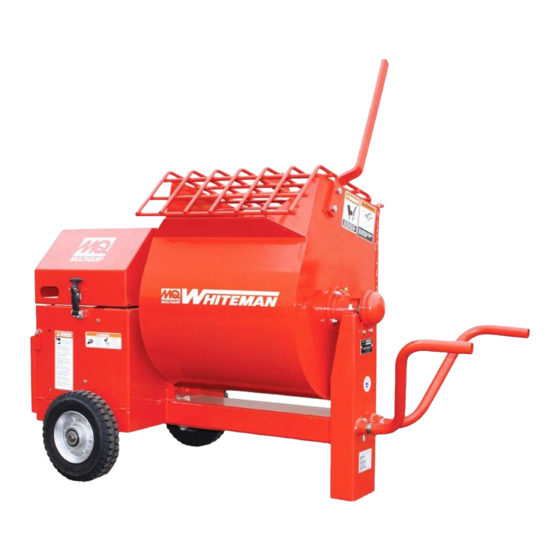
- Page 1 OperatiOn and parts Manual series MOdels WM70sH5C WM70sH8C plaster and MOrtar Mixer (HOnda Gx160/Gx240 GasOline enGine) Revision #0 (06/07/11) To find the latest revision of this publication, visit our website at: www.multiquip.com THIS MANUAL MUST ACCOMPANY THE EQUIPMENT AT ALL TIMES.
-
Page 2: Proposition 65 Warning
ALWAYS work in a well ventilated area, and work with approved safety equipment, such as dust masks that are specially designed to filter out microscopic particles. page 2 — WM70SH5C/WM70SH8C Mixer • operaTion and parTS Manual — rev. #0 (06/07/11) -
Page 3: Silicosis/Respiratory Warnings
NIOSH/MSHA for the materials being used. WM70SH5C/WM70SH8C Mixer • operaTion and parTS Manual — rev. #0 (06/07/11) — page 3... -
Page 4: Table Of Contents
Engine Assy............48-49 Cabinet Assy............. 50-51 Terms And Conditions Of Sale — Parts ....52 NOTICE Specifications and part numbers are subject to change without notice. page 4 — WM70SH5C/WM70SH8C Mixer • operaTion and parTS Manual — rev. #0 (06/07/11) -
Page 5: Parts Ordering Procedures
NOTICE All orders are treated as Standard Orders and will ship the same day if received prior to 3PM PST. We aCCepT all MaJor CrediT CardS! WM70SH5C/WM70SH8C Mixer • operaTion and parTS Manual — rev. #0 (06/07/11) — page 5... -
Page 6: Safety Information
Rotating parts hazards CauTion Indicates a hazardous situation which, if not avoided, Could result in Minor or ModeraTe inJurY. NOTICE Addresses practices not related to personal injury. page 6 — WM70SH5C/WM70SH8C Mixer • operaTion and parTS Manual — rev. #0 (06/07/11) -
Page 7: General Safety
„ alWaYS check the equipment for loosened threads or bolts before starting. „ do noT use the equipment for any purpose other than its intended purposes or applications. WM70SH5C/WM70SH8C Mixer • operaTion and parTS Manual — rev. #0 (06/07/11) — page 7... -
Page 8: Mixer Safety
„ never tamper with the factory settings of the engine or engine governor. Damage to the engine or equipment can result if operating in speed ranges above the maximum allowable. page 8 — WM70SH5C/WM70SH8C Mixer • operaTion and parTS Manual — rev. #0 (06/07/11) - Page 9 AC receptacle. the engine start diffi cult. WM70SH5C/WM70SH8C Mixer • operaTion and parTS Manual — rev. #0 (06/07/11) — page 9...
- Page 10 „ Mixer should be adjusted to a level position at all times when towing. „ Raise and lock mixer wheel stand in up position when towing. „ Place chock blocks underneath wheel to prevent rolling while parked. page 10 — WM70SH5C/WM70SH8C Mixer • operaTion and parTS Manual — rev. #0 (06/07/11)
-
Page 11: Safety Chain Connection
SAFETY CHAIN CONNECTOR LINK STEP 4 TOW OR LOCKED Figure 1. Tow Bar and Safety Chain Installation POSITION Figure 2. Drum Latch Pin (Tow or Locked Position) WM70SH5C/WM70SH8C Mixer • operaTion and parTS Manual — rev. #0 (06/07/11) — page 11... -
Page 12: Specifications
55.1 lbs. (25 Kg.) NOTICE In accordance with our established policy of constant improvement, we reserve the right to amend these specifications at any time without notice. page 12 — WM70SH5C/WM70SH8C Mixer • operaTion and parTS Manual — rev. #0 (06/07/11) -
Page 13: Dimensions
56 in. (142 cm) OPTIONAL TOW BARS APPROXIMATE LENGTH HPC-1 36 IN. (91.44 CM) 1-INCH PIN COUPLER HBC-1 2-INCH BALL COUPLER HLC-1 LOOP COUPLER Figure 3. Dimensions WM70SH5C/WM70SH8C Mixer • operaTion and parTS Manual — rev. #0 (06/07/11) — page 13... -
Page 14: General Information
Use Table 4 as a general guideline when torqueing of mixer hardware is required. Remember to keep all mixer hardware components tight. Figure 4. Mixer Components page 14 — WM70SH5C/WM70SH8C Mixer • operaTion and parTS Manual — rev. #0 (06/07/11) -
Page 15: Components
Keep the grill clean by washing 18. Chock Blocks — Place these blocks (not included as it down daily. part of the mixer package) under each mixer wheel to prevent rolling. WM70SH5C/WM70SH8C Mixer • operaTion and parTS Manual — rev. #0 (06/07/11) — page 15... -
Page 16: Inspection
2. Remove the filler dipstick from the engine oil filler hole (Figure 5) and wipe it clean. Figure 5. Engine Oil Dipstick (Removal) page 16 — WM70SH5C/WM70SH8C Mixer • operaTion and parTS Manual — rev. #0 (06/07/11) - Page 17 Check the zerk grease fittings at each end of the mixing drum. These grease fittings lubricate the dumping mechanism. If the dumping handle is stiff or hard to move lubricate these fittings. WM70SH5C/WM70SH8C Mixer • operaTion and parTS Manual — rev. #0 (06/07/11) — page 17...
-
Page 18: Basic Engine
10. Fuel Tank — Holds unleaded gasoline. For additional information refer to engine owner's manual. page 18 — WM70SH5C/WM70SH8C Mixer • operaTion and parTS Manual — rev. #0 (06/07/11) -
Page 19: Paddle Blade Adjustment
INCORRECT CORRECT CORRECT SIDE PADDLE BLADE PADDLE BLADE IS TOO TIGHT AGAINST DRUM ROTATION SIDE WALLS. DRUM END AND SIDE WALLS Figure 8. Paddle Blade Adjustment WM70SH5C/WM70SH8C Mixer • operaTion and parTS Manual — rev. #0 (06/07/11) — page 19... -
Page 20: Start-Up
Figure 9. Fuel Shut-Off Lever 2. To start a cold engine, move the choke lever (Figure 10) to the CLOSED position. Figure 13. Start/Stop Switch Figure 10. Choke Lever page 20 — WM70SH5C/WM70SH8C Mixer • operaTion and parTS Manual — rev. #0 (06/07/11) - Page 21 LOCK enabling the shaft to rotate. FRONT POST BELT SLIP POSITION LEVER DRUM Figure 15. Drum Lock Pin (Side-View) Figure 18. Belt Slip Lever (Mix Position) WM70SH5C/WM70SH8C Mixer • operaTion and parTS Manual — rev. #0 (06/07/11) — page 21...
-
Page 22: Operation
Serious Injury may result if it is disabled, disconnected or improperly maintained. page 22 — WM70SH5C/WM70SH8C Mixer • operaTion and parTS Manual — rev. #0 (06/07/11) - Page 23 WM70SH5C/WM70SH8C Mixer • operaTion and parTS Manual — rev. #0 (06/07/11) — page 23...
-
Page 24: Maintenance (Engine)
(2) These items should be serviced by your service dealer, unless you have the proper tools and are mechanically proficient. Refer to the HONDA Shop Manual for service procedures. (3) For commercial use, log hours of operation to determine proper maintenance intervals. page 24 — WM70SH5C/WM70SH8C Mixer • operaTion and parTS Manual — rev. #0 (06/07/11) -
Page 25: Maintenance (Engine)
Table 5. For engine oil capacity, see Table 2 (Engine Specifications). do noT overfill. 4. Install drain bolt with sealing washer and tighten securely. Figure 23. Engine Air Cleaner WM70SH5C/WM70SH8C Mixer • operaTion and parTS Manual — rev. #0 (06/07/11) — page 25... -
Page 26: Maintenance (Mixer)
There is 1 set of countershaft bearings (Figure 26) that will require lubrication. Lubricate the grease fitting for each countershaft bearing every 40 hours of operation using any grade lithium base grease. page 26 — WM70SH5C/WM70SH8C Mixer • operaTion and parTS Manual — rev. #0 (06/07/11) -
Page 27: Wheel Bearings
.001” to .010” end play. Lock the nut at this position. Install the cotter pin and dust cap, and tighten all hardware. WM70SH5C/WM70SH8C Mixer • operaTion and parTS Manual — rev. #0 (06/07/11) — page 27... - Page 28 Figure 30. Pinion and Bull Gear Lubrication NOTICE Grease main and pinion gears every 250 hours of operation. avoid over-greasing. Excess grease will accumulate contaminants and cause premature wear. page 28 — WM70SH5C/WM70SH8C Mixer • operaTion and parTS Manual — rev. #0 (06/07/11)
- Page 29 AIR GUN 16" 20-25 50-60 90-120 TORQUE WRENCH NOTICE never use an pneumatic air gun to tighten wheel Figure 31. Wheel Lug Nuts Tightening lug nuts. Sequence WM70SH5C/WM70SH8C Mixer • operaTion and parTS Manual — rev. #0 (06/07/11) — page 29...
- Page 30 6. never pour or spray water over the engine or electric 7. When cleaning of the entire mixer is done, return mixing motor (Figure 33). drum to an upright position. page 30 — WM70SH5C/WM70SH8C Mixer • operaTion and parTS Manual — rev. #0 (06/07/11)
-
Page 31: Maintenance (Mixer)
„ Place the mixing drum in the down position (mouth facing downward). „ Cover the mixer and place it a clean dry area, that is protected from harsh elements. WM70SH5C/WM70SH8C Mixer • operaTion and parTS Manual — rev. #0 (06/07/11) — page 31... -
Page 32: Troubleshooting
Fuel fi lter/lines clogged? Replace fuel fi lter. Fuel tank cap breather hole clogged? Clean or replace fuel tank cap. Air in fuel line? Bleed fuel line. page 32 — WM70SH5C/WM70SH8C Mixer • operaTion and parTS Manual — rev. #0 (06/07/11) - Page 33 Check cable connections. Charge or replace Will not start, no power with key "ON". (if Battery disconnected or discharged? applicable) battery Ignition switch/wiring defective? Replace ignition switch. Check wiring. WM70SH5C/WM70SH8C Mixer • operaTion and parTS Manual — rev. #0 (06/07/11) — page 33...
-
Page 34: Troubleshooting
Apply grease to bracket or replace. brackets? Drum difficult to discharge (tilt) Adjust blades until they almost touch Blades adjusted too tight. side walls of drum. page 34 — WM70SH5C/WM70SH8C Mixer • operaTion and parTS Manual — rev. #0 (06/07/11) -
Page 35: Wiring Diagram
WirinG diaGraM WM70SH5C/WM70SH8C Mixer • operaTion and parTS Manual — rev. #0 (06/07/11) — page 35... -
Page 36: Explanation Of Code In Remarks Column
Multiquip. Other entries will for sale through Multiquip. be clarifi ed in the “Remarks” Column. page 36 — WM70SH5C/WM70SH8C Mixer • operaTion and parTS Manual — rev. #0 (06/07/11) -
Page 37: Suggested Spare Parts
2....EM203010 ....KIT, WIPER BLADES (STEEL DRUM) NOTICE Part numbers on this Suggested Spare Parts list may supersede/replace the part numbers shown in the following parts lists. WM70SH5C/WM70SH8C Mixer • operaTion and parTS Manual — rev. #0 (06/07/11) — page 37... -
Page 38: Nameplate And Decals
1. Use manufacturer’s recommended torque values when tightening wheel lug nuts. SERIAL 2. Use manufacturer’s recommended tire pressure DO NOT values when inflating tires. exceed recommended tire pressure. CIP520937 page 38 — WM70SH5C/WM70SH8C Mixer • operaTion and parTS Manual — rev. #0 (06/07/11) -
Page 39: Nameplate And Decals
CIP520915 DECAL, POWDER COATED (FRENCH) 13118 DECAL, POWDER COATED (ENGLISH) CIP520936 DECAL, DRUM LOCK POSITIONING NAMEPLATE ................... 1 ..CONTACT MQ PARTS DEPT. CIP520937 DECAL, INSPECT BEFORE TOWING WM70SH5C/WM70SH8C Mixer • operaTion and parTS Manual — rev. #0 (06/07/11) — page 39... -
Page 40: Frame Assy
MOUNT PILLOW BLOCKS MOUNT DRUM FOR PINION SHAFT HERE BEARING HERE MOUNT DRUM BEARING HERE CHAIN & LINK OPTIONAL TOW BARS page 40 — WM70SH5C/WM70SH8C Mixer • operaTion and parTS Manual — rev. #0 (06/07/11) - Page 41 CHAIN AND LINK KIT ........1....INCLUDES ITEMS W/@ HBC-1 BALL HITCH 2-INCH .........1....CONTACT UNIT SALES HLC-1 LOOP HITCH .............1....CONTACT UNIT SALES HPC-1 PIN HITCH 1-INCH ..........1....CONTACT UNIT SALES WM70SH5C/WM70SH8C Mixer • operaTion and parTS Manual — rev. #0 (06/07/11) — page 41...
-
Page 42: Paddle Shaft Assy
ENGINE END CENTER ENGINE END CENTER TOW END WIPER SCRAPPER HARDWARE page 42 — WM70SH5C/WM70SH8C Mixer • operaTion and parTS Manual — rev. #0 (06/07/11) - Page 43 WASHER, LOCK 5/15" EM202899 PADDLE ARM, TOW END 17@# EM202927 BLADE ,SCRAPPER END EM202926 BLADE, RUBBER END EM203010 KIT, WIPERS, SCRAPERS & HARDWARE ..1....INCLUDES ITEMS W/@ WM70SH5C/WM70SH8C Mixer • operaTion and parTS Manual — rev. #0 (06/07/11) — page 43...
-
Page 44: Steel Tub Assy
PART OF REAR FRAME PART OF FRONT FRAME page 44 — WM70SH5C/WM70SH8C Mixer • operaTion and parTS Manual — rev. #0 (06/07/11) - Page 45 BOLT 1/2" UNC 1-1/2" 492584 NUT, LOCK1/2" NC EM201537 HANDLE DUMP EM98195 GRIP, DUMP HANDLE 507418 WASHER, TOOTHED 520541 GATE, MOBILE EM963610 CAPSCREW, 3/8" NC X 1-1/4" G8 WM70SH5C/WM70SH8C Mixer • operaTion and parTS Manual — rev. #0 (06/07/11) — page 45...
-
Page 46: Axle Assy
NOTES: COMPLETE HUB ASSEMBLY INCLUDES ITEMS WITHIN DASHED LINES, AND ALSO INCLUDES ITEMS 1 AND 2. page 46 — WM70SH5C/WM70SH8C Mixer • operaTion and parTS Manual — rev. #0 (06/07/11) - Page 47 WASHER, FLAT, .087" THICKNESS EM501299 WASHER, FLAT, .135" THICKNESS EM903113 BEARING CONE EM903012 BEARING CUP EM914288 OIL SEAL EM941306 HUB ASSY., 4-BOLT ..........2....INCLUDES ITEMS W/ # 514802 AXLE, UNIVERSAL WM70SH5C/WM70SH8C Mixer • operaTion and parTS Manual — rev. #0 (06/07/11) — page 47...
-
Page 48: Engine Assy
PART OF FRAME PART OF FRAME PART OF FRAME page 48 — WM70SH5C/WM70SH8C Mixer • operaTion and parTS Manual — rev. #0 (06/07/11) -
Page 49: Engine Assy
ROD-END 492584 NUT, HEX 1/2" 492574 NUT, HEX 3/8" NF G5 492476 SET SCREW, 5/16' NC 3/4" EM901515 PULLEY, IDLER 515299 ROD ..............1....GX160UT1HX2 515045 ROD ..............1....GX240UT1HA2 WM70SH5C/WM70SH8C Mixer • operaTion and parTS Manual — rev. #0 (06/07/11) — page 49... -
Page 50: Cabinet Assy
Cabinet assy. 12oz page 50 — WM70SH5C/WM70SH8C Mixer • operaTion and parTS Manual — rev. #0 (06/07/11) -
Page 51: Cabinet Assy
NUT NYLOCK 29174-001 KNOB, MUSHROOM 29173-001 SWITCH, PUSH-PULL 504135C WIRE HARNESS EM974007 PAINT, SPRAY 12 OZ. TRAFFIC RED 520560 GUARD EM963055 HEX HEAD CAPSCREW 520561 SPACER WM70SH5C/WM70SH8C Mixer • operaTion and parTS Manual — rev. #0 (06/07/11) — page 51... -
Page 52: Terms And Conditions Of Sale - Parts
Multiquip’s designated receiving point. page 52 — WM70SH5C/WM70SH8C Mixer • operaTion and parTS Manual — rev. #0 (06/07/11) - Page 53 WM70SH5C/WM70SH8C Mixer • operaTion and parTS Manual — rev. #0 (06/07/11) — page 53...
- Page 54 © COPYRIGHT 2011, MULTIQUIP INC. Multiquip Inc, the MQ logo and the Whiteman logo are registered trademarks of Multiquip Inc. and may not be used, reproduced, or altered without written permission. All other trademarks are the property of their respective owners and used with permission.