Table of Contents
Advertisement
Quick Links
Safe Operation Practices • Set-Up • Operation • Maintenance • Service • Troubleshooting • Warranty
O
'
M
peratOr
s
anual
Tank S S7237
Liquid Propane Gas
WARNING
READ AND FOLLOW ALL SAFETY RULES AND INSTRUCTIONS IN THIS MANUAL
BEFORE ATTEMPTING TO OPERATE THIS MACHINE.
FAILURE TO COMPLY WITH THESE INSTRUCTIONS MAY RESULT IN PERSONAL INJURY.
CUB CADET LLC, P.O. BOX 361131 CLEVELAND, OHIO 44136-0019
Printed In USA
Form No. 769-05599
(March 4, 2010)
Advertisement
Table of Contents

Related Manuals for Cub Cadet Tank S S7237


Summary of Contents for Cub Cadet Tank S S7237
- Page 1 READ AND FOLLOW ALL SAFETY RULES AND INSTRUCTIONS IN THIS MANUAL BEFORE ATTEMPTING TO OPERATE THIS MACHINE. FAILURE TO COMPLY WITH THESE INSTRUCTIONS MAY RESULT IN PERSONAL INJURY. CUB CADET LLC, P.O. BOX 361131 CLEVELAND, OHIO 44136-0019 Printed In USA Form No. 769-05599...
-
Page 2: Table Of Contents
Choose from the options below: ◊ Visit us on the web at www.cubcadet.com ◊ Locate your nearest Cub Cadet Dealer at (877) 282-8684 ◊ Write us at Cub Cadet LLC • P.O. Box 361131 • Cleveland, OH • 44136-0019... -
Page 3: Safe Operation Practices
Important Safe Operation Practices WARNING! This symbol points out important safety instructions which, if not followed, could endanger the personal safety and/or property of yourself and others. Read and follow all instructions in this manual before attempting to operate this machine. Failure to comply with these instructions may result in personal injury. - Page 4 Mow only in daylight or good artificial light. When looking for oil leaks, never run your hand over hydraulic hoses, lines or fittings. Never tighten or adjust Never carry passengers. hydraulic hoses, lines or fittings while the system is under Back up slowly.
- Page 5 Do not mow on wet grass. Reduced traction could cause Transporting Machines sliding. Consult the national Fire Protection Association code 58 Do not tow heavy pull behind attachments (e.g. loaded (nFPA – 58) for safe storage and handling of LPG dump cart, lawn roller, etc.) on slopes greater than 5 The owner/operator is responsible for transporting the LPG degrees.
- Page 6 Hydraulic Devices and Systems Seat belts are attached to the movable portion of the seat when suspension seats are utilized, and therefore the seat- Hydraulic fluid escaping under pressure may have sufficient force mounting base must be secured to its pivot means and the to penetrate skin and to cause serious injury.
-
Page 7: Spark Arrestor
Cylinders must be filled by trained personnel only. Grass catcher components and the discharge cover are subject to wear and damage which could expose moving Store cylinders in well ventilated and unoccupied buildings parts or allow objects to be thrown. For safety protection, away from sparks and flames. -
Page 8: Safety Symbols
Safety Symbols This page depicts and describes safety symbols that may appear on this product. Read, understand, and follow all instructions on the machine before attempting to assemble and operate. Symbol Description READ THE OPERATOR’S MAnUAL(S) Read, understand, and follow all instructions in the manual(s) before attempting to assemble and operate WARnInG—... - Page 9 2 — s ectiOn peratiOn ractices...
-
Page 10: Assembly & Set-Up
Assembly & Set-Up Contents of Crate • One Deck Wash Hose Coupler • One Zero-Turn Tractor • One Zero-Turn Tractor Operator’s Manual • One Engine Operator’s Manual Tractor Preparation Install Roll Over Protective System (ROPS) The Roll Over Protective System (ROPS) has not been installed Remove the upper crating material from the shipping pallet, and on your unit for shipping purposes. - Page 11 Install the upper ROPS section onto the lower ROPS “posts”. Move the upper ROPS section to the upright position, and Install the (1⁄2-13 x 3.25) HHCS bolts, nuts and washers. See insert the locking pins with their retainer hairpin clips. See Fig.
- Page 12 Initial LPG Tank Fill-Up When the tank is in place, secure it by locking down the straps (A). See Fig. 3-8. NOTE: The vapor withdrawal service valve of the Aluminum Outdoor Equipment Propane Cylinder is fitted with left-hand threaded safety coupler. Typical forklift cylinders withdraw liquid propane and have right-handed safety couplers.
- Page 13 To adjust the tilt of the steering wheel: Suspension Seat Pull back on the adjustment lock lever to loosen the This tractor is equipped with an adjustable suspension seat steering wheel tilt. See Fig. 3-10. system, which includes a seat with retractable seat belt assembly, a low profile mechanical suspension, and an Operator Presence Sensor (OPS).
-
Page 14: Discharge Chute
Connecting the Battery Cables Discharge Chute CALIFORNIA PROPOSITION 65 WARNING Remove the strap or any other device securing the mower deck dischage chute during shipping. The discharge chute is a spring- Battery posts, terminals, and related accessories loaded device that must be down for proper and safe operation. contain lead and lead compounds, chemicals known to the State of California to cause cancer and Tires... -
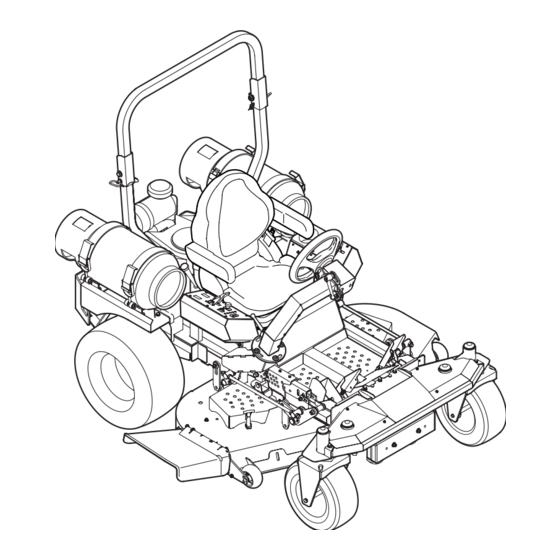
Page 15: Controls & Features
Controls & Features Roll-Over Protection System Relief Power Valve Valve Implement Lift Fuel Valve Cup Holder AVOID SERIOUS INJURY OR DEATH 1/4 1/2 • READ THE OPERATOR'S MANUAL, BEFORE USING THE MACHINE. • GO ACROSS, NOT UP AND DOWN SLOPES. •... -
Page 16: Ignition Switch
Speed Control Pedals Digital Tachometer and Hour Meter The speed control pedals are located on the right side of the traction unit. The speed control pedals must be in the neutral position to start the tractor engine. Pushing the forward pedal causes the mower to move forward. Pushing the reverse pedal causes the mower to move backward. - Page 17 Transmission Bypass Valves (Not Shown) The transmission bypass valves (one for each the RH and LH transmission) are located just in front of the engine and just behind the seat. When engaged, the two valves open a bypass within the hydrostatic transmissions, which allows the tractor to be pushed short distances by hand.
-
Page 18: Operation
Operation General Safety • If yo u hit a solid object while mowing, turn off the PTO, place the speed control pedals in the neutral position, move the throttle to slow, set the parking brake, shut off • RECEIVE InSTRUCTIOn — Entirely read this operator’s the engine, and take the key from the ignition switch. -
Page 19: Safety Interlock System
Contact your authorized Set the throttle slightly faster than the slow position. Cub Cadet Dealer. Crank engine for about 5 seconds and stop. • The safety interlock system prevents the engine from... -
Page 20: Driving The Tractor
Stopping the Engine Adjust the operator’s seat to the most comfortable position that allows you to operate the controls. See seat Place the PTO switch in the “OFF” position. adjustment in the Assembly & Set-Up section. Move the speed control pedals to the neutral position. Swing the steering column inward and lock with the Engage the parking brake. - Page 21 Turning the Tractor While Driving Forward Turning While Driving Rearward WARNING! To turn the tractor while driving rearward, use the steering wheel When reversing the direction of travel, to turn in the direction you wish to travel. we recommend performing gradual ‘U’ turns where possible.
- Page 22 Periodically check the safety interlock circuits to ensure they are Using the Mower Deck working properly. If a safety circuit is not working as designed, contact you Cub Cadet dealer to have the tractor inspected. DO WARNING! Make certain the area to be mowed is...
- Page 23 Mower Cutting Blades The blades normally “factory installed” on a mower afford the best grass cutting performance on the majority of grasses and mowing conditions; however, there will be occasions whereby the grass type, stage of grass growth, soil conditions, and weather conditions will require different cutting blade types.
- Page 24 Reconfigurable Mower Inner Discharge Cutting Gauge Front Rear Front Skirt Baffle Baffle Blades Wheels Roller Rollers Low = 3 Low = 3 Low = 3 Standard set-up Installed Installed Hi-lift to 5” to 5” to 5” High = 1 to High = 1 to High = 1 to 2-1⁄2”...
-
Page 25: Maintenance & Adjustments
Maintenance & Adjustments Maintenance Schedule Before Every Every Every Every After Yearly Each use 25 Hours 50 Hours 100 Hours 500 Hours Mowing Check engine oil/LP level Check LP valve, hoses and seals Check hydraulic hoses for leaks Check tires & tire pressure Check deck, mower and hydro drive belts Check blades and blade bolt tightness Check safety switches for proper operation... - Page 26 OIL CHART Apply a few drops of SAE engine oil, grease, or use a spray lubricant. Apply the oil to both sides of pivot points. Wipe off any excess. Start engine and operate mower briefly to insure that oil spreads evenly. number of Oil Points Description DAILY...
- Page 27 LUBRICATION CHART Use a grease-gun filled with nO. 2 Multipurpose Lithium Base Grease number of Grease Fittings Description EVERY 25 HOURS Blade Spindle Bearings WEEKLY Front Wheels Front Wheel Spindles Mower Deck Ball Wheels number of Grease Points Description WEEKLY Mowing Deck Pivots Deck Take-Up Idler Pivots Axle Pivot...
- Page 28 Engine WARNING ! If the engine has been recently run, the Contact Cub Cadet Customer Service for engine issues. Refer to engine, muffler and surrounding metal surfaces will page 2 for more information. be hot and can cause burns to the skin. Exercise caution to avoid burns.
-
Page 29: Hydraulic Oil
To re-install the tank, reverse the above instructions Pour hydraulic oil into the reservoir a 1⁄4 ” below the oil tank but make sure the alignment pin fits into the slot on the fill neck and 1.5 ounces of Ornite additive, if necessary. bottom of the cylinder valve guard. -
Page 30: Hydraulic System
engine and re-check hydraulic oil. If oil appears foamy or Battery Maintenance contains excessive air bubbles, DO nOT OPERATE UnIT. • The battery is filled with battery acid and then sealed at Contact service technician. the factory. However, every 50 operating hours remove the Contaminants or foreign matter in the oil will also damage the fill caps and check the level of the liquid electrolyte in the pumps . - Page 31 Front wheel Pull back the lock collar of the nozzle adapter and push the adapter onto one of the deck wash nozzles at either end of Set the park brake and block both traction wheels the mower deck. Release the lock collar to lock the adapter and raise the caster wheel so that the tire is an inch on the nozzle.
-
Page 32: Battery Storage
Using the Transmission Bypass Valves Battery Storage If for any reason the tractor will not drive or you wish to move When storing the tractor for extended periods, disconnect the tractor, the two hydrostatic transmissions are equipped with the negative battery cable. It is not necessary to remove the a bypass valve that will allow you to manually move the tractor battery. - Page 33 Side to Side Leveling Clean the engine and the entire tractor thoroughly. NOTE: Use of a pressure washer or garden hose is not Park the mower on a flat paved surface, engage the recommended to clean your tractor. They may cause parking brake, shut off the engine, remove the key from the damage to electrical components, spindles, pulleys, ignition switch, disconnect the spark plug wires and using...
- Page 34 Loosen the inner jam nuts at the rear left and right of the The mower deck cutting height can be set using the tractor’s horizontal threaded rods. See Fig. 6-8. power implement lift. The deck heights range from 1” to 4”. The deck gauge wheel position should be approximately 1⁄4 to 1⁄2”...
- Page 35 Brakes Removing/Installing the Inner Baffle The parking brake pedal should engage with moderate force. To The inner flow-control baffle can be removed depending on increase parking brake capacity, adjust brake cables at the brake the mowing conditions. The baffle controls discharge and can arms equally.
-
Page 36: Service
If you have a recurring problem with blown fuses, have the electrical short caused by contacting the tractor tractor’s electrical system checked by your Cub Cadet Service body with tools being used to connect the cables. Dealer. -
Page 37: Dealer
Seat Switch NOTE: There is a certain amount of spring tension due to the weight of the deck. When removing the lift linkage • With the speed control pedals in the neutral position, the from the deck the tension of the springs will go from the parking brake engaged and the PTO switch in the “OFF”... -
Page 38: Replacing The Blades
Replacing the Blades Use a 1- 1⁄8” socket wrench on the pulley side of the spindle bolt. See Fig. 7-5. WARNING! Before performing any maintenance, place the PTO switch in the “OFF” position, engage Hex Screw the parking brake lever, turn the ignition key to the “OFF”... - Page 39 Changing the Spindle Assembly Jack up the front of the mowing deck about one foot and block it in that position. Make sure the blade clutch is disengaged. Remove the deck cover. Remove the drive belts. (See Replacing the Deck Belt.) Remove the blade.
-
Page 40: Troubleshooting
Troubleshooting Problem Cause Remedy Engine fails to start PTO engaged. Place PTO knob in disengaged (OFF) position. Parking brake not engaged. Engage parking brake. Spark plug wire(s) disconnected. Connect wire(s) to spark plug(s). Throttle control lever not in correct starting Place throttle lever in the fast position. -
Page 41: Replacements
Replacement Parts Component Part Number and Description KM-BPR4ES Spark Plug KM-11013-7038 Outer Air Filter KM-11013-7039 Inner Air Filter KM-49065-2078 Oil Filter 01007937 Deck Belt 954-04223 Drive Belt 02004377 PTO Belt 02000568 Blade, 25.0 02000920P Deck Spindle Phone (800) 800-7310 to order replacement parts or a complete Parts Manual (have your full model number and serial number ready). Parts Manual downloads are also available free of charge at www.mtdproducts.com. - Page 42 Component Part Number and Description 634-3159 Deck Wheel 925-1707D Battery 746-04534 Throttle Control 725-1341B Ignition Key 01009705P Discharge Chute Assembly 02002668 Wheel Assembly 02003396 Wheel Assembly Phone (800) 800-7310 to order replacement parts or a complete Parts Manual (have your full model number and serial number ready). Parts Manual downloads are also available free of charge at www.mtdproducts.com.
-
Page 43: Attachments & Accessories
Attachments & Accessories The following attachments and accessories are compatible with your TAnK S tractor. See your dealer or the retailer from which you purchased your tractor for information regarding price and availability. Part Number Part 59A30032150 33 lb. LPG Tank Kit (One Tank) 59A30019150 Striper Kit 59A30020150... -
Page 44: Specifications
Specifications NOTE: Specifications subject to change without notice. Engine: 37HP Kawasaki * Type: Vertical air cooled V-Twin Air Cleaner: Dual Paper element with rain cap Lube System: Pressurized with oil filter Hydraulic System: In tank filter, 6 quart capacity, aluminum oil cooler with 12VDC fan Starter: 12-volt electric Traction Drive:... - Page 45 Notes...
- Page 46 FEDERAL and/or CALIFORNIA EMISSION CONTROL WARRANTY STATEMENT YOUR WARRANTY RIGHTS AND OBLIGATIONS MTD Consumer Group Inc, the United States Environmental Protection Agency (EPA), and, for those products certified for sale in the state of California, the California Air Resources Board (CARB) are pleased to explain the emission (evaporative and/or exhaust) control system (ECS) warranty on your outdoor 2006 and later small off-road spark-ignited engine and equipment (outdoor equipment engine) In California, new outdoor equipment engines must be designed, built and equipped to meet the State’s stringent anti-smog standards (in other states, 1997 and later model year equipment must be designed, built, and equipped to meet the U.S.
- Page 47 WARRANTED PARTS: The repair or replacement of any warranted part otherwise eligible for warranty coverage may be excluded from such warranty coverage if MTD Consumer Group Inc demonstrates that the outdoor equipment engine has been abused, neglected, or improperly maintained, and that such abuse, neglect, or improper mainte- nance was the direct cause of the need for repair or replacement of the part.
-
Page 48: Warranties
361131, Cleveland, Ohio 44136-0019, call 1-877-282- 8684 required maintenance and service intervals. or log on to our website at www.cubcadet.com. The limited warranty set forth below is given by Cub Cadet LLC with In Canada: respect to new merchandise purchased or leased and used in the Contact MTD Products Limited, Kitchener, ON N2G 4J1, call 1-800- 668-1238 or log on to our website at www.mtdcanada.com.