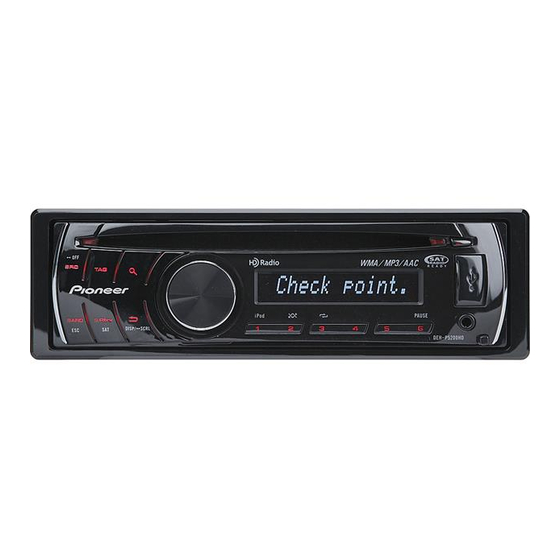
Pioneer DEH-P5200HD Operation Manual
Cd receiver
Hide thumbs
Also See for DEH-P5200HD:
- Operation manual (88 pages) ,
- Installation manual (6 pages) ,
- Service manual (96 pages)

Related Manuals for Pioneer DEH-P5200HD


Summary of Contents for Pioneer DEH-P5200HD
- Page 1 CD RECEIVER AUTORADIO CD RADIO CD DEH-P5200HD Operation Manual Mode d’emploi Manual de instrucciones...
-
Page 2: Table Of Contents
Contents Thank you for purchasing this PIONEER product. To ensure proper use, please read through this manual before using this product. It is especially important that you read and observe WARNINGs and CAUTIONs in this manual. Please keep the manual in a safe and accessible place for future refer- ence. -
Page 3: Before You Start
! In this manual, iPod and iPhone will be re- After-sales service for ferred to as iPod. Pioneer products WARNING Please contact the dealer or distributor from Handling the cord on this product or cords asso-... -
Page 4: In Case Of Trouble
Long Beach, CA 90801-1760 again to start. Operating the demo while the 800-421-1404 ignition switch is set to ACC may drain battery CANADA power. Pioneer Electronics of Canada, Inc. CUSTOMER SATISFACTION DEPARTMENT 300 Allstate Parkway Resetting the microprocessor Markham, Ontario L3R 0P2 1-877-283-5901... -
Page 5: Operating This Unit
Press to select different displays. CAUTION DISP/SCRL Press and hold to scroll through Use an optional Pioneer USB cable (CD-U50E) to the text information. connect the USB audio player/USB memory to Press to pause or resume. the USB port. Since the USB audio player/USB Press to select functions. -
Page 6: Display Indication
Section Operating this unit Display indication Indicator State Shuffle or shuffle all function is (shuf- on while the iPod source is being fle) selected. The sound retriever function is (sound re- triever) 4 6 8 CTRL (control mode) is set to iPod iPod. -
Page 7: Use And Care Of The Remote Control
Section Operating this unit Use and care of the remote Removing the front panel to protect your unit from theft control 1 Press the detach button to release the front panel. Using the remote control 2 Grab the front panel and remove. 1 Point the remote control in the direction of the 3 Always keep the detached front panel in the pro- front panel to operate. -
Page 8: Menu Operations Identical For Function Settings/Audio Adjustments/Initial Settings/Lists
Section Operating this unit ! “Perchlorate Material – special handling may Selecting a band apply. 1 Press BAND/ESC until the desired band (FM1, See www.dtsc.ca.gov/hazardouswaste/ FM2, FM3 for FM or AM) is displayed. perchlorate. (Applicable to California, U.S.A.)” Manual tuning (step by step) 1 Push M.C. -
Page 9: Using Itunes Tagging
Section Operating this unit Using iTunes tagging Function settings This function can be operated with the following Press M.C. to display the main menu. iPod models. — iPod 5th generation Turn M.C. to change the menu option — iPod nano 3rd generation and press to select FUNCTION. -
Page 10: Cd/Cd-R/Cd-Rw And Usb Storage Devices
Section Operating this unit CD/CD-R/CD-RW and USB Displaying text information storage devices Selecting the desired text information 1 Press /DISP/SCRL. Basic Operations CD TEXT discs: Track number and play time— disc title—disc artist name—track title—track ar- Playing a CD/CD-R/CD-RW tist name 1 Insert the disc, label side up, into the disc loading WMA/MP3/AAC: Play time—folder name—file slot. -
Page 11: Advanced Operations Using Special Buttons
Section Operating this unit Use M.C. to select the desired file name Turn M.C. to change the menu option (or folder name). and press to select FUNCTION. Turn M.C. to select the function. Changing file or folder name 1 Turn M.C. After selecting, perform the following proce- dures to set the function. -
Page 12: Displaying Text Information
Section Operating this unit Notes Playing a song in the selected category 1 When a category is selected, press and hold M.C. ! The iPod’s battery will be charged if the igni- Searching by alphabet in the list tion switch is set to ACC or ON, while con- 1 When a list for the selected category is displayed, nected. -
Page 13: Function Settings
Section Operating this unit Operating this unit’s iPod function from your iPod 1 Press M.C. to display the setting mode. This function is not compatible with the following 2 Turn M.C. to change the mode; press to select. iPod models. For details about the settings, refer to Playing —... -
Page 14: Audio Adjustments
Section Operating this unit Audio Adjustments Loudness (loudness) Press M.C. to display the main menu. Loudness compensates for deficiencies in the low- and high-frequency ranges at low volume. Turn M.C. to change the menu option 1 Press M.C. to display the setting mode. 2 Turn M.C. -
Page 15: Initial Settings
Section Operating this unit SLA (source level adjustment) Activate this setting when using auxiliary device con- nected to this unit. SLA (Source level adjustment) lets you adjust the vo- 1 Press M.C. to turn AUX on or off. lume level of each source to prevent radical changes in volume when switching between sources. -
Page 16: Other Functions
Section Operating this unit % Use an IP-BUS-RCA Interconnector such Ever SCRL (scroll mode setting) as the CD-RB20/CD-RB10 (sold separately) When Ever Scroll is set to ON, recorded text informa- to connect this unit to auxiliary device fea- tion scrolls continuously in the display. Set to OFF if turing RCA output. -
Page 17: Available Accessories
Section Available accessories Bluetooth adapter Basic Operations You can use this unit to control a Bluetooth Select an XM band. adapter, which is sold separately. 1 Press BAND/ESC. For details concerning operation, refer to the ! Band can be selected from XM1, XM2 or XM3. -
Page 18: Advanced Operations Using Special Buttons
Section Available accessories Advanced operations using Displaying the Radio ID special buttons Select the channel select settings to CH number. Selecting the XM channel select mode Refer to Selecting the XM channel select mode 1 Press S.Rtrv/SAT to cycle between: on this page or CH select (channel select CH number (channel number select setting)—... -
Page 19: Storing And Recalling Broadcast Stations
Section Available accessories Advanced operations using Switching the SIRIUS display 1 Press special buttons /DISP/SCRL. Play time—Channel number—Channel name— Category name—Artist name—Song title/pro- Selecting the SIRIUS channel select mode gram title—Composer name 1 Press S.Rtrv/SAT repeatedly to select the desired ! Play time is displayed during the Instant Re- channel select setting. -
Page 20: Selecting A Channel In The Channel Category
Select the channel select settings to teams. ! To use this function, Pioneer SIRIUS bus interface Category. (e.g. CD-SB10) is required. Refer to Selecting the SIRIUS channel select ! To use this function, SIRIUS plug-and-play unit mode on the previous page. -
Page 21: Additional Information
When you contact your dealer or your nearest NO AUDIO No songs Transfer the audio files to the USB Pioneer Service Center, be sure to note the storage device and error message. connect. The connected Follow the USB... - Page 22 Appendix Additional Information Message Cause Action Message Cause Action ERROR-23 SKIPPED The connected Play an audio file USB storage de- USB storage de- vice is not for- vice should be for- USB storage de- not embedded with vice contains Windows Media matted with matted with FAT16 WMA files em-...
-
Page 23: Handling Guideline
Appendix Additional Information Avoid leaving discs in excessively hot environments Message Cause Action including under direct sunlight. CHECK USB iPod operates Check if the con- correctly but nection cable for Do not attach labels, write on or apply chemicals to does not charge iPod shorted out the surface of the discs. -
Page 24: Compressed Audio Compatibility (Disc, Usb)
Appendix Additional Information Firmly secure the iPod when driving. Do not let the Sampling frequency: 8 kHz to 48 kHz (32 kHz, 44.1 iPod fall onto the floor, where it may become jammed kHz, 48 kHz for emphasis) under the brake or accelerator pedal. Compatible ID3 tag version: 1.0, 1.1, 2.2, 2.3, 2.4 (ID3 For details, refer to the iPod’s manuals. -
Page 25: Ipod Compatibility
Cable is required. Regardless of the length of blank section between the songs of the original recording, compressed audio Pioneer CD-IU50 interface cable is also available. For discs play with a short pause between songs. details, consult your dealer. About the file/format compatibility, refer to iPod man- uals. -
Page 26: Copyright And Trademark
Appendix Additional Information 3 Save the folder containing files on the USB iPod storage device. However, depending on the system environ- ment, you cannot specify the playback se- quence. For USB portable audio players, the sequence is different and depends on the player. iPod is a trademark of Apple Inc., registered in Copyright and trademark the U.S. -
Page 27: Specifications
Nose ......170 mm × 46 mm × 24 mm The SAT RADIO READY mark indicates that (6-3/4 in.× 1-3/4 in.× 1 in.) the Satellite Radio Tuner for Pioneer (i.e., XM Weight .......... 1.3 kg (2.9 lbs) tuner and Sirius satellite tuner which are sold separately) can be controlled by this unit. - Page 28 Appendix Additional Information AAC decoding format .... MPEG-4 AAC (iTunes en- coded only) (.m4a) (Ver. 8.2 and earlier) WAV signal format ....Linear PCM & MS ADPCM (Non-compressed) FM tuner Frequency range ...... 87.9 MHz to 107.9 MHz Usable sensitivity ..... 9 dBf (0.8 μV/75 W, mono, S/N: 30 dB) Signal-to-noise ratio ....
- Page 29 TEL: (03) 9586-6300 PIONEER ELECTRONICS OF CANADA, INC. 300 Allstate Parkway, Markham, Ontario L3R 0P2, Canada TEL: 1-877-283-5901 TEL: 905-479-4411 PIONEER ELECTRONICS DE MEXICO, S.A. de C.V. Blvd.Manuel Avila Camacho 138 10 piso Col.Lomas de Chapultepec, Mexico, D.F. 11000 TEL: 55-9178-4270 先鋒股份有限公司...
- Page 30 CD RECEIVER AUTORADIO CD RADIO CD DEH-P5200HD Installation Manual Manuel d’installation Manual de instalación Printed in Thailand Imprimé en Thaïlande CRD4447-A/N < > UC <KMINX> <09H00000>...
- Page 31 Connecting the unit English — Place all cables away from moving parts, such WARNING as gear shift and seat rails. — Place all cables away from hot places, such as • Use speakers over 50 W (output value) and between 4 : to 8 : (impedance value). Do not use near the heater outlet.
- Page 32 IP-BUS input (Blue) (sold separately) To front output Wired remote input Power amp Hard-wired remote control (sold separately) adaptor can be connected Pioneer IP-BUS To rear output (sold separately). accessories or subwoofer IP-BUS cable output Yellow Connect to the constant 12 V supply terminal.
-
Page 33: When Using A Subwoofer Without Using The Optional Amplifier
Rear output or subwoofer output Antenna jack Front output IP-BUS input (Blue) Wired remote input Hard-wired remote control adaptor can be connected Pioneer IP-BUS (sold separately). accessories IP-BUS cable Blue/white Connect to system control terminal of the power amp or auto-antenna relay control terminal (max. - Page 34 Installation English 3. Install the unit as illustrated. Note • Use commercially available parts when • Check all connections and systems before final installing. installation. • Do not use unauthorized parts. The use of unauthorized parts may cause malfunctions. Firewall or •...
-
Page 35: Fastening The Front Panel
Installation English Removing the Unit Fastening the front panel 1. Extend top and bottom of the trim If you do not plan to detach the front panel, ring outwards to remove the trim the front panel can be fastened with supplied screw.