Table of Contents
Advertisement
Quick Links
Advertisement
Table of Contents

Related Manuals for EnGenius EP902


Summary of Contents for EnGenius EP902
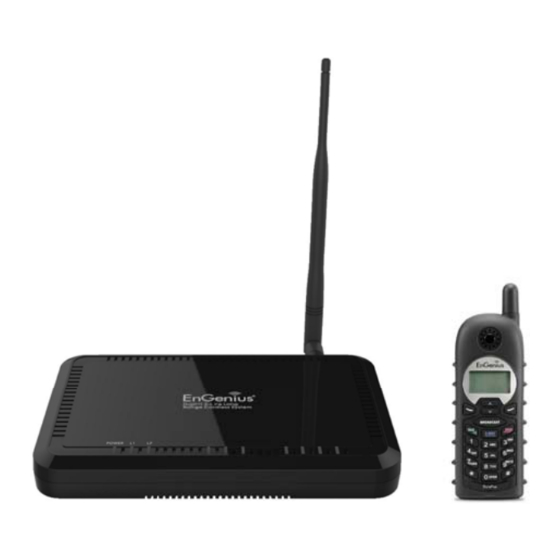
- Page 1 User Manual EP902 Digital 2-Line Long Range Cordless...
- Page 2 Intentionally left blank...
-
Page 3: Table Of Contents
Table of Contents Safety Instructions ..............5 General Safety Instructions ..........5 Product Safety Instructions ........... 6 Battery Safety Instructions ............ 8 Regulatory Information ............. 9 Equipment Checklist ............. 11 Handset Illustration ..............12 Basic Handset Features ............. 13 Additional Handset Features ..........15 Base Illustration .............. - Page 4 Do Not Disturb (Silent Ring) ..........36 Key Guard ................36 Battery Recharge and Replacement ........37 Advanced Operations ............38 Handset Registration ................... 38 Handset Group Subscription ..........39 Call Transfer ............... 40 3-Way Conferencing ............41 Call Park ................42 Phonebook Operations ............
-
Page 5: Safety Instructions
Safety Instructions Caution: Your wireless telephone gives you freedom and flexibility to stay in touch while you move around. However, when using your phone equipment, safety instructions should be followed to avoid the risks of fire, electric shock, injury to person, and damage to property. -
Page 6: Product Safety Instructions
Product Safety Instructions 1. Read and understand all instructions. 2. Follow all warnings and instructions including those marked on the product. 3. Changes or modifications to this product not expressively approved by the manufacturer will void the warranty and the CE authorization to operate the equipment. - Page 7 removing covers may expose you to dangerous voltages, electrical currents or other risks. Incorrect reassembling of the product may cause electric shock when the product is subsequently used. 13. Avoid using the product during a storm. There may be a risk of electric shock from lightning.
-
Page 8: Battery Safety Instructions
Battery Safety Instructions 1. Use only manufacturer approved Li-ion rechargeable batteries and charger. Do not use other types of rechargeable batteries or non- rechargeable batteries. The batteries could short-circuit, and the battery enclosure may be damaged causing a hazardous condition. 2. -
Page 9: Regulatory Information
Regulatory Information EP902 This device complies with CE Rules. Operation is subject to the following two conditions: 1) this device may not cause harmful interference, and 2) this device must accept any interference received, including interference that may cause undesired operation. - Page 10 telephone system should not be placed or operated near other electronic devices. However, there is no guarantee that interference will not occur in a particular installation. If this telephone system does cause interference to other electronic devices, which can be determined by turning the system off and on, the user is encouraged to try to correct the interference by one or several of the following measures: a.
-
Page 11: Equipment Checklist
Equipment Checklist In a Base + Handset package, please find the following components: Base Station x 1 (antenna installed) Base AC/DC Adaptor x 1 Handset x 1 (antenna installed) Handset Antenna x 1 (Long ×1) Desktop Charger x 1 Charger AC/DC Adaptor x 2 1700mA Li-ion Battery Pack x 1 Telephone Cord x 2 Quick Guide... -
Page 12: Handset Illustration
Handset Illustration Antenna Receiver Display Up / Down Soft key Soft key Broadcast Talk / Flash End / Power Off Intercom Speakerphon Dialing key Microphone ~12~... -
Page 13: Basic Handset Features
LCD consists of icons. c. Icons explanation from left to right (1) RSSI level (Receive Signal Strength (1)(2) (3) (4) Indicator) EP902 During a call, the number of bars is proportional to the radio signal strength REDIAL MENU received. - Page 14 d. The 2 and 3 lines of the LCD, maximum 16 characters each, display status, message, menu selections, or user-editable alphanumerical characters. The last line displays the left and right soft keys. 2. Ringer a. Rings to an incoming call and intercom call. b.
-
Page 15: Additional Handset Features
Make menu selection. 8. Up( ) /Down( ) Scrolling Keys a. Scroll through records and menu selections. b. Adjust receiver or speaker voice volume when in the Talk mode. c. Press to enter received call log when in the Standby mode. d. - Page 16 screen will display the name or nickname instead of pure caller ID info (needs Call Waiting with Caller ID service from local telephone company). 6. DND (Do Not Disturb, i.e., Silent Ring) 7. Call Logs a. Redial: Stores 10 phone numbers (up to 26 digits each) dialed most recently.
- Page 17 b-2. Manual: A handset will be set prompted a select from a list of available lines before making an outgoing call. b-3. Predefine line: A handset will be set a specific line for making an outgoing call. b-4 Off: Disable the capability to make an outgoing call. Call Barring c-1.
- Page 18 17. Programmable Feature Call a. Allow user to pre-program the most frequently used Feature code into EP902 which is adjunct to the PBX system. b. Up to 10 entries can be saved. Once the feature code is being programmed, you can quickly...
- Page 19 Allow handset to subscribe to one or several groups. Re: Up to 9 groups (ID: 91~99) can be subscribed. 20. Custom Name Allow changing the “EP902” screen to the desired wording or info, such as the user’s name. Re: Up to 32 characters can be entered.
- Page 20 26. Change PIN Allow changing the base PIN which requires entering the “Base Settings” (MENU-6-5). a. Using registered handset to change PIN from MENU-6-5. b. Default PIN is “0000”. When entering the Base Settings, PIN is required. Default is “0000”. 27.
- Page 21 Allow changing the handset microphone gain based on the handset in different environment – 1.Standard(for Quiet), 2.Medium(for Normal) and 3.Low(for Noisy) environment. This requires entering the “Phone Settings” (MENU-5-1). 32. Headset Ring Allow changing the ringer emitted either from handset speaker or receiver of headset.
-
Page 22: Base Illustration
Base Illustration Base unit Diagram ~22~... -
Page 23: Base Features
6. Audio in Jack (3.5mm) Connect to an external device for music on hold 7. Console jack Jack for firmware upgrade (Type-B USB connector) Please consult with EnGenius Tech support about the firmware upgrade. 8. DC In: to plug in the power adaptor ~23~... - Page 24 ~24~...
-
Page 25: Charger Illustration
Charger Illustration DC In Spare Battery Charging Slot Spare Battery Charging Indicator Handset Charging Slot ~25~... -
Page 26: Charger Features
Charger Features 1. DC In Connects to Charger AC Adaptor. 2. Handset Charging Slot a. Charge handset battery when handset is placed in cradle. b. Refer to the handset LCD for charging status (1) Charging: battery status bar is running and the LCD screen showed: “Charging”. -
Page 27: Getting Started
Getting Started Base Station Installation There are three possible base station setups: Base station alone Base station plus telephone answering device Base station plus standard telephone For best performance, maintain at least a distance of 1 meter (about 3 feet) between the base station and other electronic devices (e.g., TV, computer, stereo, fax machine, answer machine, cordless phone, etc.) 1. -
Page 28: Handset And Charger Installation
Handset and Charger Installation 1. Plug the transformer end of the Charger AC/DC adaptor into a standard AC electric power outlet, plug the other end into the “DC In” jack on the back of the Charger. 2. Install battery pack onto the handset. 3. -
Page 29: Basic Operations
REG button for three seconds. A prompt sound will be emitted in “Registration” mode. B. Handset Operation Modes 1. STANDBY mode- this is the default mode. a. If there is no on-going activity, the handset EP902 automatically goes into SLEEP/STANDBY mode to save battery power. REDIAL MENU b. -
Page 30: Menu Tree
3. Menu Tree Menu 1.KeyGuard 2.PhoneBook 3.Sounds 1.Ring Volume 2.Ring Tone *Exist when multi -base setting is on 3.Key Voulme * Subscribe BS 4.Key Tone 1.PA On/Off 4.Call Settings 1.Dial Prefix 2.Line On/Off 2.Group Setting 3.Int. On/Off 3.Call Manager Incoming 4.Line Dedicated 4.Feature Call Outgoing... -
Page 31: Making A Telephone Call
2. A call duration timer will start displaying the length of the call after link is established. Making an 2-Way/ Intercom Call The EP902 Cordless Phone System offers private, Intercom/ 2-way radio calls independence of base station. Intercom/ 2-way communication can be placed between handsets. -
Page 32: Making A Broadcast
1. Press key followed by a two-digit handset ID Enter Ext #: or Group ID. 2. Press key to end the call. BASE PHBOOK Notes: Intercom calls can be made regardless if the Base Station is present. If a Group ID is entered, the first handset (belonging to that group) that answers will establish a link with the caller. -
Page 33: Redial
Release key to end the broadcasting. Redial 1. Press REDIAL (Left) soft key. EP902 2. The LCD shows the last phone number dialed. To dial this number, press key. REDIAL MENU key to scroll through the last 10... -
Page 34: Receiving An Intercom Call
Re: You can turn on the “Any Key Talk” from MENU-5-2 Notes: You can press SILENT (Left) soft key if you choose to ignore the call. Unlike turning off the ringer (from the handset menu), the SILENT (Left) soft key operation is valid only for the current call. -
Page 35: Adjusting Handset Receiver (Earpiece) Voice Volume
To end a telephone or intercom call, press key, or place handset into charger cradle. Adjusting Handset Receiver (Earpiece) Voice Volume 1. Voice volume can only be adjusted during a call. 00:00:15 2. There are 6 levels of volume selections. Use Volume: 3 key to adjust MUTE... -
Page 36: Mute
that a call is being on hold. 2. If the operation (e.g., call transfer) after putting a call on- hold fails, the held call may be dropped. Mute 1. After a link is established, you can press MUTE (Left) soft key to mute the handset microphone. 00:00:15 MUTE 2. -
Page 37: Battery Recharge And Replacement
3. Once returning back to standby mode for 15 seconds, the keyguard will be automatically enabled. 4. Key Guard is in effect until unlocked. Battery Recharge and Replacement 1. Charge the battery when one or several of the following happen: a. -
Page 38: Advanced Operations
Advanced Operations Handset Registration 1. If your handset(s) is purchased as part of a system, it has been pre- registered with the base station at the factory. 2. If Handset ID as “00,” that means it is a new handset or the ID has been erased. -
Page 39: Handset Group Subscription
register”. Notes: The base station has a 30 second registration timeout starting from pressing the PAGE button. The handset has a 6 second registration timeout starting from the registration or de-registration option has been selected. The base station and handset will automatically exit registration mode after timeout. -
Page 40: Call Transfer
The base station is not responsible for group assignments. Consequently, it cannot de-subscribe a handset from a group. 3. When an intercom caller enters a group ID, all handsets subscribed to this group will ring. The first handset to answer will establish a link with the caller. -
Page 41: 3-Way Conferencing
Notes: If the destination handset does not answer after handset paging or transferring timeout, the call is routed back to the originating handset. 3-Way Conferencing While a telephone call is in progress, you can place call on hold and bring in another phone line or another handset for a 3-way conference. -
Page 42: Call Park
Call Park While a telephone call is in progress, you can place this call on hold and pick up by another handset. Press OPTION (Right) soft key, followed by the key to put the call on * hold. The LCD shows “You have a call on hold”. Press OPTION (Right) soft key, followed by the... - Page 43 entered. When completed, press SAVE (Left) soft Name? key to save. Re: Up to 16 characters can be entered as the Caps = * name. SAVE DELETE c. You will then be prompted to enter a number for the Number? name just entered.
- Page 44 Phone Book mode. b. Press a key that corresponds to the first character of the name you are looking for. c. For example, you are looking for “EnGenius”, and then press the number twice. d. Use scrolling key to locate the exact record you are looking for.
- Page 45 d. LCD shown “Delete entry?” Press (Left) soft Delete entry ? key to confirm your change. 12345678 8. To edit phonebook: a. Use scrolling key or the alphabetical search method to locate the record to be erased or edited. 033289289 OPTION b.
-
Page 46: Programmable Feature Call
Re: The phonebook transfer through the wireless interface, it may partially miss transmission by interference. Programmable Feature Call 1. If EP902 base station is installed behind a PBX system, it is feasible to pre-program some feature call along with the PBX’s feature code into the system. -
Page 47: Caller Id
*.Hold 0.PBX Transfer #.Phonebook Notes: 1. This feature call would be useful if the EP902 base station is adjunct to a PBX system, 2. if you have not pre-programmed any feature call into the system, only “#.Phonebook” in the OPTION menu. -
Page 48: Multi-Base Setting
phonebook or deleted. View Call Log 1. To view the call log, press to enter the Call Log. 01/04 08:20P NEW Johnson Press key to scroll through the numbers 423-1234 and names when available. OPTION FORMAT 2. Press OPTION (Right) soft key, you can Option : Save key to choose save, delete, clear all. - Page 49 to the 1 base station (i.e. the handset with ID 11), followed by below processes: 1. Press MENU (Right) soft key followed by to enter Registration the registration mode. 3.Multi-Base SELECT BACK 2. Press & hold the base station button for thress Set Base seconds, the base station will emit the prompt sound BS #1...
-
Page 50: Call Manager
Call Manager “Call Manager” feature allows four options: 1. The first option is ”Subscribe BS”. The handset can be set to receive incoming calls or make outgoing calls (2-way intercom, broadcast and transferred call are allowed). The option is selectable by base station 1 to base station 4. -
Page 51: Incoming
press CHANGE (Left) soft key to set the Subscribe BS ON/OFF. Note If set the Subscribe BS ON, that means the handset is able to access the line of the desired base station, so the handset is able to make outgoing call or answer incoming call via the desired base station. -
Page 52: Outgoing
key to select line 1 or line 2. Press CHANGE (Left) soft key to change the dedication handset or group or all handsets. (4) Press SELECT (Left) soft key and enter Handset ID number or group ID. (5) Go to item (3) to set another line. To exit the setting by pressing BACK (Right) soft key or... -
Page 53: Call Barring
press key to select the desired base to be edited by pressing CHANGE (Left) soft key and followed by digit , 2, & & select the line or line sequence for outgoing call. d Press to “Off”.The hanset is disable to make any outgoing call. -
Page 54: Visual Message Waiting Indicator (Vmwi)
b. Press OPTION (Right) soft key to delete or edit the Call Barring Call Barring codes. 1212 Up to 5 sets of Call Barring codes can be programmed. OPTION c. If wants to block all outgoing calls, enter “* * * **"... -
Page 55: Adjust Headset Ring
Adjust Headset Ring When using headset, to avoid missing the call due to the ringer emitted from receiver of headset, you can change the ringer emitting from either handset speaker or receiver of headset. a. Press MENU (Right) soft key while the handset is in the standby mode. -
Page 56: Menu Operations
Menu Operations Menu 1.KeyGuard 2.PhoneBook 3.Sounds 1.Ring Volume 2.Ring Tone *Exist when multi -base setting is on 3.Key Voulme * Subscribe BS 4.Key Tone 1.PA On/Off 4.Call Settings 1.Dial Prefix 2.Line On/Off 2.Group Setting 3.Int. On/Off 3.Call Manager Incoming 4.Line Dedicated 4.Feature Call Outgoing 1.Auto... - Page 57 1. Press MENU (Right) soft key to enter menu mode while the phone is in standby mode. Re: You can either press , followed by SELECT (Left) soft key to confirm the selected menu. Or Press the digit directly to confirm the selected menu.
- Page 58 Press to turn on or off the dial prefix feature. Default = Off. If “On” is selected, the handset is prompted to enter the prefix number, up to 14 digits can be entered. Delete (Right) soft key to edit prefix number. Press SAVE (Left) soft key to confirm the selection.
- Page 59 (3) Press SAVE (Left) soft key to confirm setting. Re: Once entering the custom name, the greeting of LCD in standby mode will be changed as the entering. Default greeting is “EP902”. ~59~...
- Page 60 CHANGE (Left) soft key to select and confirm on or off. The Re: When setting “on”, the EP902 will automatically hang up if the far end caller hung up already. However, this function depends on if there is “dial tone or busy tone” signal sent out by PBX or PSTN, after the call hung up.
- Page 61 SAVE (Left) soft key to select and confirm the Date and Time you have set (see Set Time operation on page 19). 8. Press to register, de-register handset and set Multi-Base: see Handset Registration operation on Page 36, and Multi-base Setting on Page 47. 9.
-
Page 62: Index
Index 2-WAY INTERCOM...............14 3-Way Conferencing..............41 Adjust Handset Microphone Gain..........54 Adjust Headset..............55 Adjusting Handset Receiver (Earpiece) Voice Volume..35 Adjusting Handset Speakerphone Voice Volume....35 Area Code................20, 58 Auto Hang Up..............20, 60 Baby Monitor..............21, 55, 58 Base Illustration..............22 Base Operation..............29 Base PIN..............20, 51, 60 Base Station........11, 13, 23, 27, 28, 32, 66 Battery Recharge a nd Replacement........37 Battery Safety Instructions............8... - Page 63 Change PIN..............20, 60 Charger Features..............26 Charger Illustration..............25 De-registration...............38 Direct transfer................40 DND..................16 Do Not Disturb (Silent Ring)..........36 DTMF Duration..............19, 60 electric shock..............5, 6, 7 Emergency................5 Equipment Checklist..............11 Feature Call...............18, 46, 58 Flash..............14, 19, 46, 60, 66 General Safety Instructions.............5 Group ID..............15, 16, 32 Group Selections..............39 Group Setting.................19 Handset and Charger Installation..........28...
- Page 64 Line Dedicated...............16 Making a Telephone Call............31 Making an 2-Way/ Intercom Call..........31 Menu Display.............18, 19, 61 MENU mode................29 Multi-Base Setting............48, 49 Multiple Base setting..............20 Multiple handsets registration..........15 Mute.................17, 36 Name tagging with caller ID...........15 Outdoor Antenna..............11 Outgoing..............16, 50, 52 Phone Settings........18, 21, 54, 55, 58, 61 Phonebook.............18, 42, 47, 57, 59 Placing a Call On Hold............35 Power Outage................6...
- Page 65 Set Time..............20, 60, 61 SILENT..............17, 34, 36, 58 speakerphone............14, 32, 33, 35 Speed dial................31 Subscribe BS..............50, 51 Talk mode................15 TALK/FLASH.................14 Technical Specifications............66 transformer..............27, 28 Vibrator..................15 View Call Log.................48 Visual Message Waiting Indicator..........54 warning message..............26 ~65~...
-
Page 66: Technical Specifications
Technical Specifications Electrical Specifications Base Station Portable Handset Frequency 863-865 MHz 863-865 MHz Peak: 8 dBm Peak: 8 dBm RF Output Power Average: 5 dBm Average: 5 dBm Channel Spacing 150 kHz 150 kHz Number of Channels Modulation GMSK GMSK TDD Frame Length 10 ms 10 ms...