Advertisement
Quick Links
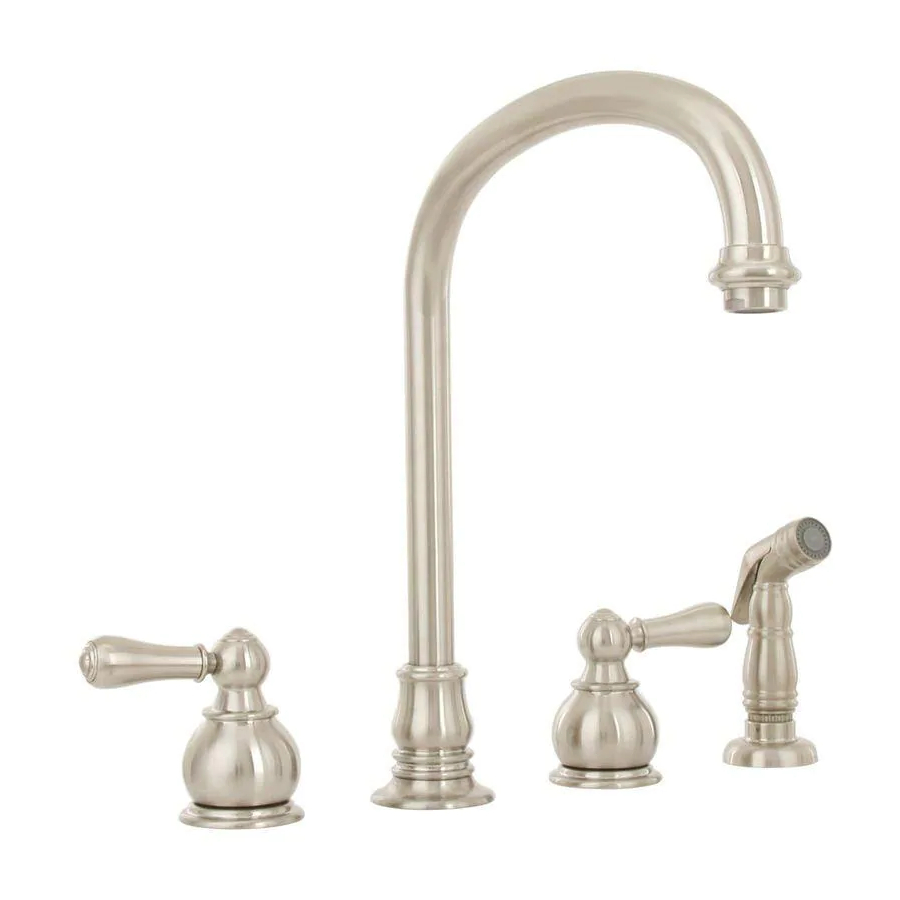
Williamsburg
KITCHEN FAUCETS
MEZCLADORA DE COCINA DUOMANDO
ROBINETS DE CUISINE
Thank you for selecting American-Standard...the benchmark of fine
quality for over 100 years. To ensure that your installation proceeds smoothly--
please read these instructions carefully before you begin.
Gracias por preferir American Standard.... El punto de referencia de la más fina calidad por más de
100 años. Para asegurar que su instalación se efectue de la mejor forma favor de leer estas
instrucciones cuidadosamente antes de empezar.
Nous vous remercions d'avoir choisi American Standard... synonyme de qualité
supérieure depuis plus de 100 ans. Pour s'assurer d'une installation sans
inconvénients, veuillez lire attentivement ces instructions avant de commencer.
HERRAMIENTAS NECESARIAS
TOOLS REQUIRED
Channel Locks
Pinzas de Plomero
Pinces de sûreté
1
2
4
1
CAUTION
INSTALL FAUCET
Install MOUNTING NUT (1) onto SPOUT BODY (3). Insert SPOUT
BODY (3) through hole from underside of SINK.
Place RUBBER RING (4) over SPOUT BODY (3). Screw
ESCUTCHEON (2) onto SPOUT BODY (3) until snug against
internal stop.
From under sink tighten MOUNTING NUT (1) to secure SPOUT.
ADVERTENCIA:
INSTALACION
del agua caliente y fría antes de comenzar lainstalación
DE LA LLAVE
Instale la TUERCA DE SEGURIDAD (1) y sobre el CUERPO DE LA
BOQUILLA (3). Inserte el CUERPO DE LA BOQUILLA (3) a través del
agujero, desde la parte inferior del fregadero.
Coloque el ANILLO DE HULE (4) dentro del ESCUDETE DE LA
BOQUILLA (5), y atornille el ESCUDETE (2) sobre el CUERPO DE LA
BOQUILLA (3), hasta que quede ajustado contra el tope interno.
Desde abajo del fregadero, apriete la TUERCA DE SEGURIDAD (1)
para asegurar la BOQUILLA.
INSTALLER
ATTENTION
LE ROBINET
Installer l'ÉCROU DE BLOCAGE (1) et sur le CORPS DU BEC (3).
Glisser le CORPS DU BEC (3 ) à travers l'orifice par-dessous l'ÉVIER.
Mettre le JOINT D'ÉTANCHÉITÉ (4) dans l'ÉCUSSON DU BEC (2) et visser
l'ÉCUSSON (2) sur le CORPS DU BEC (3) jusqu'à ce qu'il soit bien en place.
Serrer l'ÉCROU DE BLOCAGE (1) pour fixer le BEC par-dessous l'évier.
Installation Instructions
Instrucciones de Instalacion
Instructions d'installation
T M
Adjustable Wrench
Llave Ajustable
Clé universelle
3
Turn off hot and cold water
supplies before beginning.
Cierre la tuberia de la ali mentación
Fermer l'alimentation d'eau
chaude et froide
avant de commencer.
4751 SERIES
4752 SERIES
OUTILS REQUIS
Plumbers' Putty or Caulking
Masilla de Plomero
Mastic de plomberie
2
5
4
1
INSTALL
VALVE BODIES
Install MOUNTING NUT (1) onto VALVE BODIES (3). Insert VALVE
BODY (3) through hole from underside of SINK.
Place RUBBER RING (4) over SPOUT BODY (3). Screw ESCUTCHEON (5)
onto VALVE BODY (3) until snug against internal stop.
From under sink tighten MOUNTING NUT (1) to secure VALVE BODY (3).
Insert SPOUT BODY SUPPLY HOSES (2) and tighten connection to
VALVE BODIES (3).
INSTALACIÓN DE LOS CUERPOS DE LA VÁLVULA
Instale la TUERCA DE SEGURIDAD (1) y sobre los CUERPOS DE LA
VÁLVULA (3). Inserte el CUERPO DE LA VÁLVULA (3)
a través del agujero, desde la parte inferior del fregadero.
Coloque el ANILLO DE HULE (4) dentro del ESCUDETE (5), y atornille el
ESCUDETE (5) sobre el CUERPO DE LA VÁLVULA (3), hasta que quede
ajustado contra el tope interno.
Desde abajo del fregadero, apriete la TUERCA DE SEGURIDAD (1) para
asegurar el CUERPO DE LA VÁLVULA.
Inserte de las MANGUERAS DE ALIMENTACIÓN DEL CUERPO DE LA
BOQUILLA (2) y apriete la conexión a los CUERPOS DE LA VÁLVULA (3).
INSTALLER LES CORPS D'APPAREILLAGE DE ROBINETTERIE
Installer l'ÉCROU DE BLOCAGE (1) et sur les CORPS D'APPAREILLAGE DE
ROBINETTERIE (3). Glisser le CORPS D'APPAREILLAGE DE ROBINETTERIE (1)
à travers l'orifice par-dessous l'ÉVIER.
Mettre le JOINT D'ÉTANCHÉITÉ (4) dans l'ÉCUSSON (5) et visser l'ÉCUSSON (5) sur
le CORPS D'APPAREILLAGE DE ROBINETTERIE (3) jusqu'à ce qu'il soit bien en place.
Serrer l'ÉCROU DE BLOCAGE (1) pour fixer le CORPS D'APPAREILLAGE DE
ROBINETTERIE (3) par-dessous l'évier.
Insérer les TUYAUX D'ALIMENTATION DU CORPS DU BEC (2) et serrer le
raccordement aux CORPS D'APPAREILLAGE DE ROBINETTERIE (3).
Certified to comply with ASME A112.18.1M
Certifié ASME A112.18.1M
M 9 6 8 7 2 0 D
Flat Blade Screwdriver
Desatornillador Plano
Tournevis à lame plate
Phillips Screwdriver
Desarmador Regular
Tournevis cruciforme
2
3
© A m e r i c a n S t a n d a r d I n c . 2 0 0 1
Advertisement

Related Manuals for American Standard Williamsburg Kitchen Faucets 4751 Series


Summary of Contents for American Standard Williamsburg Kitchen Faucets 4751 Series
- Page 1 Gracias por preferir American Standard…. El punto de referencia de la más fina calidad por más de 100 años. Para asegurar que su instalación se efectue de la mejor forma favor de leer estas instrucciones cuidadosamente antes de empezar.
- Page 2 INSTALL HANDLES Push ADAPTER (1) on VALVE STEM (2), so that the hole of the ADAPTER (1) without spline is facing up. See figure "A". Screw HANDLE BASE (3) on top of ESCUTCHEON (4) until it is snug against stop. Push LEVER BALL (5) through HANDLE BASE (3) onto ADAPTER (1).
- Page 3 FITTING WITH SPRAY Place SPRAY HOLDER (1) into separate hole of SINK (2) and assemble NUT (3) onto shank from underside of SINK (2). Hand tighten NUT (3). MEZCLADORA CON REGADERA Coloque el portaregadera (1) en el orificio separado de el fregadero (2) y ensamble la tuerca de fijación (3) sobre la rosca del portaregadera por la parte inferior de el fregadero (2).
- Page 4 Williamsburg KITCHEN FAUCETS MEZCLADORA DE COCINA DUOMANDO ROBINETS DE CUISINE MODEL NUMBER NÚMERO DE MODELO NUMÉRO DE MODÈLE 4751 4752 060353-YYY0A PORCELAIN LEVER HANDLE MANIJA PALANCA DE PORCELANA POIGNÉE EN PORCELAINE 051379-YYY0A VALVE ESCUTCHEON KIT JUEGO DE ESCUDETE DE VÁLVULA ENSEMBLE DE ROSACE DE ROBINET 9 1 8 0 4 9 - 0 0 7 0 A...