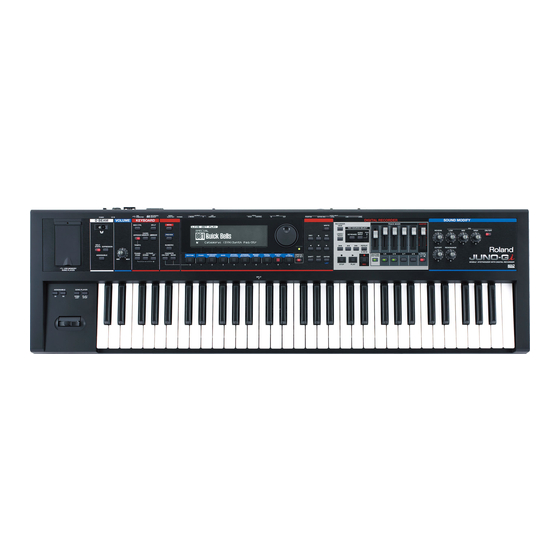
Roland JUNO-Gi Owner's Manual
Mobile synthesizer with digital recorder
Hide thumbs
Also See for JUNO-Gi:
- Workshop (26 pages) ,
- Workshop manual (19 pages) ,
- Quick start manual (7 pages)
Table of Contents
Advertisement
Quick Links
Advertisement
Chapters
Table of Contents

Related Manuals for Roland JUNO-Gi


Summary of Contents for Roland JUNO-Gi
-
Page 2: Features
Features The JUNO-Gi is a full-fledged synthesizer that’s lightweight and compact, designed to meet the needs of live performance in a wide range of musical styles. With the latest high-quality synthesizer sound engine and a built-in digital recorder, the JUNO-Gi makes live performance and recording easier than ever. -
Page 3: Table Of Contents
(OCTAVE [DOWN] [UP] Button) ........27 Overview of the JUNO-Gi ...... - Page 4 17: TREMOLO ..........54 Backing Up JUNO-Gi Settings to SD Card (User Backup) ... 78 18: AUTO PAN .
- Page 5 Digital Recorder 1 (Recording/Playing/Editing) igital Recorder 2 (Effects) Displaying the Digital Recorder Screen ....Effects in the Recorder Section ..... Displaying the RECORDER Screen .
- Page 6 Selecting a Pattern ........122 Playing the JUNO-Gi from an External MIDI Device ... . . 134 Selecting Drum Sounds (Rhythm Set) .
-
Page 7: Overview
Overview... -
Page 8: Overview Of The Juno-Gi
Overview of the JUNO-Gi Broadly speaking, the JUNO-Gi consists of three sections: “Synthesizer, ” “Digital Recorder, ” and “USB Memory Song Player. ” The explanations in this manual are also organized according to these sections. You can use the index tabs at the right edge of each page to jump to the section you want to read. -
Page 9: About The Digital Recorder
About the Digital Recorder About the Recorder Tempo The JUNO-Gi uses two types of tempo: the “keyboard tempo” and the The JUNO-Gi’s digital recorder lets you record the JUNO-Gi’s “recorder tempo. ” The keyboard tempo is used for the synthesizer’s... -
Page 10: Panel Descriptions
D BEAM Move your hand above the D Beam to apply various effects to the sound. p. 28 [VOLUME] knob Adjusts the volume of the entire JUNO-Gi. p. 16 KEYBOARD area Here you can make keyboard-related settings. [MIDI CTRL] button Puts the JUNO-Gi in MIDI Controller mode. - Page 11 Cancels (Undo) or re-executes (Redo) an operation of the Digital Recorder. p. 96 REC SOURCE SELECT Selects the source for recording. Press the [KEYBOARD] button to record the JUNO-Gi’s keyboard sound, or p. 93 [KEYBOARD]/[AUDIO INPUT] button press the [AUDIO INPUT] button to record the sound of the external input.
-
Page 12: Rear Panel Connections
Rear Panel Connections The JUNO-Gi does not contain an amp or speakers. In order to produce sound, you’ll need to connect the rear panel OUTPUT jacks to an audio device such as an amplified speaker system (subsequently referred to as “speakers”), or use headphones. -
Page 13: Sd Card Slot
(see figure) with an external ground. When the unit is grounded, a slight hum may occur, depending on the particulars of your installation. If you are unsure of the connection method, contact the nearest Roland Service Center, or an authorized Roland distributor, as listed on the “Information”... -
Page 14: About Batteries
Removing Batteries 4. Replace the battery compartment cover. To remove the batteries, switch off the JUNO-Gi’s power, remove the * When turning the unit upside-down, get a bunch of newspapers or battery case cover, and remove the batteries as described in “Installing magazines, and place them under the four corners or at both ends to prevent Batteries. -
Page 15: About Sd Cards
• Since the 2 GB SD card included with the JUNO-Gi contains a demo song, the available recording time will be shorter than listed above. • With the Track Export function, a maximum of approximately 6 hours and 40 minutes worth of monaural data (approximately 3 hours and 20... -
Page 16: Turning The Power On
If you don’t want the power to turn off automatically, turn off the “Auto Power Off” setting The JUNO-Gi will automatically turn off when no operation has been performed for a certain length of time. (With the factory settings, the power will turn off after 240 minutes.) -
Page 17: About The Display
The characters in the display may be difficult to read immediately after 1. Hold down the [SHIFT] button and press the [EXIT] button. the power is turned on, or after you have been using the JUNO-Gi for The display backlight will turn off. -
Page 18: Basic Operation Of The Juno-Gi
Basic Operation of the JUNO-Gi About the Function Buttons Editing a Value The [1]–[6] buttons located below the display execute various Moving the Cursor functions (function buttons), and their operation will differ depending on the screen. The functions are shown in the bottom of the screen, and the corresponding function buttons will light. -
Page 19: Entering A Value ([Numeric] Button)
Assigning a Name If you turn the [NUMERIC] button on, you’ll be able to use the [0]–[9] On the JUNO-Gi, you can assign names to each live set, song. The buttons to enter numeric values. procedure is the same for any type of data. -
Page 20: Listening To The Demo Song
Listening to the Demo Song Demo song list The SD card included with the JUNO-Gi contains demo songs for the Digital Recorder. The first time that you turn on the power, the demo song in song data format will be loaded automatically. - Page 21 Synthesizer...
-
Page 22: Synthesizer 1 (Selecting Sounds)
Synthesizer 1 (Selecting Sounds) Selecting Live Sets Selecting Live Sets from the List On the JUNO-Gi, “Live Sets” are the units of sound that you select and use. The JUNO-Gi’s Live Sets are divided into the following groups. You can view a live set list and select a live set from that list. -
Page 23: Using The Value Dial To Select A Live Set
Using the VALUE Dial to Select a Live Selecting Special Live Sets ([SPECIAL LIVE SET] Button) To select a live set, use the cursor buttons and the VALUE dial to 1. Press the [SPECIAL LIVE SET] button. change the value in the LIVE SET PLAY screen. 2. Use the cursor buttons to move the cursor to the live set number. -
Page 24: Registering And Calling Up Favorite Live Sets (Favorite)
Registering and Calling Up Favorite Live Sets (FAVORITE) Registering, Calling Up, or Editing If you register frequently used live sets as “favorites, ” you’ll later be able to call them up instantly. Favorites in a List Each bank of favorites lets you register a total of ten live sets. You can create ten of these banks. -
Page 25: Selecting Tones (Layer/Split)
VALUE dial or the [DEC] [INC] buttons to select the It’s not possible to edit or rewrite tones themselves on the JUNO-Gi. desired tone number. However, you can select the tones that will be played by a live set, and make relative adjustments (offsets) to the values of each tone. -
Page 26: Dividing The Keyboard Into Two Areas To Play Separate Tones (Split)
2. To close the setting window, press the [EXIT] button. MIDI receive channel when in Split mode If you want to play the JUNO-Gi from an external MIDI- connected device, use the MIDI channel that’s specified by the System setting “Main Channel” (p. 82). -
Page 27: Synthesizer 2 (Performance Functions)
• By holding down the [TRANSPOSE] button and pressing the [–] and [+] buttons simultaneously you can reset the value to “C. ” • There is a single Transpose setting for the entire JUNO-Gi. The changed setting will be remembered even if you switch live sets. -
Page 28: Controlling Your Performance
On the JUNO-Gi, the D Beam controller can be used not only to modify the sounds, but also to control the pitch of a monophonic (solo) synthesizer sound. -
Page 29: Pitch Bend/Modulation Lever
Pitch Bend/Modulation Lever Knob Parameter Value Explanation Boosts the sound in the vicinity of the cutoff frequency, adding a While holding down a key, moving the lever to the left will lower the distinctive character to the sound. pitch, and moving it to the right will raise the pitch. This is called “pitch [RESONANCE] Resonance -64–... -
Page 30: Using Pedals
(Vocoder) You can connect a hold pedal (sold separately: DP series) and an expression pedal (sold separately: EV-5) to the JUNO-Gi. If an optional hold pedal (DP series) is connected to the rear panel Connecting a microphone, and adjusting the PEDAL HOLD jack, you can press the hold pedal to cause notes to sustain or “hold”... -
Page 31: Using The Chord Memory Function
Using the Chord Memory Function About the Chord Memory Function Chord Memory Settings 1. Press the [CHORD MEMORY] button so it’s lit. Alternatively, Chord Memory is a function that allows you to play chords based on pre-programmed Chord Forms, just by pressing a single key on the hold down the [SHIFT] button and press the [CHORD keyboard. -
Page 32: Playing Arpeggios (Arpeggio)
The JUNO-Gi will play an arpeggio, according to the notes forming the chord you have just voiced. • If you use the USB memory song player to play back MIDI data (SMF) when the [5] (LINK) button is off, the keyboard 3. To finish playing arpeggios, press the [ARPEGGIO] button... -
Page 33: Saving Arpeggio Settings (Write)
“/ROLAND/IMPORT” folder. CHORD All notes you press will sound simultaneously. 2. Insert the SD card into the JUNO-Gi, and switch on the The timing at which keys will sound will be JUNO-Gi’s power. AUTO1 assigned automatically, giving priority to the lowest key that was pressed. -
Page 34: Synthesizer 3 (Editing/Effects)
Synthesizer 3 (Editing/Effects) Editing a Live Set (LIVE SET EDIT) If you want to create an original sound on the JUNO-Gi, you can edit a For details on each screen, refer to the following pages. live set. Screen Explanation Page On the JUNO-Gi, it’s not possible to edit or rewrite the tones... -
Page 35: Initializing A Live Set
Initializing a Live Set Copying/Exchanging Layers Here’s how to return (initialize) the settings of the currently selected Here’s how to exchange the Upper and Lower layers, or to copy the live set to their default values. Upper layer settings to the Lower layer. 1. Select the live set that you want to edit. -
Page 36: Live Set Edit Parameter
Voice Reserve settings. 0–63, FULL (Voice Reserve) Key Range Upper Key Range Lower * The JUNO-Gi is able to play up to 128 notes simultaneously. The polyphony, or the Parameter Value Explanation number of voices (sounds) does not refer... -
Page 37: Live Set Edit 2 Screen
LIVE SET EDIT 2 Screen Parameter Value Explanation Determines what will happen to the tone’s level when the tone is played at a velocity [1] (OFFSET) 0–127 greater than Velo Range Upper. If you (Velocity Fade don’t want the tone to sound at all, set this Upper) parameter to "0."... -
Page 38: Live Set Edit 3 Screen
LIVE SET EDIT 3 Screen Parameter Value Explanation Assignable Switch The function assigned to the [S1], [S2] buttons [1] (COMMON) Shift the pitch of the keyboard upward TRANSPOSE UP in semitone steps (a maximum of six semitones). Parameter Value Explanation Shift the pitch of the keyboard down- LiveSet Category Type (category) of the live set... -
Page 39: Pro Edit Screen
Specify this as a note value if you want to be used. Note synchronize the delay to the tempo of the JUNO-Gi. When one key is held down and another key is then pressed, only the pitch changes, without The setting of the tone assigned to the layer will TONE the attack of the latter key being played. -
Page 40: Tvf Parameter
3. TVF PARAMETER Parameter Value Explanation Use this parameter when you want key release speed to affect the T4 value of the Pitch Parameter Value Explanation envelope. P-Env T4 V-Sens -64–+63 No filter is used. If you want T4 to be speeded up for quickly released notes, set this parameter to a positive Low Pass Filter. -
Page 41: Tvf Envelope
4. TVF ENVELOPE Parameter Value Explanation Use this parameter when changing the cutoff frequency to be applied as a result of changes in Parameter Value Explanation playing velocity. Cutoff V-Sens -64–+63 Depth of the TVF envelope If you want strongly played notes to raise the cutoff frequency, set this parameter to positive Higher settings will cause the TVF envelope to F-Env Depth... -
Page 42: Tva Parameter
5. TVA PARAMETER 6. TVA ENVELOPE Parameter Value Explanation Parameter Value Explanation Curve that determines how keyboard playing This allows keyboard dynamics to affect the T1 dynamics (velocity) will affect the volume of the TVA envelope. A-Env T1 V-Sens -63–+63 Set this to “FIX”... -
Page 43: Lfo1/8. Lfo2
7. LFO1/8. LFO2 Parameter Value Explanation 0–127 Modulation speed of the LFO If you want the LFO rate to be synchronized Note with the tempo, this should be set in terms of a Rate note value. The setting of the tone assigned to the layer will TONE be used. -
Page 44: Applying Effects (Effect Edit)
2. Press the [MENU] button. 3. Use the VALUE dial or the cursor buttons to select The JUNO-Gi’s onboard effects can be switched on/off as a whole. “2. Effect Edit,” and press the [ENTER] button. Turn these OFF when you want to listen to the unprocessed sound as The EFFECT ROUTING screen will appear. -
Page 45: Signal Flow And Parameters (Effect Routing)
Signal Flow and Parameters Num- Parameter Value Explanation (EFFECT ROUTING) Type of reverb 0 (OFF) Reverb will not be used Here you can make overall settings for effects, such as the output 1 (REVERB) Basic reverb destination and level of the various signals. Reverb that simulates the reverbera- 2 (SRV ROOM) tion of a room... -
Page 46: Multi-Effect Settings (Mfx1, 2)
MFX1, 2 79: VOCODER MFX 1, 2 For this reason, the JUNO-Gi allows you to use control changes and other common MIDI messages to control the most important multi-effect parameters. For example, you might use the pitch bend lever to control the degree of distortion, or use keyboard touch to change the delay time. -
Page 47: Chorus Settings (Chorus)
Chorus Settings (CHORUS) Reverb Settings (REVERB) From the EFFECT ROUTING screen (p. 45), press the [3] (CHORUS) button From the EFFECT ROUTING screen (p. 45), press the [4] (REVERB) button to access the CHORUS screen. to access the REVERB screen. Use the cursor buttons to move the cursor to the parameter that you Use the cursor buttons to move the cursor to the parameter that you want to edit, and use the VALUE dial or the [DEC] [INC] buttons to set... -
Page 48: Effects Parameters
Effects Parameters Multi-Effects Parameters (MFX1, 2) MODULATION DELAY p. 64 3TAP PAN DELAY p. 65 The multi-effects feature 79 different kinds of effects. Some of the 4TAP PAN DELAY p. 65 effects consist of two or more different effects connected in series. MULTI TAP DELAY p. - Page 49 When Using 3D Effects Some effect parameters (such as Rate or Delay Time) can be set in The following 3D effects utilize RSS (Roland Sound Space) technology terms of a note value. Such parameters have a num/note switch that to create a spaciousness that cannot be produced by delay, reverb, lets you specify whether you will set the value as a numerical value chorus, etc.
-
Page 50: 01: Equalizer
01: EQUALIZER 03: ISOLATOR This is a four-band stereo equalizer (low, mid x 2, high). This is an equalizer which cuts the volume greatly, allowing you to add a special effect to the sound by cutting the volume in varying ranges. L in L out 4-Band EQ... -
Page 51: 05: Super Filter
05: SUPER FILTER 06: STEP FILTER This is a filter with an extremely sharp slope. The cutoff frequency can be varied This is a filter whose cutoff frequency can be modulated in steps. You can specify the cyclically. pattern by which the cutoff frequency will change. L in L out L in... -
Page 52: 08: Auto Wah
08: AUTO WAH Parameter Value Explanation Point at which Vowel 1/2 switch Cyclically controls a filter to create cyclic change in timbre. Vowel 1 will have a longer 0–49 duration. L in L out Auto Wah 2-Band EQ Manual # Vowel 1 and 2 will be of equal duration. -
Page 53: 11: Phaser
11: PHASER Parameter Value Explanation Selects whether the left and right phase of the modulation This is a stereo phaser. A phase-shifted sound is added to the original sound and will be the same or the opposite. modulated. The left and right phase will be INVERSE opposite. -
Page 54: 14: Infinite Phaser
14: INFINITE PHASER 16: STEP RING MODULATOR A phaser that continues raising/lowering the frequency at which the sound is This is a ring modulator that uses a 16-step sequence to vary the frequency at which modulated. modulation is applied. L in L out L in L out... -
Page 55: 18: Auto Pan
18: AUTO PAN 20: SLICER Cyclically modulates the stereo location of the sound. By applying successive cuts to the sound, this effect turns a conventional sound into a sound that appears to be played as a backing phrase. This is especially effective when L in 2-Band EQ L out... -
Page 56: 21: Rotary
21: ROTARY Parameter Value Explanation Adjusts the rate at which the The Rotary effect simulates the sound of the rotary speakers often used with the woofer rotation speeds up when Woofer Trans Down 0–127 electric organs of the past. Since the movement of the high range and low range the rotation is switched from rotors can be set independently, the unique type of modulation characteristic of these FAST to SLOW. -
Page 57: 24: Flanger
24: FLANGER 25: STEP FLANGER This is a stereo flanger. (The LFO has the same phase for left and right.) This is a flanger in which the flanger pitch changes in steps. The speed at which the It produces a metallic resonance that rises and falls like a jet airplane taking off or pitch changes can also be specified in terms of a note-value of a specified tempo. -
Page 58: 26: Hexa-Chorus
26: HEXA-CHORUS 28: SPACE-D Uses a six-phase chorus (six layers of chorused sound) to give richness and spatial This is a multiple chorus that applies two-phase modulation in stereo. It gives no spread to the sound. impression of modulation, but produces a transparent chorus effect. Balance D L in L out... -
Page 59: 29: 3D Chorus
29: 3D CHORUS Parameter Value Explanation Adjusts the proportion of the This applies a 3D effect to the chorus sound. The chorus sound will be positioned 90 flanger sound that is fed back Feedback # -98–+98% degrees left and 90 degrees right. into the effect. -
Page 60: 32: 2 Band Chorus
32: 2 BAND CHORUS Parameter Value Explanation Rate at which the low-range Low Rate # 0.05–10.00 Hz, note A chorus effect that lets you apply an effect independently to the low-frequency and flanger sound is modulated high-frequency ranges. Modulation depth for the Low Depth 0–127 L in... -
Page 61: 35: Overdrive
37: VS OVERDRIVE Parameter Value Explanation Delay time from when the This is an overdrive that provides heavy distortion. original sound is heard to when High Pre Delay 0.0–100 msec the high-range flanger sound L in L out is heard Pan L 2-Band Overdrive... -
Page 62: 39: Guitar Amp Simulator
39: GUITAR AMP SIMULATOR Specifications for each Speaker Type The speaker column indicates the diameter of each speaker unit (in inches) and the number of units. This is an effect that simulates the sound of a guitar amplifier. L in L out Type Cabinet... -
Page 63: 41: Limiter
41: LIMITER 43: DELAY Compresses signals that exceed a specified volume level, preventing distortion from This is a stereo delay. occurring. When Feedback Mode is NORMAL: L in L out Balance D Limiter 2-Band EQ 2-Band L in L out Delay Balance W R in... -
Page 64: 44: Long Delay
44: LONG DELAY Parameter Value Explanation Pan # L64–63R Panning of the delay sound A delay that provides a long delay time. Low Gain -15–+15 dB Gain of the low range 2-Band High Gain -15–+15 dB Gain of the high range L in L out Volume balance of the original... -
Page 65: 47: 3Tap Pan Delay
47: 3TAP PAN DELAY Parameter Value Explanation Adjusts the frequency above Produces three delay sounds; center, left and right. which sound fed back to the effect is filtered out. If you do Balance D HF Damp 200–8000 Hz, BYPASS not want to filter out any high 2-Band L in L out... -
Page 66: 50: Reverse Delay
50: REVERSE DELAY 51: SHUFFLE DELAY This is a reverse delay that adds a reversed and delayed sound to the input sound. A Adds a shuffle to the delay sound, giving the sound a bouncy delay effect with a swing tap delay is connected immediately after the reverse delay. -
Page 67: 53: Time Ctrl Delay
54: LONG TIME CTRL DELAY Parameter Value Explanation Adjusts the frequency above A delay in which the delay time can be varied smoothly, and allowing an extended which sound fed back to the delay to be produced. HF Damp 200–8000 Hz, BYPASS effect will be cut. -
Page 68: 55: Tape Echo
A virtual tape echo that produces a realistic tape delay sound. This simulates the tape In addition to a lo-fi effect, this adds various types of noise such as white noise and disc echo section of a Roland RE-201 Space Echo. noise. -
Page 69: 57: Lofi Compress
57: LOFI COMPRESS Parameter Value Explanation Level 0–127 Output Level This is an effect that intentionally degrades the sound quality for creative purposes. 2-Band 59: TELEPHONE L in L out Compressor Lo-Fi This effect produces a muffled sound, like that heard through a telephone. 2-Band R in R out... -
Page 70: 61: Pitch Shifter
61: PITCH SHIFTER Parameter Value Explanation Low Gain -15–+15 dB Gain of the low range A stereo pitch shifter. High Gain -15–+15 dB Gain of the high range L in 2-Band EQ L out Volume balance between the Balance # D100:0W–D0:100W direct sound (D) and the pitch Pitch Shifter... -
Page 71: 64: Reverb
64: REVERB Parameter Value Explanation Adjusts the time from when Adds reverberation to the sound, simulating an acoustic space. Gate Time 5–500 msec the reverb is heard until it disappears. 2-Band L in L out Low Gain -15–+15 dB Gain of the low range Balance D High Gain -15–+15 dB... -
Page 72: 67: Overdrive G Flanger
67: OVERDRIVE g FLANGER 69: DISTORTION g CHORUS The parameters are essentially the same as in “66: OVERDRIVE g CHORUS, ” with the Balance D exception of the following two. L out L in Overdrive Drive g Distortion Drive, Feedback Balance W Overdrive Pan g Distortion Pan Overdrive... -
Page 73: 72: Enhancer G Chorus
72: ENHANCER g CHORUS 74: ENHANCER g DELAY L in L out L in L out Enhancer Enhancer Balance D Balance D Balance W Balance W Chorus Delay Balance W Balance W Feedback R in Enhancer R out R in Enhancer R out Balance D... -
Page 74: 76: Flanger G Delay
76: FLANGER g DELAY 77: CHORUS g FLANGER Balance D Balance D Balance D L in L out L in L out Balance D Feedback Feedback Balance W Balance W Balance W Balance W Flanger Chorus Flanger Delay Balance W Balance W Balance W Balance W... -
Page 75: 78: Sympathetic Resonance
78: SYMPATHETIC RESONANCE 79: VOCODER On an acoustic piano, holding down the damper pedal allows other strings to resonate Mic Mix in sympathy with the notes you play, creating rich and spacious resonances. This effect L out Mic Sens simulates these sympathetic resonances. INPUT Vocoder 3-Band... -
Page 76: Chorus Parameters
This is because there is The JUNO-Gi’s Chorus effect unit can also be used as a stereo delay unit. an upper limit for the delay time; if the delay time is specified as a note value... -
Page 77: Reverb Parameters
Reverb Parameters Parameter Value Explanation Adjusts the frequency below which the low-frequency content These settings allow you to select the desired type of reverb, and its characteristics. LF Damp Freq 50–4000 Hz of the reverb sound will be Parameter Value Explanation reduced, or “damped. -
Page 78: Synthesizer 4 (Other Settings)
“User Backup,” and press the [ENTER] button. (Factory Reset) The following screen will appear. You can return all of the JUNO-Gi’s settings to the state they were in when the instrument was shipped from the factory. This operation is called “Factory Reset. ”... -
Page 79: Formatting Usb Memory (Usb Memory Format)
“USB Mem Format,” and press the [ENTER] button. 1. Switch off the JUNO-Gi’s power. A confirmation message will appear. 2. Remove the SD card from the JUNO-Gi, and use a commercially available SD card reader to open the SD card on your computer. -
Page 80: System Settings (System)
Here you can make “System settings” that affect the operation of the Parameter Value Explanation entire JUNO-Gi, such as the tuning and how MIDI messages will be USB Audio received. Volume of the USB audio from the computer Making System Settings USB Audio Level 0–127... -
Page 81: System Menu [2] (Kbd/Ctrl)
If your pedal Hold Pedal Polarity has an effect opposite of what you expect, set this parameter to “REVERSE. ” If you are using a Roland pedal (that has no polarity Parameter Value Explanation switch), set this parameter to “STANDARD. ”... -
Page 82: System Menu [3] (Midi/Sync)
Local Switch turned off. Read the following for details. Hold then connect an optional expression pedal Typically, things are hooked up so the data travels as follows: the JUNO-Gi’s (DP-10, etc.), and employ pedal work to keyboard g your external sequencer software g the JUNO-Gi’s sound achieve even finer control in performances generator. -
Page 83: System Menu [4] (Click/Player)
Chorus Send MIDI device. 0–127 Level of the signal sent to chorus Level * If the Tempo Link is on, the JUNO-Gi cannot synchronize to an Reverb Send 0–127 Level of the signal sent to reverb external MIDI device (p. 134). -
Page 84: System Menu [6] (Information)
Depth to which the LFO will modulate the Osc -63–+63 Depth 2 pitch Depth to which the LFO will modulate the pulse Here you can view the JUNO-Gi’s software version. width of the Osc 1 waveform LFO Osc 1 Pulse -63–+63 Width Depth * The Pulse Width is activated when “SQR”... - Page 85 Digital Recorder...
-
Page 86: Digital Recorder 1 (Recording/Playing/Editing)
Digital Recorder 1 (Recording/Playing/Editing) Displaying the Digital Recorder Screen Displaying the RECORDER Screen Num- Name Explanation Indicator 1. Press the [RECORDER VIEW] button so it’s lit. This is displayed when Repeat is enabled. This is displayed when you use the [REPEAT] B) button to specify the A–B region used by Repeat or Auto Punch In. -
Page 87: Playing A Song
You can use any of the following methods to change the current position within the song. When the JUNO-Gi is shipped from the factory, an SD card containing demo songs are installed. Here’s how to play these demo songs. 1. In the RECORDER screen, press the [3] (MENU) button. -
Page 88: Muting Tracks
Muting Tracks Adjusting the Volume of the Tracks Track button operations Adjusting the volume of tracks 1–8 Button Status Explanation 1. Use the TRACK MIXER[1/5]–[4/8] sliders to adjust the volume. Unlit Controlling tracks 1–4 [TRACK 1–4 5–8] If the [TRACK 1–4 5–8] button is lit, you’ll be controlling tracks 5–8. Lit red Controlling tracks 5–8 MEMO... -
Page 89: Adjusting The Pan, Reverb, And Eq (Track Setting)
Adjusting the Pan, Reverb, and EQ Parameter Value Explanation High (TRACK SETTING) High Gain -12–+12 dB Gain of the high range High Freq 400 Hz–16 kHz Frequency of the high range In the TRACK SETTING screen you can adjust the pan and reverb of tracks 1–8 and the Rhythm Pattern. -
Page 90: Playing Back Repeatedly (Repeat)
Playing Back Repeatedly (REPEAT) Using the A–B SETTING Screen To Specify the Repeat Region The “repeat” function lets you play back a specified region repeatedly. This function is useful when you want to check the mix balance 3. Hold down the [SHIFT] button and press the [REPEAT] (A repeatedly, or can be used in conjunction with punch-in/out to perform Loop Recording (p. -
Page 91: Recording
Recording Song Production Flow Creating a New Song (Create New Song) A general outline of the song production workflow is shown below. This manual explains each function in detail, but when you’re creating On the Digital Recorder, each of your compositions is managed as a a song for the first time, please read the “Quick Guide”... -
Page 92: Connecting The Equipment To Record And Adjusting The Input
Connecting the Equipment to Record and Adjusting the Input Level To the rear panel AUDIO INPUT jacks, connect the equipment that you want to record in the Digital Recorder. Connect your digital audio player or other audio device to the LINE jacks. Connect your microphone or guitar to the GUITAR/MIC jack as shown in the illustration. -
Page 93: Level
Selecting an Instrument to Record Selecting the Sound of the External Audio Input (AUDIO INPUT) (REC SOURCE SELECT) If you want to record the sound from a guitar, microphone, line input, Here’s how to select the instrument you’ll be recording. or USB audio, select the desired sound as follows. -
Page 94: Recording
Recording Selecting stereo tracks for recording Entering normal mode If INPUT is set to “KEYBOARD”, “LINE” or “USB” 1. In the RECORDER screen, press the [1] (MODE) button a Since the input is stereo, this will normally be stereo recording number of times to select Normal mode. -
Page 95: Re-Recording Over A Mistake (Punch-In/Out)
Punch-Out Stop The A–B SETTING screen will appear. On the JUNO-Gi, you can choose from two methods of doing this; 3. Press the [2] (AUTO) button. manual punch-in/out and auto punch-in/out. The region you specified will be the auto punch-in/out region. -
Page 96: Repeatedly Recording The Same Region (Loop Recording)
Canceling a Recording/Editing Repeatedly Recording the Same Region (Loop Recording) (Undo/Redo) “Loop recording” is when you use the Repeat function and the Auto Occasionally when the recording you make doesn’t turn out as you Punch-In/Out function together to record repeatedly. wish, or the settings you make for an editing operation are incorrect, and you want to reverse what you have done. -
Page 97: Putting Multiple Tracks Together (Bounce Mode)
3. Play back the song, and use the [MASTER] slider to adjust the Although the JUNO-Gi allows the simultaneous playback of eight tracks, when you run out of tracks, the JUNO-Gi also lets you copy master level. the recordings of multiple tracks together onto one track (V-Track). -
Page 98: Editing
Editing Selecting the RECORDER MENU TRACK EDIT Menu (Editing a Track) 1. In the RECORDER screen, press the [3] (MENU) button. These operations let you change the structure of your song by copying track data or moving it to another location. The Recorder Menu screen will appear. -
Page 99: Track Move (Moving Data)
Track Move (Moving Data) 1. Choose Recorder Menu g 2. Track Edit g Track Copy (p. 98). The TRACK COPY screen will appear. This operation moves the data of the specified region (or the entire track) to another location. 2. Specify the Source Track, Source V-Track, Start and End for * Following this operation, the original location of the moved data the Copy operation, and press the [6] (NEXT) button. -
Page 100: Track Erase (Erasing Data)
Track Erase (Erasing Data) Track Exchange (Exchanging Data) This operation erases data from the specified region. If you use this This operation exchanges data between two tracks. operation to erase data, any data located later than the erased data will Example: Exchanging the entire contents of tracks 1 and 2 not be moved forward. -
Page 101: Track Import (Importing An Audio File)
Caution when importing JUNO-Gi’s power. • Use an SD card that was formatted by the JUNO-Gi. However, if 3. Choose Recorder Menu g 2. Track Edit g Track Import you’re using the SD card that was included with the JUNO-Gi, (p. -
Page 102: Track Export (Exporting Track Data To An Audio File)
6. If you’re sure you want to export, press the [5] (EXEC) button. If you decide to cancel, press the [6] (CANCEL) button. The track data will be exported to the audio file. The exported audio file will be saved in the “/ROLAND/EXPORT/” folder on the SD card. -
Page 103: Song Edit Menu
SONG EDIT Menu Song Remove This operation removes a song from the SD card. This is a menu of song-related operations. 1. Choose Recorder Menu g 1. Song Edit g Song Remove Song Select (p. 98). The SONG REMOVE screen will appear. Refer to “Selecting and Playing a Song (Song Select)”... -
Page 104: Song Protect
Saving the Current Settings to the Song Protect Song (Song Write) Even after you’ve finished the work of creating a song, you could lose your song by accidentally recording over it or erasing it. To prevent such accidents, the Song Protect setting lets you protect a song so that The following content is saved as song data. -
Page 105: Igital Recorder 2 (Effects)
Insert Effects What is a Effect Patch? An effect added directly to a specific signal (on the JUNO-Gi, the sound of the synthesizer, guitar or mic you’re recording) is called an “insert The Insert effects provides numerous effects, and two or more of these effect. -
Page 106: Using Insert Effects
Using Insert Effects Displaying the Recorder’s Effects Selecting an Insert Effect Screen 1. In the recorder’s effects screen, press the [1] (INS FX) button. The INSERT FX screen will appear. 1. In the RECORDER screen, [6] (EFFECT) button. The recorder’s effects screen will appear. 2. Use the cursor buttons to move the cursor, and use the VALUE dial or the [DEC] [INC] buttons to change the bank, group and patch. -
Page 107: Editing The Insert Effects Settings (Edit)
Editing the Insert Effects Settings Saving Insert Effects Settings (WRITE) (EDIT) Here’s how to assign a name (patch name) to the effect settings you’ve edited, and save them as a new effect patch. If you want to create a new effect sound, start by selecting an existing 1. In the INSERT FX EDIT screen, press the [6] (WRITE) button. -
Page 108: Changing The Location Of The Insert Effects (Location)
However, in some cases, you may wish to change this method of MASTER connection. The JUNO-Gi lets you change the location where the insert effects are connected, thus allowing you to use the effect in a variety TRACK 1 of ways. -
Page 109: Insert Effects Parameters
* The trademarks listed in this document are trademarks of their respective owners, which are separate companies from Roland. Those companies are not affiliated with Roland and have not This is a multi-effect designed for vocals. It provides the basic effects licensed or authorized Roland’s JUNO-Gi. -
Page 110: Amp
This is a clean sound that is smooth and warm. HEAVY LEAD distortion. JC-120 This is the sound of the Roland JC-120. BOSS METAL This is a metal sound suited to heavy riffs. JAZZ COMBO This is a sound suited to jazz. -
Page 111: Equalizer
EQUALIZER Parameter Value Explanation This setting selects the simulated microphone type. Low Gain Lo-Mid Gain Hi-Mid Gain High Gain This is the sound of the SHURE SM-57, a general-use dynamic microphone used for DYN57 instruments and vocals. Optimal for use in miking guitar amps. -
Page 112: Od/Ds
BLUES This is the crunch sound of the BOSS BD-2. This produces BLUES OD distortion that faithfully reproduces the nuances of picking. Parameter Value Explanation CRUNCH A crunch sound with an added element of amp distortion. On/Off OFF, ON Turns FX OFF/ON. This provides the natural sounding distortion of a slightly NATURAL OD Explanation... -
Page 113: Wah
COMPRESSOR Parameter Value Explanation Parameter Value Explanation Selects the wah mode. Sustain 0–100 This sets the sustain for the sound. If you set “Control Pedal Assign” (p. 81) to Attack 0–100 This sets the attack (onset) of the sound. “INSERT FX CTRL, ” you can use an expression MANUAL Level 0–100... -
Page 114: Phaser
PHASER ROTARY Parameter Value Explanation Parameter Value Explanation Selects the number of stages that the phaser effect uses. This parameter adjusts the SPEED SELECT of Rate Slow 0–100, BPM rotation when set to “SLOW. ” This is a four-phase effect. A light 4 STAGE phaser effect is obtained. -
Page 115: Delay
DELAY REVERB Parameter Value Explanation Parameter Value Explanation On/Off OFF, ON Turns the DELAY OFF/ON. On/Off OFF, ON Turns the REVERB OFF/ON. Use this to choose the type of delay. Use this to choose the type of reverb. SINGLE This is a simple monaural delay. Simulates an ambience microphone (off-mic, placed at a distance from the sound source) used This delay is specifically for stereo output. -
Page 116: Compressor
COMPRESSOR ENHANCER Parameter Value Explanation Parameter Value Explanation This parameter turns the compressor effect This parameter turns the enhancer effect On/Off OFF, ON On/Off OFF, ON on/off. on/off. Sustain 0–100 This sets the sustain for the sound. Adjusts the manner in which the enhancer Sens 0–100 will be applied relative to the input signals. -
Page 117: Using Reverb Effect
Using Reverb Effect Reverb Parameters Here we will explain how to edit the reverb settings (parameters). Selecting the Reverb Effect Reverberation (or reverb) is the effect caused by sound waves decaying in an acoustic space, or a digital simulation thereof. This decay occurs because sound waves bounce off many walls, ceilings, objects, etc. -
Page 118: Mastering (Mastering Mode)
If the V-track contains data, a n symbol is shown beside the V-track The mastering data will be exported to the audio file. The exported field. audio file will be saved in the “/ROLAND/EXPORT/” folder on the SD 3. In the RECORDER screen, press the [6] (EFFECT) button. card. -
Page 119: Editing The Mastering Tool Kit Settings (Edit)
Saving the Mastering Tool Kit Settings MEMO • You can audition an exported WAV file in the TRACK IMPORT screen (WRITE) (p. 101) by pressing the [5] (PREVIEW) button. • With the Export function, a maximum of approximately 6 hours and 40 minutes worth of monaural data (approximately 3 hours and 20 Here’s how you can assign a name (patch name) to the kit settings minutes worth of stereo data) can be output. -
Page 120: Mastering Tool Kit Parameters
Mastering Tool Kit Parameters Algorithm Parameter Value Explanation This sets the time it takes for the upper- range compressor effect to stop once the The Mastering Tool Kit’s algorithms are composed from the following effects. Hi Release 50–5000ms input level falls below the Hi threshold Algorithm Explanation level. -
Page 121: Digital Recorder 3 (Rhythm Pattern)
Digital Recorder 3 (Rhythm Pattern) Playing a Rhythm Pattern What is an arrangement? The JUNO-Gi provides a dedicated rhythm track in addition to its audio tracks 1–8. You can play rhythms as a guide during recording, or place internal You could let a certain pattern repeat endlessly and practice along rhythms in the order of your song structure to create your own original with it, just as though you were playing along with a metronome. -
Page 122: Displaying The Rhythm Pattern Screen
Rhythm Set group and Rhythm Set number. The JUNO-Gi has two types of tempo: “keyboard tempo” and “recorder tempo. ” Keyboard tempo is used for the Synthesizer’s arpeggio performance etc, and recorder tempo is the tempo of the Digital Recorder. -
Page 123: Placing Patterns To Create An Arrangement (Arrange Edit)
Placing Patterns to Create an Arrangement (ARRANGE EDIT) CLEAR ALL (Clear All Steps) Here’s how to create an arrangement by placing patterns in the desired order from the intro through the ending. The arrangement you create is saved in the song. This operation clears all of the steps that you input, returning them to the blank condition. -
Page 124: Editing A Pattern (Pattern Edit)
Editing a Pattern (PATTERN EDIT) SETUP (Specify the Time Signature and In addition to using the patterns that are provided, you are also free to create your own patterns. Your edited content can be saved either as a Length) user pattern or a song pattern. Displaying the PATTERN EDIT screen Here’s how to specify the time signature and length of the pattern. -
Page 125: Entering Notes
Explanation • To delete all notes in the vertical axis of the cursor location, press the [3] (CLR STEP) button. These are patterns saved within the JUNO-Gi’s USER internal memory. These patterns can be used in • To delete all notes in the horizontal axis of the cursor location, press any song. -
Page 126: Importing Smf On Your Computer To A Rhythm Pattern (Import)
1. Using your computer and a commercially available SD card reader, copy your Standard MIDI File (.MID) into the SD card’s “/ROLAND/IMPORT” folder. 2. Insert the SD card into the JUNO-Gi, and switch on the JUNO-Gi’s power. 3. Press the [RECORDER VIEW] button. -
Page 127: Usb Memory Song Player
USB Memory Song Player... -
Page 128: Playing Song Files From Usb Memory
MEMO • If the USB memory contains numerous song files, it may take some • Use USB memory sold by Roland. We cannot guarantee operation if time for loading to be completed. other products are used. Playing Along with an Song File from • A maximum of 99 song files can be handled. -
Page 129: Adjusting The Volume Of The Song Player
Detailed Settings for Center Cancel 3. Press the [PLAY/STOP] button to play/stop the song. You can choose from types of the center cancel function. 1. In the SONG LIST screen, press the [5] (SETUP) button. 2. Use the cursor buttons to move the cursor to the “Center Cancel Type”... -
Page 130: Using The Included Usb Memory Protector
Using the Included USB Memory Protector NOTE You can use the included USB memory protector to prevent theft of the USB memory connected to the JUNO-Gi. • You must use the included screws. • You must use the included Allen wrench to tighten or remove the screws. -
Page 131: Appendix
Appendix... -
Page 132: Connecting To Your Computer Via Usb
The USB driver is software that transfers data between the JUNO-Gi • Use the JUNO-Gi to hear audio or SMF files played back by MIDI and the application (e.g., DAW software) on your computer when the software (DAW). -
Page 133: Connecting An External Midi Device
RHYTHM SWITCH, TRACK 1–4 SWITCH, 1. Press the [MIDI CTRL] button so it’s lit. 1-4 5-8 SWITCH, KNOB 1–6 The MIDI CONTROLLER screen will appear, and the JUNO-Gi will be in CC01–31, MIDI Controller mode. CC33–127, PITCH Specifies the MIDI message... -
Page 134: Playing The Juno-Gi From An External Midi Device
[ENTER] button. MIDI device. 3. Press the [3] (MIDI/SYNC) button. * If the Tempo Link (p. 83) is on, the JUNO-Gi cannot synchronize to an external MIDI device. 4. Press the [1] (GENERL) button. 5. Use the [ 1. Press the [MENU] button. -
Page 135: Using The Keyboard To Control Images (V-Link)
0-8-16, 0-16-32, positions of the pitch bend. (-1) -0-1, (-2) -1-4, (-6) -1-8 As an example, we will use a setup in which the JUNO-Gi is connected 4. To save the settings, press the [6] (WRITE) button. to the EDIROL P-10. -
Page 136: Chord Memory List
Chord Memory List 01: Pop 1 06: Blues Assign Key Chord Name Constituent Notes of Chord Forms Assign Key Chord Name Constituent Notes of Chord Forms Cadd9 C3, G3, D4, E4 C7(9) C3, A#3, D4, E4 C#maj9 C#3, C4, D#4, F4 C#7(9) C#3, F3, B3, D#4 D3, F4, A3, C4... - Page 137 11: Pop Min 2 16: 5th Stack Assign Key Chord Name Constituent Notes of Chord Forms Assign Key Chord Name Constituent Notes of Chord Forms C-add9 C3, D4, D#4, G4 C4, G4 Eb7(on Db) C#3, A#3, D#4, G4 C#4, G#4 D-7(b5) D3, G#3, C4, F4 D4, A4...
-
Page 138: Error Message List
What is an event? The smallest unit of memory used by the JUNO-Gi to store recorded results on a memory card is the event. A newly created Event Full! song provides approximately 2,000 events per song. For each track, one recording pass uses two events. Operations such as punch-in/out or track copy also use up events. - Page 139 The number of steps in the arrangement exceeds 99. Keep the number of steps in the arrangement within 99. The JUNO-Gi cannot recognize or use the format of the Unsupported Format! Use the JUNO-Gi to format the SD card (p. 79).
-
Page 140: Troubleshooting
Check the system setting “Hold Pedal Polarity” (p. 81). play the keyboard The JUNO-Gi provides multi-effects that let you apply a wide variety of different ef- fects, and when you switch live sets, the multi-effect type used by the live set will also... - Page 141 If “USB Song Sync Mode” is set to “SLAVE, ” the JUNO-Gi must be receiving MIDI clock Could the system setting “USB Song Sync Mode” (p. 83) have from an external device.
- Page 142 Format the SD card on the JUNO-Gi (p. 79). Check the format of the SD card. The JUNO-Gi can use SD Do not format the SD card that is included with this product; doing so will erase the cards that are formatted in FAT format.
-
Page 143: Specifications
1008 (W) x 300 (D) x 105 (H) mm • Since the 2 GB SD card included with the JUNO-Gi contains a Dimensions 39-11/16 (W) x 11-13/16 (D) x 4-3/16 (H) inches demo song, the available recording time will be shorter than listed above. -
Page 144: Midi Implementation Chart
MIDI Implementation Chart Date : June 1, 2010 Model JUNO-Gi Version : 1.00 Transmitted Recognized Function... Remarks Basic Default 1–16 1–16 Channel Changed 1–16 1–16 Default Mode 3 Mode 3 Mode Messages Mono, Poly Mode 3, 4 (M = 1) -
Page 145: Index
Index CTRL ......82 MASTERING ..... 94 current position . - Page 146 Release Time Offset ... . . 37 system parameters ....80 Vibrato Rate ....37 PATTERN EDIT screen .
-
Page 147: Using The Unit Safely
Do not operate for a long you may remove and the included USB memory This (JUNO-Gi) for use only with Roland stand KS-18Z. period of time at a high volume level, or at a level that protector in a safe place out of children’s reach, Use with other stands (or carts) is capable of resulting is uncomfortable. -
Page 148: Important Notes
• To prevent damage to the cards from static electricity, USB memory once it has been lost. Roland Corporation electrical outlet. be sure to discharge any static electricity from your own assumes no liability concerning such loss of data. - Page 149 For China For EU Countries...
-
Page 150: Declaration Of Conformity
Compliance Information Statement Model Name : JUNO-Gi Type of Equipment : Synthesizer Keyboard Responsible Party : Roland Corporation U.S. Address : 5100 S. Eastern Avenue, Los Angeles, CA 90040-2938 Telephone : (323) 890-3700 For EU Countries This product complies with the requirements of EMC Directive 2004/108/EC. - Page 151 Information When you need repair service, call your nearest Roland Service Center or authorized Roland distributor in your country as shown below. PHILIPPINES CURACAO URUGUAY POLAND JORDAN AFRICA G.A. Yupangco & Co. Inc. Zeelandia Music Center Inc. Todo Musica S.A.