
Related Manuals for Tripp Lite SmartRack SRCOLOKIT42U


Summary of Contents for Tripp Lite SmartRack SRCOLOKIT42U
- Page 1 SmartRack Assembly Instructions ® Models: SRCOLOKIT42U, SRCOLOKIT48U 1111 West 35th Street, Chicago, IL 60609 USA • www.tripplite.com/support Copyright © 2014 Tripp Lite. All trademarks are the sole property of their respective owners.
-
Page 2: Parts List
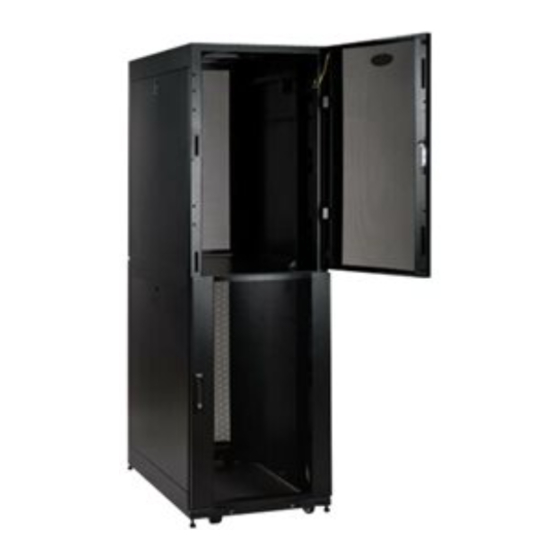
Parts List Colo Door Hinge Divider Roof Cable Blocking Brackets Plate Channel Plate MODEL: SRCOLOKIT42U WWW.TRIPPLITE.COM SERIAL NUMBER XXXXXXXXXXXXXXXX Divider Plate M6 Screw M6 Flat Head Lock Washer 8-32 Screw Cable Channel Label Bracket Screw Plate Required tools (User Supplied): Phillips Head Screwdriver WARNING: The rack enclosure is extremely heavy. - Page 3 step Remove front and rear doors. step For front doors, attach additional hinge brackets to door frame on the same side as the existing hinge brackets. For rear doors, move two hinge brackets so that all brackets are on the same side of the door frame.
- Page 4 step Attach colo doors to hinges on frame. Repeat step 3 for rear doors. step Assemble divider plate brackets onto divider plate. There are left and right brackets. Make sure the flat surface of the brackets face away from each other when assembled to divider plate.
- Page 5 step Using an assistant, install divider. Divider should be installed with lower doors installed and completely closed so divider can rest on the lower doors while installing M6 washers and screws. Lock the doors to prevent them from opening and damaging the divider. Brackets on divider should be on the inside of the rack vertical rails.
- Page 6 step Once upper M6 hardware is installed, the bottom doors can safely be opened to install the lower M6 hardware. step...
- Page 7 step Install cable channels onto the cable managers using the tabs. step...
- Page 8 Place provided label over existing model number label. 1111 West 35th Street, Chicago, IL 60609 USA • www.tripplite.com/support Tripp Lite follows a policy of continuous improvement. Product specifications are subject to change without notice. 13-09-210 • 9332D8-EN Rev C...