Table of Contents
Advertisement
Available languages
Available languages
Quick Links
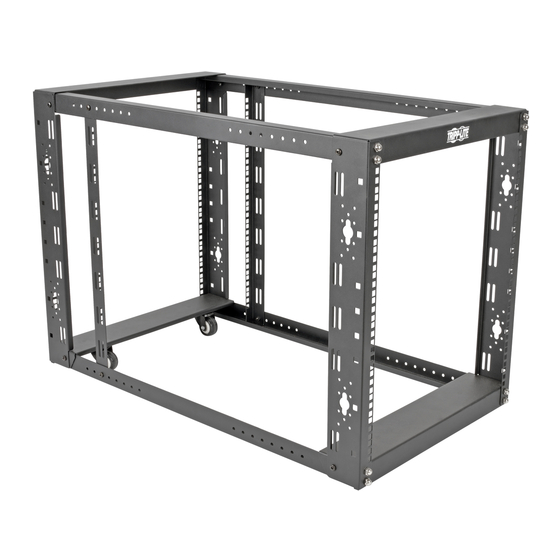
12U, 4-Post Open Frame Rackmount Kit with
Casters and Adjustable Rail
PROTECT YOUR INVESTMENT!
Register your product for quicker service and ultimate peace of mind.
You could also win an ISOBAR6ULTRA surge protector-a $50 value!
Owner's Manual
SR12UBEXPNDKD
www.tripplite.com/warranty
1111 W. 35th Street, Chicago, IL 60609 USA • www.tripplite.com/support
Copyright © 2015 Tripp Lite. All rights reserved.
1
2
2
3
6
7
7
8
15
22
Advertisement
Chapters
Table of Contents

Related Manuals for Tripp Lite SmartRack SR12UBEXPNDKD


Summary of Contents for Tripp Lite SmartRack SR12UBEXPNDKD
-
Page 1: Table Of Contents
Register your product for quicker service and ultimate peace of mind. You could also win an ISOBAR6ULTRA surge protector—a $50 value! www.tripplite.com/warranty 1111 W. 35th Street, Chicago, IL 60609 USA • www.tripplite.com/support Copyright © 2015 Tripp Lite. All rights reserved. -
Page 2: Important Safety Instructions
Important Safety Instructions SAVE THESE INSTRUCTIONS This manual contains instructions and warnings that must be followed during the installation and operation of the product described in this manual. Failure to comply may invalidate the warranty and cause property damage or personal injury. •... -
Page 3: Rack Assembly
Parts List Equipment Mounting Hardware M6 Cage Nut PVC Cup Washer M6 Phillips Screw Cable Management Hardware (Optional Installation) Cable Management Hook Hook Mounting Screws Rack Assembly Lay out a side bracket . Insert the side bracket’s front threaded M8 studs through the corresponding holes on the base bracket and the corresponding holes on the vertical mounting rail Fasten with two M8 acorn/cap nuts and an M6 Screw... - Page 4 Rack Assembly Determine the maximum estimated depth of the equipment to be installed inside the rack. At the approximate maximum depth along an unused side bracket, attach an adjustable side support/ mounting rail to the side bracket’s threaded hole with an M6 Phillips screw.
- Page 5 Rack Assembly Insert the rear base bracket’s holes through the rear threaded M8 studs of the bottom side brackets . Then insert the rear top bracket’s holes through the rear threaded M8 studs of the top side brackets Insert the left rear vertical mounting rail’s holes through the rear threaded M8 studs of the bottom and top side brackets Then insert the right rear vertical mounting rail’s holes through the rear threaded M8 studs of the bottom and top side brackets...
-
Page 6: Equipment Installation
Equipment Installation The SR12UBEXPNDKD can support a maximum equipment load up to 1,000 lb. Warning: Do not install equipment until you have stabilized the enclosure. Install heavier equipment first and install it towards the bottom of the enclosure. Install equipment starting from the bottom of the enclosure and proceeding toward the top of the enclosure - never the reverse. -
Page 7: Storage And Service
Product Registration Visit www.tripplite.com/warranty today to register your new Tripp Lite product. You’ll be automatically entered into a drawing for a chance to win a FREE Tripp Lite product!* * No purchase necessary. Void where prohibited. Some restrictions apply. See website for details. -
Page 8: Español
4 Postes, 12U, con Ruedas y Riel Ajustable Instrucciones de seguridad importantes Lista de piezas Ensamble del Rack Instalación de equipos Almacenamiento y servicio Garantía English Français Póññêèé 1111 W. 35th Street, Chicago, IL 60609 USA • www.tripplite.com/support Copyright © 2015 Tripp Lite. Todos los derechos reservados. -
Page 9: Instrucciones De Seguridad Importantes
Instrucciones de seguridad importantes GUARDE ESTAS INSTRUCCIONES Este manual contiene instrucciones y advertencias que deben seguirse durante la instalación y operación de este producto descriptas en este manual. El incumplimiento invalidará la garantía, pudiendo causar serios daños a la propiedad y/o lesiones personales. -
Page 10: Ensamble Del Rack
Lista de piezas Accesorios para Instalación del Equipo Tuerca de Fijación M6 Arandela de Copa de PVC Tornillo Phillips M6 Accesorios para Administración de Cables (Instalación Opcional) Gancho para Administración de Cables Tornillos para Instalación del Gancho Ensamble del Rack Coloque un soporte lateral . - Page 11 Ensamble del Rack Determine la profundidad máxima estimada del equipo a instalar dentro del rack. A la profundidad máxima aproximada coloque un soporte lateral no usado, instale un riel de instalación lateral en el orificio roscado del soporte lateral con un tornillo Phillips M6. Nota: Los rieles de instalación verticales anteriores y posteriores soportan una profundidad fija de riel de 914 mm.
- Page 12 Ensamble del Rack Inserte los orificios del soporte posterior de la base a través de los pernos roscados M8 posteriores de los soportes laterales inferiores . Entonces inserte los orificios del soporte posterior superior a través de los pernos roscados M8 posteriores de los soportes laterales superiores Inserte los orificios del riel de instalación vertical posterior izquierdo a través de los pernos roscados M8 posteriores de los...
-
Page 13: Instalación De Equipos
Instalación de equipos El SR12UBEXPNDKD puede soportar una carga máxima de equipo de hasta 454 kg [1000 lb]. Advertencia: No instale equipos hasta que haya estabilizado el rack. Instale primero los equipos más pesados en la parte inferior del rack. Instálelos de abajo hacia arriba, nunca en sentido contrario. Si usa rieles para equipos deslizantes, tenga cuidado al extender los rieles. -
Page 14: Almacenamiento Y Servicio
Esta garantía no cubre ningún daño (directo, indirecto, especial o consecuencial) que el producto sufra durante el envío a Tripp Lite o un centro de servicio autorizado por Tripp Lite. Los productos que se envían a Tripp Lite o un centro de servicio autorizado por Tripp Lite debe tener prepagos los cargos de envío. -
Page 15: Français
4 montants, 12U, avec roulettes et rail réglable Consignes de sécurité importantes Nomenclature des pièces Ensemble du bâti Installation de l’équipement Entreposage et service Garantie English Español Póññêèé 1111 W. 35th Street, Chicago, IL 60609 USA • www.tripplite.com/support Copyright © 2015 Tripp Lite. Tous droits réservés. -
Page 16: Consignes De Sécurité Importantes
Consignes de sécurité importantes CONSERVEZ CES INSTRUCTIONS Ce manuel contient des instructions et des mises en garde importantes qui doivent être suivies durant l’installation et l’utilisation du produit décrit dans ce manuel. Le non-respect de ces instructions et mises en garde risque d’annuler la garantie du produit et de causer des dommages à... -
Page 17: Ensemble Du Bâti
Nomenclature des pièces Quincaillerie de montage de l’équipement Écrou à cage M6 Rondelle à collerette en PVC Vis Phillips M6 Quincaillerie pour la gestion des câbles (installation optionnelle) Crochet pour la gestion des câbles Vis de montage pour le crochet Ensemble du bâti Déposer un support latéral . - Page 18 Ensemble du bâti Déterminer la profondeur maximale approximative de l’équipement à être installé dans le bâti. Au niveau de la profondeur maximale approximative le long d’un support latéral inutilisé, fixer un rail de support/montage latéral réglable au trou fileté du support latéral avec une vis Phillips M6.
- Page 19 Ensemble du bâti Insérer les trous du support de base arrière sur les goujons filetés arrière M8 des supports latéraux inférieurs . Insérer ensuite les trous du support de base arrière sur les goujons filetés arrière M8 des supports latéraux supérieurs Insérer les trous du rail de montage vertical arrière gauche sur les goujons filetés arrière M8 des supports latéraux inférieurs et supérieurs...
-
Page 20: Installation De L'équipement
Installation de l’équipement Le SR12UBEXPNDKD peut supporter une charge de l’équipement pouvant atteindre jusqu’à 454 kg maximum. Attention : N’installez pas l’équipement avant d’avoir stabilisé l’enceinte. Installez l’équipement lourd d’abord et vers le bas de l’enceinte. Installez l’équipement à partir du fond de l’enceinte en allant vers le haut - jamais l’inverse. Si vous utilisez des rails d’équipement coulissants , soyez prudent lors de l’extension des rails. -
Page 21: Entreposage Et Service
Le numéro RMA ainsi que les instructions relatives à l’expédition vous seront envoyés par courriel. Tout dommage (direct, indirect, spécial ou consécutif) que le produit pourrait subir au cours de l’expédition à Tripp Lite ou à un centre de réparation reconnu par Tripp Lite n’est pas couvert sous cette garantie. -
Page 22: Póññêèé
двухрамную открытую стойку высотой 12U с роликами и регулируемой направляющей Основные правила безопасности Спецификация Сборка стойки Установка оборудования Хранение и обслуживание Гарантийные обязательства English Español Français 1111 W. 35th Street, Chicago, IL 60609 USA • www.tripplite.com/support Охраняется авторским правом © 2015 Tripp Lite. Перепечатка запрещается. -
Page 23: Основные Правила Безопасности
Основные правила безопасности ПРОСЬБА СОХРАНИТЬ НАСТОЯЩИЕ ПРАВИЛА В настоящем руководстве содержатся указания и предупреждения, которые необходимо соблюдать в процессе монтажа и эксплуатации описанного в нем изделия. Несоблюдение вышеупомянутых указаний и предупреждений может привести к аннулированию гарантии, а также к повреждению имущества или человеческим травмам. •... -
Page 24: Сборка Стойки
Спецификация Оснастка для монтажа оборудования Гайка закладная M6 Шайба чашеобразная из ПВХ Винт M6 с крестообразным шлицем Оснастка для оптимизации кабельных соединений (установка необязательна) Крюк для подвески кабелей Винты для монтажа крюка Сборка стойки Размещение бокового кронштейна . Вставить передние резьбовые... - Page 25 Сборка стойки Оценить максимальную глубину оборудования, устанавливаемого в стойку. Приблизительно на уровне максимальной глубины вдоль неиспользуемого бокового кронштейна прикрепить регулируемую опорную/монтажную направляющую, ввернув винт М6 с крестообразным шлицем в резьбовое отверстие бокового кронштейна. Примечание. Передняя и задняя вертикальные монтажные шины обеспечивают фиксированную глубину направляющей в размере 914 мм. Регулируемые...
- Page 26 Сборка стойки Вставить задние резьбовые пальцы М8 нижних боковых кронштейнов в задние отверстия опорного кронштейна. Затем вставить задние резьбовые пальцы М8 верхних боковых кронштейнов в задние отверстия верхнего кронштейна. Вставить задние резьбовые пальцы М8 нижних и верхних боковых кронштейнов в отверстия левосторонней задней вертикальной монтажной...
-
Page 27: Установка Оборудования
Установка оборудования Стойка модели SR12UBEXPNDKD рассчитана на нагрузку, создаваемую равномерно распределенным по ее объему оборудованием весом до 454 кг. Внимание: не устанавливайте оборудование до закрепления шкафа. Сначала устанавливайте более тяжелое оборудование, которое должно располагаться в нижней части шкафа. Установку оборудования следует производить по направлению снизу вверх шкафа и ни в коем... -
Page 28: Хранение И Обслуживание
гарантийных обязательств в отношении пригодности настоящих изделий для тех или иных конкретных применений. Компания Tripp Lite постоянно совершенствует свою продукцию. В связи с этим возможно изменение технических характеристик без предварительного уведомления. 1111 W. 35th Street, Chicago, IL 60609 USA • www.tripplite.com/support...