Hotpoint GF640 Instructions For Installation And Use Manual
Hotpoint gas hob instructions for installation and use gf640, gf641
Hide thumbs
Also See for GF640:
- Operating instructions manual (16 pages) ,
- Operating instructions manual (12 pages) ,
- Operating instructions manual (16 pages)
Table of Contents
Advertisement
Quick Links
Advertisement
Table of Contents

Related Manuals for Hotpoint GF640


Summary of Contents for Hotpoint GF640
- Page 1 Instructions for Installation and Use Gas Hob Model GF640 - GF 641...
-
Page 2: Table Of Contents
Electrical Connection Characteristics of Burners and Nozzels After Sales Service Hotpoint Guarantee Key Contacts Retention of this Instruction Book This Instruction Book must be kept handy for reference as it contains important details on the safe and proper use of the appliance. -
Page 3: Introduction
Your new hob is guaranteed* and will give lasting service. This guarantee is only applicable if the appliance has been installed in accordance with the installation instructions detailed in this booklet. To help make best use of your cooking equipment, please read this booklet carefully. The hob is designed specifically for domestic use and responsibility will not be accepted for use in any other installation. -
Page 4: For Your Safety
When used properly your appliance is completely safe but as with any electrical product there are certain PLEASE READ THE BELOW PRECAUTIONS BEFORE USING YOUR APPLIANCE. To maintain the efficiency and safety of this appliance, we recommend you do the following: - only call the Service Centres authorised by the manufacturer. -
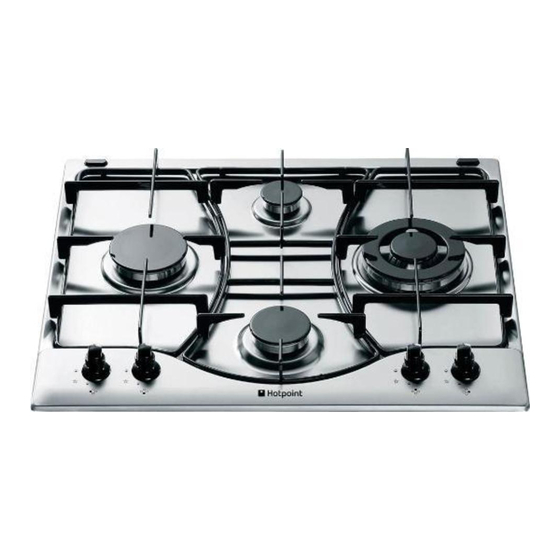
Page 5: Know Your Hob
The position of the corresponding gas burner is indicated on each control knob. The burners differ in size and power. Choose the most appropriate one for the diameter of the cookware being used. The burner can be regulated with the corresonding control knob by using one of the following settings: •... -
Page 6: Practical Advice
Practical Advice It may occur that the cooktop does not function or does not function properly. Before calling customer service for assistance, lets see what can be done. First of all, check to see that there are no interruptions in the gas and electrical supplies, and, in particular, that the gas valves for the mains are open. -
Page 7: Care And Cleaning
• The support grids have not been inverted. If, despite all of these checks, the hob does not function properly and problem persists, call Hotpoint Service (see KEY CONTACTS, back page), informing them of: - The type of problem. - The abbreviation used to identify the model (Mod..) as indicated on the warranty. -
Page 8: Installation
The following instructions are intended for the installer so that the installation and maintenance procedures may be followed in the most professional and expert manner possible. Important: Disconnect the appliance from the electrical supply before performing any maintenance or repair. Positioning the Hob Important: this unit may be installed and used only in permanently ventilated rooms in accordance with British... - Page 9 Fastening Clamps - Assembly Diagram Clamp Position for Clamp Position for H=30mm top H=40mm top Clamp Position for H=20mm top N.B: Use the clamps contained in the "accessory kit." f) In the event the hob is not installed above a built-in oven, a wood panel must be inserted as insulation.
- Page 10 On completing the operation, replace the old rating label with the one showing the new type of gas; the sticker is available from Hotpoint Service (see KEY CONTACTS, back page). If the gas pressure is different than that prescribed, a pressure regulator must be installed at the source, in compliance with national standards governing the use of piped gas regulators.
-
Page 11: Electrical Connection
Electrical connection WARNING: THIS APPLIANCE MUST BE EARTHED. The hob is designed to work with alternating current, the supply voltage and frequency indicated on the rating plate (situated under the hob). Make sure that the local supply voltage corresponds to the voltage indicated on the rating plate. -
Page 12: Characteristics Of Burners And Nozzels
Characteristic of the burners and nozzles Table 1 Burner Diameter Thermal Power (mm) kW (p.c.s.*) Nom. Rapid Fast 3.00 (Large) (R) (Large) (R) Reduced Fast Reduced 2.60 Rapid (RR) (RR) Semi Rapid Semi Fast 1.65 (Medium) (S) (Medium) (S) Auxiliary 1.00 (Small) (A) Triple Crown... - Page 13 Notes...
-
Page 14: After Sales Service
Hotpoint appliance than us - the manufacturer" As part of our commitment to you, all Hotpoint appliances have the added benefit of a fully inclusive parts and labour guarantee for the first 12 months. In addition to this you also have the advantage of replacement parts for the first 5 years when fitted by a Hotpoint engineer. -
Page 15: Hotpoint Guarantee
All Hotpoint appliances carry a fully inclusive 12 month parts and labour guarantee as well as free replacement parts for the first 5 years (except microwaves, selected integrated appliances and cooker hoods, which have a one year guarantee) provided that they are fitted by a Hotpoint engineer. -
Page 16: Key Contacts
Over 1200 trained specialists, directly employed by us, ensure that you can have complete confidence in both the appliances and services we offer. (Open 8 to 8 Mon - Fri, 8 to 6 Sat, 10 to 4 Sun & Bank Holidays) Note: Our operators will require the following information: (Open 8-30 to 5-30 Mon - Fri &...