
Related Manuals for Honeywell HRDPX


Summary of Contents for Honeywell HRDPX
- Page 1 HRDPX DVR Performance Series Digital Recording and Transmission System User Guide ______________________________________________________________________________________________ Document 800-04765 Rev A 06/09...
- Page 2 ______________________________________________________________________________________________...
- Page 3 Revisions Issue Date 06/09 ______________________________________________________________________________________________ Document 800-04765 Rev A 06/09 Revisions Initial Release Performance Series DVR User Guide...
- Page 4 ______________________________________________________________________________________________ Document 800-04765 Rev A 06/09...
-
Page 5: Warnings And Safeguards
USERS OF THE PRODUCT ARE RESPONSIBLE FOR CHECKING AND COMPLYING WITH ALL FEDERAL, STATE, AND LOCAL LAWS AND STATUTES CONCERNING THE MONITORING AND RECORDING OF VIDEO AND AUDIO SIGNALS. HONEYWELL VIDEO SYSTEMS SHALL NOT BE HELD RESPONSIBLE FOR THE USE OF THIS PRODUCT IN VIOLATION OF CURRENT LAWS AND STATUTES. -
Page 6: Important Safeguards
Object and Liquid Entry Points – Never insert foreign objects into the DVR, other than the media types approved by Honeywell, as they may touch dangerous voltage points or short-out parts that could result in a fire or electrical shock. Never spill liquid of any kind on the product. - Page 7 Refer all servicing to qualified personnel. Replacement Parts – When replacement parts are required, be sure the service technician has used replacement parts specified by Honeywell. Unauthorized substitutions may result in fire, electric shock or other hazards. ...
-
Page 8: Notes On Handling
If using a chemical saturated cloth to clean the unit, follow that product’s instructions. Notes on Maintenance This DVR is designed to last for long periods of time. To keep the DVR always operational we recommend regular inspection maintenance (cleaning parts or replacement). For details contact the nearest dealer. -
Page 9: Notes On Moisture Condensation
If the DVR is used in such a situation, it may damage discs and internal parts. Remove any CD discs, connect the power cord of the DVR to the wall outlet, turn on the DVR, and leave it for two to three hours. - Page 10 Warnings and Safeguards WARNING TO REDUCE THE RISK OF ELECTRICAL SHOCK, DO NOT EXPOSE THIS DANGEROUS HIGH VOLTAGES ARE PRESENT INSIDE THE ENCLOSURE. REFER SERVICING TO QUALIFIED PERSONNEL ONLY. CAUTION ______________________________________________________________________________________________ APPLIANCE TO RAIN OR MOISTURE. DO NOT OPEN THE CABINET. C A U T I O N RISK OF ELECTRIC SHOCK DO NOT OPEN...
-
Page 11: Table Of Contents
Connecting to a Sensor Input ... 27 Connecting to a Relay Output ... 27 Installing the Rackmount Kit (optional) ... 28 Turning on the DVR... 28 Setting the Remote Controller ID ... 28 5 Setup ... 29 Setup Menus ... 29 System ... - Page 12 Contents Overwrite ... 33 Check ... 33 SMART Check ... 34 User Configuration ... 35 Server ... 35 Client ... 36 Configuration ... 37 Shutdown ... 37 Camera ... 37 Camera Configuration ... 37 Color Setup (Adjust) ... 38 PTZ Configuration ... 38 Spot / Sequence Configuration ...
- Page 13 7 Remote Software ... 69 Set up a Remote Connection ... 69 Configuring the DVR ... 69 Creating a DVR Connection with Remote Software ... 70 Default Remote Software Log in Information ... 70 Access Remote Connection ... 71 Connecting Multiple DVRs... 71 Using the Remote Software ...
- Page 14 Using the Graphical PTZ Controller ... 87 Using the On-screen Compass ... 88 Web Viewer Overview ... 89 Connecting to a DVR Using Web Viewer ... 90 Search Video Using Web Viewer ... 90 Performing a Basic Search ... 91 Status Search ...
- Page 15 Live Monitoring ... 99 Recording ... 100 Searching and Playing Video ... 100 Backup ... 100 Network ... 100 Miscellaneous ... 100 Troubleshooting ... 101 Specifications (HRDPX) ... 102 ______________________________________________________________________________________________ Document 800-04765 Rev A 06/09 Performance Series DVR User Guide ...
- Page 16 Contents Notes ______________________________________________________________________________________________...
-
Page 17: Introduction
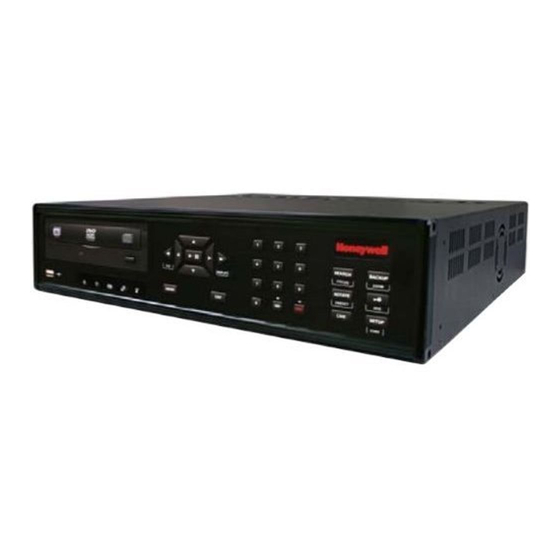
Introduction Product Description Honeywell’s HRDPX Performance Series DVR is a powerful, yet affordable, video management solution designed for easy installation and operation. Preconfigured for continuous recording, with no additional setup required, the Performance Series DVR offers quick search, setup, and backup features. -
Page 18: Features
Introduction Features HRDPX is a Honeywell Performance Series DVR that includes the following features: • • • • • • • • • • • • • • • • • • ______________________________________________________________________________________________ 16 Composite Video Input Connectors Compatible with Color (NTSC or PAL) and B&W Video Sources... -
Page 19: Usb Flash Drive Approved List
USB Flash Drive Approved List These USB flash drives have been tested and approved to work with the Performance Series HRDP DVR. Other USB flash drives may also work with the HRDP DVR but have not yet been tested. Manufacturer... -
Page 20: Ptz Compatibility List
Introduction PTZ Compatibility List The Honeywell Performance Series DVRs support a wide selection of PTZ camera protocols: Honeywell MAXPRO Honeywell VCL Honeywell (GC-655P) Honeywell (HSD-250) Honeywell (HSD-251) American Dynamics OpenEye 500 OpenEye 510 OpenEye – Pelco D AcutVista AlfaVision KalatelDome... -
Page 21: Quick Start Instructions
Quick Start Instructions 10. Complete Motion/Event Configuration to trigger recording on an event: 11. The DVR is now configured to record, search and playback video. See the Logging In for the First Time The default administrative log in information: Password: <none>... - Page 22 Introduction Notes ______________________________________________________________________________________________...
-
Page 23: Installation
______________________________________________________________________________________________ Document 800-04765 Rev A 06/09 Arrow Buttons LED Lights • Power • HDD • Record • Network • Fan Performance Series DVR User Guide Backup Menu Search Mode Numeric Keypad Instant Record Live Display Rotate Lock (logout) Setup Menu... -
Page 24: Rear Panel Connectors
Installation Rear Panel Connectors The rear panel of the DVR contains virtually all of the connectors you will be using. The diagram below shows the location and description of each connector: Primary and Spot Monitor Outputs AC Power Input Power Switch... -
Page 25: Remote Control
Document 800-04765 Rev A 06/09 ZOOM FOCUS IRIS Pause REPL AY ENTER ROTATE ALARM Performance Series DVR User Guide Record Toggle Log Off (Lock) PRESE T PTZ Controls Play Fast Forward Arrow EXI T Display Options *The ID Select button allows you to use one remote control for several DVRs. -
Page 26: Connection Guide
• Video Inputs and Looping Outputs The HRDPX DVR comes with 16 BNC video inputs on the rear of its chassis. Each video input has a corresponding looping BNC output beneath it for passing the video signal to another monitoring/recording device. -
Page 27: Connecting A Ptz Camera
To make connections on the Alarm Connector Strip: Remove the Alarm In block from the DVR for easy access. Use a small screw driver to open the connection and insert the wire into the hole. To disconnect the wire loosen the connection with the screw driver and pull the wire out. -
Page 28: Installing The Rackmount Kit (Optional)
Connect camera cables. Connect a network cable and a monitor cable. Switch the power switch on the back of the DVR to the ON position and wait until the main screen is displayed on the connected monitor; this process will take approximately two minutes. -
Page 29: Setup
Use the setup menus to configure all of the DVR settings, schedule recording, networking and shutdown. Press the SETUP key on the front of the DVR or remote control to enter the setup menus and log in. See the Logging In for the First Time section if entering setup for the first time. -
Page 30: System
System System Configuration To enter System Configuration, press the Setup key on the front of the DVR and press ENTER to select System Configuration. Use the arrow buttons on the front panel of the DVR or the remote control to navigate the display. Select Save and press ENTER to update settings. -
Page 31: Setup Wizard
Setup Wizard The Setup Wizard allows you to define global recording settings for an easy and custom recording schedule on the DVR. Global Resolution – 352 x240 / 704 × 240 / 704 × 480. Motion/Continuous – Motion / Continuous. -
Page 32: Disk Configuration
Caution All USB devices must be formatted as FAT32 before using with the Note ______________________________________________________________________________________________ Refer to the list of Approved USB Flash Drives in the Introduction chapter. DVR. Upon formatting a drive, all video and other data stored on that drive will be permanently erased and cannot be recovered. -
Page 33: Overwrite
Enable HDD OVERWRITE to allow the DVR to write over previously recorded data, starting with the oldest date, when the HDD is full. If set to Off the DVR will not record any new data once the HDD becomes full. (Default) Enable DISK FULL WARNING for notification when the HDD becomes full and HDD Overwrite is disabled. -
Page 34: Smart Check
Setup SMART Check S.M.A.R.T. = Self Monitoring Analysis & Reporting Technology. Enable SMART Check to detect signs of HDD failure. Note ______________________________________________________________________________________________ Set ENABLE S.M.A.R.T. to ON or OFF. Set a CHECK INTERVAL between 1 and 24 hours. Define a TEMP THRESHOLD and select Celsius or Fahrenheit. The recommended upper optimum operating temperature for the HDD is between 104F to 122F (40C to 50C). -
Page 35: User Configuration
Use the User Configuration to Add or Delete users. Server Use the Server menu to manage users that access the DVR locally. EXPORT VIEWER – Allow the user to include a copy of the Backup Viewer application when a local backup is made. This is a Server side feature only. -
Page 36: Client
Use the Client menu to manage users that access the DVR remotely. Remote users must be defined on this page. Only the users defined here can access the DVR remotely. Add up to 18 users in addition to the two Admin users. To add a new user: ______________________________________________________________________________________________ Select a new row and press ENTER to change the LOGIN name. -
Page 37: Configuration
Select OK to confirm and press ENTER to safely shutdown the system. Turn the power off when shutdown is complete using the toggle switch on the back of the DVR. Improper shut down of the system can cause data loss and system corruption. -
Page 38: Color Setup (Adjust)
Setup Color Setup (Adjust) CAMERA – 1 ~ 16 [camera to apply color settings to] SCREEN MODE – Live / Record BRIGHT - -25 ~ 25 CONTRAST- -25 ~ 25 SATURATION - -25 ~ 25 HUE - -25 ~ 25 POSITION - APPLY ALL –... -
Page 39: Spot / Sequence Configuration
CAMERA DWELL TIME - 0 ~ 99 seconds [Set the sequence interval time for individual cameras]. CUSTOM SELECT - 1 ~ 16 / All [Select cameras to display on the Spot Monitor]. ______________________________________________________________________________________________ Document 800-04765 Rev A 06/09 Performance Series DVR User Guide... -
Page 40: Monitor Configuration
Setup Monitor Configuration DATE/TIME – ON / OFF [On-screen Date/Time display]. CAMERA LABEL OPTIONS – All / Number / Off. BORDER COLOR - Black / White / Grey [Set the border color of the grid for the main channel display]. TRANSPARENCY SETUP –... -
Page 41: Record
C-FPS – 1~30 [Continuous Recording FPS] M-FPS – 1~30 [Motion Recording FPS] QUALITY – Low / Normal / High POST-A – 5~99 seconds [Post Alarm Recording] ______________________________________________________________________________________________ Document 800-04765 Rev A 06/09 Performance Series DVR User Guide C: Continuous M: Motion / Event... -
Page 42: Schedule
Setup Schedule NIGHT – Set nighttime (ex. If 18:00 to 6:00 is defined as nighttime, 6:00 to 18:00 is defined as daytime). WEEKEND –Define weekend. Audio Specify volume level and enable each audio channel for recording. ______________________________________________________________________________________________... -
Page 43: Instant Recording
______________________________________________________________________________________________ Document 800-04765 Rev A 06/09 Press the REC key on the front panel of the DVR or remote control. Select OK to Force Continuous Recording. Press ENTER. The screen will display the Instant Record message. Press the REC key on the front panel of the DVR or remote control. -
Page 44: Motion/Event Configuration
Setup Motion/Event Configuration Motion / Event Configuration has four sections; Input, Sensor, Action, and Alarm Monitor. When an event comes in (Input) the DVR records the image according to its settings (Camera Configuration) and triggers an alarm (Action). Input CH –... -
Page 45: Setting Up Motion Detection Recording
______________________________________________________________________________________________ Document 800-04765 Rev A 06/09 Press SETUP on the front of the DVR or remote control. Select Record > Motion/Event Configuration and set MOTION to ON. Set SENS level. [Normal / High / Highest / Low]. Select AREA and press ENTER to set a motion area (global setting;... -
Page 46: Sensor
Setup Sensor Sensor Setup Relay Setup ______________________________________________________________________________________________ Use the arrow buttons to select Sensor 1 and press ENTER to change to NO (Normally Open) or NC (Normally Closed). Repeat for all sensors. Select SAVE and press ENTER to save settings and exit Sensor Setup. Use the arrow buttons to select Relay 1 and press ENTER to turn OFF or ON. -
Page 47: Action
Select EA SERVER ENABLE and press ENTER to select ON. Select the types of events to send to the Emergency Agent (MOTION, SENSOR, MOTION + SENSOR. Enter the IP ADDRESS of the remote client. Enter the PORT number. Performance Series DVR User Guide... -
Page 48: Network
DDNS service. This is important if your router is running NAT (Network Address Translation) services for your network. If you are unsure of your network configuration Honeywell recommends this feature be set to ON. STATUS CHECK – Select STATUS CHECK to confirm the DDNS settings. -
Page 49: Serial Configuration
Serial Configuration Configure connected serial devices. TYPE – None / External Controller MODEL – Select appropriate model. PORT – [Baud Rate / Data Bit / Parity / Stop Bit] ______________________________________________________________________________________________ Document 800-04765 Rev A 06/09 Performance Series DVR User Guide... -
Page 50: Client Configuration
Setup Client Configuration Configure general remote access. REMOTE PORT – Use this port number when configuring remote access software. The default port is 4000 but can be changed. WEB PORT – Used for remote connections using a web browser. This port should be open on the router. -
Page 51: E-Mail Configuration
E-mail Configuration The DVR can send an email notification to up to six defined e-mail addresses when an event happens. E-MAIL SERVER – DVR/SMTP [Configure the DVR to use selected e-mail server.] SCHEDULE – ON / OFF [Enable to send e-mail notifications only for events that occur within a specified range of time.]... -
Page 52: Information
Setup Information System Log View Displays system log information. Version View Displays system information and software version information for the DVR. ______________________________________________________________________________________________... -
Page 53: Status View
Status View Displays status screens for: Record Network Disk ______________________________________________________________________________________________ Document 800-04765 Rev A 06/09 Performance Series DVR User Guide Event Sensor... - Page 54 Setup Notes ______________________________________________________________________________________________...
-
Page 55: Operation
Operation Navigation You can navigate the on screen menus of the HRDPX DVR using the front panel keys, the remote controller, or a USB mouse. Using a Mouse to Navigate Quick Menus Mouse up to the top of the screen to display the Quick Menu Bar. -
Page 56: Search
Searching Recorded Data Search recorded video on the DVR to find a specific time or event. Press the SEARCH key on the front of the DVR or the remote control to enter Search Mode. Select TARGET media (HDD, DVD-RW, USB) Select the desired search method. -
Page 57: Search Methods
(Highlighted time blocks represent recorded data). Press ENTER to go from the desired hour to the minutes selection. Select PLAY. Use the play controls on the front of the DVR or remote control to search video. Select EVENT SEARCH. Define the date and time to search. -
Page 58: Go To Last
After Image Removal The DVR is capable of recording video using one of three different resolutions. When using the 720 x 480 resolution, two fields are mixed. Because of the timing gap between the two fields, according to the standardized image rules, after image might occur to high speed moving images. -
Page 59: Search Details
Press ENTER again to open the Popup Menu. SAVE JPEG is only available when a single camera is selected. To activate, select a single channel (full screen), pause playback, and press ENT twice to open the popup menu. Performance Series DVR User Guide... -
Page 60: Monitoring
Monitoring Select Channel • Use the number keys on the front of the DVR or remote control to select • Press the LIVE key to change the display mode. Display switches in the • Press the ROTATE key to rotate through to the remaining channels within the ______________________________________________________________________________________________ specific channels for full screen display. -
Page 61: Live Popup Menu
PTZ CONFIGURATION – Change PTZ settings. AUDIO ON – ON/OFF. ______________________________________________________________________________________________ Document 800-04765 Rev A 06/09 Press ENTER to highlight a channel box. Use the arrow keys to select the desired channel. Press ENTER again to open the Popup Menu. Performance Series DVR User Guide... -
Page 62: Backup (Export)
Operation Backup (Export) Manual Export Back up recorded data on a CD-RW, DVD-RW or connected USB device. Caution If you are using a new USB device to back up your data, you must Note Caution Do not shutdown the system during the backup process. ______________________________________________________________________________________________ Refer to the USB Flash Drive Approved List in the Introduction chapter. -
Page 63: Auto Backup
Auto Backup Create a mirrored backup of recorded data on a connected USB external hard drive. Caution Honeywell recommends the use of hard drives only; the use of flash Caution Do not shutdown the system during the backup process. ______________________________________________________________________________________________... -
Page 64: Using The Backup Viewer
Operation Using the Backup Viewer Play recorded video on a PC using Backup Viewer, the proprietary media player included with every backup file. Controlling Backup Viewer ______________________________________________________________________________________________ Stop Back Play Previous Speed Zoom Brightness Contrast Forward Play Next Frame... -
Page 65: Play Back Backup Image
Area. To return to a different Multi-Camera View, select a different Screen Division option from the Screen Division Menu. 16 Camera View – Displays cameras 1-16 in the Video Display Area. To return to a different Multi-Camera View, select a different Screen Division button. Performance Series DVR User Guide... -
Page 66: Upgrade Firmware At The Dvr
______________________________________________________________________________________________ Insert a CD/DVD or USB Drive containing the update files. Select System > Shutdown and select Restart. Select OK to confirm Restart. The DVR will restart and automatically find the update files. Select Start when the upgrade window appears. -
Page 67: Save Settings
______________________________________________________________________________________________ Document 800-04765 Rev A 06/09 Press the SETUP key on the front of the DVR or remote control to log in. Select SYSTEM > CONFIGURATION and log in. Select an empty PROFILE and define a name for the settings configuration. -
Page 68: Ptz Camera Control
Operation PTZ Camera Control To control a PTZ camera: SPEED SETUP – 1-8 [Set the speed that PTZ cameras move.] PRESET SETUP – Move/Set [Create preset PTZ camera positions.] PRESET TOUR – [Create a tour of preset PTZ camera positions.] PATTERN SETUP –... -
Page 69: Remote Software
______________________________________________________________________________________________ Document 800-04765 Rev A 06/09 Press the SETUP key on the front of the DVR or remote control to log in. Select NETWORK > CLIENT CONFIGURATION (See the Client Configuration section of this manual for more details). Change port settings or write down current port settings. -
Page 70: Creating A Dvr Connection With Remote Software
Select HRDP Performance Series as the Site Type. Enter a name for the system in the Site Name box. Enter the IP address of the DVR - found in Network > Network Configuration on the DVR. Enter the Port number found in Network Client Configuration on the DVR system (default is 4000). -
Page 71: Access Remote Connection
Click on the icon of the server as defined previously. Enter the user name and password of an authorized remote user as defined in the System > User Configuration > Client menu on the DVR. User Name and Password are both case sensitive. -
Page 72: Using The Remote Software
Remote Software Using the Remote Software Setting the Time and Date The Remote Software uses the system time of the PC. If the system time is not correct, follow the steps below to change it. ______________________________________________________________________________________________ Exit to Windows by clicking the Exit button on the Live View screen and selecting Restart in Windows Mode. -
Page 73: Live View Screen
Live View screen. It is important to be familiar with these options as this is the screen displayed the majority of the time. Camera Display Buttons ______________________________________________________________________________________________ Document 800-04765 Rev A 06/09 Performance Series DVR User Guide Current Date & Time Menu Buttons Displays Connected Users Status of/Activates... -
Page 74: Camera View
Displayed when the camera is currently being recorded to the DVR. Motion Detection Displayed when a camera (set up for motion detection) detects motion. Display Displayed when the video from the camera is currently not being recorded to the DVR. Current Recording Status... -
Page 75: Screen Division Buttons
Division Menu. You can deactivate Full Screen mode by right- clicking on the screen. Auto Sequence – Sequences through the Screen Divisions sets. For example, selecting the 1A and then the Loop button will sequence through 1A, 2A, 3A, 4A and then repeat. Performance Series DVR User Guide... -
Page 76: Setup Overview
Performance Series Setup to expand the menu tree and access the Camera, Record, Sensor Setup and System Setup details. Many of the setup options are the same in the remote software and in the DVR system. Click Apply after changing any settings. -
Page 77: Spot Setup
Schedule Setup Night – Set night time (ex. If 18:00 to 6:00 is defined as night time, 6:00 to 18:00 is defined as day time) Weekend –Define weekend days ______________________________________________________________________________________________ Document 800-04765 Rev A 06/09 Performance Series DVR User Guide... -
Page 78: Audio Setup
Remote Software Audio Setup Specify volume level and audio settings for recording according to preset schedules and live or playback mode. Audio Day - Enable/Disable Audio Night - Enable/Disable Audio Weekend - Enable/Disable Audio Live - Enable/Disable Audio Playback - Enable/Disable Volume –... -
Page 79: Hdd Setup
HDD Setup Disk Overwrite – Enable / Disable [Select the check box to enable the DVR to write over old data when the hard drive is full.] Disk Full Warning – Enable/Disable [Enable Disk Full Warning for notification when the HDD becomes full and HDD Overwrite is disabled.] Remain Time –... -
Page 80: System Setup
PTZ Authorization – Enable PTZ control for specific channels. Firmware Upgrade The HRDP Performance Series DVR can be remotely upgraded with the latest firmware. Download the firmware file to your PC, locate the file on the Firmware Upgrade screen and click UPGRADE. -
Page 81: Search Overview
Screen Division Buttons Select Cameras Note ______________________________________________________________________________________________ Document 800-04765 Rev A 06/09 Actual Date/Time Calendar Button Audio Channel buttons are only viewable when one camera is selected. Performance Series DVR User Guide Search Options Play Controls Search Date/Time Hour Minute Control... -
Page 82: Play Controls
Remote Software Play Controls Back Frame Rewind Stop Play Forward Frame Performing a Basic Search Adjust the Brightness of an Image Zooming in on an Image ______________________________________________________________________________________________ Rewind Back Frame Stop Moves video back one frame Rewinds video Stops video playback Plays video Moves video forward one frame Select a date using the Calendar button on the Date Display. -
Page 83: Zooming In On A Portion Of An Image
Note Save Clip The DVR can export single images in the JPG file format, save video clips in the AVI format, or output to a VCR using the s-video port. The JPG and AVI file formats are extremely common with universal computer support making them ideal formats to use. -
Page 84: Saving A Video Clip
Remote Software Saving a Video Clip AVI File available. Codec. Each codec provides different levels of quality, compatibility and file-size. to record. Although 50 is the longest time displayed, a longer recording may be entered manually. When size is not an issue, set quality to 100. -
Page 85: Status Search
Click along the orange recorded video block to select a desired camera or time frame. After locating the desired video, close the Status Search window and use the playback controls to play forward, reverse or frame-by-frame. Performance Series DVR User Guide... -
Page 86: Ptz Overview
Internal PTZ Onscreen Menu. Since every PTZ camera is different, the functions of these options can vary slightly. The Performance Series DVR provides an easy way to access the cameras options. For explanations of what those options are please refer to the manual that came with the camera. -
Page 87: Using The Graphical Ptz Controller
Live View screen. Current Camera Eight directions are available only for select protocols. Only four of the PTZ Control buttons work for all protocols (UP, DOWN, LEFT, RIGHT). Performance Series DVR User Guide Arrow Buttons Activate Corresponding Preset Position... -
Page 88: Using The On-Screen Compass
Remote Software Using the On-screen Compass ______________________________________________________________________________________________ Click PAN/TILT on the Live View screen. Control the PTZ by dragging the mouse on the screen in the desired direction. A green line will appear to show the direction the PTZ will move. The shorter the line the less the PTZ will move. -
Page 89: Web Viewer Overview
The DVR allows access to the video using Microsoft® Internet Explorer® browser 6+. To log in to the DVR server from the Web Viewer, a user account must be made for the user. This ensures that only authorized users are allowed to log in. In addition, each user can be assigned different privileges that allow or deny access to different functions. -
Page 90: Connecting To A Dvr Using Web Viewer
If you receive a message saying Internet Explorer security settings do not allow you to download Active X components then you will need to adjust the browser security settings. Add the IP address of the DVR to the trusted sites list inside Internet Explorer settings. Contact the System administrator for additional help with adjusting Internet Explorer settings. -
Page 91: Performing A Basic Search
Performing a Status Search Clean Image The HRDPX can record video using one of three different resolutions. When using the 720 x 480 resolution, two fields are mixed. Because of the timing gap between the two fields, according to the standardized image rules, after image might occur to high speed moving images. -
Page 92: Print
Note Save The HRDPX can export single images in the Image file formats and save video clips in an .AVI format. Both .JPG and .AVI file formats are the most commonly used graphical formats today. Virtually every computer offers some type of support for these file formats which make them the most ideal formats to use. -
Page 93: Digital Verifier Overview
HRDP > Digital Verifier > Digital Signature Verifier. Click the Browse button to load the JPG image. Enter the Site Code of the DVR that the image was originally extracted from. (The Site Code is specified in the System Configuration Menu) Click Verify to continue or Close to close the window without verifying. -
Page 94: Fvms (Option) Overview
DVR, and import maps of buildings and other locations. ______________________________________________________________________________________________ Configure the DVR for remote access as shown above in Set up a Remote Connection. Follow the instructions in the FVMS manual for Adding a New Site. -
Page 95: Appendix
Sensor (Alarm) Recording Continuous Continuous Recording Icon Recording Recording Icon This icon always appears in conjunction with the motion or continuous recording icons. Video Loss Video Loss detected Freeze Pause Live View PTZ Camera channel Performance Series DVR User Guide... -
Page 96: Status Icons
Flashes when the hard drive is being accessed. Record Flashes when live video is recording. Network Illuminates when the DVR is connected to a network. Illuminates when the fan is working. Flashes when the fan is working improperly. Unlit when the fan is not working. -
Page 97: Enter / Exit Buttons
(Single > 4 > 7 > 9 > 10 > 13 > 16 > Single > 4 > 7 > 9 ...split screen mode) Setup Open the setup menu. SETUP Performance Series DVR User Guide buttons to adjust. buttons to adjust. buttons to adjust. -
Page 98: Numeric Buttons And Rec
Appendix Numeric Buttons and Rec Directional and Playback Control Buttons ______________________________________________________________________________________________ Numeric In live and search modes, press to watch that channel full screen. Record In live mode, press to start instant recording of all channels. Live Search Search-Pause Live REPLAY Search Search-Pause... -
Page 99: Dvr Faq
Embedded Linux means that the operating system of the DVR has been imprinted into the CPU (Central Processing Unit). This means that the system response time is faster, more stable, and that the core of the DVR is protected against external factors, such as virus. -
Page 100: Recording
Mail is not sent out. Please check all the settings in the Network E-Mail Configuration. What types of cameras can be used? The Honeywell Performance Series DVR supports either NTSC or PAL analog cameras. Both standards may not be used simultaneously. -
Page 101: Troubleshooting
Check camera lens setting If a cable is attached to the video channels looping output, make sure that it is properly terminated. The HDD is full, delete video or set the DVR Overwrite Mode to On in Disk Configuration > Overwrite. -
Page 102: Specifications (Hrdpx)
Appendix Specifications (HRDPX) Specification Inputs Video Outputs Display Monitoring Screen split Performance Resolution Recording Compression Mode Storage media • Internal 2 x HDD (Option) • USB Recording Audio Mode Playback Searching Remote Monitoring S/W Alarm Sensor Camera Control Back-up Size... - Page 103 Performance Series DVR User Guide Notes ______________________________________________________________________________________________ Document 800-04765 Rev A 06/09...
- Page 104 ℡ +971.04.881.5506 © 2009 Honeywell International Inc. All rights reserved. No part of this publication may be reproduced by any means without written permission from Honeywell Video Systems. The information in this publication is believed to be accurate in all respects. However, Honeywell Video Systems cannot assume responsibility for any consequences resulting from the use thereof.