Advertisement
RF-TVMLPT02V2
TV Wall Mount
For wood-stud and concrete
wall installations
Before using your new product, please read these instructions to prevent any damage.
Safety information and specifications .................................2
Tools needed.................................................................................3
Package contents: parts ............................................................3
Installation instructions.............................................................5
Assembly Guide
Advertisement
Chapters
Table of Contents

Related Manuals for RocketFish RF-TVMLPTO2V2


Summary of Contents for RocketFish RF-TVMLPTO2V2
- Page 1 RF-TVMLPT02V2 TV Wall Mount Safety information and specifications .........2 Tools needed.................3 Package contents: parts ............3 Installation instructions.............5 For wood-stud and concrete Assembly Guide wall installations Before using your new product, please read these instructions to prevent any damage.
-
Page 2: Safety Information And Specifications
We’re here for you about the safety of the installation, contact Customer Service or call a qualified contractor. Rocketfish is not www.rocketfishproducts.com responsible for damage or injury caused by incorrect For customer service, call: installation or use. -
Page 3: Parts List
RF-TVMLPT02V2 TV Wall Mount Tools needed You will need the following tools to assemble your new TV wall mount: Level Pencil Drill Edge-to-edge stud finder Phillips screwdriver Tape 7/32" (5.5 mm) wood drill bit for wood stud wall Socket wrench with Measuring tape 1/2"... -
Page 4: Tv Hardware Bag
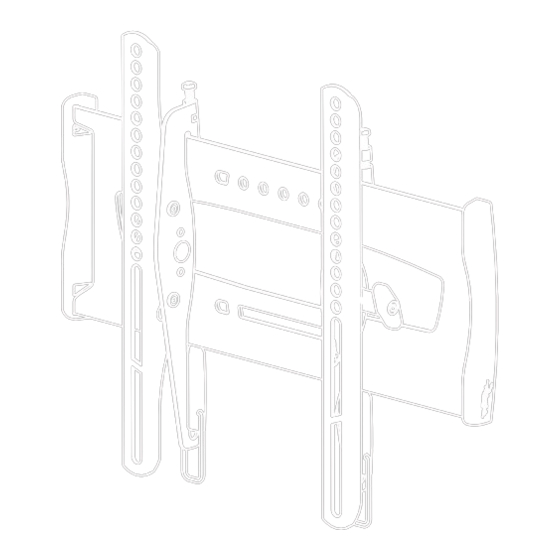
RF-TVMLPT02V2 TV Wall Mount Package contents: hardware Make sure that you have all the hardware necessary to assemble your new TV wall mount: TV Hardware Bag Label Hardware Qty. Label Hardware Qty. M4 × 12 mm M8 × 16 mm screw screw M4 ×... -
Page 5: Installation Instructions
RF-TVMLPT02V2 TV Wall Mount Installation instructions STEP 1 - Determine wall-mount location Note: • For more detailed information on determining where to drill your holes, visit our online height-finder at: http://mf1.bestbuy.selectionassistant.com/index.php/heightfinder • Your TV should be high enough so your eyes are level with the middle of the screen. Normally, 40 to 60 inches from the ground. -
Page 6: Installing On Wood Stud Wall
RF-TVMLPT02V2 TV Wall Mount STEP 2 - Option 1: Installing on a wood stud wall Note: Drywall covering the wall must not exceed 5/8" (16 mm). Locate the stud. Verify the center of the stud with an edge-to-edge stud finder. Align the wall platetemplate (D) at the height you determined in the previous step and make sure that it is level. - Page 7 RF-TVMLPT02V2 TV Wall Mount STEP 2 - Option 2: Installing on a solid concrete or concrete block wall CAUTION: To prevent property damage or personal injury, never drill into mortar between blocks. Mount wall plate directly onto the concrete surface. Align the wall plate template (D) at the height you determined in the previous step and make sure that it is level.
- Page 8 RF-TVMLPT02V2 TV Wall Mount STEP 3 - Determine whether your TV has a flat back or an irregular or obstructed back Carefully place your TV screen face-down on a cushioned, clean surface to protect the screen from damages and scratches. If your TV has a table-top stand attached, remove the stand.
- Page 9 RF-TVMLPT02V2 TV Wall Mount STEP 4 - Select screws, washers, and spacers Select the hardware for your TV (screws, washers, and spacers). A limited number of TVs come with mounting hardware included. (If there are screws that came with the TV, they are almost always in the holes on the back of the TV.) If you don't know the correct length and diameter of the mounting screws your TV requires, test various sizes by hand threading the screws.
- Page 10 RF-TVMLPT02V2 TV Wall Mount STEP 5 - Option 1: Attaching the mounting hardware to TVs with a flat back Align the holes you noted on the TV brackets (B and C) with the screw holes on the back of your TV. The brackets are marked “R”...
- Page 11 RF-TVMLPT02V2 TV Wall Mount STEP 5 - Option 2: Attaching the mounting hardware to TVs with irregular or obstructed backs Align the TV brackets (B and C) with the screw holes on the back of the TV. Place spacers (I) behind the TV brackets and washers (G or H) over the holes in the TV bracket, then insert the screws (F, K., M, or P) through the washers, TV bracket, and spacers.
-
Page 12: Attaching Tv To Wall Mount
RF-TVMLPT02V2 TV Wall Mount STEP 6 - Attach your TV to the wall mount • Holding the TV with the top of the screen tilted toward the wall, slide the upper notches of the right and left TV brackets (B and C) over the upper lip of the wall plate (A). Then, gently lower the TV until the lock engages the lower lip of the wall plate (A). - Page 13 RF-TVMLPT02V2 TV Wall Mount STEP 7 - Adjusting the level and tilt angle Adjust the swivel tension by hand or by using a 3/16" hex key (not included), then adjust the tilt angle by gripping the top and bottom of the TV and manually moving the TV to the angle you want. When you are done adjusting the tilt, retighten the knob, but do not over-tighten.
- Page 14 RF-TVMLPT02V2 TV Wall Mount Optional - Removing the TV from the wall mount • Pull the latches down to unlock the TV from the wall mount, then lift the TV up and off the wall plate. For customer service, call: 800-620-2790 (U.S./Canada markets) Need help? Call 800-620-2790...
- Page 15 7601 Penn Avenue South, Richfield, MN 55423-3645 USA © 2013 BBY Solutions, Inc. All rights reserved. ROCKETFISH is a trademark of BBY Solutions, Inc. All other products and brand names are trademarks of their respective owners. Part number: 6907-002046 00...