
Related Manuals for Mira Play


Summary of Contents for Mira Play
- Page 1 ELECTRIC SHOWER Installation & User Guide THESE INSTRUCTIONS ARE TO BE LEFT WITH THE USER...
-
Page 2: Table Of Contents
Commissioning ................16 User Instructions................18 Fault Diagnosis ................23 Maintenance ................28 Dimensions ..................30 Wiring Diagram ................31 Accessories - Mira DCV-H ............32 Spare Parts ................... 32 Guarantee, Customer Care Policy, and How to contact us ..............Back Cover... -
Page 3: Introduction
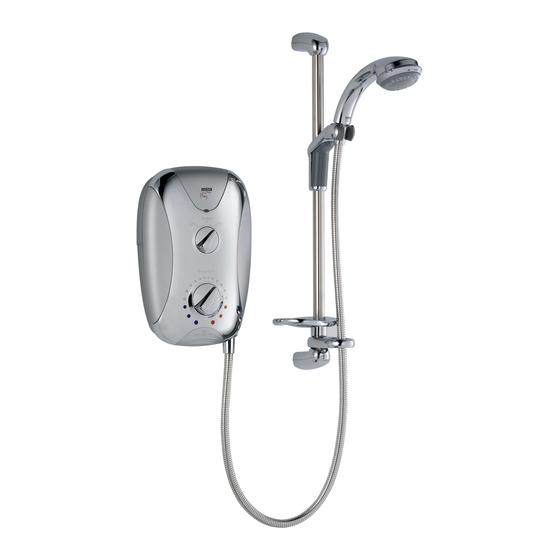
This shower comes complete with a set of Mira Response Adjustable Shower Fittings. Mira Play models covered by this guide: Mira Play 9.5 kW- A 9.5 kW 240 V AC (8.3 kW 230 V AC) heater. Available in white/ white panel, white/chrome panel and satin/chrome panel finishes. -
Page 4: Important Safety Information
1.5. DO NOT fit any form of outlet flow control as the outlet acts as a vent for the tank body. Only Mira recommended outlet fittings should be used. 1.6. If the cover is removed, the following warnings must be observed: 1.6.1.Turn off the electrical and water supplies before removing the cover. - Page 5 2. Caution! 2.1. Follow all warnings, cautions and instructions contained in this guide, and on or inside the appliance. 2.2. The electrical installation must comply with the “Requirements for Electrical Installations”, commonly referred to as BS 7671 the “IEE Wiring Regulations”. Or any particular regulations and practices, specified by the local electricity supply company in force at the time of the installation.
-
Page 6: Pack Contents Checklist
Tick the appropriate boxes to familiarize yourself with the part names and to confirm that the parts are included. 1. Mira Play 9.5 kW 1 x Mira Play 9.5 kW 3 x Fixing Screws 3 x Wall Plugs 2. Documentation... -
Page 7: Specifications
2. Electrical 2.1. The Mira Play 9.5 kW requires a 40 Amp fuse. 2.2. The terminal block will accept cable sizes up to 16 mm 3. Standards and Approvals 3.1. The Mira Play complies with all relevant directives for CE marking. -
Page 8: Installer Instructions
Installer Instructions Read the section “Important Safety Information” first. Plumbing Checklist Minimum maintained inlet pressure = 70 kPa (0.7 bar). Maximum static inlet pressure = 1000 kPa (10 bar). Water treatment device (if required). Free flowing isolating valve. Positioned over water catchment area. Fitted to finished wall surface. - Page 9 In these instances an outlet double checkvalve, e.g. a Mira DCV-H, must be fitted. This will increase the required supply pressure typically by 10 kPa (0.1 bar). See section “Accessories”.
-
Page 10: Electrical Checklist
Read the section “Important Safety Information” first. Electrical Checklist Electrical supply fuse and consumer unit are adequate for the product. Shower unit is earthed. The minimum required supply cable size must conform to BS 7671. Double pole isolating switch. DO NOT twist live or neutral cable cores. Electrical connections are tightly secured. - Page 11 In a domestic installation, the rating of the electricity supplier’s fuse and the consumer unit must be adequate for the additional demand. All Mira Play electric showers are high power units, therefore it is essential to contact your electricity supplier to ensure that the supply is adequate for the product.
-
Page 12: Installation
Installation Mira Play Read the section “Important Safety Information” first. 200 mm Electrical supply is 200 mm minimum Remove three screws. turned off at the mains. gap from ceiling. Remove Cover and For back inlet use CAUTION! Do not drill into determine supply soldered elbow. - Page 13 Connect supply pipe. Feed cable into Case. Fit Earth Do not overtighten! sleeve (not supplied) and strip insulation. Do not twist cable cores. L = BROWN = GREEN N = BLUE Firmly connect the Make sure wires are clear conductors. Do not exert of all mounting holes.
- Page 14 Mira Response Adjustable Shower Fittings Read the section “Important Safety Information” first. Clamp Bracket Release Button Soap Dish/Hose Retaining Ring 25 mm Minimum Slide Bar Spill-over level Position as shown to prevent Depress release button back siphoning. FULLY and assemble Clamp Bracket.
- Page 15 Mark the positions of the slots on CAUTION! Do not drill into buried both top and bottom Supports. cables or pipes. First fix bottom Slide Bar Support Fit the End Caps to the Slide Bar and fully tighten the screw*. Then Supports.
-
Page 16: Commissioning
Commissioning If you are unsure how an electric shower works, please read through the section “User Instructions” before continuing. Electrical supply is Set control to LOW. Turn water supply fully turned off at the mains. Check for water leaks. Turn control to full cold. Switch on electrical supply. - Page 17 Set control to HIGH. The temperature will rise further. PUSH Adjust temperatures as required. Press STOP and isolate power. Flow rate will adjust automatically. The shower will purge water Residual water may drain from its tank for a few seconds. over a few minutes.
-
Page 18: User Instructions
User Instructions 1. Warning! 1.1. DO NOT operate this appliance if it appears to be frozen. Allow the appliance to thaw and then contact your installer before using again. 1.2. DO NOT operate this appliance if water leaks from the pressure relief valve; maintenance will be required before the appliance can be safely used. -
Page 19: How Your Electric Shower Works
How Your Electric Shower Works Hot water is produced by passing cold water through a heating tank. The shower has three heater settings. The warmer the shower, the lower the flow rate and vice versa. -
Page 20: The Effect Of Seasonal Changes
The Effect of Seasonal Changes * * * For a cold shower select Low. For a summer warm shower select Medium. For a winter warm shower select High. During extremes of mains water supply temperature, adjust heater setting to obtain a better showering temperature. The Effect of Other Water Devices Example of how shower temperature stabilizes due to sudden pressure changes. -
Page 21: Using Your Shower
Using Your Shower Read the section “Important Safety Information” first. PUSH Switch on electrical supply. Press START button. Set to desired position. Check water temperature before entering shower. Allow 10-15 seconds for any temperature adjustments to reach the handset. PUSH A small amount of water Press STOP button. - Page 22 Changing the Spray Setting The handset has three different spray settings (Start, Soothe and Force). Start Soothe Turn the Spray Plate Turn the Spray Plate anticlockwise until it “clicks”. anticlockwise until it “clicks”. Water will flow from the outer Water will flow from the large set of holes.
-
Page 23: Fault Diagnosis
Fault Diagnosis The trouble shooting information table below gives details on probable causes and remedies should difficulties be encountered whilst the shower is in operation. Warning! There are no user serviceable components beneath the cover of the appliance. ONLY A COMPETENT TRADESPERSON SHOULD REMOVE THE FRONT COVER! Symptom Power Heater Probable Cause... - Page 24 Symptom Power Heater Probable Cause Possible Remedy Setting Light Low/ Medium/ High The incoming water Open the stop/isolating supply stop valves, valve fully. or the appliance isolating valve, is closed. Handset blocked. Remove and clean. For sprayplate cleaning, refer to the Handset manual.
- Page 25 Symptom Power Heater Probable Cause Possible Remedy Light Setting Low/ Medium/ High Medium/ The temperature is Turn the Temperature High set too high. This Control anticlockwise is causing the to reduce the water Thermal Switch to temperature. turn off the Heating Element to reduce DO NOT TAMPER with the water...
- Page 26 Symptom Power Heater Probable Cause Possible Remedy Light Setting Low/ Medium/ High Handset blocked. Remove and clean. No water, or very low The incoming water Open the stop/isolating flow rate. valve fully. supply stop valves, or the appliance isolating valve, is closed.
- Page 27 Symptom Power Heater Probable Cause Possible Remedy Setting Light Low/ Medium/ High When the Relief Reset the Relief Valve Valve operates, a assembly. See small rubber ball is “Maintenance” section. ejected. Replace. The Pilot Valve is The water faulty. cannot be turned off.
-
Page 28: Maintenance
Maintenance Handset - Cleaning Clean with mild washing up detergent or soap solution. Wipe dry with soft cloth. Poor shower performance can be avoided by cleaning the spray head. Use thumb or soft cloth to wipe rubber nozzles. The handset must also be descaled regularly. - Page 29 Relief Valve Assembly - Resetting Read the section “Important Safety Information” first. Electrical supply is Turn water supply fully off. Remove three screws, turned off at the mains. Cover and Service Tunnel. Small rubber ball should be loose in the Case. Screws Switch Assembly Heater...
-
Page 30: Dimensions
Dimensions 225 mm 98 mm 335 mm 332 mm 52 mm 600 mm... -
Page 31: Wiring Diagram
Wiring Diagram... -
Page 32: Accessories - Mira Dcv-H
DCV-H: An outlet double checkvalve, designed to prevent the backflow or backsiphoning of potentially contaminated water, through shower controls which are fitted with a flexible hose as part of the outlet shower fitting. Available as an optional accessory from all Mira Showers stockists. - Page 33 Mira Play Spare Parts Diagram 1539.339 1539.349 439.90 439.93 1539.343 1539.344 1539.352 1539.350 406.27 439.99 439.75 1539.341 1539.342 1539.355 Important Note! Push-fit connectors must be assembled back to back 4 mm MINIMUM onto terminals of micro-switches. A minimum air gap of 4 mm must be maintained...
- Page 34 Mira Response Adjustable Shower Fittings Spares List 150.58 Hose - chrome 411.05 Adjuster Ring 411.23 Clamp Bracket Assembly 411.30 Slide Bar Support Assembly 411.37 Service Pack 'O' Seals - components identified 'A' 411.53 Slide Bar - stainless steel 411.58 Hose Retaining Ring 411.91...
- Page 35 Mira Response Adjustable Shower Fittings Spare Parts Diagram 411.92 411.30 411.96 411.94 411.53 632.73 411 94 411.05 411.23 411.91 632.73 150.58 411.58 411.94 411.94 411.30...
-
Page 36: Customer Service
Customer Service UKAS 1058045-W2-B © Kohler Mira Limited, May 2005...