Table of Contents
Advertisement
Advertisement
Table of Contents

Related Manuals for Gateway TAB TP


Summary of Contents for Gateway TAB TP
-
Page 1: User Guide
User Guide... - Page 2 © 2011. All Rights Reserved. Gateway TAB TP series User Guide Model: G100 (Wi-Fi only models) and G100W (Wi-Fi+3G models) First issue: 06/2011 Gateway TAB TP series Model number: __________________________________ Serial number: ___________________________________ Date of purchase: ________________________________ Place of purchase: ________________________________...
-
Page 3: Table Of Contents
Table of contents End user license agreement Getting to know your tablet Features and functions ......... . . 7 Product registration . - Page 4 Dolby Mobile ..........34 Managing contacts Using the camera Camera icons and indicators .
-
Page 5: End User License Agreement
End user license agreement IMPORTANT - READ CAREFULLY: THIS END USER LICENSE AGREEMENT ("AGREEMENT") IS A LEGAL AGREEMENT BETWEEN YOU (EITHER AN INDIVIDUAL OR A SINGLE ENTITY), AND ACER INC. INCLUDING ITS SUBSIDIARIES ("ACER") FOR THE SOFTWARE (WHETHER PROVIDED BY ACER OR BY ACER'S LICENSORS OR SUPPLIERS) THAT ACCOMPANIES THIS AGREEMENT, INCLUDING ANY ASSOCIATED MEDIA, PRINTED MATERIALS AND RELATED USER ELECTRONIC DOCUMENTATION WHICH MAY BE BRANDED "ACER"... - Page 6 WARRANTY OR CONDITION OF TITLE, QUIET ENJOYMENT, QUIET POSSESSION, CORRESPONDENCE TO DESCRIPTION OR NON-INFRINGEMENT WITH REGARD TO THE SOFTWARE. EXCLUSION OF INCIDENTAL, CONSEQUENTIAL AND CERTAIN OTHER DAMAGES TO THE MAXIMUM EXTENT PERMITTED BY APPLICABLE LAW, IN NO EVENT SHALL ACER, ACER'S SUPPLIERS, OR ACER'S LICENSORS, BE LIABLE FOR ANY SPECIAL, INCIDENTAL, INDIRECT, PUNITIVE, OR CONSEQUENTIAL DAMAGES WHATSOEVER (INCLUDING, BUT NOT LIMITED TO, DAMAGES FOR LOSS OF PROFITS OR CONFIDENTIAL OR OTHER INFORMATION, FOR BUSINESS INTERRUPTION, FOR PERSONAL INJURY, FOR LOSS OF PRIVACY, FOR FAILURE TO MEET ANY...
-
Page 7: Features And Functions
Hurry and register, as other advantages await you! How to register To register your Packard Bell product, please visit www.gateway.com. Click Registration and follow the simple instructions. You can also register directly from your tablet by tapping the Registration icon. -
Page 8: Unpacking Your Tablet
Setting up Unpacking your tablet Your new tablet comes packed in a protective box. Carefully unpack the box and remove the contents. If any of the following items is missing or damaged, contact your dealer immediately: • Liberty Tab • Quick Guide •... -
Page 9: Back View
Back view Item Description LED flash Lights to illuminate images. 5 MP camera A 5-megapixel camera for taking high- resolution images. Speakers Emits stereo audio. Left view Item Description HDMI Micro (Type D) Connects to an HDMI cable with a Type D port connector. -
Page 10: Right View
Right view 1 2 3 Item Description Reset button Insert a small thin object (such as a paperclip) to reset power to the tablet. USB port (Host) Connects USB devices to your tablet. Micro USB port (Slave) Connects to a computer with a USB cable. DC-in jack Connects to the DC power supply. -
Page 11: Using Your Tablet
Using your tablet Using the SIM card slot (only for Wi-Fi+3G models) Certain tablets include a SIM slot for internet access. To take full advantage of your tablet’s Internet capabilities, you should install a SIM card with data before subscription turning on your tablet. -
Page 12: Turning On For The First Time
Turning on for the first time To turn on your tablet, press and hold the power button for two seconds. You will then be asked some questions before you can use your tablet. To start, tap to select your language, then tap Start. Follow the rest of the instructions as they are displayed. -
Page 13: Locking Your Tablet
Locking your tablet If you will not use your tablet for a while, briefly press the power button to lock access. This saves power and ensures your tablet does not unintentionally use any services. Your tablet will lock automatically if it is not used after a while. To change the delay, tap Apps >... -
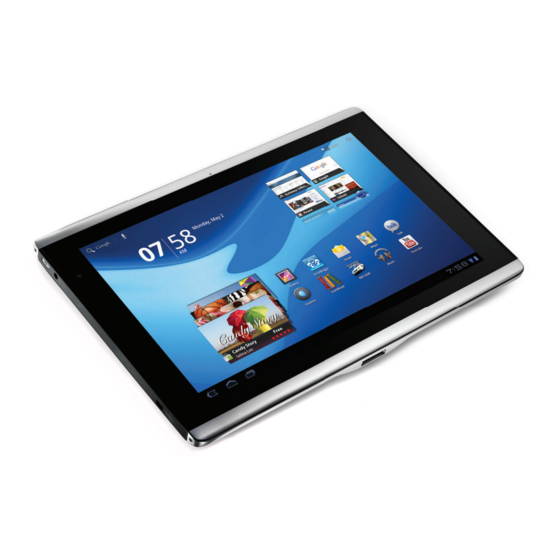
Page 14: The Home Screen
Tap and hold: Tap and hold an item to see a list of actions available for that item. On the pop-up menu that appears, tap the action you want to perform. Scroll: To scroll up or down the screen, simply drag your finger up or down the screen in the direction that you want to scroll. - Page 15 Back Tap this icon to go to the previous page, or to go up one level in a hide menu. This icon may be replaced with the icon in certain cases (such as if the keyboard or list of recent applications is shown). Hide Home Tap this icon to go directly to the Home screen.
-
Page 16: Status And Notification Area
The application menu The application menu displays applications installed on your tablet. Two categories are available: All and My apps. All displays all applications that are installed on your tablet; My apps displays applications that you have installed from the Android Market. Note: All images are for reference only. -
Page 17: Status And Notification Icons
Tap the status icons to view more status information and a summary of events. Tap the status area again to view more controls. While viewing a notification, tap the summary to see more information, if available. Some event summaries include controls, such as media controls if music is playing. Status and notification icons Connection and batterystatus icons Note: Network connection icons are blue if you have an active Google... - Page 18 Notification icons Icon Description Icon Description Alarm is set Speaker is silenced New Gmail message Tablet microphone is off New Google Talk message GPS is on Upcoming event Receiving location data from Song is playing More status notifications SD card or USB storage is full Syncing data Tablet is connected to PC via Sync is on...
-
Page 19: Personalizing The Home Screen
Personalizing the Home screen You may personalize your Home screen by adding or removing application shortcuts or widgets, and by changing the wallpaper. Adding or removing shortcuts or widgets To add shortcuts or widgets open the Add to Home screen: tap the plus sign next to Apps in the top-right corner of the Home screen. -
Page 20: The Onscreen Keyboard
Adding shortcuts from the Application menu You can add shortcuts to the Home screen directly from the Application menu. Open the Application menu then tap and hold an icon until an image of the Home screens appears. Drag the icon to a Home screen to create a shortcut. The onscreen keyboard When you tap a text box to enter text, an onscreen keyboard will appear. -
Page 21: Xt9 Text Input
settings. These settings include Auto-correction and keyboard sounds and vibration. Predictive text or auto correction The Android keyboard can provide predictive text input. As you tap the letters of a word, a selection of words are displayed that continue the sequence of letters tapped, or are a close match allowing for errors. -
Page 22: Editing Text
listing the text input methods available on your tablet. Tap the settings icon next to the XT9 Text Input entry. Function Description Languages and Set the languages that will be available. settings If you have selected more than one language, tap the globe in the text prediction bar to cycle through the languages. - Page 23 1. Tap the text you want to select. If you can select this text, a cursor is inserted below the text. Note: The cursor indicates where text you type or paste will be inserted. 2. If the cusor is not in the desired position, simply drag it to the correct position Paste If you previously copied (see below) text, a...
-
Page 24: Connecting Devices To Your Tablet
Connecting to a PC as a USB storage device Download and install the latest USB driver on your computer before connecting your tablet to the computer. Visit www.gateway.com for the latest drivers: Select Support, Drivers & Downloads, Tablet. Select your tablet model, and then... -
Page 25: Connecting A Usb Device To Your Tablet
This allows you to transfer your personal data to or from your PC, using your PC’s file explorer. Plug the micro USB connector to your tablet, and plug the other end of the USB cable into a USB port on your PC. After a short delay, your tablet's internal memory will be visible as an external drive in your PC’s file explorer. -
Page 26: Connecting To A Television With Hdmi
Tap Find nearby devices to scan for available devices. Note: Please check for updates to the tablet's software that may add support for additional Bluetooth devices. See “Updating your tablet’s operating system” on page 55. Connecting to a television with HDMI HDMI micro Connect an (Type D) cable to your tablet then plug the other end... -
Page 27: Going Online
Going online Managing Wi-Fi connections If you did not connect to a Wi-Fi network when you first started your tablet, or want to connect to a new network, tap Apps > Settings > Wireless & networks > Wi-Fi settings to manage your connection settings. Alternatively, tap the Wi-Fi status icon in the bottom-right corner of the screen. -
Page 28: Setting Up Gmail (Google Mail)
You may open multiple tabs. When a page is open, press the small tab with a plus sign. Simply tap one of the tabs across the top of the screen to switch pages. New tab Pinch to zoom in or out of pages. Tap and hold an item on a page to open a contextual menu. -
Page 29: Setting Up The Email Application
Setting up the Email application The Email application enables you to access email from most popular email providers. Most accounts can be set up in two steps. Open the application menu and then tap Email to start setting up your email access. If necessary, enter your email address and tap Manual setup to enter the parameters manually. -
Page 30: Android Market
SocialJogger SocialJogger combines your social network updates in one location, allowing you to quickly follow what your friends are doing across several platforms. From the application menu, tap SocialJogger to launch the program. Select Sign in to enter your account information. When you are finished press Start. - Page 31 You can browse the market by category or tap the search icon to search for a specific application. Once you have selected an application, tap the DOWNLOAD button to download and install the application. You will be told which services (contact information, wireless access, GPS, etc.) the application requires access in order to function correctly.
-
Page 32: Google Talk
Using downloaded applications Once you’ve downloaded and installed an application, you may find it in the My apps or All sections of the Application menu. Certain applications also provide widgets, or only provide a widget (with no application icon). Widgets can be found in the Widget section when personalizing your Home screen. -
Page 33: Playing Music And Video
Playing music and video Multimedia playback Your tablet comes supplied with a variety of programs that you can use to enjoy multimedia content. Music Use Music to listen to music and other audio files that you download or copy from your computer. Tap Apps >... -
Page 34: Media Server
Note: You can return to the Home page while playing music; a Music icon is displayed with the notification icons. Tap this icon to control playback. nemoPlayer Open nemoPlayer from the Application menu to play media you have stored on your tablet. -
Page 35: Managing Contacts
Managing contacts Your tablet features an address book that allows you to save contacts to the internal memory, SIM card or your Google account. Tap Contacts from the application menu to view your contacts. If you don’t have any contacts stored on your tablet, you can sync with your Google account contacts, import contacts from a contact data file (vCard or csv) or add a new contact. -
Page 36: Editing A Contact
You may now edit the new contact entry. Editing a contact If you have opened an new or existing contact you can enter information about the contact: Simply tap on a box and type the appropriate information. Click on the arrow next to the name entry to see options, such as adding a name prefix or phonetic name. -
Page 37: Starred Contacts
Tap on an entry (such as an email address) to open the application linked to that type of entry. For example, tap an email address to open the Gmail application. To add or change information, tap the pencil icon. Tap Done to save changes, or Cancel to discard them. Starred contacts star You may quickly access your favorite contacts by adding a... -
Page 38: Using The Camera
Using the camera Your tablet features two cameras: a 5-megapixel digital camera and flash mounted on the rear and a 2-megapixel digital camera mounted on the front. This section will take you through all the steps in taking photos and videos with your tablet. -
Page 39: Taking A Photo
Icon Description Zoom out You may only zoom out after you have zoomed in. Zoom in Crop and enlarge the center of the screen. When using zoom, the image on the screen does not represent the quality of the final image. Take photo After taking a photo, tap the thumbnail in the bottom-left corner to view the photo in the Gallery. -
Page 40: Shooting A Video
3. Zoom in or out as needed. Note: When using zoom, the image on the screen does not represent the quality of the final image. 4. Tap the camera icon to take the photo. After taking a photo, tap the thumbnail in the bottom-left corner to view the photo in the Gallery. -
Page 41: Supported Formats
Note: Zoom is only available in certain resolutions. Supported formats Type Formats Image JPEG Video H.264BP Audio AAC-LC Viewing photos and videos After you have taken your photo or video, it is automatically saved; normally to internal memory. After taking a photo or video, you can view it in the Gallery by tapping the thumbnail in the bottom-left corner of the screen. -
Page 42: Reading An Ebook Or Pdf
Reading an eBook or pdf LumiRead The LumiRead application allows you to purchase, store and read books on your tablet. Tap the LumiRead shortcut in the Application menu, or the eReading content folder, to open the LumiRead application. The bookshelves All the books available on your tablet are shown on the bookshelves. - Page 43 Icon Item Description Display Changes how the books are shown. Settings Opens settings to manage folders, register an Adobe ID, change the theme or edit tags. Recently read The first shelf (at the top) displays books you have recently read. This list will change to reflect your activity.
-
Page 44: Opening A Book
Management) system is used. LumiRead supports books protected with Adobe ID. In order to read certain books, you must activate your tablet with an Adobe ID. See “Your Adobe ID” on page 46. Opening a book All books stored on your tablet may be seen on the shelves on the main screen. If you have many books, swipe the bookshelves up to see them. - Page 45 and your PC“ on page 24 or “Connecting to a PC as a USB storage device“ on page 24. LumiBooks Note: Connect your tablet to a computer and add books to the folder on your tablet’s internal memory or microSD card to see them on the LumiRead bookshelves.
- Page 46 Your Adobe ID Some books available for purchase are protected with Adobe DRM (Digital Rights Management). Before you can read them, you must enter an Adobe ID to activate your tablet. Only one activation is required, as it covers all purchases. If you already have an Adobe ID, you may use this to activate your tablet.
-
Page 47: Using A Cellular Data Network (Only For Wi-Fi+3G Models)
Using a cellular data network (only for Wi-Fi+3G models) ‘3G’, or data over a cellular network, is only available on models equiped with a SIM card slot, or through a separate 3G modem (not supplied - available from your mobile Internet provider, check for compatibility). Important: Please check the information provided by your mobile internet provider. -
Page 48: Adjusting Connection Settings
Important: Depending on your settings, you may be required to enter your PIN each time you switch on the cellular data function. SIM card lock Your tablet may come with a SIM card lock, i.e., you will only be able to use the SIM card provided by your network operator. -
Page 49: Internet Sharing
Disable data when roaming You can prevent your tablet from transmitting data over other carriers’ mobile networks when you are traveling and leave an area that is covered by your carrier’s networks. This is useful for controlling expenses if your mobile data contract doesn’t include data roaming. - Page 50 Wi-Fi hotspot You can turn your tablet into a portable Wi-Fi hotspot to share your mobile Internet connection with up to eight clients. 1. Tap Apps > Settings > Wireless & networks > Tethering & portable hotspot. 2. Tap Portable Wi-Fi hotspot and Portable Wi-Fi hotspot settings. 3.
-
Page 51: Advanced Settings
Advanced settings Access Settings from the Application menu. Tap Apps, then Settings. Sound Adjust the volume of your tablet using the volume buttons on the side of the tablet. Alternatively, you can adjust your tablet sound settings by tapping Apps >... -
Page 52: Putting Your Tablet In Airplane Mode
Putting your tablet in Airplane mode You can enter Airplane mode (also known as flight mode) to turn off network and Bluetooth functions and use your tablet during a flight. Check with your airline to make sure this is permitted onboard. Switch your tablet off during takeoff and landing as it may interfere with aircraft electronic systems. -
Page 53: Adjusting Bluetooth Settings
Adjusting Bluetooth settings You can use Bluetooth to exchange information between your tablet and other mobile devices. Bluetooth connections For all Bluetooth settings, tap Apps > Settings > Wireless & networks > Bluetooth settings. Here you can switch Bluetooth on or off, set a device name and discoverability. -
Page 54: Setting The Date And Time
Some applications, such as Gmail and Calendar, have their own Menu synchronization settings. Open the application and tap the button (four bars) and then tap Accounts. Auto-sync To have your tablet auto-sync, make sure Background data and Auto-sync are enabled. Background data •... -
Page 55: Managing Applications
Managing applications You can allow programs from Unknown sources to be installed and Manage applications. Closing an application To close an active application, go to Settings > Applications > Manage applications. Tap the Running tab, then tap the program you wish to close. Select Force stop to close the program. - Page 56 Warning! This will erase all your personal information, any contacts stored on your tablet and any programs you installed. Open Settings from the application menu, then tap Privacy > Factory data reset; click Reset tablet and then Erase everything to format your tablet. If your tablet still does not respond, refer to “FAQ and troubleshooting”...
-
Page 57: Faq And Troubleshooting
FAQ and troubleshooting This section lists frequently asked questions that may arise during the use of your tablet, and gives easy answers and solutions to these questions. Aspect Question Answer Audio Why is there no If the headset is plugged into the sound coming from device, the speaker is automatically the device? -
Page 58: Other Sources Of Help
All Packard Bell tablets are factory- tested before release. Other sources of help For information on: Refer to: Up-to-date information regarding www.gateway.com your tablet Service enquiries support.gateway.com... -
Page 59: Specifications
Specifications Performance ® ™ • NVIDIA Tegra 2 mobile processor ® ™ • Dual-Core ARM Cortex • System memory: • 1 GB of RAM • 16, 32 or 64 GB of flash memory ™ • Android operating system Display • 10.1” WXGA TFT-LCD capacitive multi-touch screen •... - Page 60 3G support (only available on Wi-Fi+3G models) • aGPS • GSM 850 / 900 / 1800 / 1900 • UMTS 850 / 900 / 1900 / 2100 • HSDPA 7.2 Mbps / HSUPA 5.76 Mbps / EDGE / GPRS • Optional HSDPA 21 Mbps Camera •...