
Related Manuals for Pfaff varimatic 6091


Summary of Contents for Pfaff varimatic 6091
- Page 1 01/29/2008 • — Bodienungsanweisung Instruction Book Mode d’ernploi Gebruiksaanwijzing...
- Page 2 01/29/2008 Sicherheitshinweise Quelques conseils de sécurité für Haushaltnähmaschinen a) Toujours faire preuve de prudence et nach DIN 57 700 Tell 28 continuellement surveiller le travail. bzw. IEC 335 Tell 28 b) Toujours enlever Ia fiche de Ia prise a) Der Benutzer hat wegen der auf- und de courant avant de quitter Ia machi abgehenden Nadel genugend Vor ne, avant les travaux d’entretien et...
- Page 3 01/29/2008 rieces ae ,a macnine a couure OCUICf1III9SUWCII VUD UC IIddIITIdUIlii 1 Levier releveur de fit 1 Draadhefboom 2 Pretension du dévidoir 2 Spoelvoorspanning 3 Poignee 3 Handgreep 4 Porte-bobine 4 Garenpennen 5 Dévidoir 5 Spoelwinder 6 Volant main 6 Handwiel 7 Disque de debrayage 7 Koppelschroef 8 Interrupteur principal...
- Page 5 I elle aer Igahmas chine I’arts ot tne sewing machine...
- Page 7 Position full top speed Enfoncer le bouton de I’interrupteur general P; Ia lampe s’allume. Abaisser Ia pedale du rheostat. Plus Ia pédale sera abaissée, plus Ia Pfaff> coudra vite. Rheostat electronique (interrupteur 0) Position demi-vitesse maximale Position vitessemaximaleintégrale...
- Page 8 01/29/2008 VerwandlungsnaOttacne etwas annenen und herausnehmen. Preparation for bobbin winding: Lift detachable work support and remove Preparation des canettes: Lever quelque peu a boIte de range ment et Ia sortir. Spoelen voorbereiden: Accessoiresbox ets optillen en wegnemen. VerschluRklappe 19 nach unten öffnen. Open free arm cover 19.
- Page 9 01/29/2008 puie muR in Schlitz Q. Place a bobbin on spindle 5, making sure pin P enters slot Q. Mettre Ia canette sur le ddvidoir 5: le tenon P doit sengager dans a fente Q. Steek de spoel op de spoelas 5, en draai hem tot gleuf Q over stift P valt Spule nach rechts gegen den Anschlag R drücken.
-
Page 10: Bobbin Winding
01/29/2008 Spulen Bobbin winding Hauptschalter einschalten. Switch on rnaster switch. Den Faden von der Garnrolle in die Pull thread from thread reel into bobbin Spulervorspannung 2 ziehen, nach winder tension 2, lead to the right and rechts führen und einige Male in Pfeii wind a few tirnes around the bobbin richtung urn die Spule wickeln. - Page 12 01/29/2008 %JII1HdUeIlJdIIftUflLJ I)IUIeH. leicht ruckartig aufwärtsbewegen Sie muR stufenweise niedersinken. (Einstell schraube P nach inks drehen loser, nach rechts drehen fester). Checking the bobbin thread tension: With a brief, sharp upward movement of your hand, the bobbin must gradually slip downwards. Turn screw P counter clockwise for a looser tension, or clock wise for a tighter tension.) Tension du fil de canette: Laisser...
- Page 13 01/29/2008 ‘._IUCI I UI! IICUOS I. OL..SCSSLS..SS..S SOtSfrL ausschalten, Nadel und Fadenhebel 1 mUssen oben stehen. NähfuP, anheben. Den Faden von der Garnrolle in die Spulervorspannung, durch die Offnung N, den Schlitz 0, hinter das Fuhrungsstuck P. nach oben in den Schlitz Q, durch den Fadenhebel 1, zurück durch den Schlitz 0, hinter die Fuhrung R und in die rechte ___._._...
- Page 14 01/29/2008 test Unterfaden heraufholen: Oberfaden halten. Handrad nach vorn drehen und einen Stich ndhen his Nadel und Faden hebel wieder oben stehen. Mit dem Oberfaden den Unterfaden nach oben ziehen. Drawing up the bobbin thread: Hold the needle thread taut. Turn the handwheel towards you and sew a stitch until both needle dud tekeup lever are up.
- Page 15 01/29/2008 zeigt, an die Maschine schieben. Push work support against the machine, as shown by the arrow Placer Ia bolte de rangement contre Ia machine, comme le montre Ia flèche. Accessoiresbox in pijlrichting tegen de machine schuiven. • Hauptschalter 8 ausschalten. Stoff unter den NhhfuB legen.
- Page 16 ,—fl.uaacI 111UJU,L!Cttfl. LICIC IC1fl rjructt so scnne l er naht die Pfaff Operating the foot control: The more you press down the pedal, the faster the macnine runs. Abaisser Ia pédale du rheostat: Plus a pédale sera abaissée, plus is Pfaff coudra vite.
- Page 17 01/29/2008 Urn eon goed stiksel te verkrijgen moot v’eDeza ceci pour obtenir une bonne u op bet volgende letten: outure: Eon onbeschadigde naald gebruiken, UtUiser une aigufle impeccable et 2. Do spanning van boven en under de fIs bien réglees. 2.
- Page 18 01/29/2008 Doppelter Stofftransport: Er verhindert das Verschieben der Stoff bahnen gegeneinander. Vor dem Ein oder Ausschalten den Nähfuf/ anheben. Dual Feed: prevents shifting of the fabric plies during sewing. Before engaging or disengaging, raise the presser foot. Entralnement double du tissu: II empêche le decalage des couches de tissu.
- Page 19 ilGiIldlI iI IrIsLeiIF i...
- Page 20 01/29/2008 Rückwártsnähen Die Taste 23 niederdrücken. Solange die Taste gedrückt wird, näht die Maschine iic k warts. Reverse sewing Press button 23. As long as hold this buttons the machine sews backwards, Couture en marche arrière 23. La machine coud Abaisser a touche en arrière aussi longtemps que a touche est maintenue...
- Page 21 vuws Oil SdIeLy...
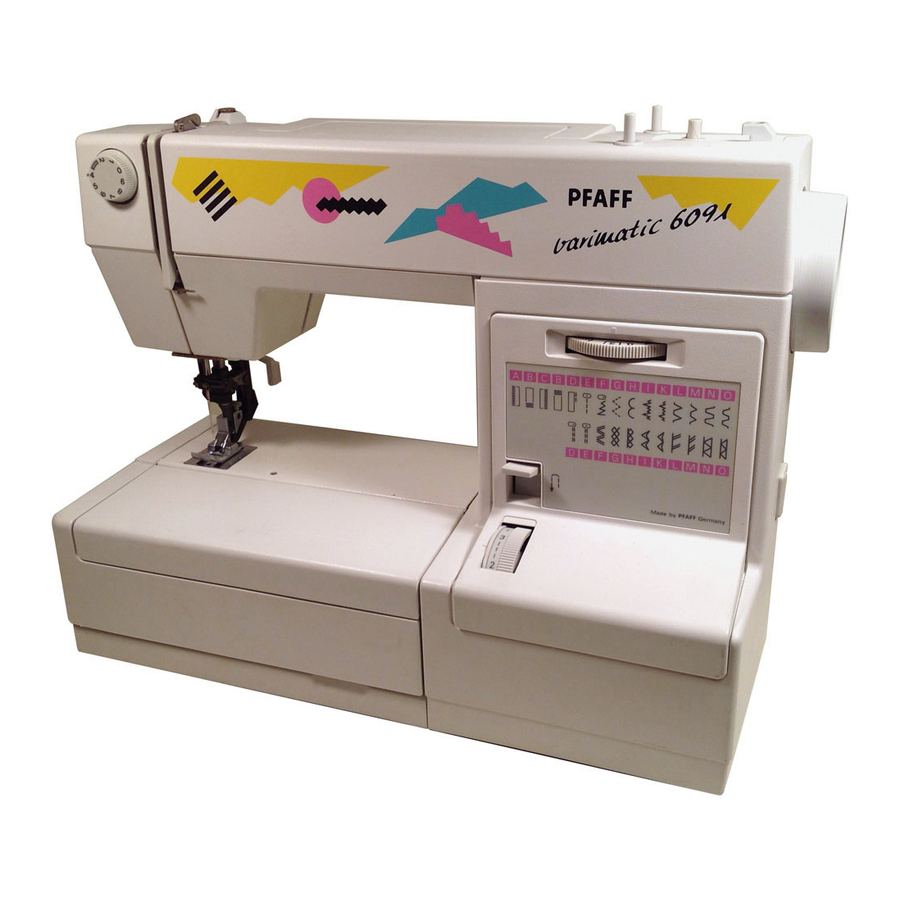
- Page 22 01/29/2008 Stichmuster-Ejnstellrad Stitch pattern control Jedem Stichmuster st em Buchstabe Each stitch pattern is identified by a zugeordnet. Das Stichmuster aus der letter. Select the desired stitch pattern Tabelle 17 auswdhlen. Mit dem Einstell from Chart 1 7. Turn dial 22 until red 22 den entsprechenden Buchstaben corresponding letter is positioned below...
- Page 23 01/29/2008 JLIttaI Symbol pattelil table Letter Symbole Lettre Stich ----- Stitch Symbool Letterko. L! fl Buttonhole symbols Straight stitch, Geradstich Stichiage rechts right needle position Straight stitch, Geradstich Stichlage Mitte center needle position Zickzack Zigzag Ggenaht erZickza ck 3 step gzag estonstich Scallop stitch Elastischer Blindstich breit...
- Page 24 _____ HI{tIIIIlifIIflhIIT IIIllhIIIHliIItIlII — — — — — — — — —-____ _ — —...
- Page 26 01/29/2008 PddfIIUI dUSW JISII. fldUpLsUIIdIul ausschalten. Die Nadel hochstellen. Den NähfuB vorne nach unten drücken, der Fu rastet dabei aus. Beim Knopfloch ful/, muR zuerst die Schiene nach vorne gezogen und die Nähfläche heraus genommen werden. Nähfu( anbringen: Stoffdrückerhebel senken und den FuR dabei so schieben, daB die Stege N in die Nuten 0 em rasten.
- Page 28 01/29/2008 (Normaizubenor) Nantulse 0 Normalnahfug ReiRverschlu8,- 2 Zierstichfu8, nicht und Kantenfu8, für Obertransport Knopflochfu8 3 Blindstich- und Filzscheibe OverlockfuI. Lineal Sewing (standard accessories) feet 0 Ordinary 4 Zipper and sewing foot edge-stitching 2 Fancy stitch foot foot (without 5 Buttonhole foot Dual Feed) 7 Felt washer 3 Blind stitch...
- Page 32 01/29/20 08 Blindstic h Blind stitch NáhtuR: Blindstic hful/. Sewing foot: blind stitch foot Spannun g: Oberfad en etwas leichter Tension : needle thread tension a Garn: Nähgarn little slack Stichmu ster Thread: ordinary sewing thread Einstellr ad: breit I Stitch pattern schmal K selector wheel: wide I...
- Page 33 01/29/2008 Point invisible Blindzoom: Pied presseur: Pied points invisbies Naaivoet: blindzoomvoet Tension: Eu d’aiguille moms Spanning: bovenspanning lets tendu losser Fil: coudre Garen: normaa( naaigaren Disque sélecteur lnstelwiel voor de motifs: large de steken: breed I étroit K smal K Longueur de Steeklengte: point:...
- Page 34 01/29/2008 Safety rules valid for United Kingdom only The wires in this mains lead are coloured according to the following code: Blue: Neutral Brown: Live As the colours of the wires in the mains lead of this appliance may not corre spond with the colour coding of the ter minals in your plug, proceed as follows: the wire which is coloured blue must be...
- Page 35 01/29/2008 Knopfloch einstellen Buttonhole setting Stitch length control 9 at range 3 for StichldngenEinsteller 9 in den Knopf buttonhole sewing. Attach the button lochbereich bel 3 stellen. Knopflochfuf hole foot. Set the stitch density at anbringen. Stichdichte im Knopftoch range N. Insert a gimp thread in the bereich N einstellen.
- Page 37 01/29/2008 — — — — — — — — — Zeichnungen sind ohne Nthfutt. Drawings do not show sewing foot Las illustrations ne montrent pas Ia semelle du pied presseur. Voor een beter overzicht is de knoopsgatenvoet op de afb, weggelaten. Execution de boutonnières Knoopsgaten maken: Regler le sélecteur de motifs sur A.
- Page 38 01/29/20 08 Sewing on buttons Knopt annähen Sewing foot: Clear-vi ew foot or without ohne NähfuB oder Nähful/ sewing foot mit Klarsich tfu1 Stitch: Stich: Feed dog: Lowered Transpo rteur: versenke n Fine sewing thread feines Nähgarn Thread: Garn: Move the needle to its left position , and Drehen Sie das Handrad auf sich zu, bis turn the hand wheel towards you until die Nadel in linker Stichiag e abwärts...
- Page 40 01/29/2008 ReiBverschIu( einnähen Sewing in zippers NähfuR: Rei1verschluIfuB 4 Sewing foot: zipper foot 4 Stichlänge: 2--3 Stitch length: 2 to 3 Stich: Stitch: Garn: Nahgarn Thread: sewing thread Je nach Verarbeitung kann der Rei1ver- The zipper foot can be engaged on the schluBfuL links oder rechts eingerastet left or right, as required by the method werden (Fig.
- Page 41 01/29/20 08 Insertion de fermetur es glissière Ritssluit ing inzetten Pied presseur : Pied fermetur e Naaivoe t: ritsvoet 4 glissiere 4 Steek(en gte: Longueu r de point: 2 C 3 mm Steek: Point: Garen: normaal garen Fil: coudre De ritssluiti ng-voet kan zowel links als Suivant (‘operati on, Ta semelle du pied rechts ingeklik t worden (afb.
- Page 42 01/29/2008 Zippers in ladies’ slacks Hosenreilverschlug (Damen) For machine setting see pages 36, 37. Maschinen-Einstellung siehe Seite 36, Engage the zipper toot on the right. Press the edges of the placket. Baste Den ReiLf,verschlultfult rechts einrasteri. the closed zipper to the right edge of Die Schlrtzkanten bügeln.
- Page 43 01/29/2008 Treksluiting in damespantalon glissiere pour pantalon Fermeture Machine instellen zie blz. 36. dame Verschuif de zool van de treksluiting Reglage de Ia machine voir voet geheel naar links. pages 36, 37. De inslagen van bet sp(it scherp instrij droite iusqu’à (a Deplacer le pied ken.
- Page 45 01/29/20 08 ------- ft-ti-i-ti- ’--—’ —, -‘---—*— ——, ————% Reprisag e au point droit Stoppen med de rechte steek Pied presseur : Pied repriser Naaivoe t: stopvoet (contre supplem ent) (extra accessoi re) Point: Steek: Tension du til Boverisp anning: jets (osser d’...
- Page 47 01/29/2008 Reprise Ia lame Stoppen met wol Pied presseur: Pied repriser Naaivoet: stopvoet (contre supplément( Steek: Point: Bovenspanning: knoopsgatenzone bij 3 Tension du fil Naaigaren: dun en soepel garen, d’aiguille: Zone boutonnières (31 liefst stopgaren, wol Fil: broder ou repriser dikte 70 Naald: fil de lame...
- Page 50 01/29/2008 Die WahI der richtigen Nadel garantiert eine bessere Verarbeitung des Nähmaterials Stoffqualitat Stoffqualitdt Stoffqualitdt mittel schwer Ieicht Nadel Nadel Nadel 100 110 120 80 90 60 70 75 Nadelspitze und Geeignet für Profit Bezeichnung Nadelöhr Universalnadel für feinmaschige Synthe kleine 130/705 H tikgewebe, feines Leinen, Chiffon, Batist,...
- Page 51 — — — — ‘...
- Page 52 — -— —- —...
- Page 53 01/29/2008 System & No. Stitch length Stitch width Needle Suitable for spacing 130/705 HZWl 2.5mm 1.6mm Mediumwide • 2.5 mm 2.0 mm cording 130/705 H-ZWI 2.5 mm 2.5 mm Wide cording • 2.5 mm 3.0 mm Extra wide cording —. 3.0 mm 4.0 mm Extra wide cording...
- Page 54 01/29/20 08 Le choix de (a pointe d’aiguill e adequate est tres importan t et garantit de mei(leur s résu(tats . Matières : Matières : Matières : lourdes moyenn e légère Aiguille s: Aiguille s: Aiguille s: 100 110 120 80 90 60 70 75 Utilisati ons...
- Page 55 — -— — — —...
- Page 56 — • bol— --—-—- --- —-—-— —-- —-—— -—...
- Page 57 —...
- Page 58 01/29/20 08 Nahstor ungen und ihre Beseitig ung Beseitig ung: Ursache : 1. Die Maschin e Iäft Stiche aus Nadel his zum Anschia g hochsch ieben. Die Nadel ist nicht richtig eingeset zt. Flache Kolbens eite nach hinten. Nadel System 130705 H einsetze n. Es st eine falsche Nadel eingeset zt.
- Page 61 01/29/2008 Cause: Remedy: 5. Machine feeds irregularly or not at all Lint has accumulated between tooth Remove needle plate and clean out lint. rows of feed dog. Feed dog lowered. (Feed-lowering Set feed-lowering control to the left. control is at right.l 6.
- Page 63 01/29/2008 Rernddes Causes: 5. La machine nentraine pas ou irregulierement aiguille, ôter es Enlever a plaque Bourres agglomérées entre es dents de bourres au pinceau. a griffe. Placer le bouton abaisse-griffe gauche La gnffe est escarnatée, droite. Le curseur ahaisse-griffe est 6.
- Page 65 01/29/20 08 Opheften Oorzaak 5. De machine transpor teert met of onregeJm atig Steekpaa t wegnem en, stof met het Tussen de tandjes van de transpor teur stofkwas tje weghale n. zit stof geperst. Transpo rteur inschake len. Transpo rteur is ungesch akeld. 6.
- Page 66 -— —---—- -— ——---— —-— —--— -—-.—. ———— .—--—— —---—— — —,- ---.- —-- — ---,- —-- ----- .—- -—- -— ----. ..- ----- -.--- ---.- ----,...
- Page 67 01/29/2008 Inhaitsverzeichnhis: 26, 27 Abstepparbeiten 3, 12 Anlasser 4, 11, 23 Verwandlungsnähflache 26, 27 Elastischer Blindsttch Elektnscher AnschluB Fadenabschneider Geradstichnähen Glühlampe auswechseln 38, 39 Hosenreiiverschiul/, (Damen) 34, 35 Knoptannáhen 31, 32 Knopflochnähen Nade) auswechseln 46, 47 Nadeltabelle Nähfü1/e Nähfü8,e auswechseln 54, 55 Nahstörungen und ihre Beseitigung 5, 7...
- Page 68 --- -— --- --- ----— - -—---— ——-— --—-—. —..—-- -.-——— --—----- —---—- —-—--— —-...
- Page 70 UI ILVI)Ll U frU%.lII l.lIU 001 II ti OVaUP , LIUIJIT CI 0 ott, eobuIles ‘.es -— --.——- - ----- -_-.—--— —--—— -——-—...
- Page 72 ..--— .— —-.- ----— —— —-.- -— -— .--- .--- ---- ---— .--. — -—...
- Page 74 UI !LtlUUS G. M. PFAFF AktengeseHschaft Werk Karisruhe Dudach Grtznerstrd6,e 11 D 76227 Karlsruhe Te h oc r CreSt Sutpct to roots o lscn S r Apr I’ mien to reserve Jo rr Sf cat or s techr quem Lmpr mc or P F A...