
Related Manuals for Pfaff tiptronic 6232


Summary of Contents for Pfaff tiptronic 6232
- Page 1 PFAFF ti pt ron i c 6232 tip mat i c 6152, 6122, 6112 tptro&c 6232 PFAFF Instruction manual...
- Page 3 ________ ____ —5 ftfflI PFAFF tiptn,nic 6232 frilAl —1 2 35 24 25 ALAJiAiAAAAAA A4AA4IMIAAAAA PcAcF ,I__I 41AAAA A4—27 PEAFF 30—.. / $!-I...
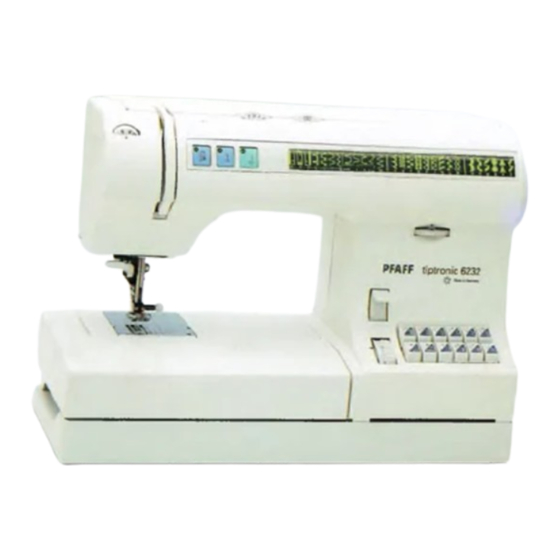
- Page 4 Parts of the sewing machine (models 6232 and 6152) Key for “stow sewing” (model 6232) (1> Key for “needle down position” (model 6232) Key for “tacking” (model 6232) Carrying handle Handwheel Handwheel release disk Fancy stitch knob Main switch Connection socket “foot control with mains cord” (model 6152) (10) Touch controls (11)
- Page 5 Important safety instructions For the United States only When you use an electrical appliance, basic safety precauti ons should always be adhered to as follows: Read all instruc tions before using this sewing machine. DANGER To reduce the risk of electric shock: 1.
- Page 6 — — —...
- Page 7 — —...
- Page 10 —...
- Page 12 —...
- Page 15 —...
- Page 18 lift it it is...
- Page 19 Preparing the machine for bobbin winding Hold the handwheel (5) firmly and turn the handwheel release disc (6) until it stops in the direction of the arrow. This stops the needle from moving while the machine is winding the bobbin. /‘i”...
- Page 21 ____________ ji1±1I Winding from the second spool holder Swing the second spool holder (25) up and place a spooi of thread with the correspon ding unwinding-disk on it. Threading Place the thread into guide C and pull it through opening B to the night under hook D (see page 16, top illustration>.
- Page 22 Now, pull the thread into the take-up lever Winding through the needle from left to right (19). The take-up fever mu Even if the machine has been completely be positioned at the very top. threaded, you can still wind the bobbin. Raise presser bar lifter (20).
- Page 24 —...
- Page 29 The built-in dual feed/lOT System (Integrated Dual Transport) (Models 6122, 6152, 6232) PFAFF offers the ideal solution for sewing difficult materials: the built-in dual feed. This system feeds the material from the top and bottom simultaneously as is done in industrial sewing machines.
- Page 30 Engaging the top feed Disengaging the top feed (Models 6122. 6152, 6232) Hold the dual feed with two fingers at the Important! For all sewing jobs with the marked places. Push the top feed (23) dovn feed, only use sewing feet with cutout at the little and out to the rear, and let it move back.
- Page 31 -.--,...
- Page 32 (11)
- Page 33 _____ Pushbutton controls Setting utility stitches Each programm has been given a letter that you can find on the pushbutton controls, By pressing the correct button, the program is selected and the machine is ready to sew. releases the keys that have been activated. (26) you will find the program Under the lid...
- Page 34 Mad .,...
- Page 35 _______ _______ —...
- Page 37 Utility stitches and practical sewing Sewing chart page 34 General sewing aids page 35 Non-elastic stitches page 36 — Elastic stitches pages 40, 41 Overlock stitches page 42, 43 Covering stitches page 44, 45 Buttonhole pages 46, 47 Hemming with the twin needle page 48 Smocking page 48...
- Page 38 Explanation of the sewing chart The following charts show the recommen ded settings that you require for the rele vant sewing operations. These charts also provide you with further instructions that are necessary when sewing the selected programs. The choice of the sewing toot, the setting of the needle thread tension and whether the sewing is tarried out with the top feed swit ched on or off,...
- Page 39 —...
- Page 40 — — —...
- Page 41 — —...
- Page 42 — — — — — — —...
- Page 43 Sewing on buttons with stems prog Insert the sewing foot. — Place a matchstick between the holes of the — button and sew it on as described on the left. Sewing on buttons With zigzag stitch 0 {stitch width 4 mm) you can sew on two- and four-hole buttons with no problem at all.
- Page 44 ___ ___ ___ ___ ___ ___...
- Page 45 •1, Stretch 5’l Stretch 5’l — Honeyco mb stitch Elastic stitch The honeyco mb stitch is an elastic and deco Because of its high elasticity , this stitch is rative hem which is particula rly suitable for used for sewing on elastic tape, e.g. on under hems on underwe ar and T-shirts.
- Page 46 —. —...
- Page 47 *..— . — ,.•__ •‘ .,-, -‘— -.. * — — — —...
- Page 49 — — — —...
- Page 51 — — — — — — — — — — — —...
- Page 52 — — — — — — —...
- Page 53 — — — — —...
- Page 54 — — — — — — —...
- Page 55 Darning with the straight stitch Insert the darning foot: Set the needle at its highest point and push the pin of the darning foot fully into the hole C of the sewing foot holder. When doing this. the guide fork G should position itself around the presser bar.
- Page 56 — — — — —...
- Page 57 Repairing tears On tears, frayed edges or small holes it is use ful to lay a piece of material under the reverse side of the fabric, The underlayed fabric rein forces the workpiece and ensures perfect repair. Lay a piece of material underneath the —...
- Page 58 — — — —...
- Page 59 — — — — — — — — —...
- Page 60 — — — — .—...
- Page 61 — — — — — — — .,‘. ‘...
- Page 62 _V_fl. •VV4 __VVV _•_V .:_. — — — —...
- Page 63 Decorative stitches and traditional embroidery techniques Sewing table for embroidery page Decorative stitches page — Monograms page Embroidering with the dense zigzag stitch/Tapering page 66 — Appliqué page 69 Richelieu page 69 Patchwork quilt page 70 Quilt and patchwork foot page 70 Eyelet embroidery page 71...
- Page 65 — —...
- Page 66 — — — — — — — — —...
- Page 67 — — — — — — — — — —...
- Page 68 — — — — —...
- Page 69 4/Ij1i -c.,_’ Monograms Embroidering block letters is somewhat easier. Here the feed dog is not dropped which Whether working with terry-cloth or woven means that free sewing is no longer neces fabric, with the help of the darning foot and sary.
- Page 70 — — —...
- Page 71 — — — — —...
- Page 72 — — — — — — — — — —...
- Page 73 Appliqué Richelieu Appliqués are quickly made and always pro This especially artistic form of eyelet and duce a beautiful fancy effect. By using diffe insert embroidery is easy to sew with your rent materials and patterns you can sew many sewing machine.
- Page 74 And here’s how it’s done: Patchwo rk quilt Using your own or commer cially available Patching and quilting are tradition al handicra ft — template s, cut the pieces you need for your techniqu es which were originally used by patchwo rk.
- Page 75 — — — — — — — it is —...
- Page 76 — — — — — —...
- Page 77 Accessories and needles page 74, 75 Presser feet (normal accessories) page 76 Special accessories table page 77 Felling foot page 77 Gathering foot page 78 Cording foot page 79 Bias-tape binder page 79 Multi-stitch gathering attachment page 80 Cording foot page 80 Appliqué...
- Page 79 Sewing feet (normal accessories) Buttonhole foot Part No. 98-694 882-00 (models 6122-6232) Darning foot Part No. 93-035 960-9 1 (models 6122-6232) For model 6112 special accessory Hemmer Part No. 98-694 818-00 (models 6122-6232) For model 6112 special accessory Edge guide Part No.
- Page 80 —...
- Page 81 _______ progi 013-5ILap-i 13-51 fefler — Gathering foot Lap-feller Beautiful gathering effects, e.g. on children’s Lap-feller seams are not only ornamental but wear or curtains, can be made quickly and strong too. This makes them very suitable for easily with the gathering foot. This eliminates sportswear and children’s wear, men’s shirts and jeans.
- Page 83 Set the tape binder in such a way that the When you buy your multi-stitch gathering — needle perforates 1 1.5 mm from the fol attachment at your PFAFF dealer, full opera — ded bias-tape edge or adjust the needle ting instructions are included. position.
- Page 84 — — — — — — —...
- Page 85 ________________ ‘ prog prog — s,I_— IGuiftandI 10.3511 • 0.25 I patch- foot Jworkfootj 0.25 10.35-lI Fringe foot Quilt and patchwork foot With this special foot for loop embroidery you When using the quilt and patchwo foot, can produce fantastic effects in no time. This always sew the pieces of fabric with the requi foot is very useful for terry cloth.
- Page 87 — — — — — — — — — — liii...
- Page 88 Changing the needle plate Cleaning and oiling Switch off the main switch Switch off the main switch It is very important to clean and oil the sewing Remove the needle plate and lower the teed — machine, because it will reward you with a dog.
- Page 90 — — — — — — —...
- Page 92 (4) Carrying handie (5) Handwh eel (6) Handwh eel release disk (8) Main switch (9) Connect ion socket “foot control with mains cord” (10) Touch controls (11) Stitch length knob (13) Base plate (14) Detacha ble work support (15) Sewing foot holder with sewing foot (16) Needle threader (17) Threadin g slit (18) Needle thread tension...