Table of Contents
Advertisement
Advertisement
Table of Contents
Troubleshooting

Related Manuals for Star Trac Pro CrossTrainer Elite CrossTrainer


Summary of Contents for Star Trac Pro CrossTrainer Elite CrossTrainer
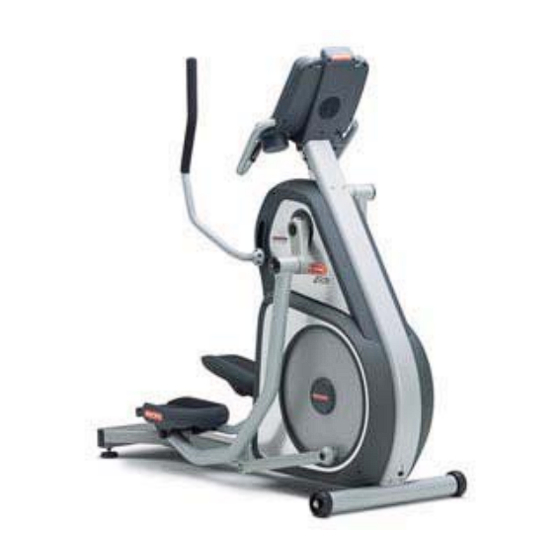
- Page 1 Pro CrossTrainer Elite CrossTrainer Service Manual...
-
Page 2: Table Of Contents
CrossTrainer Service Manual Table of Contents Table of Contents ................................1 Preventive Maintenance..............................2 Settings - Maintenance Mode ............................3 Diagnostics - Display Codes ............................5 Diagnostics - LED Test ..............................6 Diagnostics - Keypad Test............................... 7 Diagnostics - Heart Rate Test, Measurements ......................8 Diagnostics - UB Calibration ............................ -
Page 3: Preventive Maintenance
CrossTrainer Service Manual Preventive Maintenance To keep your Star Trac CrossTrainer in top condition, Star Trac strongly recommends performing regular daily, weekly and monthly preventive maintenance routines outlined below. Daily Maintenance x Remove excessive accumulations of dust, dirt and other substances by using a clean, soft cloth and a non-abrasive liquid cleaner, such as Formula 409™... -
Page 4: Settings - Maintenance Mode
CrossTrainer Service Manual Settings - Maintenance Mode The Maintenance Mode allows you to query and modify the basic settings of the Star Trac CrossTrainer. Engaging Maintenance Mode 1. Press and hold the keys together. 2. A beep will sound and the “MAINTENANCE MODE” will display momentarily in the information window. - Page 5 CrossTrainer Service Manual Settings - Maintenance Mode (cont.) Language Language is English, Dutch, French, German, Spanish, Swedish, Italian or Katakana (English) Model PB-UB = Pro Bike Upright, PB-RB = Pro Bike Recumbent, Pro CT = Pro CrossTrainer, Elite CT = Elite CrossTrainer, Stepper = Pro Stepper LCB Ver2 LCB hardware version (N/A) CSAFE Turns on/off CSAFE functionality (Off) Auto Status Turns on/off the unsolicited status of the CSAFE feature (Off)
-
Page 6: Diagnostics - Display Codes
Diagnostics - Display Codes Display Codes Star Trac CrossTrainers perform a self-test at the beginning of every workout. If a problem is detected, a message displays before or after the workout, depending on the nature of the problem. Key Down – One or more keys on the display panel are stuck in the “on” position for at least 10 seconds. -
Page 7: Diagnostics - Led Test
CrossTrainer Service Manual Diagnostics - LED Test LED Test The LED Test can be used to verify that all LED (lights) are functioning on the display assembly. To engage the LED Test 1. Enter the Maintenance Mode (see Settings – Maintenance Mode). 2. -
Page 8: Diagnostics - Keypad Test
CrossTrainer Service Manual Diagnostics - Keypad Test Keypad Test The Keypad Test can be used to verify that all keys are functioning on the display assembly. To engage the Keypad Test 1. Enter the Maintenance Mode (see Settings – Maintenance Mode). 2. -
Page 9: Diagnostics - Heart Rate Test, Measurements
CrossTrainer Service Manual Diagnostics - Heart Rate Test, Measurements Heart Rate Test Heart Rate can be checked using the Heart Rate Test. To verify heart rate operation: 1. Enter the Maintenance Mode (see Settings – Maintenance Mode). 2. Press until Heart Rate Test is displayed in the information window. 3. -
Page 10: Diagnostics - Ub Calibration
CrossTrainer Service Manual Diagnostics - UB Calibration UB (Upper Body) Calibration (Elite Only) The UB Calibration will set the minimum and maximum range of the upper body arms in which they can move within. You can do a Manual Calibration or an Auto Calibration. Auto Calibration is recommended. -
Page 11: Trouble Shooting - Incorrect Model Setting
Trouble Shooting - Incorrect Model Setting The display electronics on the CrossTrainer can be configured to operate with many different models of Star Trac products. For them to operate properly, the correct model must be set in the Maintenance mode. -
Page 12: Trouble Shooting - Noises : Pinging
CrossTrainer Service Manual Trouble Shooting - Noises : Pinging While striding on the Star Trac CrossTrainer, a pinging (metal on metal) noise is heard. Possible Causes: x The pin has come loose on the upper crank arm. x Not enough clearance between the lower crank disk and the bolt on the end of the pedal arm. - Page 13 CrossTrainer Service Manual Trouble Shooting - Noises : Pinging (cont.) 2. Have someone ride the unit and verify where the contact between the pedal arm and the disk is occurring. 3. If the head of the bolt in the forward end of the pedal arm is hitting the disk, you may be able to adjust the position of the bolt by twisting the arm to eliminate the noise.
- Page 14 CrossTrainer Service Manual Trouble Shooting - Noises : Pinging (cont.) 6. Test ride the machine again to confirm that the problem has been fixed. Jump slightly from side to side as you pedal to be sure the pedal arm is adjusted correctly. 7.
-
Page 15: Trouble Shooting - Noises : Bearings
CrossTrainer Service Manual Trouble Shooting - Noises : Bearings If the Star Trac CrossTrainer makes a squeaking or grinding bearing noise while striding, this process will help determine if the noise is caused by a bearing. Check Pillow Block Bolts 1. - Page 16 CrossTrainer Service Manual Trouble Shooting - Noises : Bearings (cont.) Upper Crank Bearings 1. Insert the straw of the lube can into the slit on the upper crank arm. Be sure to insert the straw all the way so you are hitting the inner race of the bearing. 2.
- Page 17 CrossTrainer Service Manual Trouble Shooting - Noises : Bearings (cont.) 3. Spray the lube then test the CrossTrainer to see if the noise has disappeared. If the noise remains, lubricate the other crank bearing. If the noise goes away, then the bearing is the cause and the upper crank assembly should be replaced (part number 721-0121).
-
Page 18: Trouble Shooting - Excess Lateral Ub Arm Movement
CrossTrainer Service Manual Trouble Shooting - Excess Lateral UB Arm Movement The Upper Body Arms on the Star Trac CrossTrainer should have little to no lateral movement (side to side). If a CrossTrainer has excessive lateral movement do the following. -
Page 19: Part Installation Procedure - Shrouds
CrossTrainer Service Manual Part Installation Procedure - Shrouds Parts Needed: x UB Shroud Lt (721-1075-01) x UB Shroud Rt (721-1075-02) x UB Shroud Panel Lt (721-1074-01) x UB Shroud Panel Rt (721-1074-02) x Lower Shroud Lt (721-1072-01) x Lower Shroud Rt (721-1072-02) Tools Needed: x 3/32 (Allen) Hex Key x 5/16 (Allen) Hex Key... - Page 20 CrossTrainer Service Manual Part Installation Procedure - Shrouds (cont.) 3. Use the Phillips screwdriver to remove the 5 UB shrouds screws. 4. Slide the shroud off the frame. 5. Repeat step 1-4 on the right UB shroud panel. Remove the Lower Body Shroud 1.
- Page 21 CrossTrainer Service Manual Part Installation Procedure - Shrouds (cont.) 3. Use the Phillips screwdriver to remove the 7 screws from the lower shroud. 4. Remove the plastic cap from the metal guard disk, using the flat-head screwdriver. 5. Use the ¼ Allen (hex) key to remove the 3 screws on the guard disk. Remove disk. 6.
-
Page 22: Part Installation Procedure - Keypad
CrossTrainer Service Manual Part Installation Procedure - Keypad Parts Needed: x Keypad Overlay (050-1923) Tools Needed: x Phillips Screwdriver Procedure: Remove the Old Keypad 1. Remove the back display housing. x Remove the 7 screws from the back of the display housing x Pull the back housing off display. - Page 23 CrossTrainer Service Manual Part Installation Procedure - Keypad (cont.) 4. Remove the old keypad. x Gently push from behind one corner of the information window until it comes loose from the display panel. x Carefully peel away the old keypad. Install the New Keypad 1.
-
Page 24: Part Installation Procedure - Lcb, Batt. And Ub Board
Part Installation Procedure - LCB, Batt. And UB Board The following procedure will cover the process for replacing the Load Control Board, battery or Upper Body Electronic Board (Star Trac CrossTrainer Elite only). Parts Needed: x Load Control Board (721-1045) x Battery (580-0305) x Upper Body Controller –... - Page 25 CrossTrainer Service Manual Part Inst. Procedure - LCB, Batt. And UB Board (cont.) Remove the LCB Plastic Shield 1. Turn the two plastic thumb screws to loosen the top of the LCB shield. Note: There is a thumb screw on the bottom of the shield but it may not be necessary to loosen it to service the LCB. LCB Replacement Remove the Old LCB 1.
- Page 26 CrossTrainer Service Manual Part Inst. Procedure - LCB, Batt. And UB Board (cont.) Battery Replacement Remove the Old Battery 1. Use the Phillips head screwdriver to remove the 4 screws holding the battery to the frame. 2. Unplug the wires from the battery and set the old battery aside. Install the New Battery 1.
- Page 27 CrossTrainer Service Manual Part Inst. Procedure - LCB, Batt. And UB Board (cont.) Install the New UB Board 1. Use the short Phillips head screwdriver to install the two screws to hold the UB board to the frame. 2. Connect the two wires to the board. 3.
-
Page 28: Part Installation Procedure - Upper Crank Arm
CrossTrainer Service Manual Part Installation Procedure – Upper Crank Arm Parts Needed: x Crank Arm (721-0109) Note: They are ordered individually and you may need two. Tools Needed: x 3/16 (Allen) Hex Key x 5/16 (Allen) Hex Key x Torque Wrench (foot pounds) x ¾... - Page 29 CrossTrainer Service Manual Part Installation Procedure – Upper Crank Arm (cont.) 4. With one hand cupped over the e-clip, use a flat-head screwdriver to pop the e-clip off the upper crank pin. Be careful not to lose the e-clip. 5. Carefully slide the leg beam off of the upper crank pin. You may want to use your foot to support the lower end of the leg beam as you pull.
- Page 30 CrossTrainer Service Manual Part Installation Procedure – Upper Crank Arm (cont.) Install the New Upper Crank Arm 1. Insert a ¾ inch cold chisel or a large flat-head screwdriver in the slot in the end of the new upper crank arm and tap with a hammer to slightly spread open the end of the crank arm. The crank arm should easily slide on the main shaft assembly.
-
Page 31: Crosstrainer Parts List
CrossTrainer Service Manual CrossTrainer Parts List Pro CrossTrainer Elite CrossTrainer CrossTrainer Service Manual Rev A 620-7575... - Page 32 CrossTrainer Shrouds...
- Page 33 CrossTrainer Part List Shrouds 721-1075-01 Assy, Shroud Top, Lf, El6100 721-1075-02 Assy, Shroud Top, Rg, El6100 721-1074-01 Assy, Shoud Panel, Lf, El6100 721-1074-02 Assy, Shoud Panel, Rg, El6100 721-1072-01 Assy, Shroud Lower, Lf, El6200 721-1072-02 Assy, Shroud Lower, Rg, El6200 020-6633 Shroud, Center Cover, El6200 721-1081...
- Page 34 CrossTrainer Outer Mechanical...
- Page 35 CrossTrainer Part List Outer Mecahnical 721-0135-02 Weldment, Arm, Right, Ub 721-0135-01 Weldment, Arm. Left, Ub 721-0109 Assy, Crank Upper Arm, El6200 721-0128-01 Assy, Leg, Left, El6200 721-0128-02 Assy, Leg, Right, El6200 020-6623 Guard, Disk Plate, El6200 721-0126 Assy, Lower Linkage, El6200 721-0114-01 Weldment, Pedal Base,lf,el6200 721-0114-02...
- Page 36 CrossTrainer Pro Frame/Inner Mechanical DETAIL A DETAIL B...
- Page 37 CrossTrainer Part List Pro Frame/Inner Mechanical 721-0118 Assy, Display & Neck, El6200 710-1044 Frame. Finished, Front, El6100 020-6577 Tube, Adjustment, Base 721-0109 Assy, Crank Upper Arm, El6200 020-6566 Crank, Arm 8.7", El6200 721-1057 Assy, Upr Pulley-crank, El6200 130-1714 Belt, 520j10, Poly Vee 130-1732 Belt, 580j10, Poly Vee 721-0121...
- Page 38 CrossTrainer Elite Inner Mechanical DETAIL C...
- Page 39 CrossTrainer Part List Elite Inner Mechanical 721-1039 Assy, Pivot, Upper, El6200 020-6642 Shaft, Axle, Pivot, Arm 260-0936 Actuator, Screw, El6200 721-1062 Assy, Pillowblock, 120-0463 Washer, 3/8x1.0" Flat 110-3312 Screw, 3/8-16x3.25,hhc,he,cs,z 110-0575 Screw, 1/4-20x1.25,hhc,he,cs,z 110-1810 Nut, 1/4-20 Kep 020-6634 Base, Pedal Side Logo, El6200 110-0601 Screw, 3/8-16x4.0"...
- Page 40 CrossTrainer Display Assembly GROUND TO FRAME...
- Page 41 CrossTrainer Part List Display Assembly 718-1108 Disp Elec, PB6k 050-1923 Keypad, Display, Engl, El6200 020-6413 Disp Housing, Front, PB6k 020-6411 Disp Housing, Back, PB6k 720-5068 Assy, Fan W/bracket,pro Bike 020-6416 Disp Housing, Bottom, PB6k 020-6555 Plate, Hr, Universal, Top 020-6556 Grip, Hr, Universal, Black 721-0112 Weldment, Handlebar, El6200...
- Page 42 CrossTrainer Control System...
- Page 43 CrossTrainer Part List Control System 020-6766 Plate, Front Bolted, El6200 721-1045 Assy, Lcb W/heatsink, Ub/rb/el 721-1044 Assy, Ub, Electronics, El6200 580-0305 Battery, 6v, Ee/Nr/PB5k/6k 721-1049 Assy, Harness, Ub Interface 721-1046 Assy, Harness, Battery, El6200 140-0715 Deck Foam, 1/4", p/ft, top 140-3324 Foam Rubber, 1/4x3/4 110-3026...