Table of Contents
Advertisement
Quick Links
Advertisement
Table of Contents

Related Manuals for Verbatim Gigabit Ethernet Hard Drive


Summary of Contents for Verbatim Gigabit Ethernet Hard Drive
- Page 1 Gigabit Ethernet Hard Drive User Guide...
-
Page 3: Table Of Contents
Contents Introduction ............................ Controls, Connectors and Indicators ................Front Panel Area ................Rear Panel Area ................About the Hard Disk ............Locating NAS Drive on Your Desk ................Bundled Software ..................Finder.exe ................Backup Software ..................TorrentFlux Connecting To Your Network .......... - Page 4 ..............Browse My Computer ............Sharing Files Using Mac OS X ..............Attaching USB Devices ................ Attaching A Printer ........... Attaching A USB Storage Device NAS Administration Reference ........Users And Groups ..................User Management.................. Group Management ................File And Print....................File Server ....................
- Page 5 iTunes Server ................... Media Server ................... TorrentFlux ....................Maintenance ....................Disk Utility ....................Firmware Upgrade ................. Save Configuration ................. Restore Configuration ................Factory Reset ................... Install New Service ................. Log File ......................Samba Log ....................FTP Log ....................DHCP Server Log ..................System Log ....................
-
Page 6: Introduction
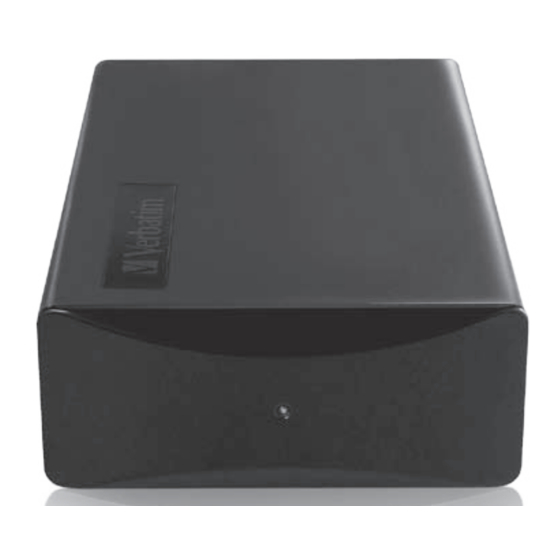
Introduction Your Verbatim Network Attached Storage (NAS) drive is a versatile external hard drive featuring high-performance storage with an Ethernet interface. Once your drive is connected properly to your network, you will be able to use it as you would any hard drive for storing your data and for performing data back-up functions. -
Page 7: Rear Panel Area
now fully turned off. Rear Panel Area Along the rear panel you will find the interface connectors and a recessed micro-switch that is used for reset functions. Refer to the figure below. 1. ON/OFF Button. Once the AC Adapter has been properly connected to the NAS drive and an AC outlet, you can press the ON/OFF button to power on the drive. -
Page 8: About The Hard Disk
5. Reset Button. If the NAS drive is having a problem connecting to the local area network (LAN) or appears to be hung, press the reset button momentarily using the end of a paper clip. This will cause the unit to reset, similar to rebooting your PC. If the problem persists, or if you are unsure of current settings (such as forgetting your administration password), press and hold in the Reset button for 5 seconds. -
Page 9: Locating Nas Drive On Your Desk
1) Finder.exe, 2) Nero backup software and 3) TorrentFlux. Finder.exe This is a Windows application that can locate all Verbatim NAS drives on your LAN and display the corresponding IP address of each drive. To run this application, copy the Finder.exe file to your client Windows computer and double-click on the file to launch it. - Page 10 LAN configuration. Computer 2 Computer 1 Router Verbatim Gigabit Ethernet To Internet Hard Drive via Cable Modem Before attempting to establish a connection to the network it would be useful first to review some background information about how the NAS drive handles data over the network.
-
Page 11: About Nas Drive User Accounts
About NAS Drive User Accounts The NAS drive keeps track of data stored by its network users by managing the data’s destination folder (also referred to herein as a “shared folder” or simply a “share”). Furthermore, the NAS drive must keep track of who may read from, and write to, each folder. -
Page 12: Connecting The Nas Drive To Your Lan
• The folder “guest-share” can be accessed by anyone on the LAN, even if they have not set up a user account. Access to this folder does not require entering a user name and password. This folder can also be accessed by anonymous FTP. •... - Page 13 domain (e.g., 192.168.1.x). 5. Connect the included AC Adapter to the NAS drive, and then to a wall outlet. 6. Press the ON/OFF button on the rear of the NAS drive. The front green LED will come on to indicate that the unit is now powered on. 7.
-
Page 14: Web-Based Administration Tool
8. After successfully connecting to your network you will be able to see the NAS drive on your network. Its default name is “verbatimnas” and it will be located in the network workgroup named “Workgroup”. In Windows go to My Network Places/ Entire Network / Microsoft Windows Network / Workgroup, or in Mac OS X go to Finder / Network / Workgroup. -
Page 15: Basic Settings For Initial Setup
assigns addresses automatically, your router’s manual will describe how to determine your drive’s IP address. Alternatively, you can find your drive’s IP address using the included Finder.exe utility as described above. After your browser retrieves the initial web page from the NAS drive, the browser window will present the following login screen: From this screen you must enter the following default Username and Password: Username: admin Password: admin... - Page 16 Set Language, Password, Hostname, IP Address, and Time A special setup wizard will lead you through the configurations for user interface language, administrator password, hostname, IP address, and time. 2. Select Wizard. 3. Select your language preference from the pull-down menu. The selection “set from browser options”...
- Page 17 Press Next to continue. 7. The next screen allows you to manually set the date and time, or to use an available Network Time Protocol (NTP) server. It is useful to set the correct date and time because time stamps are used in the various status logs that are described later in this manual.
- Page 18 be a maximum of 20 alphanumeric characters, without spaces. The User Name must begin with an alphabetic character. Note: If your Windows username currently contains a space character, or begins with a number, you may want to modify your Windows username slightly so that it can follow the same format required by the NAS drive.
- Page 19 defined shares. Of course, if you checked “Create Private Folder” in step (9), then read/write access has automatically been provided to this user’s private folder. Though the initial factory setting provides for three default shares (admin, guest- share, and public), only “public” is available for selection for access to new user accounts.
- Page 20 read/write access. When done with this form, press Complete. Add New Shared Folder 15. The final procedure for Quick Setup allows you to optionally setup a new share. If you do not want to set up a share at this time, you may exit the administration tool as described in Step 18.
-
Page 21: Nas Drive Operation
CIFS. You can assign read-write access for all users and groups by checking the box marked “Allow for all”. Alternatively, you can assign no access, read-only access, or read-write access privileges individually for each user and group. Note that group names in the list provided are denoted with the “@”... -
Page 22: Sharing Files Using Windows
• Copy and paste data to NAS drive • Make and delete folders • Share files and folders • Back-up your data How you access the drive will depend on your computer’s operating system. A brief overview for accessing files for both Windows and Mac OS X is provided next. You should consult your computer’s documentation for more detailed explanations of file sharing using your specific operating system. -
Page 23: Search Dialogue
Places. Browse to Workgroup to find the NAS drive shared folders. Search Dialogue Select Start in the system tray and select Search. Use the Search dialogue to search for Computers. For the computer name to search for enter “verbatimnas” and then press Search Now to find the connected NAS drive. -
Page 24: Attaching Usb Devices
Attaching USB Devices Your NAS drive contains two USB-A ports on the rear panel. A USB-A port can be used to attach either a USB printer or a USB storage device, such as a flash disk. This section describes how to install and use these USB devices while the NAS drive is connected to your LAN. -
Page 25: Attaching A Usb Storage Device
list, you can alternatively insert the driver CD-ROM from your printer manufacturer and follow the dialogue for installing a driver from CD. 7. You can verify that the verbatimnas printer has been installed by going to Advanced/ Printers and Faxes. Under Printers and Faxes you will see the verbatimnas printer icon. -
Page 26: Nas Administration Reference
Now press the Format button. You will be prompted to confirm. Press YES to continue. After successfully reformatting your device, you can logout of the administration tool and again look for the device in your file browser. Now you can drag and drop files to your USB storage device like any other storage device on your system. -
Page 27: User Management Group Management
BASIC Quick Setup Wizard Add User Add Group Add Share ADVANCED Users and Groups User Management Group Management File Server File and Print Share Management Print Server System LAN Settings Time Settings Turn Off Server Information Disk Usage Error Notification DHCP Server Network Service Bonjour... -
Page 28: Users And Groups
Because the Basic / Quick Setup functions (Wizard, Add User, Add Group, and Add Share) have been described previously under “Basic Settings for Initial Setup”, we begin this reference section with a description of the Advanced group of functions. Users and Groups This group of settings provides an alternate way to create a new user account or new group, and also provides a method to modify properties of existing user accounts or groups. -
Page 29: Group Management
the left. The list of groups in the right box includes groups for which the user is not a member. By selecting group names and pressing either the Add or Remove button you can reassign the user to various existing groups. When done with your assignments, press Save to save your changes. -
Page 30: File And Print
The Members screen presents a list of the selected group’s assigned members in the box on the left. The users listed in the right box are not currently members of the group. By selecting user names and pressing either the Add or Remove button you can reassign various users to the group. - Page 31 description. If a WINS server is available, you may optionally fill in its IP address. FTP Server Setting You can enable or disable the FTP server support. If enabled, you can enter the port number you will use for FTP (default is port 21). Once FTP is enabled, you can remotely login to the NAS drive via FTP using your username and password.
-
Page 32: Share Management
Guest Access Setting When Guess Access is enabled, anyone on the LAN can access the “guest-share” folder, even if they have not set up a user account. Here you can also optionally set a storage quota (in megabytes), provided that the disk has not been formatted to FAT32, which does not support the quota function. -
Page 33: Printer Server
button. To assign NFS access privileges, press the NFS Access button. Using the screen for SMB/CIFS Access (Windows, FTP Access) you can assign read-write access for all users and groups by checking the box marked “Allow for all”. Alternatively, you can assign no access, read-only access, or read-write access privileges individually for each user and group. -
Page 34: Time Settings
Address automatically”. With these selections enabled, the NAS drive will act as a DHCP client and attempt to retrieve its IP Address and its DNS Server Address from the DHCP server active on your LAN. Under some LAN environments you will need to enter fixed addresses in the form provided. -
Page 35: Disk Usage
Disk Usage Basic information about your hard disk, such as total and free space, can be displayed by selecting Advanced / System / Disk Usage. If you have a USB storage device connected to one of your USB-A ports as described previously under “Attaching a USB Storage Device”, then you will also see information about this device on the screen. -
Page 36: Network Service
addresses for these e-mail notices. Pop-Up Notification In addition to e-mail notification, the product has the capability to use the Windows Messenger service to display a pop-up message on your computer screen. To enable this feature, check the box marked “Enable” and fill in the form provided with the hostnames of up to five (5) computers that will receive these pop-up notices. -
Page 37: Bonjour
If your LAN contains some equipment with fixed IP addresses that you would like the server to avoid when issuing new addresses, you can define these static IP addresses and MAC addresses on the screen accessed by pressing the Static IP button at the bottom of the page. - Page 38 / Network Service / Media Server. The factory default setting is disabled. Press Save to save any change to this screen. Only the administrator can access this menu option. The ports used by the server include UDP ports 1030, 1900, 9080 and the first free TCP port above 9000.
-
Page 39: Torrentflux
Sharing Content Locations Rescan in x minutes Clients / Security Internet Radio Advanced Setup External applications Naming Music Tree Photo Tree Video Tree Network Miscellaneous Support Maintenance For more information about the TwonkyMedia Server, refer to additional documentation on the CD-ROM. TorrentFlux TorrentFlux is an open-source implementation of the BitTorrent protocol, originally written by Bram Cohen. - Page 40 Warning: Verbatim expressly does not encourage or condone the use of this software for illegal activities, such as downloading and/or sharing copyrighted content. The use of this software for illegal purposes can result in serious legal consequences for those who engage in it.
-
Page 41: Maintenance
Search for Torrents RSS Torrents Drive Space Server Stats / Who Directory List My Directory Directory History My Profile Specify user Password Theme Language Cookie management Messages Admin Settings Queue Search Settings Activity Links New User Initiate Backup For further information, refer to the TorrentFlux web site at www.torrentflux.com . Maintenance The Maintenance group of settings provides control over disk formatting and status, firmware upgrades, and ways to make global changes to all settings. -
Page 42: Disk Utility
Disk Utility Enter this screen by selecting Advanced / Maintenance / Disk Utility. You will be presented with a table that lists the status of all detected storage devices. The first device listed (“/dev/hda/”) will be the main data partition of the NAS hard drive. If you have another storage device attached to one of the USB-A ports, its status will be displayed on the next row of the table. -
Page 43: Firmware Upgrade
the encryption/unencryption process results in slower performance. Transfer rates for encryption may reach only 20-30% of what you will achieve using an unencrypted drive. The factory default format is un-encrypted. Regarding auxiliary storage devices attached to either of your USB-A ports, you may find that you need to reformat your attached device to FAT32 using Disk Utility before your device will mount properly using the NAS drive. -
Page 44: Save Configuration
Then visit Verbatim’s Technical Support web site (refer to the Getting Help section later in this manual) to check if a more recent version is available. If so, follow the download instructions provided on the site. -
Page 45: Log File
One example is the TorrentFlux application, which is an implementation of the BitTorrent protocol. Verbatim has installed the TorrentFlux application onto the hard drive at the factory, so you can find this protocol listed under Advanced / Network Service / TorrentFlux when you power up the NAS drive for the first time. -
Page 46: Ftp Log
Log File / Samba Log. FTP Log To view the log of events that have occurred during FTP file transfers, select Advanced / Log File / FTP Log. DHCP Server Log To view the log of events that have been recorded by the NAS drive’s DHCP Server, select Advanced / Log File / DHCP Server Log. -
Page 47: Getting Help
Verbatim warrants its products to be free of defects in material and workmanship under normal use and service for a period of 3 years from the date of purchase. Verbatim’s sole obligation with respect to claims of non-conformance made within the warranty period... - Page 48 Customer for any labor provided and expenses incurred by Verbatim in connection with such determination, at Verbatim’s then current rates. Verbatim is not liable for any damage to or loss of any programs, data, or other information stored on any media contained within the Verbatim hardware product, or any non-Verbatim product or part not covered by this warranty.
-
Page 49: Rights
Data recovery is not included in the warranty service and Verbatim is not responsible for data that may be lost or damaged during transit or a repair. Verbatim will not be responsible for items returned without an RMA or improperly packaged. -
Page 50: Gnu General Public License
Version 2, June 1991 Copyright (C) 1989, 1991 Free Software Foundation, Inc. 51 Franklin Street, Fifth Floor, Boston, MA 02110-1301, USA Everyone is permitted to copy and distribute verbatim copies of this license document, but changing it is not allowed. Preamble The licenses for most software are designed to take away your freedom to share and change it. - Page 51 programs; and that you know you can do these things. To protect your rights, we need to make restrictions that forbid anyone to deny you these rights or to ask you to surrender the rights. These restrictions translate to certain responsibilities for you if you distribute copies of the software, or if you modify it.
- Page 52 Program (independent of having been made by running the Program). Whether that is true depends on what the Program does. 1. You may copy and distribute verbatim copies of the Program’s source code as you receive it, in any medium, provided that you conspicuously and appropriately publish on each copy an appropriate copyright notice and disclaimer of warranty;...
- Page 53 and a notice that there is no warranty (or else, saying that you provide a warranty) and that users may redistribute the program under these conditions, and telling the user how to view a copy of this License. (Exception: if the Program itself is interactive but does not normally print such an announcement, your work based on the Program is not required to print an announcement.) These requirements apply to the modified work as a whole.
- Page 54 distribution, a complete machine-readable copy of the corresponding source code, to be distributed under the terms of Sections 1 and 2 above on a medium customarily used for software interchange; or, c) Accompany it with the information you received as to the offer to distribute corresponding source code.
- Page 55 works. These actions are prohibited by law if you do not accept this License. Therefore, by modifying or distributing the Program (or any work based on the Program), you indicate your acceptance of this License to do so, and all its terms and conditions for copying, distributing or modifying the Program or works based on it.
- Page 56 or she is willing to distribute software through any other system and a licensee cannot impose that choice. This section is intended to make thoroughly clear what is believed to be a consequence of the rest of this License. 8. If the distribution and/or use of the Program is restricted in certain countries either by patents or by copyrighted interfaces, the original copyright holder who places the Program under this License may add an explicit geographical distribution limitation excluding those countries, so that distribution is permitted only in or among countries...
-
Page 57: Fcc Compliance
11. BECAUSE THE PROGRAM IS LICENSED FREE OF CHARGE, THERE IS NO WARRANTY FOR THE PROGRAM, TO THE EXTENT PERMITTED BY APPLICABLE LAW. EXCEPT WHEN OTHERWISE STATED IN WRITING THE COPYRIGHT HOLDERS AND/OR OTHER PARTIES PROVIDE THE PROGRAM “AS IS” WITHOUT WARRANTY OF ANY KIND, EITHER EXPRESSED OR IMPLIED, INCLUDING, BUT NOT LIMITED TO, THE IMPLIED WARRANTIES OF MERCHANTABILITY AND FITNESS FOR A PARTICULAR PURPOSE. - Page 58 television reception, which can be determined by turning the equipment off and on, the user is encouraged to try to correct the interference by one or more of the following measures: • Reorient or relocate the receiving antenna. • Increase the separation between the equipment and receiver. •...
- Page 60 © Verbatim Americas, LLC, 2009 Verbatim and the V logo are registered trademarks of Verbatim Americas, LLC. RM# 173373A...