Dell Latitude C840 User Manual
Hide thumbs
Also See for Latitude C840:
- System information manual (136 pages) ,
- Service manual (78 pages) ,
- System information manual (122 pages)
Table of Contents
Advertisement
Quick Links
Dell™ Latitude™ C840 User's Guide
Notes, Notices, and Cautions
NOTE:
A NOTE indicates important information that helps you make better use of your computer.
NOTICE:
A NOTICE indicates either potential damage to hardware or loss of data and tells you how to avoid the problem.
CAUTION:
A CAUTION indicates a potential for property damage, personal injury, or death.
Abbreviations and Acronyms
For a complete list of abbreviations and acronyms, see the Glossary.
This document describes the features and operation of your computer. This document is stored on your computer hard drive. For information on other
documentation included with your computer, see
Information in this document is subject to change without notice.
© 2001–2003 Dell Computer Corporation. All rights reserved.
Reproduction in any manner whatsoever without the written permission of Dell Computer Corporation is strictly forbidden.
Trademarks used in this text: Dell, the DELL logo, Latitude, OptiPlex, Inspiron, Dell Precision, Dell TravelLite, and DellNet are trademarks of Dell Computer Corporation; Intel, Pentium,
and Intel SpeedStep are registered trademarks of Intel Corporation; Microsoft, Windows, Windows NT, and MS-DOS are registered trademarks of Microsoft Corporation; ENERGY STAR
is a registered trademark of the U.S. Environmental Protection Agency. As an ENERGY STAR Partner, Dell Computer Corporation has determined that this product meets the ENERGY
STAR guidelines for energy efficiency.
Other trademarks and trade names may be used in this document to refer to either the entities claiming the marks and names or their products. Dell Computer Corporation
disclaims any proprietary interest in trademarks and trade names other than its own.
This product incorporates copyright protection technology that is protected by method claims of certain U.S. patents and other intellectual property rights owned by Macrovision
Corporation and other rights owners. Use of this copyright protection technology must be authorized by Macrovision Corporation, and is intended for home and other limited
viewing uses only unless otherwise authorized by Macrovision Corporation. Reverse engineering or disassembly is prohibited.
Model PP01X
April 2003 P/N 7J543 Rev. A03
"Finding
Information."
Advertisement
Table of Contents

Related Manuals for Dell Latitude C840

Summary of Contents for Dell Latitude C840
- Page 1 STAR guidelines for energy efficiency. Other trademarks and trade names may be used in this document to refer to either the entities claiming the marks and names or their products. Dell Computer Corporation disclaims any proprietary interest in trademarks and trade names other than its own.
-
Page 2: About Your Computer
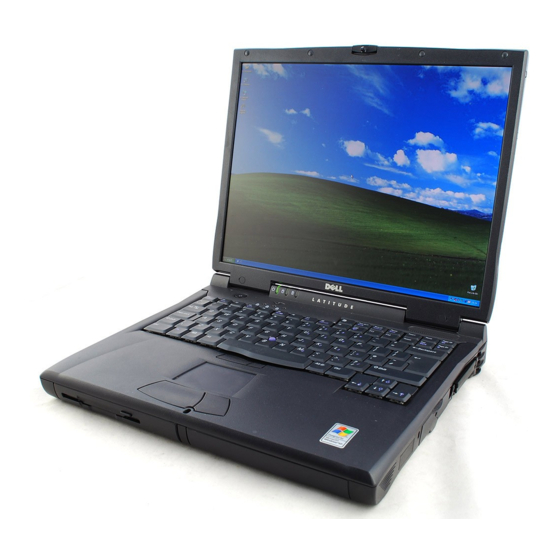
2 display battery bay 3 device status lights 10 module bay 4 air vent 11 touch pad/track stick buttons 5 keyboard status lights 12 Dell™ AccessDirect™ button 6 keyboard 13 power button 7 track stick 14 microphone Display Latch —... -
Page 3: Device Status Lights
Device Status Lights Device Status Lights Turns on when you turn on the computer. Turns on when the computer reads or writes data. NOTICE: To avoid loss of data, never turn off the computer while the light is flashing. Turns on steadily or blinks when the computer is in a power management mode. - Page 4 Display Latch Button — Press this button to release the display latch and open the display. Module Bay — You can install devices such as a CD drive, CD-RW drive, DVD drive, Zip drive, second hard drive, second battery, or Dell TravelLite™ module in the module bay. For more information, see "Using the Module Bay."...
-
Page 5: Left Side View
Press this button to launch a frequently used program, such as your default Internet browser. You can reprogram the button to launch a program of your choice. For more information, see "Using the Keyboard and Touch Pad." Power Button —... - Page 6 Fixed Optical Drive — Accommodates a CD drive, DVD drive, CD-RW drive, and combination drives. S-Video TV-Out Connector Connects your computer to a TV. Also connects digital audio capable devices using the TV/digital audio adapter cable. For more information, see "Adding and Replacing Parts."...
-
Page 7: Right Side View
Speaker — Press the volume control buttons or volume control keyboard shortcuts to adjust the volume of the integrated speakers. For more information, see "Using the Keyboard and Touch Pad." Right Side View 1 speaker 5 PC Card slot 2 security cable slot 6 IEEE 1394 connector 3 hard drive bay 7 audio connectors... -
Page 8: Back View
When you receive your computer, the infrared sensor is disabled. You can use the system setup program to enable the infrared sensor. For information on transferring data, see Windows Help, the Windows Help and Support Center, or the documentation that came with your infrared-compatible device. ... - Page 9 NOTICE: To avoid damaging the computer, wait 5 seconds after turning off the computer before you disconnect an external device. 1 fans (2) 5 docking connector 2 AC adapter connector 6 parallel connector 3 PS/2 connector 7 serial connector 4 video connector 8 USB connectors (2) ...
-
Page 10: Bottom View
Docking Connector NOTE: Docking devices may not be available in all countries. Connects the optional docking device. A docking device allows you to easily use external devices with your computer, such as an external keyboard, mouse, and monitor. For information on your computer's power requirements for docking, see "Docking Power Considerations."... - Page 11 1 memory module and modem cover 2 device release latches 3 Mini PCI card cover 4 docking device latch Memory Module and Modem Cover — Protects the memory module(s) and modem daughter card. See "Adding and Replacing Parts." ...
-
Page 12: Ergonomic Computing Habits
Appendix Ergonomic Computing Habits Regulatory Notices Warranty and Return Policy Ergonomic Computing Habits CAUTION: Improper or prolonged keyboard use may result in injury. CAUTION: Viewing the display or external monitor screen for extended periods of time may result in eye strain. ... -
Page 13: Fcc Notices (U.s. Only)
Most Dell computers are classified for Class B environments. However, the inclusion of certain options can change the rating of some configurations to Class A. To determine the electromagnetic classification for your computer or device, see the following sections specific for each regulatory agency. Each section provides country-specific EMC/EMI or product safety information. -
Page 14: Fcc Identification Information
If you experience trouble with this telephone equipment, see "Contacting Dell" to find the appropriate telephone number for obtaining customer assistance. If the equipment is causing harm to the telephone network, the telephone company may request that you disconnect the equipment until the problem is resolved. -
Page 15: Ic Notice (Canada Only)
Most Dell computers (and other Dell digital apparatus) are classified by the Industry Canada (IC) Interference-Causing Equipment Standard #3 (ICES-003) as Class B digital devices. To determine which classification (Class A or B) applies to your computer (or other Dell digital apparatus), examine all registration labels located on the bottom, side, or the back panel of your computer (or other digital apparatus). -
Page 16: Ce Mark Notice
This Dell device is classified for use in a typical Class B domestic environment. A "Declaration of Conformity" in accordance with the preceding directives and standards has been made and is on file at Dell Computer Corporation Products Europe BV, Limerick, Ireland. -
Page 17: Energy Star Compliance
Certain configurations of Dell computers comply with the requirements set forth by the Environmental Protection Agency (EPA) for energy-efficient computers. If the front panel of your computer bears the ENERGY STAR® Emblem, your original configuration complies with these requirements and all ENERGY STAR® power management features of the computer are enabled. - Page 18 Most Dell computers are classified by the Voluntary Control Council for Interference (VCCI) as Class B information technology equipment (ITE). However, the inclusion of certain options can change the rating of some configurations to Class A. ITE, including devices, expansion cards, printers, input/output (I/O) devices, monitors, and so on, integrated into or connected to the computer should match the electromagnetic environment classification (Class A or B) of the computer.
-
Page 19: Mic Notice (Republic Of Korea Only)
To determine which classification (Class A or B) applies to your computer (or other Dell digital device), examine the Republic of Korean Ministry of Information and Communications (MIC) registration labels located on your computer (or other Dell digital device). The MIC label may be located separately from the other regulatory marking applied to your product. -
Page 20: Polish Center For Testing And Certification Notice
Polish Center for Testing and Certification Notice The equipment should draw power from a socket with an attached protection circuit (a 3-prong socket). All equipment that works together (computer, monitor, printer, and so on) should have the same power supply source. ... -
Page 21: Bsmi Notice (Taiwan Only)
NOM Information (Mexico Only) The following information is provided on the device(s) described in this document in compliance with the requirements of the official Mexican standards (NOM): Exporter: Dell Computer Corporation One Dell Way Round Rock, TX 78682 Importer: Dell Computer de México, S.A. de C.V. -
Page 22: Warranty And Return Policy
Warranty and Return Policy Dell Computer Corporation ("Dell") manufactures its hardware products from parts and components that are new or equivalent to new in accordance with industry-standard practices. For information about the Dell warranty for your computer, see the System Information Guide. -
Page 23: Using A Battery
You can install an optional second battery in the module bay. With two fully charged batteries, you can double operating time. NOTE: Dell recommends that you connect your computer to an electrical outlet when writing to a CD. You can... -
Page 24: Charging The Battery
Health Gauge The battery life span is largely determined by the number of times it is charged. After hundreds of charge and discharge cycles, batteries lose some charge capacity, or battery health. To check the battery health, press and hold the status button on the battery charge gauge for at least 3 seconds. If no lights appear, the battery is in good condition, and more than 80 percent of its original charge capacity remains. -
Page 25: Installing A Battery
Installing a Battery Slide the battery into the bay until the latch release clicks. Storing a Battery Remove the battery when you store your computer for an extended period of time. A battery discharges during prolonged storage. After a long storage period, recharge the battery fully before you use it. -
Page 26: Cleaning Your Computer
Cleaning Your Computer Computer and Keyboard Display Touch Pad Floppy Drive CD, CD-RW, DVD, and Combination Drives Computer and Keyboard 1. Shut down and turn off your computer, disconnect any attached devices, and disconnect them from their electrical outlets. 2. - Page 27 ...
-
Page 28: Using Dell Diagnostics
As long as the microprocessor and the display, keyboard, and CD or DVD drive are working, you can use the Dell Diagnostics. Running the Dell Diagnostics may help you to resolve the problem yourself quickly without having to contact Dell for assistance. -
Page 29: Advanced Testing
For a quick check of your computer, select Quick Tests from the Test All Devices or Test One Device option. Quick Tests runs only the subtests that do not require user interaction and that do not take a long time to run. Dell recommends that you choose Quick Tests first to increase the odds of tracing the source of the problem quickly. -
Page 30: Confirming The System Configuration Information
Keys Explains the functions of the all of the keystrokes that can be used in Dell Diagnostics. Device Describes the test group that is presently highlighted in the Device Groups list on the main menu screen. It also provides reasoning for Group using some tests. - Page 31 Do not be concerned if the Device Groups area does not list the names of all the components or devices you know are part of your computer. For example, you may not see a printer listed, although you know one is attached to your computer. Instead, the printer is listed as a parallel port. The computer recognizes the parallel port as LPT1, which is an address that tells the computer where to send outgoing information and where to look for incoming information.
-
Page 32: Using The Display
Before you change any of the original display settings, make a note of the original settings for future reference. NOTE: Dell recommends that you use only the Dell-installed video drivers, which are designed to offer the best performance with your Dell-installed operating system. - Page 33 pad or track stick to pan up and down and left and right. NOTICE: You can damage an external monitor by using an unsupported refresh rate. Before adjusting the refresh rate on an external monitor, see the monitor user's guide.
-
Page 34: Reinstalling Software
Reinstalling Drivers and Utilities Dell ships your computer to you with required drivers and utilities already installed—no further installation or configuration is needed. NOTICE: The Drivers and Utilities CD may contain drivers for operating systems that are not on your computer. Ensure that you are installing software appropriate for your operating system. -
Page 35: Manually Reinstalling Drivers For Windows Xp
9. Ensure that Search for a suitable driver for my device (recommended) is selected, and then click Next. 10. Ensure that the Specify a location check box is checked and that all other check boxes are unchecked, and click Next. 11. -
Page 36: Creating A Restore Point
Restore is automatically disabled. Before you use System Restore, see the following subsections to confirm that it is enabled. Windows XP 1. Click the Start button and click Control Panel. 2. Click the Performance and Maintenance. 3. Click System. 4. Click the System Restore tab. 5. - Page 37 NOTICE: Save and close all open files and exit all open programs. Do not alter, open, or delete any files or programs until the system restoration is complete. 3. Click Next. 4. The System Restore screen appears, and then the computer automatically restarts. 5.
-
Page 38: Finding Information
For more information on using the Windows operating system, see the Microsoft Windows documentation that came with your computer. Using Devices Dell™ User's Guides For help on using your computer devices (such as a modem) and options you purchase separately from your computer, see the device user's guide. -
Page 39: Using The Drivers And Utilities Cd
The Drivers and Utilities CD contains drivers and utilities, the Dell Diagnostics, and user's guides for your computer and optional devices. Dell ships your computer to you with required drivers and utilities already installed—no further installation or configuration is needed. If you ever need to reinstall a driver or utility, run diagnostics tests on your computer, or access the user's guides, use the Drivers and Utilities CD. -
Page 40: Getting Help
Online Services You can access Dell Support at support.dell.com. Select your region on the WELCOME TO DELL SUPPORT page, and fill in the requested details to access help tools and information. You can contact Dell electronically using the following addresses: ... -
Page 41: Problems With Your Order
If you need information about additional products available from Dell, or if you would like to place an order, visit the Dell website at www.dell.com. For the telephone number to call to speak to a sales specialist, see the contact numbers for your region. -
Page 42: Before You Call
Prepare all items being returned, whether for repair or credit, as follows: 1. Call Dell to obtain a Return Material Authorization Number, and write it clearly and prominently on the outside of the box. For the telephone number to call, see the contact numbers for your region. - Page 43 Toll-free numbers are for use within the country for which they are listed. When you need to contact Dell, use the electronic addresses, telephone numbers, and codes provided in the following table. If you need assistance in determining which codes to use, contact a local or an international operator.
- Page 44 02 2186 27 14 City Code: 2 TechFax 02 2186 27 28 Switchboard 02 2186 27 11 Denmark (Copenhagen) Website: support.euro.dell.com E-mail Support (portable computers): den_nbk_support@dell.com International Access Code: 00 E-mail Support (desktop computers): den_support@dell.com Country Code: 45 E-mail Support (servers): Nordic_server_support@dell.com Technical Support 7023 0182 Customer Care (Relational) 7023 0184...
- Page 45 El Salvador General Support 01-899-753-0777 Finland (Helsinki) Website: support.euro.dell.com E-mail: fin_support@dell.com International Access Code: 990 E-mail Support (servers): Nordic_support@dell.com Country Code: 358 Technical Support 09 253 313 60 Technical Support Fax 09 253 313 81 City Code: 9 Relational Customer Care 09 253 313 38 Home/Small Business Customer Care 09 693 791 94...
- Page 46 Country Code: 81 Technical Support (Dimension™ and Inspiron™) toll-free: 0120-198-226 Technical Support outside of Japan (Dimension and Inspiron) 81-44-520-1435 City Code: 44 Technical Support (Dell Precision™, OptiPlex™, and Latitude™) toll-free:0120-198-433 Technical Support outside of Japan (Dell Precision, OptiPlex, and Latitude) 81-44-556-3894 Faxbox Service 044-556-3490 24-Hour Automated Order Service 044-556-3801 Customer Care 044-556-4240...
- Page 47 Home/Small Business Sales Fax 020 674 47 75 Relational Sales Fax 020 674 47 50 Switchboard 020 674 50 00 Switchboard Fax 020 674 47 50 New Zealand E-mail (New Zealand): nz_tech_support@dell.com E-mail (Australia): au_tech_support@dell.com International Access Code: 00 Home and Small Business 0800 446 255 Country Code: 64 Government and Business 0800 444 617...
- Page 48 E-mail: swe_support@dell.com International Access Code: 00 E-mail Support for Latitude and Inspiron: Swe-nbk_kats@dell.com Country Code: 46 E-mail Support for OptiPlex: Swe_kats@dell.com City Code: 8 E-mail Support for Servers: Nordic_server_support@dell.com Technical Support 08 590 05 199 Relational Customer Care 08 590 05 642...
- Page 49 (1-877-335-5638) Employee Purchase Program (EPP) Customers toll-free: 1-800-695-8133 Financial Services website: www.dellfinancialservices.com Financial Services (lease/loans) toll-free: 1-877-577-3355 Financial Services (Dell Preferred Accounts [DPA]) toll-free: 1-800-283-2210 Business Customer Service and Technical Support toll-free: 1-800-822-8965 Employee Purchase Program (EPP) Customers toll-free: 1-800-695-8133 Projectors Technical Support toll-free: 1-877-459-7298...
- Page 50 Dell Outlet Store (Dell refurbished computers) toll-free: 1-888-798-7561 Software and Peripherals Sales toll-free: 1-800-671-3355 Spare Parts Sales toll-free: 1-800-357-3355 Extended Service and Warranty Sales toll-free: 1-800-247-4618 toll-free: 1-800-727-8320 Dell Services for the Deaf, Hard-of-Hearing, or Speech-Impaired toll-free: 1-877-DELLTTY (1-877-335-5889) U.S. Virgin Islands General Support 1-877-673-3355 Venezuela General Support 8001-3605 ...
- Page 51 Glossary Terms in this Glossary are provided for informational purposes only and may or may not describe features included with your particular computer. ...
- Page 52 bootable disk — A disk that you can use to start your computer. In case your hard drive is damaged or your computer has a virus, ensure that you always have a bootable CD or floppy disk available. bps —...
- Page 53 Control Panel — A Windows utility that allows you to modify operating system and hardware settings, such as display settings. controller — A chip that controls the transfer of data between the microprocessor and memory or between the microprocessor and devices. ...
- Page 54 A connector on the system board (in some computers) where you insert an expansion card, connecting it to the system bus. Express Service Code — A numeric code located on a sticker on your Dell™ computer. Use the Express Service Code when contacting Dell for assistance. Express Service Code service may not be available in some countries. extended display mode —...
- Page 55 Fahrenheit — A temperature measurement system where 32° is the freezing point and 212° is the boiling point of water. FCC — Federal Communications Commission — A U.S. agency responsible for enforcing communications-related regulations that state how much radiation computers and other electronic equipment can emit. floppy drive — A disk drive that can read and write to floppy disks. ...
- Page 56 HTTP — hypertext transfer protocol — A protocol for exchanging files between computers connected to the Internet. Hz — hertz — A unit of frequency measurement that equals 1 cycle per second. Computers and electronic devices are often measured in kilohertz (kHz), megahertz (MHz), gigahertz (GHz), or terahertz (THz).
- Page 57 A device that allows your computer to communicate with other computers over analog telephone lines. Three types of modems include: external, PC Card, and internal. You typically use your modem to connect to the Internet and exchange e-mail. module bay — A bay that supports devices such as optical drives, a second battery, or a Dell TravelLite™ module. monitor — The high-resolution TV-like device that displays computer output.
- Page 58 mouse — A pointing device that controls the movement of the cursor on your screen. Typically you roll the mouse over a hard, flat surface to move the pointer or cursor on your screen. ms — millisecond — A measure of time that equals one thousandth of a second. Access times of storage devices are often measured in ms. ...
- Page 59 pixel — A single point on a display screen. Pixels are arranged in rows and columns to create an image. A video resolution, such as 800 x 600, is expressed as the number of pixels across by the number of pixels up and down. ...
- Page 60 An I/O port often used to connect devices such as a handheld digital device or digital camera to your computer. Service Tag — A bar code label on your computer that identifies your computer when you access Dell Support at support.dell.com or when you call Dell for customer service or technical support. ...
- Page 61 SXGA+ — super-extended graphics array plus — A video standard for video cards and controllers that supports resolutions up to 1400 x 1050. system board — The main circuit board in your computer. Also known as the motherboard. system setup program —...
- Page 62 virus — A program that is designed to inconvenience you or to destroy data stored on your computer. A virus program moves from one computer to another through an infected disk, software downloaded from the Internet, or e-mail attachments. When an infected program starts, its embedded virus also starts. A common type of virus is a boot virus, which is stored in the boot sectors of a floppy disk.
-
Page 63: Using The Keyboard And Touch Pad
Using the Keyboard and Touch Pad Dell™ AccessDirect™ Button Numeric Keypad Keyboard Shortcuts Touch Pad Track Stick Dell™ AccessDirect™ Button Press this button to launch a frequently used program, such as your default Internet browser. To change the reprogrammable button settings, or to find information on using the button: ... -
Page 64: Keyboard Shortcuts
NOTE: When you connect an external PS/2 keyboard or PS/2 keypad to the computer, the integrated keypad is disabled. The keypad numbers and symbols are marked in blue on the right of the keypad keys. To enable the keypad, press . -
Page 65: Touch Pad
Activates the power management mode of your choice. You can program this keyboard shortcut on the Advanced tab in the Power Options Properties window. Speaker Functions Microsoft® Windows® Logo Key Functions Minimizes all open windows Maximizes all windows Runs Microsoft® Windows Explorer Opens the Run dialog box Opens the Search Results dialog box Opens the Search Results-Computer dialog box (if the computer is connected to a network) -
Page 66: Customizing The Touch Pad And Track Stick
Changing the Track Stick Cap Your computer came with an additional track stick cap. You can purchase additional caps by visiting the Dell website at www.dell.com. You may need to change the track stick cap if it wears down from prolonged use. - Page 67 3. Test the track stick to ensure that the cap is seated properly.
-
Page 68: Using The Module Bay
Using the Module Bay About the Module Bay Swapping Devices While the Computer Is Turned Off Swapping Devices While the Computer Is Running Using the CD or DVD Tray Adjusting the Volume About the Module Bay You can install devices such as a floppy drive, CD drive, CD-RW drive, DVD drive, DVD/CD-RW drive, Zip drive, second hard drive, or second battery in the module bay. -
Page 69: Adjusting The Volume
1. If you want to swap a device other than a PC Card and the computer is docked, undock it. 2. Double-click the Unplug or Eject Hardware icon on the taskbar. 3. Click the device you want to eject. 4. Keep the display open, and tilt the computer back so that you can access the bottom of the computer. 5. - Page 70 2. In the Volume Control window, click and drag the bar in the Volume Control column and slide it up or down to increase or decrease the volume. For more information on volume control options, click Help in the Volume Control window. ...
-
Page 71: About Passwords
If you forget any of your passwords, contact your system administrator or call Dell. For your protection, Dell technical support staff will ask you for proof of your identity to ensure that only an authorized person can use the computer. -
Page 72: Using A Hard Drive Password
If you forget the primary password and do not have an administrator password assigned, or if you have both a primary and an administrator password assigned but forget them both, contact your system administrator or contact Dell. NOTICE: If you disable the administrator password, the primary password is also disabled. - Page 73 An asset tag number can have up to ten characters; any combination of characters excluding spaces is valid. 1. Boot the computer using a bootable floppy disk or CD. 2. Type cd c:\Dell\Util and press 3. Type asset and a space followed by the new number, and press For example, type the following command line and press asset 1234$ABCD&...
- Page 74 3. Type asset and a space followed by the option, and then press Asset Tag Option Description Deletes the asset tag number Specifies a new owner tag /o owner tag Deletes the owner tag /o /d Displays the Asset Tag utility help screen ...
-
Page 75: Using Pc Cards
Using PC Cards PC Card Types PC Card Blanks Extended PC Cards Installing a PC Card Removing a PC Card or Blank PC Card Types See "Specifications" for information on supported PC Cards. The PC Card slot has two connectors that supports four combinations of cards: ... -
Page 76: Removing A Pc Card Or Blank
PC Cards are generally marked with a symbol (such as a triangle or an arrow) to indicate which end to insert into the slot. The cards are keyed to prevent incorrect insertion. If card orientation is not clear, see the documentation that came with the card. ... - Page 77 ...
-
Page 78: Standby Mode
Power Management Management Tips Power Management Modes Power Options Properties Management Tips NOTE: "Using a Battery" for more information on conserving battery power. Connect the computer to an electrical outlet when possible because the battery life expectancy is largely determined by the number of times it is charged. -
Page 79: Power Options Properties
The Low battery alarm and Critical battery alarm settings alert you with a message when the battery charge falls below a certain percentage. When you receive your computer, the Low battery alarm and Critical battery alarm check boxes are selected. Dell recommends that you continue to use these settings. -
Page 80: Advanced Tab
Advanced Tab The Advanced tab allows you to: Set power icon and standby mode password options. Depending on your operating system, program the following functions: Prompt user for an action (Ask me what to do). ¡ Activate standby mode. ¡... -
Page 81: Solving Problems
Your computer's Intel® Pentium®4 microprocessor requires more power than the microprocessors used in Dell's previous portable computers. Your computer is designed to use the 90-W AC adapter and the 4400-mAh battery that shipped with it; for optimum system performance, you should always use these components. -
Page 82: Docking Power Considerations
The 70-W AC adapters used in some of Dell's older portable computers can be used with your computer, but they will decrease system performance. Likewise, you can use the 3800-mAh and 3600-mAh batteries from older Dell™ computers, but these lesser-capacity batteries will discharge faster. Using less-powerful AC adapters or batteries may cause you to receive a WARNING or a SYSTEM CONFIGURATION ERROR message similar to the following: ... - Page 83 Floppy drive 0 seek failure — The system configuration information may not match the hardware configuration. Run the Diskette tests as described in "Dell Diagnostics." Diskette read failure — The floppy disk may be defective. If the drive access light turns on, try a different disk. See "Drive...
- Page 84 Optional ROM bad checksum — The optional ROM apparently failed. Contact Dell. A required .DLL file was not found — The program that you are trying to open is missing an essential file. Remove and then reinstall the program.
-
Page 85: Video And Display Problems
Diagnostics Checklist as you complete these checks. If the display is blank NOTE: If you are using a program that requires a higher resolution than your computer supports, Dell recommends that you attach an external monitor to your computer. ... -
Page 86: Sound And Speaker Problems
Run the Video diagnostics tests — If no error message appears and you still have a display problem, but the display is not completely blank, run the Video device group in the Dell Diagnostics. See "Error Messages" —... -
Page 87: Printer Problems
2. Swap the printer cable with a cable that you know is working. 3. Turn on the printer and computer, and try again to print. 4. If you print successfully, contact Dell for assistance in obtaining a new printer cable. -
Page 88: Modem And Internet Connection Problems
Test the electrical outlet — Ensure that the electrical outlet is working by testing it with another device, such as a lamp. Ensure that the printer is turned on — See the documentation supplied with the printer. Verify that Windows® recognizes the printer ... -
Page 89: Touch Pad Or Mouse Problems
If all commands receive responses, the modem is operating properly. NOTE: If you still have problems with a Dell-provided modem, contact Dell for technical assistance. If you have problems with a non-Dell–provided modem, contact the modem manufacturer. Touch Pad or Mouse Problems ... -
Page 90: External Keyboard Problems
Fill out the Diagnostics Checklist as you complete these checks. NOTE: Use the integrated keyboard when working in MS-DOS® mode or when running the "Dell Diagnostics or the system setup program. When you attach an external keyboard, the integrated keyboard remains fully functional. -
Page 91: Pc Card Problems
If you have problems with a Dell-provided PC Card — Contact Dell. If you have problems with a PC Card not provided by Dell — Contact the PC Card manufacturer. Drive Problems Fill out the Diagnostics Checklist as you complete these checks. -
Page 92: If You Hear An Unfamiliar Scraping Or Grinding Sound
If a drive error message appears, see "Error Messages" for an explanation. Run the IDE Drives tests as described in "Dell Diagnostics." If you cannot eject the CD, CD-RW, or DVD drive tray 1. Ensure that the computer is turned off. -
Page 93: Network Problems
2. Right-click the drive letter (local disk) that you want to scan for errors, and then click Properties. 3. Click the Tools tab. 4. Under Error-checking, click Check Now. 5. Click Start. Run the IDE Drives tests as described in "Dell Diagnostics." Network Problems ... -
Page 94: Resolving Software And Hardware Incompatibilities
Confirm that the problem is software-related — Run the System Board Devices tests as described in "Dell Diagnostics." If all tests in the device group run successfully, the problem may be software-related. See the software documentation. Resolving Software and Hardware Incompatibilities ... -
Page 95: If Your Computer Gets Wet
CAUTION: Perform this procedure only after you are certain that it is safe to do so. If the computer is connected to an electrical outlet, Dell recommends that you turn off AC power at the circuit breaker before attempting to remove the power cables from the electrical outlet. Use the utmost caution when removing wet cables from a live power source. - Page 96 4. Remove and reinstall the battery. 5. Turn on the computer. NOTE: See your System Information Guide for information on your warranty coverage. If the computer does not start, or if you cannot identify the damaged components, contact Dell. ...
-
Page 97: Adding And Replacing Parts
Be sure to add only memory modules that are intended for your computer. NOTE: Your computer is optimized for the use of the 266-MHz DDR DDRAM memory modules sold by Dell. When adding memory, ensure that you purchase the same type of memory from Dell. -
Page 98: Adding A Mini Pci Card
Adding a Mini PCI Card If you ordered a Mini PCI card at the same time that you ordered your computer, Dell has already installed the card for you. NOTE: Handle components and cards by their edges, and avoid touching pins and contacts. - Page 99 2. Save and close any open files, exit any open programs, and shut down the computer. 3. If the computer is docked, undock it. 4. Disconnect the computer from the electrical outlet. 5. Wait 10 to 20 seconds and then disconnect any attached devices. 6.
-
Page 100: Replacing The Hard Drive
Before working inside your computer, read the safety instructions in your System Information Guide. NOTE: Dell does not guarantee compatibility or provide support for hard drives from sources other than Dell. To replace the hard drive in the hard drive bay: 1. -
Page 101: S-Video And Standard Audio
For televisions and audio devices without support for S/PDIF digital audio, you can use the audio connector on the side of the computer to connect the computer to your television or audio device. Dell recommends that you connect video and audio cables to your computer in one of the following combinations, using the instructions in the following subsections: NOTE: Diagrams for each connection combination appear at the beginning of each subsection to help you determine which method you should use. -
Page 102: S-Video And Digital Audio
1 TV/digital audio adapter cable 2 S-video cable 3 audio cable (3.5-mm mini- plug) 1. Turn off the computer and the television and/or audio device you want to connect. NOTE: You can connect an S-video cable directly to the S-video connector on the computer (without the video adapter cable) if your television or audio device supports S-video but not S/PDIF digital audio. -
Page 103: Composite Video And Standard Audio
Before you begin, make sure that you have the following cables: 1 TV/digital audio adapter cable 2 S-video cable 3 S/PDIF digital audio cable 1. Turn off the computer and the television and/or audio device you want to connect. 2. -
Page 104: Composite Video And Digital Audio
Before you begin, make sure that you have the following cables: 1 TV/digital audio adapter cable 2 composite video cable 3 audio cable 1. Turn off the computer and the television and/or audio device you want to connect. 2. -
Page 105: Enabling The Display Settings For A Television
Before you begin, make sure that you have the following cables: 1 TV/digital audio adapter cable 2 composite video cable 3 S/PDIF digital audio cable 1. Turn off the computer and the television and/or audio device you want to connect. 2. -
Page 106: Enabling S/Pdif Digital Audio
NVIDIA Video Controller NOTE: Be sure that you have properly connected the television before you enable the display settings. 1. Open the Control Panel window: In Windows 2000, click the Start button, click Settings, and then click the Control Panel icon. In Windows XP, click the Start button and then click the Control Panel icon. -
Page 107: Enabling S/Pdif In The Windows Audio Driver
3. Click the Properties (wrench) icon. 4. Click the Audio tab. 5. Click Enable S/PDIF output. 6. Click Apply. 7. Click OK. Enabling S/PDIF in the Windows Audio Driver NOTE: Enabling S/PDIF in Windows disables the sound from the headphone connector. 1. -
Page 108: Using The System Setup Program
NOTICE: Unless you are an expert computer user or are directed to do so by Dell technical support, do not change the settings for this program. Certain changes might make your computer work incorrectly. -
Page 109: Commonly Used Options
Serial Port allows you to map the serial port COM address or disable the serial port and its address, freeing that interrupt for another device to use. Enabling the Infrared Sensor 1. Enter the system setup program: a. Turn on your computer. b. Press when the Dell™ logo appears. - Page 110 5. Press the down-arrow key to select Infrared Mode, and press the right-arrow key to change the setting to Fast IR or Slow IR. Dell recommends that you use Fast IR. If the infrared device cannot communicate with your computer, turn off the computer and repeat steps 1 through 5 to change the setting to Slow IR.
-
Page 111: Specifications
Specifications Microprocessor Display System Information Keyboard PC Card Touch Pad Memory Track Stick Ports and Connectors Battery Communications AC Adapter Video Physical Audio Environmental Microprocessor Microprocessor types Intel® Mobile Pentium® 4 L1 cache 8 KB (internal) L2 cache 512 KB External bus frequency 400 MHz front-side bus ... - Page 112 4-pin USB-compliant connector Infrared sensor compatible with IrDA Standard 1.1 (Fast IR) and IrDA Standard 1.0 (Slow IR) Docking 200-pin connector for a Dell™ docking device S-video TV-out 7-pin mini-DIN connector for S-video, composite video, and S/PDIF (TV/digital audio adapter cable supports composite video and S/PDIF)
- Page 113 Operating angle 0° (closed) to 180° Viewing angles: Horizontal ±40° Vertical +10°/–30° Pixel pitch 0.20 x 0.20 mm (SXGA+) 0.19 x 0.19 mm (UXGA) Power Consumption: Panel with backlight (typical) 4.7 W using battery 6.2 W using AC power Controls brightness can be controlled through keyboard shortcuts ...
- Page 114 Dimensions: Height 27.94 mm (1.1 inches) Width 58.42 mm (2.3 inches) Depth 133.85 mm (5.25 inches) Weight (with cables) 0.54 kg (1.19 lb) Temperature range: Operating 0° to 40°C (32° to 95°F) Storage –40° to 65°C (–40° to 149°F) Physical Height 44.5 mm (1.75 inches) Width 331.0 mm (13.03 inches) Depth 276.0 mm (10.87 inches) Weight (approximate;...
-
Page 115: Traveling With Your Computer
Remove any extraneous items, such as paper clips, pens, and paper, from the keyboard and then close the display. Use the optional Dell™ carrying case to pack the computer and its accessories together safely. NOTE: To better protect your computer, Dell carrying cases must pass extensive shock and vibration tests. Avoid packing the computer with items such as shaving cream, colognes, perfumes, or food. ... -
Page 116: Traveling By Air
The Dell support technician will log your report under the computer service tag sequence and flag the computer as missing or stolen. If someone calls Dell for technical assistance and gives your service tag sequence, the computer is identified automatically as missing or stolen. The technician will attempt to get the... -
Page 117: About Microsoft® Windows® Xp
About Microsoft® Windows® XP Help and Support Center Switching to Classic View Desktop Cleanup Wizard Files and Settings Transfer Wizard Program Compatibility Wizard User Accounts and Fast User Switching Home and Small Office Networking Internet Connection Firewall Help and Support Center ... -
Page 118: Files And Settings Transfer Wizard
1. Right-click an empty spot on the desktop, and click Properties. 2. Click the Desktop tab, and click Customize Desktop. 3. Click Run Desktop Cleanup Wizard every 60 days to remove the check mark. 4. Click OK. You can run the Desktop Cleanup Wizard any time by clicking Clean Desktop Now under Run Desktop Cleanup Wizard every 60 days. Files and Settings Transfer Wizard NOTE: The time required to collect and transfer data depends on the amount of data collected. - Page 119 The Internet Connection Firewall provides basic protection from unauthorized access to the computer when the computer is connected to the Internet. The firewall is automatically enabled when you run the Network Setup Wizard. When the firewall is enabled for a network connection, the firewall icon appears with a red background in the Network Connections portion of the Control Panel.