Advertisement
Quick Links
Owner's Manual
IC..FTSMeer
I
LAWN TRACTOR
17.0 HI:', 42" Mower
Electric Start
Automatic Transmission
Model No.
917.273142
[_
This product has a low emission engine which operates
differently from previously built engines. Before you start the
engine, read and understand this Owner's Manual.
IMPORTANT:
Read and follow all Safety
Rules and Instructions before
operating this equipment.
For answers to your questions
about this product, Call:
1-800-659-5917
Sears Craftsman
Help Line
5 am - 5 pm, Mon- Sat
Sears, Roebuck and Co., Hoffman Estates, IL 60179 U.S.A
Visit our Craftsman website:www.sears.com/craftsman
Advertisement

Related Manuals for Craftsman 917.273142


Summary of Contents for Craftsman 917.273142
- Page 1 Read and follow all Safety about this product, Call: Rules and Instructions before 1-800-659-5917 Sears Craftsman Help Line operating this equipment. 5 am - 5 pm, Mon- Sat Sears, Roebuck and Co., Hoffman Estates, IL 60179 U.S.A Visit our Craftsman website:www.sears.com/craftsman...
- Page 2 IN HOME warranty service will still be available after the first 30 days of pur- chase, but a trip charge will apply. This charge will be waived if the Craftsman product is dropped off at an authorized Sears location. For the nearest authorized Sears location, please call 1-800-4-MY-HOME®.
- Page 3 IMPORTANT: This cutting machine is capable of amputating hands and feet and throw- ing objects. Failure to observe the following safety instructions could result in serious injury or death. • Be aware of the mower discharge direc- _WARNING: In order to prevent ac- tion and do not point it at anyone.
- Page 4 • Never carry children. They may fall off • Mow up and down slopes, not across. and be seriously injured or interfere with • Remove obstacles such as rocks, tree safe machine operation. limbs, etc. • Never allow children to operate the •...
- Page 5 • Remove obstacles such as rocks, tree • Be sure the area is clear of other people limbs, etc. before mowing. Stop machine if anyone enters the area. • Watch for holes, ruts, or bumps. Uneven terrain could overturn the machine. Tall •...
- Page 6 4.0 Pints AGREEMENTS W/O Filter: 3.75 Pints Congratulations on making a smart pur- Spark Plug: Champion RC12yC chase. Your new Craftsman® product is GAP: .040") designed and manufactured for years of Ground Speed Forward: dependable operation. But like all prod-...
- Page 7 Steering Wheel Steering Wheel Insert (1) Large Flat Washer 1/2-20 (1) Hex Bolt (1) Locknut 1/4-28 x 1-1/4 (1) Locknut 1/4-28 Steer, Steering Extension Boot Wheel Adapter Shaft teering (_Washer 17/32 x 1-3/16 x 12 Gauge _(1) Knob For Future Use Keys "-t Slope Sheet...
- Page 8 Your new tractor has been assembled at the factory with the exception of those parts left unassembled for shipping purposes. To ensure safe and proper operation of your tractor all parts and hardware you assemble must be tightened securely. Use the correct tools as necessary to insure proper tightness.
- Page 9 3. Place seat on seat pan so head of NOTE: You may now roll or drive your shoulder bolts are positioned over the tractor off the skid. Follow the appropriate instruction below to remove the tractor large slotted holes in pan. from the skid.
- Page 10 CHECK BRAKE SYSTEM INSTALL MULCHER PLATE After you learn how to operate your trac- (If previously removed) tor, check to see that the brake is properly 1. Raise and hold deflector shield in adjusted. See "TO ADJUST BRAKE" in upright position. the Service and Adjustments section of 2.
- Page 11 These symbols may appear on your tractor or in literature supplied with the product. Learn and understand their meaning. I'.,I REVERSE NEUTRAL HIGH CHOKE FAST SLOW IGNITION ENGINE OFF LIGHTS ON ENGINE ON ENGINE START PARKING BRAKE PARKING BRAKE PARKING BRAKE LOCKED UNLOCKED...
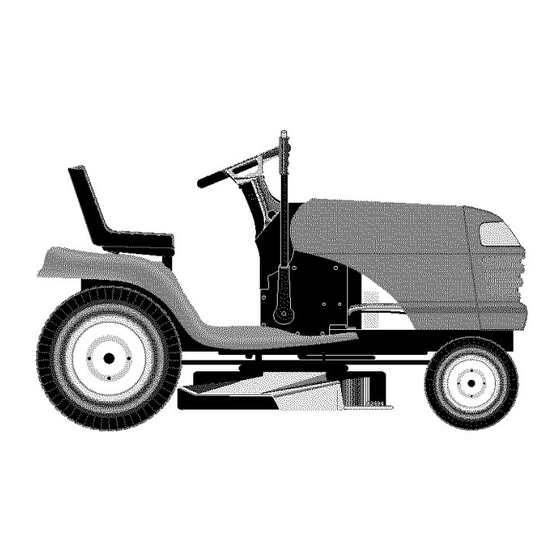
- Page 12 KNOW YOUR TRACTOR READ THIS OWNER'S MANUAL AND SAFETY RULES BEFORE OPERATING YOUR TRACTOR Compare the illustrations with your tractor to familiarize yourself with the locations of various controls and adjustments. Save this manual for future reference. Light Switch Ignition Switch Attachment Clutch Lever Lift Lever...
- Page 13 The operation of any tractor can result in foreign objects thrown into the eyes, which can result in severe eye damage. Always wear safety glasses or eye shields while operating your tractor or performing any adjustments or repairs. We recommend standard safety glasses or a wide vision safetyl mask worn over spectacles.
- Page 14 • The average lawn should be cut to ap- Attachment Attachemnt Lever proximately 2-1/2 inches during the cool "Engaged" High season and to over 3 inches during hot Position Position months. For healthier and better looking lawns, mow often and after moderate growth.
- Page 15 Transmission Engaged _I_,CAUTION: Wipe off any spilled oil or fuel. Do not store, spill or use gasoline near an open flame. IMPORTANT: When operating in tempera- tures below 32°F(0°C), use fresh, clean winter grade gasoline to help insure good cold weather starting. CAUTION: Alcohol blended fuels (called gasohol or using ethanol or methanol) can...
- Page 16 WARMWEATHERSTARTING(50° F and 1. Place tractor safely on level surface above) with engine off and parking brake set. 2. Disengage transmission by placing 7. Whenengine starts, movethe throttle freewheel control in '"transmission dis- controlto the fast position. engaged" position (See "TO TRANS- •...
- Page 17 MOWING TIPS MULCHING MOWING TIPS • Mower should be properly leveled for IMPORTANT: For best performance, keep best mowing performance. See "TO mower housing free of built-up grass and LEVEL MOWER HOUSING" in the trash. Clean after each use. Service and Adjustments section of this •...
- Page 18 MAINTENANCE SCHEDULE ._'_.,_._ _._ ,_£-__ o.-_ ,_/_ AS YOU COMPLETE REGULAR SERVICE _'__G_#P'SERVlOE DATES Check Operator Presence Interlock Systems Check for Loose Fasteners Sharpen/Replace Mower Blades Lubrication Chart Check Battery Level Clean Battery and Terminals Check Transaxle Cooling Check WBelts Check Engine Oil Level Change...
- Page 19 TRACTOR IMPORTANT: To ensure proper assembly, center hole in blade must align with star Always observe safety rules when per- on mandrel assembly. forming any maintenance. 4. Reassemble blade bolt, lock washer BRAKE OPERATION and flat washer in exact order as If tractor requires more than six (6) feet shown.
- Page 20 V-BELTS BATTERY Check V-belts for deterioration and wear Your tractor has a battery charging system which is sufficient for normal use. How- after 100 hours of operation and replace ever, periodic charging of the battery with if necessary. The belts are not adjustable. an automotive charger will extend its life.
- Page 21 Air Cleaner 3. Unlock drain valve by pushing inward Cover slightly and turning counterclockwise. 4. To open, pull out on the drain valve. 5. After oil has drained completely, close Rubber and lock the drain valve by pushing Cleaner inward and turning clockwise until the pin is in the locked position as shown.
- Page 22 IN-LINE FUEL FILTER CLEANING The fuel filter should be replaced once ,, Clean engine, battery, seat, finish, etc. of all each season. If fuel filter becomes foreign matter. ,, Keep finished surfaces and wheels free of all clogged, obstructing fuel flow to carbu- gasoline, oil, etc.
- Page 23 ARNING: TO AVOID SERIOUS INJURY, BEFORE PERFORMING ANY SER- VICE OR ADJUSTMENTS: 1. Depress clutch/brake pedal fully and set parking brake. 2. Place motion control lever in neutral (N) position. 3. Place attachment clutch in "DISENGAGED" position. 4. Turn ignition key to "STOP" and remove key. 5.
- Page 24 • To lower front of mower loosen nut "E" TO LEVEL MOWER HOUSING on both front links an equal number of Adjust the mower while tractor is parked turns. on level ground or driveway. Make sure • When distance "D" is 1/8" to 1/2" tires are properly inflated (See "PROD- UCT SPECIFICATIONS"...
- Page 25 3. Install mower (See "To Install Mower" With parking brake "Engaged" in this section of this manual). "_t "A" Idler Pulleys 13_Jam __erating Do not t_th_rrbrake adjustment is necessary contact a Sears or Pulley other qualified service center. TO REPLACE MOTION DRIVE BELT TO CHECK AND ADJUST BRAKE Park the tractor on level surface.
- Page 26 TRANSMISSION REMOVAL/ REPLACEMENT Engine Pulley- Should your transmission require removal for service or replacement, it should be Clutching Idler _/ ""_ purged after reinstallation and before op- erating the tractor. See "PURGE TRANS- MISSION" in the Operation section of this manual.
- Page 27 If your battery is too weak to start the Seat Pan engine, it should be recharged. (See "BAT- TERY" in the MAINTENANCE section of this manual). If "jumper cables" are used for emergency starting, follow this procedure: IMPORTANT: Your tractor is equipped with a 12 volt system.
- Page 28 ENGINE 2. Start engine and allow to warm for five minutes. Make adjustments with engine Maintenance, repair, or replacement of running and shift/motion control lever the emission control devices and systems, in neutral (N) position. which are being done at the customers ex- 3.
- Page 29 Immediately prepare your tractor for stor- Also, alcohol blended fuels (called gasohol age at the end of the season or if the trac- or using ethanol or methanol) can attract tor will not be used for 30 days or more. moisture which leads to separation and formation of acids during storage.
- Page 30 TROUBLESHOOTING CHART: See appropriate section in manual unless directed to Sears service center PROBLEM CAUSE CORRECTION Will not start Out of fuel. 1. Fill fuel tank. 2. See "TO START ENGINE" in Engine not "CHOKED" properly. Operation section. 3. Wait several minutes before Engine flooded.
- Page 31 TROUBLESHOOTING CHART: See appropriate section in manual unless directed to Sears service center PROBLEM CAUSE CORRECTION LOSS of power 1. Cutting too much grass/too 1. Set in "Higher Cut" position/ fast. reduce speed. 2. Throttle in "CHOKE" position. 2. Adjust throttle control. 3.
- Page 32 TROUBLESHOOTING CHART: See appropriate section in manual unless directed to Sears service center PROBLEM CAUSE CORRECTION 1. Obstruction in clutch 1. Remove obstruction. Mower blades will mechanism. not rotate 2. Worn/damaged mower drive 2. Replace mower drive belt. belt. 3. Frozen idler pulley. 3.
- Page 33 TRACTOR - - MODEL NUMBER 917.273142 SCHEMATIC °LACK BATTERY SOLENOID BLUE BLUE A_'ME_T CLUTCH • •Iv I 85 86 ] FUEL SHUT-OFF SOLENOID (NOT OCCUPIED BLACK SEAT SWITCH (IF SO EQUIPPED) BLUE I 85 86 I BLACK PRESENCE RELAY #1...
- Page 34 TRACTOR - - MODEL NUMBER 917.273142 ELECTRICAL 16 i...
- Page 35 TRACTOR - - MODEL NUMBER 917.273142 ELECTRICAL KEY PART DESCRIPTION 163465 Battery 74760412 Bolt Hex Hd 1/4-20 Uric x 3/4 176689 Box Battery 176137 Switch, Interlock 183759 Harness Asm Light W/4152j 4152J Bulb Light #1156 4799J Cable Battery 6 Ga 11" red...
- Page 36 TRACTOR - - MODEL NUMBER 917.273142 CHASSIS AND ENCLOSURES ,145 chassis-Laser -It,stlt 16...
- Page 37 TRACTOR - - MODEL NUMBER 917.273142 CHASSIS AND ENCLOSURES PART DESCRIPTION 174619 Chassis 176554 Drawbar 17060612 Screw 3/8-16 x 3/4 155272 Bumper Hood/Dash 168337X013 Dash STD533710 Bolt, Carriage 3/8-16 x 3/4 174996 Panel, Dash, LH. 172105X010 Panel, Dash, R.H. 17490608...
- Page 38 TRACTOR - - MODEL NUMBER 917.273142 GROUND DRIVE 16 _/03 drive-hydro,stlt 29...
- Page 39 TRACTOR - - MODEL NUMBER 917.273142 GROUND DRIVE PART PART DESCRIPTION DESCRIPTION Transmission (See Breakdown) 134683 Guide, Belt, Mower Drive RH Hydro Gear Model 314-0510 169183 Strap, Torque, Lh 165866 Rod, Shift 169182 Strap, Torque, Rh STD561210 Pin, Cotter 1/8 x 1...
- Page 40 TRACTOR - - MODEL NUMBER 917.273142 STEERING ASSEMBLY • steering..pL1.47...
- Page 41 TRACTOR - - MODEL NUMBER 917.273142 STEERING ASSEMBLY PART DESCRIPTION 184704X428 Steering Wheel 184706 Axle Assembly Cast Iron 169840 Spindle Assembly, L.H. 169839 Spindle Assembly, R.H. 6266H Bearing, Race, Thrust, Hardened 121748X Washer 25/32 x 1-5/8 x 16 Gauge 12000029...
- Page 42 TRACTOR - - MODEL NUMBER 917.273142 ENGINE _116 _105 - 33 OPTIONAL EQUIPMENT Spark Arrester engine*kohler KEY PART PART DESCRIPTION DESCRIPTION 170548X505 Control, Throttle 137040 Line, Fuel 17720408 Screw, Hex Head, Thread 181654 Plug Drain Oil Easy Cutting 1/4-20 x 1/2...
- Page 43 TRACTOR - - MODEL NUMBER 917.273142 SEAT ASSEMBLY ..- 16 I.knob KEY PART PART DESCRIPTION DESCRIPTION 180597 Seat 121246X Bracket Pnt Mounting Switch 121248X 180166 Bracket Pnt Pivot Seat (blk) Bushing Snap BIk Ny150 ld 71110616 Bolt Fin Hex 3/8-16 Unc x 1...
- Page 44 Decal, HP Engine 138311 Decal, Lift Handle 172331 Decal, Mower Srs 166960 Decal, By pass 186282 Pad Footrest LH STLT Decal, Fender, Craftsman 165800X428 156439 Pad Footrest RH STLT Decal, Fender Danger 165799X428 186283 Decal, Panel Side 187739 Owner's Manual, English...
- Page 45 TRACTOR - - MODEL NUMBER 917.273142 LIFT ASSEMBLY 13----_ 32 / lift-rh,lpiece_3 PART PART DESCRIPTION DESCRIPTION 159460 Washer Asm Inner Spring W/ STD624008 Retainer Spring Plunger 173288 Link Front 159471 Shaft Asm. Lift 73350800 Nut Jam Hex 1/2-13 Unc 105767X...
- Page 46 TRACTOR - - MODEL NUMBER 917.273142 MOWER DECK 106S_ _ 102 103 105 118 _ _112 _117 _116 10.---- 42 D m_n-t-path stir 3.
- Page 47 TRACTOR - - MODEL NUMBER 917.273142 MOWER DECK PART PART DESCRIPTION DESCRIPTION 165892 Mower Deck Assembly, 42" 165723 Spacer, Retainer STD533107 Bolt 141043 Guard, TUV Idler Knob Custom Oval 138017 Bracket Assembly, Sway Bar, 184939 Front 144959 V-Belt 165460 Bracket Sway Bar 38/42" Deck...
- Page 48 "r ,.< 122- :I:,, _, -,,I OlID _127...
- Page 49 TRACTOR -- MODEL NUMBER 917.273142 HYDRO GEAR TRANSAXLE - - MODEL NUMBER 314-0510 PART PART DESCRIPTION DESCRIPTION Rotor, Brake 170351 Main Housing, Assembly 170408 Brake Puck 170352 Side Housing, Assembly 142883 Puck Plate 170353 Center Section, Assembly 142882 170354 Swashplate, Trunion...
- Page 50 TRACTOR - - MODEL NUMBER 917.273142 KOHLER ENGINE-MODEL NUMBER CV492,TYPE NUMBER 27506 CYLINDER HEAD, VALVE BREATHER YLmNDRE DIRIGE SOUPAPE ET RENIFLARD CRANKCASEJ CARTER=MOTEUR 23 22 "i a%N__ _- _ _..-t4...
- Page 51 TRACTOR -- MODEL NUMBER 917.273142 KOHLER ENGINE-MODEL NUMBER CV492, TYPE NUMBER 27506 CYLINDER HEAD/VALVE/BREATHER CRANKCASE PART PART DESCRIPTION DESCRIPTION 25-351-01-S Lifter, valve (2) 12-032-03-S Seal, crankshaft 12-755-94-S Kit, cylinder head (Includes Block, cylinder (Use Short 3-17, Gaskets 12 041 01-S Block 12 522 49) (Qty.
- Page 52 TRACTOR - - MODEL NUMBER 917.273142 KOHLER ENGINE-MODEL NUMBER CV492, TYPE NUMBER 27506 BLOWER HOUSING AND BAFFLESI_ IGN_TION/ELECTRICAL ALLUIViAGE ELECTRIQUE HABiTATiON DE SOUFFLEUR ET DECALENT]...
- Page 53 TRACTOR - - MODEL NUMBER 917.273142 KOHLER ENGINE-MODEL NUMBER CV492, TYPE NUMBER 27506 IGNITION/ELECTRICAL BLOWER HOUSING & BAFFLES PART PART DESCRIPTION DESCRIPTION M-545010-S 12-086-14-S Screw, hex. flange Screw, hex. flange M10x1.5x46 M5x0.8xl 0 (6) 24-468-10-S 12-468-03-S Washer, plain 3/8" Washer, plain 1/4"...
- Page 54 TRACTOR -- MODEL NUMBER 917.273142 KOHLER ENGINE-MODEL NUMBER CV492, TYPE NUMBER 27506 STARTING SYSTEM ENGINE CONTROLS DEMARRANT D£LESYST_ME MOTEUR CONTROLE OIL PAN / LU BR]CATION D E L A HU!LE PAN D E LA LUBB!FICATIO N _ _io...
- Page 55 TRACTOR - - MODEL NUMBER 917.273142 KOHLER ENGINE-MODEL NUMBER CV492, TYPE NUMBER 27506 ENGINE CONTROLS STARTING SYSTEM PART PART DESCRIPTION DESCRIPTION 12-079-11 -S M-839070-S Screw, hex. flange Linkage, choke 12-237-01 -S M8x1.25x70 (2) Clamp, cable 24-086-43-S 25-098-07-S Starter assembly (Includes Screw, hex.
- Page 56 TRACTOR - - MODEL NUMBER 917.273142 KOHLER ENGINE-MODEL NUMBER CV492,TYPE NUMBER 27506 EXHAUST CRANKSHAFT _......ECHAPPEMENT| FUELSYSTEM...
- Page 57 TRACTOR -- MODEL NUMBER 917.273142 KOHLER ENGINE-MODEL NUMBER CV492, TYPE NUMBER 27506 FUEL SYSTEM CRANKSHAFT PART PART DESCRIPTION DESCRIPTION M-641060-S Nut, hex. flange M6x1.0 (2) 12-014-57-S Crankshaft (Includes 2) M-629116-S Stud M6x1.0xl 16 (2) 25-139-27-S Plug, cup 12-853-118-S Kit, carburetor w/gasket...
- Page 59 SUGGESTED GUIDE FOR SIGHTING SLOPES FOR SAFE OPERATION ¢,o down the face of slopes, never across the face. Do not mow ARNING: To avoid serious injury, operate your tractor up and slopes greater than 15 degrees, Make turns gradually to prevent tipping or loss of control, Exercise extreme caution when changing direction on slopes.
- Page 60 Get it fixed, at your home or ourst Your Home For repair - in your home - of all major brand apphances, lawn and garden equipment, or heatmg and coohng systems, no matter who made it, no matter who sold it! For the replacement parts, accessones owner's manuals that you need to do-it-yourself.