Table of Contents
Advertisement
User's Manual
Thank you very much for purchasing this product.
To ensure correct and safe usage with a full understanding of this product's performance, please be
sure to read through this manual completely and store it in a safe location.
Unauthorized copying or transferral, in whole or in part, of this manual is prohibited.
The contents of this operation manual and the specifications of this product are subject to change
without notice.
The operation manual and the product have been prepared and tested as much as possible. If you
find any misprint or error, please inform us.
Roland DG Corp. assumes no responsibility for any direct or indirect loss or damage which may
occur through use of this product, regardless of any failure to perform on the part of this product.
Roland DG Corp. assumes no responsibility for any direct or indirect loss or damage which may
occur with respect to any article made using this product.
Advertisement
Table of Contents

Related Manuals for Roland Modela MDX-40


Summary of Contents for Roland Modela MDX-40
- Page 1 Roland DG Corp. assumes no responsibility for any direct or indirect loss or damage which may occur through use of this product, regardless of any failure to perform on the part of this product.
-
Page 2: For Canada
AVIS Cet appareil numérique de la classe A respecte toutes les exigences du Règlement sur le matériel brouilleur du Canada. ROLAND DG CORPORATION 1-6-4 Shinmiyakoda, Hamamatsu-shi, Shizuoka-ken, JAPAN 431-2103 MODEL NAME : See the MODEL given on the rating plate. -
Page 3: Table Of Contents
Contents To Ensure Safe Use ........................3 Pour utiliser en toute sécurité ....................8 Important Notes on Handling and Use ................... 13 Chapter 1 Introduction ........................15 1-1 About This Machine ............................. 16 What You Can Do with This Machine .................... 16 Operation Screen .......................... - Page 4 5-3 Locations of the Power Rating and Serial Number Labels ................ 45 5-4 Specifications ................................. 46 Main Unit Specification ........................ 46 Expansion Connector Specification ....................47 Company names and product names are trademarks or registered trademarks of their respective holders. http://www.rolanddg.com/ Copyright© 2004 Roland DG Corporation...
-
Page 5: To Ensure Safe Use
To Ensure Safe Use Improper handling or operation of this machine may result in injury or damage to property. Points which must be observed to prevent such injury or damage are described as follows. About WARNING and CAUTION Notices Used for instructions intended to alert the user to the risk of death or severe WARNING injury should the unit be used improperly. - Page 6 Never operate if a front cover is cracked or broken. Doing so so may result in injury. If the front cover is cracked, ontact your authorized Roland DG Corp. dealer or service center. This machine weighs approximately 70 kg (155 lb.).
- Page 7 Failure to do so may result in fire, electrical shock, or electrocution. Immediately disconnect Never place gasoline, alcohol, thinner, or the power cord and contact your Roland DG any other flammable material near the Corp. service center. machine, or use an aerosol spray close to the machine.
- Page 8 To Ensure Safe Use Important Notes on Cutting WARNING CAUTION Never use an air gun (blower) to remove Do not touch the tip of the cutting tool cuttings. with your fingers. Using an air gun (blower) may blow cuttings in- Doing so may result in injury.
-
Page 9: Warning Labels
To Ensure Safe Use Warning Labels Warning labels are affixed to make areas of danger immediately clear. The meanings of these labels are as follows. Be sure to heed their warnings. Also, never remove the labels or allow them to become obscured. Caution: Pinching Hazard Contact during operation may caused the hand or fingers to... -
Page 10: Pour Utiliser En Toute Sécurité
Pour utiliser en toute sécurité La manipulation ou l'utilisation inadéquates de cet appareil peuvent causer des blessures ou des dommages matériels. Les précautions à prendre pour prévenir les blessures ou les dommages sont décrites ci-dessous. Avis sur les avertissements Utilisé pour avertir l'utilisateur d'un risque de décès ou de blessure grave en ATTENTION cas de mauvaise utilisation de l'appareil. - Page 11 Si le couvercle transparent à l'avant ou sur le côté de l'appareil est fissuré, communiquer avec le revendeur ou le centre de service autorisés de la société Roland DG. Le poids de cet appareil est d'environ 70 kg (155 lb.) ATTENTION Lorsque vous déplacez l'appareil, le saisir...
- Page 12 Ne jamais placer de l'essence, du diluant d'alimentation et communiquer avec le Centre ni aucun matériau inflammable près de de services Roland DG. l'appareil; ne jamais utiliser de produits en aérosol près de l'appareil. Si l'appareil reste inutilisé pendant de Cela crée un risque d'incendie.
- Page 13 Pour utiliser en toute sécurité ATTENTION Ne jamais utiliser l’appareil, insérer la Pour débrancher l'appareil, saisir la fiche prise dans le réceptacle ou l’en enlever si et non le fil électrique. on a les mains mouillées. Tirer sur le fil peut l'endommager, ce qui risque Il y a risque de décharge électrique ou de provoquer un incendie ou de causer une d'électrocution.
- Page 14 Pour utiliser en toute sécurité Vignettes d'avertissement Des vignettes d'avertissement sont apposées pour qu'il soit facile de repérer les zones dangereuses. La signification des vignettes est donnée ci-dessous. Respecter les avertissements. Ne jamais retirer les vignettes et ne pas les laisser s'encrasser. Attention : risque de pincement Un contact pendant le fonctionnement peut coincer la main...
-
Page 15: Important Notes On Handling And Use
Important Notes on Handling and Use This machine is a precision device. To ensure the full performance of this machine, be sure to observe the following important points. Failure to observe these may not only result in loss of performance, but may also cause malfunction or breakdown. This Machine Is a Precision Device Handle carefully, and never subject the machine to impact or excessive force. -
Page 17: Chapter 1 Introduction
Chapter 1 Introduction... -
Page 18: About This Machine
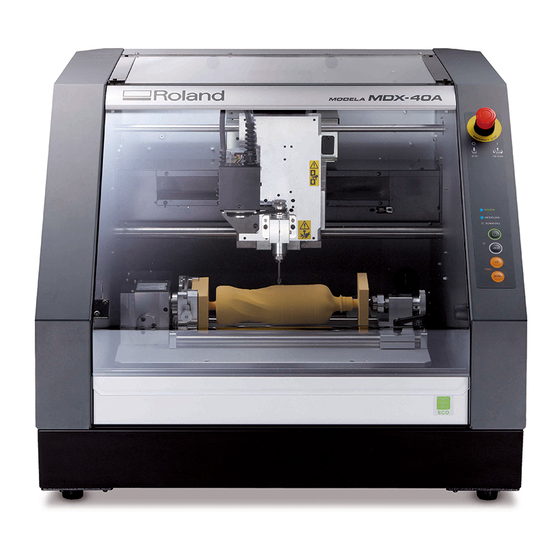
1-1 About This Machine What You Can Do with This Machine This is a high-speed, high-efficiency modeling machine. You can cut three-dimensional text and shapes by outputting data from the program included with the machine or from the CAD program you're using. Operation Screen To make the settings for cutter movement and the cutting-start location, you use the Windows-based driver. -
Page 19: Part Names And Functions
1-1 Machine Feature Part Names and Functions Front View Emergency stop switch If you press this in an emergency, the machine operation stops and the power turns off. Spindle Operation buttons You use this to switch the sub power on and off and to move the tool up and down. -
Page 20: Side View
1-1 Machine Feature Side view Expansion connector Sensor connector Connect the supplied sensor cable to this connector. USB connector Connect a USB cable (sold separately) to this connector. Power connector Expansion connector Connect the supplied power cord to this connector. Main Power switch This is the machine's main power switch. - Page 21 1-1 Machine Feature Operation panel screen To make the settings for cutter movement and the cutting-start location, you use the Windows-based driver. To operate the machine, display the operation panel screen. X-, Y-, and Z-axis coor- XYZ movement buttons dinates These move the spindle in the X, These display the present co- Y, and Z directions.
-
Page 22: The Machine's Coordinate Systems
1-1 Machine Feature The Machine's Coordinate Systems You can freely change the locations of the origin points for this machine. The coordinate values for the axes are referenced to these origin points. Changing the locations of the origins makes the coordinate values change as well. This kind of coordinate system is called a "workpiece coordinate system."... -
Page 23: Chapter 2 Preparation
Chapter 2 Preparation... -
Page 24: Included Items
The following items are included with the machine. Make sure they are all present and accounted for. Power cord Collet Sensor Hexagonal wrench Hexagonal screw drivers Spanners Roland Software Package MODELA Player4 User's Manual (this document) CD-ROM CD-ROM Roland Software Package MODELA Player 4... -
Page 25: Installation
2-2 Installation Installation Environment Never install in a location exposed to water or to gasoline, thinner, or any other WARNING flammable material. Current leakage may cause electrical shock, electrocution, or combustion and fire. WARNING Never place gasoline, alcohol, thinner, or any other flammable material near the machine. -
Page 26: Removing The Retainers
2-2 Installation Removing the Retainers Retainers are attached to the machine to protect it from vibration during transportation. When installation is complete, remove these. CAUTION Perform this task with all power switches left switched off. Otherwise sudden movement of the machine may cause injury. Remove all retainers. -
Page 27: Connecting The Power Cord
2-2 Installation Connecting the Power Cord Do not use with any electrical power supply that does not meet the ratings dis- WARNING played on the unit. Use with any other power supply may lead to fire or electrocution. WARNING Ground the unit with the ground wire. Failure to do so may result in risk of electrocution in the event of a mechanical problem. -
Page 28: Installing The Windows-Based Driver And Connecting To The Computer
2-2 Installation Installing the Windows-based Driver and Connecting to the Computer Installing the driver following "Roland Software Package Installation and Setup Guide" Be sure to make the connection between the machine to the computer during the course of installing the driver. -
Page 29: Chapter 3 Operation
Chapter 3 Operation... -
Page 30: Switching The Power On And Off
3-1 Switching the Power On and Off Starting the System Start the machine. Close the front cover. Front cover Switch on the main power switch. The POWER light comes on. Press the Sub power button. The machine starts up, and initialization is performed. After initialization ends, the MODELING light and the VIEW light comes on and the machine is paused. -
Page 31: Switching Off The Power
Click [Printers and Other Hardware], then click [Printers and Faxes]. If You're Using Windows 98/Me/2000 From the [Start] menu, click [Settings], then [Printers]. Right-click the [Roland MDX-40] printer icon. If You're Using Windows XP/2000 Click [Printing Preferences]. If You're Using Windows 98/Me Click [Properties]. -
Page 32: Emergency Stop To Ensure Safety
3-2 Emergency Stop to Ensure Safety Emergency stop switch This switch stops the machine in an emergency in order to avoid danger. Pressing the emergency stop switch immedi- ately halts operation and aborts cutting. How to Perform an Emergency Stop Press the switch. -
Page 33: Installing A Tool And Setting The Cutting-Start Location
3-3 Installing a Tool and Setting the Cutting-start Location The Locations of the Origin Points When you perform cutting using a work plate, you set three origin points: the X, Y, and Z origins. The X and Y origin points serve as the start location for cutting. You normally align the Z origin point with the surface of the workpiece. In any case, make the settings to match the size of the workpiece and the length of the cutter. -
Page 34: Setting The Cutting-Start Location
3-3 Installing a Tool and Setting the Cutting-start Location Setting the Cutting-start Location Set the Z origin point. Close the front cover. Press the VIEW button to make the VIEW light go out. Using the operation panel screen, press the button in the figure. -
Page 35: Starting Cutting
3-4 Starting Cutting CAUTION Perform dry cutting with no cutting oil. Such materials can cause fire. CAUTION Never operate if a front cover is cracked or broken. Doing so may result in injury. If the front cover is cracked, contact your authorized. Procedure Close the front cover. -
Page 36: Stopping And Pausing Cutting
3-5 Stopping and Pausing Cutting Pausing Cutting Press the VIEW button. Pressing the VIEW button moves the spindle to the left edge and the table to the front of the machine. It is possible to open the front cover while the machine is paused. Before you open the front cover, make sure that operation has stopped completely. -
Page 37: Chapter 4 Feature Reference
Chapter 4 Feature Reference... -
Page 38: Setting The Z Origin Using The Sensor
4-1 Setting the Z Origin Using the Sensor Setting the Z origin on the Workpiece Mount the sensor. Sensor Place the sensor on the workpiece. Workpiece Run the sensor cable around behind the ma- chine to the top of the table. Connect the sensor cable to the sensor con- nector. - Page 39 4-1 Setting the Z Origin Using the Sensor Click "Continue." The cutter automatically makes contact with the sen- sor, and the Z-axis origin point is set the sufface of the workpiece. Detach the sensor and sensor cable. Chapter 4 Feature Reference...
-
Page 40: Installing The Engraving Cutter
4-2 Installing the Engraving Cutter Installing a Cutter and Setting the Origin Point for Machining When using a engraving cutter, the optionally available engraving cutter and collet. Do not touch the tip of the blade with your fingers. CAUTION Doing so may result in injury. Installing a cutter and setting the Z point for machining. - Page 41 4-2 Installing the Engraving Cutter Lower the spindle and bring the tip of the collet close to the surface of the workpiece. Insert the cutter. Cutter Tool retaining screw Making the tip of the cutter touch the surface of the workpiece, and tighten the tool retaining screw.
- Page 42 4-2 Installing the Engraving Cutter Make the setting for the XY origin point. Using the operation panel screen, move the spindle to the cutting-start location. Select [Set the XY origin here]. Click [Set]. The XY origin has now been set. Chapter 4 Feature Reference...
-
Page 43: Chapter 5 Appendix
Chapter 5 Appendix... -
Page 44: Maintenance
5-1 Maintenance Daily Care This section describes the maintenance methods for day-to-day care of the machine. Never use an air gun (blower) to remove cuttings. WARNING Using an air gun (blower) may blow cuttings inside the machine, creating a fire hazard. WARNING Never use gasoline, alcohol, thinner, or any other flammable material. -
Page 45: What To Do If
Contact your When the VIEW light is on, cutting does not start even when authorized Roland DG Corp. dealer or service center. data is sent. Press the VIEW button to cancel the paused state. - Page 46 Either wait contact your authorized Roland DG Corp. dealer or ser- until the operation ends or cancel the paused state, then vice center.
-
Page 47: Locations Of The Power Rating And Serial Number Labels
5-3 Locations of the Power Rating and Serial Number Labels Serial Number This is require when you seek mainte- nance, servicing, or support. Never peel off the label or let it get dirty. Power Rating Use an electrical outlet that meets the requirements for voltage, frequency, and amperage given here. -
Page 48: Specifications
35 to 80 % (no condensation) Accessories Power cord, collet, sensor, hexagonal wrench, hexagonal screw drivers, span- ners, Roland Software Package CD-ROM, MODELA Player4 CD-ROM, user's manual, Roland Software Package installation and setup guide, MODELA Player4 installation and setup guide Chapter 5 Appendix... -
Page 49: Expansion Connector Specification
5-4 Specifications Expansion Connector Specification +24V Compatible plug / 2W Terminals If (max) = 1A Ic (max) = 150mA Use only a triple-contact plug of the size described above. This circuit is activated when the spindle motor is in operation. About expansion connector specification Use within the rated range shown above. - Page 52 Roland may change the specifications of this Software or its material without notice. Roland shall not be liable for any damage that may caused by the use of the Software or by exercise of the right licensed by this agreement.