Advertisement
NeW
110-1033
Application
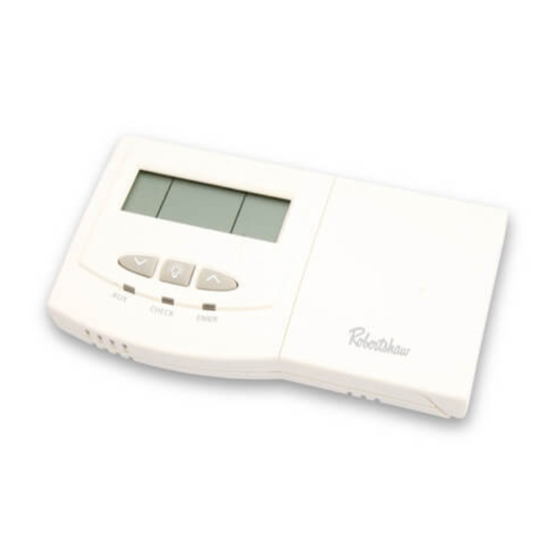
The Robertshaw 9560 is a multi-stage auto changeover thermostat
designed to control 24 VAC heat pump systems up to 2 stage heat and 2
stage cool. The 9560 requires the use of a common wire.
Features
• Multi-stage control
• Auto changeover [deadband adjustable from 2°F to 8°F (1.0°C - 4.5°C)]
• Large back lit display
• Adjustable 1
• Compressor short cycle protection
• Adjustable fan delay on cooling
• LED indication of system status
• Zone system compatible as a master thermostat
• Battery-free EEPROM memory retention
• Optional temperature limiting settings
• Fahrenheit/Celsius display option
• Adjustable from 45°F to 90°F (7°C - 32°C)
• Quick wire terminal block
®
and 2
stage temperature differential
ST
ND
9560
H
HEAT PUMP
2 Heat / 2 Cool
with Auto Changeover
User's Manual
Quick Start
Installation
1
DELUXE
NON-PROGRAMMABLE
THERMOSTAT
2
Advertisement
Table of Contents

Related Manuals for Robertshaw 9560


Summary of Contents for Robertshaw 9560
-
Page 1: Quick Start
Application The Robertshaw 9560 is a multi-stage auto changeover thermostat designed to control 24 VAC heat pump systems up to 2 stage heat and 2 stage cool. The 9560 requires the use of a common wire. Features • Multi-stage control •... -
Page 2: Step 1: Replacing Existing Thermostat
IMPORTANT SAFETY INFORMATION WARNING: • Always turn off power at the main power source by unscrewing fuse or switching circuit breaker to the off position before installing, removing, cleaning, or servicing thermostat. • Read all the information in this manual before installing or program- ming this thermostat. -
Page 3: Installing
If you have any ques- tions, call Robertshaw technical support at 1-800-445-8299. Step 2: Installing Model 9560 Thermostat NOTE: FOR NEW INSTALLATIONS, MOUNT THERMOSTAT ON INSIDE WALL, FIVE FEET ABOVE THE FLOOR. DO NOT... - Page 4 4. Remove the cover using a coin or screwdriver (Figure 3). Set aside. Figure 3 5. Place thermostat against the wall at desired location. Make sure wires will feed through opening (Figure 4) on base of thermostat. 6. Mark placement of mounting holes (Figure 4). Set base aside. Mounting Holes WIRING OPENING...
- Page 5 Insert wires into terminal strip (Figure 5) matching the label to the corresponding terminal (see Wiring Diagrams below). Tighten screws. 13. Make sure wire connections are secure. 14. Push access wire back through opening. Figure 5 Wiring Diagrams for 9560...
- Page 6 TERMINAL LEGEND - 9560 TERM EQUIPMENT TO CONNECT REQ? TERMINAL FUNCTION 24VAC common connection For input of 24VAC common side of transformer System fault indicator connection For input of system fault indicator (if present) 24VAC hot connection For input of 24VAC hot side...
-
Page 7: Step 3: Testing The Thermostat
Cut the J3 jumper to enable temperature limiting WIRING OPENING RESET NORMAL EMER HEAT Figure 7 17. Turn on power to system. Test thermostat as described in the following section. Step 3: Testing the Thermostat WARNING: DO NOT SHORT (JUMPER) ACROSS TERMINALS OF GAS VALVE OR SYSTEM CONTROL TO TEST OPER- ATION. - Page 8 3. Put the AUTO-HEAT-OFF-COOL switch into the OFF position. The air conditioning system should turn off. 4. Put the AUTO-HEAT-OFF-COOL switch into the HEAT position. 5. Press the button until the temperature setting is at least 3 degrees above room temperature.
- Page 9 Step 4: Customizing the Thermostat Settings System Cool: The thermostat controls the cooling. Off: The heating and cooling systems are off. Heat: The thermostat controls the heat. AUTO:The thermostat automatically selects heat or cool depending on the temperature. Auto: Equipment controls the fan. On: The fan operates continuously.
-
Page 10: Led Indicators
LED Indicators The Robertshaw 9560 uses three LED indicators (in addition to icons on the LCD display) to indicate functionality of the thermostat. When illumi- nated, the right red LED indicates that the thermostat is calling for emer- gency heat. -
Page 11: Reset
Backlit Display This thermostat is equipped with a backlight to make nighttime tempera- ture adjustments quick and easy. Press the button to activate the backlight. The backlight will turn off after about 15 seconds of inactivity. Emergency Heat The Emergency Heat switch is located on the bottom right corner. To activate emergency heat, slide switch from NORMAL to EMER HEAT. -
Page 12: Two-Year Limited Warranty
Two Year Limited Warranty Climate Controls Americas warrants to the original contractor installer, or to the original consumer user, each new Robertshaw thermo- stat to be free from defects in materials and workmanship under normal use and service for a period of two (2) years from date of purchase. This warranty and our liability does not apply to batteries or merchandise that has been damaged by misuse, neglect, mishandling, alterations, improper Climate...