
Related Manuals for Fisher ID Excel


Summary of Contents for Fisher ID Excel
- Page 1 ID Excel Target I.D. Metal Detector Operating Manual F I S H E R R E S E A R C H L A B O R A T O R Y...
-
Page 2: Table Of Contents
CONTENTS About Your Detector ............... pg. 1 Setting Up ................. pg. 2 Control Panel ................pg. 4 Factory Preset Mode .............. pg. 6 4 Tone Audio System ............... pg. 7 Pinpointing ................pg. 7 LCD Identification System ............pg. 8 Auto Ground Balance ............. -
Page 3: About Your Detector
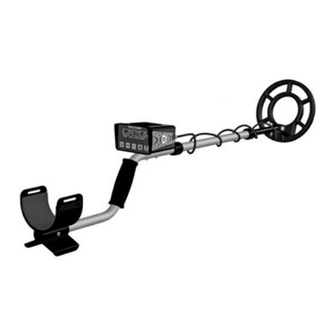
ABOUT YOUR DETECTOR Your ID Excel is the hottest digital technology on the market. It was designed to give you maximum performance, superior target separation, and a 4 tone audio ID - all in an easy to use, lightweight package. -
Page 4: Setting Up
SETTING UP Your Fisher ID Excel is built to last for years. Handle it carefully, care for it regularly, and it will give you years of dependable service. The ID Excel requires little assembly. 1. Unpack your ID Excel carefully and save the carton: it may come in handy if you ever have to return the instrument for service. - Page 5 NOTE: Remember, the longer the shaft, the more you’ll have to bend your elbow to keep the coil off the ground and the sooner your arm will get tired. The ID Excel is balanced for comfortable searching in a tight semicircle around the front of the operator.
-
Page 6: Control Panel
CONTROL PANEL The ID Excel control panel is an all new digital I/O System. The LCD Display provides you with a constant control readout showing you all of your current settings. 1. The POWER button turns the unit ON and OFF. One of the first things you will notice when you turn on your ID Excel is the battery level display. - Page 7 CONTROL PANEL A. The DISCRIMINATION control can be varied from a setting of -36 to +22 with the arrow buttons when the DISC icon is flashing. DISCRIMINATION CHART (APPROXIMATE) LOW-MID TONE FOIL MID-HIGH TONE HIGH TONE NICKELS TONE IRON PULL TABS BRASS ZINC PENNY...
-
Page 8: Factory Preset Mode
FACTORY PRESET MODE Fisher recommends that for a quick start setup and while you are learning to hunt with your ID Excel that you use the factory preset mode. Factory preset mode can be set by pressing the MENU button until the FP icon fl ashes on the LCD display. When the FP appears, press and hold the P/P (Pinpoint) button until you hear a brief tone. -
Page 9: Tone Audio System
The four-tone audio system provides you with more information per sweep, acting as a target I.D. system in the “discrimination” mode. While sweeping the ID Excel search coil over a target, you will hear one of four tones: LOW TONE = Iron objects (ferrous) -
Page 10: Lcd Identification System
LCD IDENTIFICATION SYSTEM The LCD will also show you an indication of the type of target you have found, in conjunction with the audio tones, by showing you a number preceded by a “-” or “+” sign. The target identification system works as follows: When in either search mode (ALL METAL or DISC), a target will produce a number between 0 and 36 indicating target... -
Page 11: Auto Ground Balance
AUTO button and hold it for about 2 seconds. Then, while still holding the AUTO button down, lift the coil about 6 inches off the ground, hold for a second, and release the button. The ID Excel will give you a brief tone to let you know the ground balance has been achieved. -
Page 12: Additional Features
CONSTANT CONTROL READOUT: Unlike many digital detectors, the ID Excel LCD shows you the control settings at all times while in the search mode. The control icons are similar to the knobs of older detectors, constantly showing where the settings are at in one easy glance. -
Page 13: Searching
SEARCHING Good search techniques are every bit as important as having a good detector. 1. Once your controls are properly set, press and release the P/P touch pad, and move into your search position. Begin your search by walking slowly and sweeping the search coil in a tight semicircle. - Page 14 Unlike other metal detectors, the discrimination settings have little if any effect on the depth capability of the ID Excel. Depth is also determined by the size, shape and conductivity of the target as well as the sensitivity setting of the ID Excel.
-
Page 15: Battery Replacement
BATTERY REPLACEMENT Battery replacement is simple with the ID Excel drop-in battery compartments: just pop the doors open. Two 9-volt transistor batteries are located in separate compartments at the rear of the housing. When it’s time to replace the batteries, always replace both of them. -
Page 16: Maintenance
MAINTENANCE Your ID Excel doesn’t require a lot of care. It’s built with high-quality materials. But there are a few things you should do to keep it in peak operating condition. 1. If you’re not going to be using it for a while, take the batteries out. -
Page 17: Specifications
1. Subject to improvement or modification without notice. 2. Approximate. 3. The ID Excel disassembles to fit into an optional carrying case measuring approximately 6"x 21" x 15". 4. The ID Excel is a motion detector in the All Metal and Target ID modes. - Page 20 Our detectors are durable, dependable, and search deeper. REPUTATION Fisher produced the first patented metal detector in 1931. For over 70 years, the Fisher logo has been a mark of excellence. LIFETIME WARRANTY Fisher believes in the products we produce and backs this belief with a Limited Lifetime Warranty for a Lifetime of Service &...