
Related Manuals for Fisher M-Scope M-96


Summary of Contents for Fisher M-Scope M-96
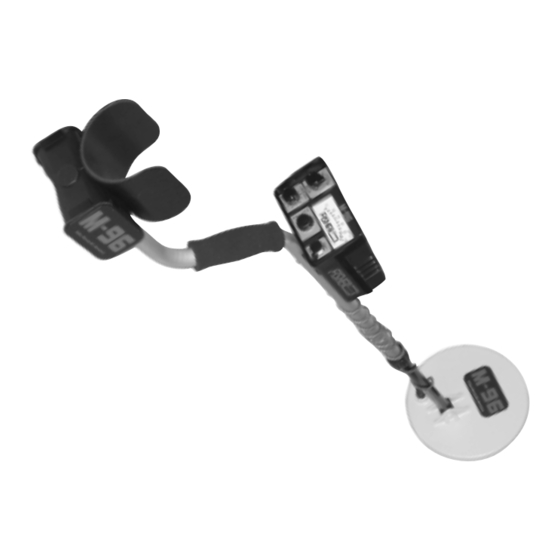
- Page 1 M-96 Value, Pedestal and Box Locator Operating Manual F I S H E R R E S E A R C H L A B O R A T O R Y...
-
Page 2: Table Of Contents
CONTENTS About Your M-96 ..............pg. 1 Condensed Operating Instructions ........pg. 2 Factory Preset ‘Turn-On-and-Go’ Marks ......pg. 2 Start-Up Procedure ............. pg. 4 Setting Up................. pg. 6 Fitting The Detector To the Operator ........ pg. 6 Normal Mode ..............pg. 7 High Mode ................ -
Page 3: About Your
Adjusting these knobs gives the operator maximum depth while eliminating annoying ground effects, usually caused by mineralization in the soil. The M-96 features state-of-the-art, surface-mount electronics in a sealed control housing. The Fisher M-96 offers a easy, uncomplicated method of finding buried metallic objects. -
Page 4: Condensed Operating Instructions
CONDENSED OPERATING INSTRUCTIONS FACTORY PRESET ‘TURN-ON-AND-GO’ MARKS Your Fisher M-96 is fairly simple to operate, especially when compared to other metal detectors. Even so, we strongly recommend that you read this entire manual. You’ll be able to tune your M-96 to your specific needs and conditions. - Page 5 CONDENSED OPERATING INSTRUCTIONS 5. With the stem length properly adjusted, wrap the search coil cable snugly around the lower stem and the upper handle. Leave just enough slack near the coil to allow it to be tilted completely backward and forward. NOTE: A loose cable near the search coil may cause false signals, but don’t wrap it so tightly that it pulls against the housing or the coil.
-
Page 6: Start-Up Procedure
CONDENSED OPERATING INSTRUCTIONS START-UP PROCEDURE Watch the meter (and listen Set Mode Knob to the speaker) for to NORMAL indications of a target. Remove protective plug and insert the Press the headphone plug to Set GROUND RETUNE button hear target signals. control to 5. - Page 7 CONDENSED OPERATING INSTRUCTIONS 10. The two knobs can be adjusted with your thumb without removing your hand from the grip, particularly if you’re right handed. Set the controls of the MODE and GROUND switches to the red preset marks: NORMAL for the MODE control and 5 for the Ground control.
-
Page 8: Setting Up
SETTING UP Your search position should be comfortable and relaxed, with the detector grasped loosely in your hand. FITTING THE DETECTOR TO THE OPERATOR 1. Start by gripping the foam hand grip and letting your arm hang comfortably by your side. 2. -
Page 9: Normal Mode
SETTING UP NORMAL MODE The NORMAL MODE of operation is generally used when searching for larger objects, such as manhole covers, telephone pedestals in the snow and valve boxes. The NORMAL MODE, which is marked in red, is also used for locating smaller, shallower objects. -
Page 10: High Mode
SETTING UP HIGH MODE 1. Rest the search coil on the ground in an area you are reasonably sure is free of metal objects. 2. After going through BAT test in the NORMAL MODE, turn the MODE knob to HIGH. 3. -
Page 11: Control Panel
CONTROL PANEL Battery Condition Signal Strength Meter MODE Knob Headphone Jack with ON/OFF GROUND RETUNE Button protective plug inserted Knob On/Off GROUND Knob The ON/OFF GROUND Rejection Knob, when turned fully counterclockwise, clicks into the off position, turning the detector off. By turning the knob clockwise, the detector is turned on. -
Page 12: Headphone Jack
CONTROL PANEL HEADPHONES Jack The HEADPHONES Jack is located to the right of the RETUNE Button. A plastic plug can be inserted into this jack to keep dirt and water out when not in use. SEARCH METHODS It’s a good idea to establish a systematic search pattern for your selected area. -
Page 13: Helpful Hints
SEARCH METHODS HELPFUL HINTS Raising the coil vertically in the air is another method of reducing the target size (as seen by the detector) and pinpointing the target. Because the area of greatest sensitivity is in the center of the search coil, it isvery easy to pinpoint the location of any metallic object, large or small. -
Page 14: Pinpointing
PINPOINTING Accurate pinpointing with the M-96 takes some practice but not much. With a little experience, you should be able to pinpoint buried targets in just a few seconds. 1. Once the presence of a buried target is indicated by a sharp increase in the audio signal and needle movement, continue moving the search coil from side-to-side across the target area in a narrower and narrower search pattern. -
Page 15: Changing Batteries
CHANGING BATTERIES To change the batteries, slide the side covers on the battery housing located underneath the arm rest in the direction of the arrows. Remove the battery holders one at a time. Replace all 6 AA cells, making sure that each one is inserted with polarity (+ or -) in the same direction as the ones you remove. -
Page 16: Specifications
SPECIFICATIONS Operating Environment +33° F to +120° F (0 to 50° C) ....with carbon zinc batteries -4° F to +120° F (-20 to 50° C) ....... with alkaline batteries Search coil submersible in water Operating Frequency of Search Coil ........4.5 KHz Sensitivity ............ - Page 18 R E P U T A T I O N Fisher produced the first patented metal detector in 1931. For over 70 years, the Fisher logo has been a mark of excellence. 2 - Y E A R W A R R A N T Y...