
Related Manuals for Samsung MM-N7


Summary of Contents for Samsung MM-N7
- Page 1 MICRO COMPONENT SYSTEM WITH REMOTE CONTROL MM-N7 Instruction Manual On/Standby Power Tuner Surround /Band Timer Timer AI Off/Sleep On/Off /Clock Mono/ST Program Tape CD Repeat /Set Shuffle Counter TAPE VOL. Tuning Mode VOL.
-
Page 2: Installing Your Micro Component System Safety Warnings
Safety Warnings Use of controls, adjustments or performance of procedures other than those specified herein CLASS 1 LASER PRODUCT may result in hazardous radiation exposure. KLASSE 1 LASER PRODUKT LUOKAN 1 LASER LAITE CAUTION-INVISIBLE LASER RADIATION KLASS 1 LASER APPARAT WHEN OPEN AND INTER LOCKS DEFEATED, PRODUCTO LASER CLASE 1 AVOID EXPOSURE TO BEAM. -
Page 3: Table Of Contents
Contents You have just purchased a SAMSUNG micro component system. Please take the time to read these instructions, as they will enable you to set up your player easily and take full advantage of its features. NSTALLING ICRO OMPONENT YSTEM Safety Warnings ........................... -
Page 4: Where To Install Your Micro Component System
Where to Install Your Micro-Component System Connecting the Loudspeakers To take full advantage of your new MICRO component system, The loudspeaker connector terminals are located on the rear of the follow these installation instructions before connecting the unit. system (red and black tabs). There are four terminals on the system: Install the system on a flat, stable surface. -
Page 5: Connecting An Am(Mw)/Lw Aerial
Connecting the AM(MW)/LW Aerial Connecting the FM Aerial How to connect a COAXIAL TYPE areial. The AM(MW)/LW aerial (for long and medium waves) can be: Connect a 75Ω antenna to the FM aerial terminal. Placed on a stable surface Plug the connector on the FM aerial supplied into the coaxial Fixed to the wall (you must first remove the base) socket (75Ω) marked FM on the rear of the system. -
Page 6: Setting The Clock
Setting the Clock Listening to a Compact Disc You can play 12 cm or 8 cm compact discs without an adapter. Your system is equipped with a clock which allows you to turn your system on and off automatically. You should set the clock: When you purchase the Micro component system Select the CD function by pressing CD on the front panel. -
Page 7: Precautions When Using Compact Discs
Precautions When Using Compact Discs Programming the Order of Playback You can decide for yourself: To guarantee hours of enjoyable listening with your compact The order in which you listen to the tracks discs: The tracks to which you do not wish to listen This feature can be combined with the Repeat function. -
Page 8: Checking And Changing Programmed Tracks
Checking and Changing Programmed Tracks Searching for and Storing the Radio Stations You can check and change your selection of tracks at any time. You can store up to: 15 FM stations You must have selected at least one track. 8 MW stations 7 LW stations Press STOP ( ) once if you have started listening to the... -
Page 9: Selecting A Stored Station
Searching for and Storing the Radio Stations(continued) Selecting a Stored Station You can listen to a stored radio station as follows: Adjust the volume by: Pressing VOLUME + or - on the front panel Switch the system on by pressing On/Standby. Pressing the VOL. -
Page 10: Listening To A Cassette
Listening to a Cassette Selecting the Cassette Playback Mode Your micro audio system has three cassette playback modes which enable you to listen to both sides of a cassette automatically. Switch the system on by pressing On/Standby. You can select this function during playback or when the Select the TAPE function by pressing TAPE on the front panel. -
Page 11: Recording A Radio Programme
Recording a Radio Programme Repeat (A B) Function You can record a radio programme of your choice and listen to it When you select CD(TAPE) Repeat (A B) playback, the music at a later date. passages to which you were listening is repeated 3 times. Press CD( )/TAPE( ) button. -
Page 12: Timer Function
Timer Function The timer enables you to switch the system on or off at specific times. Example: You wish to wake up to music every morning. If you no longer want the system to be switched on or off automatically, you must cancel the timer. On/Standby Power Tuner... -
Page 13: Setting The System To Switch Off Automatically
Setting the System to Switch Off Automatically Equalizer While listening to a compact disc or a cassette, you can set the Your micro audio system is equipped with a preset equalizer that system to switch off automatically. enables you to choose the most appropriate balance between treble Example: You wish to go to sleep to music. -
Page 14: About Rds Broadcasting
About RDS broadcasting This unit has the RDS(Radio Data System) function, which enables for About "PS NAME" MODE the various information such as broadcasting station, radio text, time and Displays the name of broadcasting station. 17 types of programs(News, Rock, Classic, etc.) to be received from the FM RDS station together with the normal radio signal. -
Page 15: Pty(Program Type) Indication And Pty-Search Function
PTY(Program Type) indication and PTY-SEARCH function The PTY information is composed of an identification symbol, which If the PTY MODE which agrees with the PTY MODE selected in helps the FM radio to recognize the program type of each FM the course of auto-search, isn't received, it is returned to the station. -
Page 16: Power Surround Function
Power Surround function Connecting to an External Source This machine is equipped with the function of Power Surround which The auxiliary input can be used to take advantage of the sound amplifies bass treble output to twice as much for powerful real quality of your micro audio system when listening to other surround-sound. -
Page 17: Safety Precautions
Your warranty details A clear description of the problem Then contact your local dealer or SAMSUNG after-sales service. Do not place heavy items on the Do not remove any equipment panels. power cord. Power cord damage... -
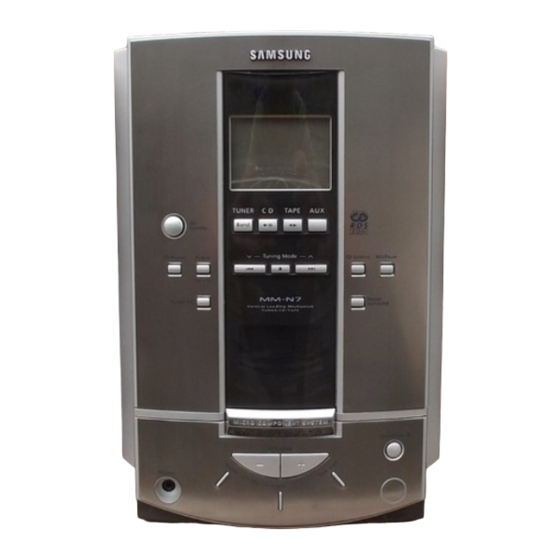
Page 18: Front Panel View
Front Panel View Push Open TUNER TAPE Standby Band Repeat CD Repeat CD Synchro REC/Pause Tuning Mode Power Preset EQ Surround Open/Close VOLUME Phones 1. Function selection buttons 10. Push Open 2. On/Standby 11. AUX 3. CD Repeat 12. REC/Pause 4. -
Page 19: Remote Control
Remote Control On/Standby Power Tuner Surround /Band Timer Timer AI Off/Sleep On/Off /Clock Mono/ST Program Tape CD Repeat Shuffle /Set Counter TAPE VOL. Tuning Mode VOL. 1. On/Standby 12. Mono/Stereo 2. AI Off/Sleep 13. Timer/Clock 3. Timer On/Off 14. Tape Counter 4. -
Page 20: Rear Panel View
Technical Specifications Rear Panel View SAMSUNG strives to improve its products at all times. Both the design specifications and these user instructions are thus subject to change without notice. TUNER Signal/noise ratio 60 dB Usable sensitivity 6 dB Total harmonic distortion 1.5%... - Page 21 THIS APPLIANCE IS MANUFACTURED BY: ELECTRONICS AH68-00349B...