
Related Manuals for JVC KD-R716


Summary of Contents for JVC KD-R716
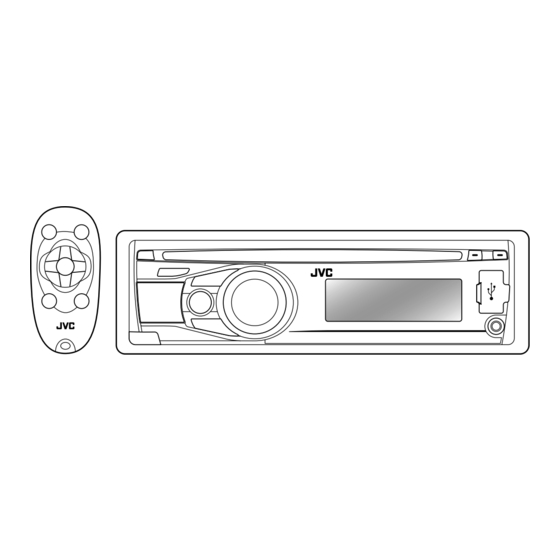
- Page 1 ENGLISH KD-R716 CD RECEIVER / For canceling the display demonstration, see page 4. / For installation and connections, refer to the separate manual. INSTRUCTIONS GET0648-001B [U/UH]...
-
Page 2: How To Read This Manual
Thank you for purchasing a JVC product. Please read all instructions carefully before operation, to ensure your complete understanding and to obtain the best possible performance from the unit. IMPORTANT FOR LASER PRODUCTS 1. CLASS 1 LASER PRODUCT 2. CAUTION: Do not open the top cover. There are no user serviceable parts inside the unit; leave all servicing to qualified service personnel. -
Page 3: Table Of Contents
How to attach/detach the control CONTENTS panel How to read this manual How to attach/detach the control panel How to reset your unit How to forcibly eject a disc Canceling the display demonstration How to reset your unit Setting the clock Your preset adjustments will also be erased (except Preparing the remote controller... -
Page 4: Canceling The Display Demonstration
Canceling the display demonstration Turn on the power. Select <DEMO OFF>. [Hold] (Initial setting) Finish the procedure. Setting the clock Turn on the power. [Hold] (Initial setting) Select <CLOCK>. Select <CLOCK SET>. Adjust the hour. Adjust the minute. Finish the procedure. ENGLISH... -
Page 5: Preparing The Remote Controller (Rm-Rk50)
Preparing the remote controller (RM-RK50) Warning (to prevent accidents and When you use the remote controller for the first time, pull out the insulation sheet. damage): • Do not install any battery other than CR2025 or its equivalent. • Do not leave the remote controller in a place (such as dashboards) exposed to direct sunlight for a long time. -
Page 6: Basic Operations
Basic operations Ejects the disc Control dial Loading slot Display window Auxiliary input jack Detaches the panel Returns to the previous menu USB (Universal Serial Bus) Remote sensor input terminal • DO NOT expose to bright sunlight. When you press or hold the following button(s)... Remote Main unit General operation... -
Page 7: Listening To The Radio
Remote Main unit General operation controller Selects the sound mode. • Enters tone level adjustment directly ( 22) if pressed and held EQ/BASS-TRE on the main unit. • Enters “Call Menu” screen or answers incoming call when the unit — rings. -
Page 8: Selecting A Preset Station
Manual presetting (FM/AM) Title assignment You can preset up to 18 stations for FM and 6 You can assign titles up to 30 station stations for AM. frequencies (FM and AM) using 8 characters (maximum) for each title. Ex.: Storing FM station of 92.50 MHz into preset •... -
Page 9: Listening To A Disc
Listening to a disc Ÿ ] Turn on the power. All tracks will be played repeatedly until you change the source or eject the disc. Stopping playback and ejecting the disc “NO DISC” appears. ] Select your desired item. Remove the disc, then press MP3/WMA: Select your desired folder, / SOURCE to listen to another then the desired track by repeating... -
Page 10: Listening To The Usb Device
• If your disc contains many tracks, searching Changing the display information take some time. Selecting the playback modes Disc title/Album name/performer (folder name)* = Track title (file name)* = Current You can use only one of the following playback modes at a time. - Page 11 ] Turn on the power. Ÿ USB input terminal USB cable from the USB memory rear of the unit and / or All tracks will be played repeatedly until you change the source or detach the USB device. If you have turned off the power (without •...
-
Page 12: Using The Bluetooth ® Device
Using the Bluetooth ® device Bluetooth is a short-range wireless radio communication technology for the mobile device such as mobile phones, portable PCs, and other devices. The Bluetooth devices can be connected without cables and communicate with each other. • Refer to pages i and ii at the end of the manual to check the countries where you may use the Bluetooth®... -
Page 13: Deleting A Registered Device
Hands- Audio Display result [Hold] Free Call Streaming CONNECT OK j ‡ ‡ [Device Name] H.FREE OK j ‡ — [Device Name] ] <BLUETOOTH> ] <NEW PAIRING> A. STREAM OK j ‡ — [Device Name] CONNCT FAIL j — — TRY CONNECT ] Enter a PIN (Personal Identification Number) code in to the unit. -
Page 14: Using A Bluetooth Mobile Phone
Connecting/disconnecting a • MISSED CALL * : Shows the list of the registered device missed calls. Go to the following step. • PHONEBOOK * : Shows the name/ phone number of the phonebook [Hold] registered in the unit or from the connected phone * . -
Page 15: Receiving A Call
How to enter phone number 1 Turn the control dial to select a number. 2 Press 4 /¢ to move the entry ] Show the search menu (A to Z, 0 to position. 9, and OTHERS). 3 Repeat steps 1 and 2 until you finish The first character of the first contact on entering the phone number. -
Page 16: Using A Bluetooth Audio Player
Using the remote controller When <AUTO ANSWER> is activated..The unit answers the incoming calls 5 U / D ∞ / : Answers calls automatically, 2 R / F 3 / • Press or the control dial to answer the SOURCE incoming call when <AUTO ANSWER>... -
Page 17: Changing The Bluetooth Settings
(or reset the unit). HW ERROR : Reset the unit and try the operation again. If “HW ERROR” appears ] “REPEAT” j “RANDOM” again, consult your nearest JVC car audio dealers. Bluetooth Information: REPEAT If you wish to receive more information about... - Page 18 Setting item Selectable setting, [ Initial: Underlined AUTO CNNCT • LAST : The connection is established automatically with the last connected Bluetooth device when you turn on the unit. • OFF : The unit does not connect the Bluetooth device automatically.
-
Page 19: Listening To The Ipod/Iphone
Listening to the iPod/iPhone You can connect the iPod/iPhone using the USB 2.0 cable (accessory of the iPod/iPhone) to the USB input terminal on the control panel or USB cable from the rear of the unit. There are three control terminals: <HEAD MODE>, control by this unit; <IPOD MODE>, control by the connected iPod/iPhone;... -
Page 20: Selecting The Playback Modes
The following is not applicable in <EXT MODE>. You can also use the search menu (A to Z and 0 to 9) to scroll through the desired menu. Starts playback or pauses/ resumes playback After you have selected your desired menu (in •... -
Page 21: Listening To The Other External Components
When operating an iPod, some operations • To return to the previous menu, press BACK. may not be performed correctly or as intended. In this case, visit the following JVC web site: <http://www.jvc.co.jp/english/car/> (English website only). Listening to the other external... -
Page 22: Selecting A Preset Sound Mode
Connecting an external component to the AUX input jack Portable audio player, etc. 3.5 mm stereo mini plug (not supplied) Selecting a preset sound mode You can select a preset sound mode suitable Storing your own sound mode for the music genre. You can store your own adjustments in memory. -
Page 23: Menu Operations
Menu operations Repeat step 2 if necessary. [Hold] • To return to the previous menu, press BACK. • To exit from the menu, press DISP or MENU. Category Menu item Selectable setting, [ Initial: Underlined DEMO • DEMO ON : Display demonstration will be activated Display demonstration automatically if no operation is done for about 20 seconds. - Page 24 Category Menu item Selectable setting, [ Initial: Underlined SSM * • SSM 01 – 06 : For settings, Strong-station • SSM 07 – 12 Sequential • SSM 13 – 18 Memory MONO * • MONO ON : Activate monaural mode to improve FM Monaural mode reception, but stereo effect will be lost.
- Page 25 Category Menu item Selectable setting, [ Initial: Underlined SUB.W FREQ * • LOW : Frequencies lower than 72 Hz are sent to the Subwoofer subwoofer. cutoff frequency • MID : Frequencies lower than 111 Hz are sent to the subwoofer. •...
-
Page 26: More About This Unit
More about this unit Basic operations • When a disc is inserted upside down, “PLEASE” and “EJECT” appear alternately on the display. General Press 0 to eject the disc. • If you turn off the power while listening to • If the ejected disc is not removed within a track, playback will start from where it had 15 seconds, it is automatically inserted into been stopped previously next time you turn... - Page 27 Using these discs under high temperature – WMA files which are not based upon or high humidity may cause malfunctions or Windows Media® Audio. damage to the unit. – WMA files copy-protected with DRM. – Files which have data such as AIFF, ATRAC3, Playing an MP3/WMA disc etc.
-
Page 28: Bluetooth Operations
• This unit can play back MP3 files recorded in • If you turn off the unit, detach the control VBR (variable bit rate). panel, or unplug the USB Bluetooth Adapter • The maximum number of characters for folder during a phone call conversation, the and file names is 25 characters (including Bluetooth connection is disconnected. -
Page 29: Maintenance
Maintenance How to clean the connectors To keep discs clean Frequent detachment will deteriorate the A dirty disc may not play connectors. correctly. If a disc does become dirty, wipe it with a soft cloth To minimize this possibility, periodically wipe the connectors with a cotton swab or cloth in a straight line from center to moistened with alcohol, being careful not to... -
Page 30: Troubleshooting
( If “PROTECT” does not disappear, consult your JVC car audio dealer or a company supplying kits. The unit does not work at all. - Page 31 Symptom Remedy/Cause Disc cannot be played back. • Use a disc with MP3/WMA tracks recorded in a format compliant with ISO 9660 Level 1, Level 2, Romeo, or Joliet. • Add the extension code <.mp3> or <.wma> to the file names.
- Page 32 Symptom Remedy/Cause Tracks/folders are not played The playback order is determined by the file name. back in the order you have Folders with numbers on the initial of their names intended. are sorted in numerical order. However, folders with no numbers on the initial of their names are sorted according to the file system of the USB device.
- Page 33 ( 28). JVC bears no responsibility for any loss of data in an iPod/iPhone and/or USB mass storage class device while using this System. • Microsoft and Windows Media are either registered trademarks or trademarks of Microsoft Corporation in the United States and/or other countries.
-
Page 34: Specifications
Specifications Maximum Power Output: Front/ 50 W per channel Rear: Continuous Power Output (RMS): Front/ 20 W per channel into 4 Ω, 40 Hz to Rear: 20 000 Hz at no more than 1% total harmonic distortion. Load Impedance: 4 Ω (4 Ω to 8 Ω allowance) Tone Control Range: Bass: ±12 dB (60 Hz, 80 Hz, 100 Hz, 200 Hz) - Page 35 Type: Compact disc player Signal Detection System: Non-contact optical pickup (semiconductor laser) Number of Channels: 2 channels (stereo) Frequency Response: 5 Hz to 20 000 Hz Dynamic Range: 96 dB Signal-to-Noise Ratio: 98 dB Wow and Flutter: Less than measurable limit MP3 Decoding Format: (MPEG1/2 Audio Layer 3) Max.
- Page 36 Having TROUBLE with operation? Please reset your unit Refer to page of How to reset your unit EN, TH © 2009 Victor Company of Japan, Limited 1209DTSMDTJEIN...
-
Page 37: Removing The Unit
โปรดปรึ ก ษาตั ว แทนจำหน่ า ยเครื ่ อ งเสี ย งติ ด รถยนต์ ของท่ า นหรื อ บริ ษ ั ท ที ่ จ ั ด หาชุ ด อุ ป กรณ์ ใ ห้ regarding installation kits, consult your JVC car audio dealer or a company supplying kits. รายการอุ ป กรณ์... -
Page 38: Troubleshooting
เพื ่ อ ใช้ เ ชื ่ อ มต่ อ ระหว่ า งเครื ่ อ งและรถ • Consult your JVC car audio dealer or a company supplying kits for details. ของคุ ณ หรื อ บริ ษ ั ท ที ่ จ ั ด ส่ ง ชุ ด อุ ป กรณ์ เ พื ่ อ ขอรายละเอี ย ด...