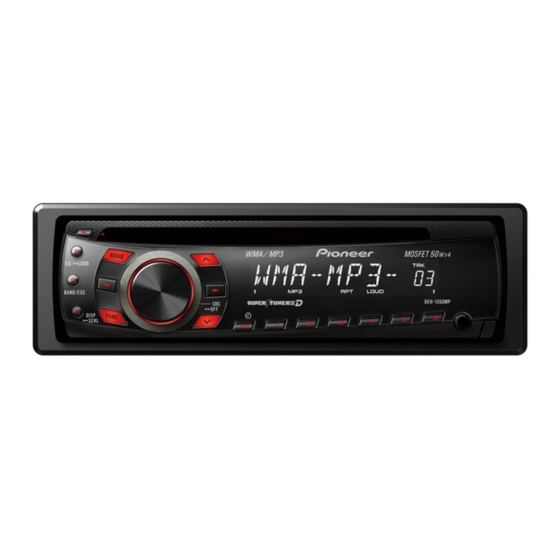
Pioneer DEH-1300MP Owner's Manual
Cd receiver, autoradio cd, radio cd
Hide thumbs
Also See for DEH-1300MP:
- Service manual (71 pages) ,
- Owner's manual (28 pages) ,
- Owner's manual (64 pages)

Related Manuals for Pioneer DEH-1300MP


Summary of Contents for Pioneer DEH-1300MP
- Page 1 CD RECEIVER AUTORADIO CD RADIO CD DEH-1300MP Owner’s Manual Mode d’emploi Manual de instrucciones...
-
Page 2: Before You Start
Section Before You Start ESTABLISH A SAFE LEVEL: Thank you for purchasing this PIONEER ! Set your volume control at a low setting. product. ! Slowly increase the sound until you can To ensure proper use, please read through this manual before using this product. -
Page 3: After-Sales Service For Pioneer Products
Pioneer Electronics (USA) Inc. CUSTOMER SUPPORT DIVISION P.O. Box 1760 Long Beach, CA 90801-1760 800-421-1404 CANADA Pioneer Electronics of Canada, Inc. CUSTOMER SATISFACTION DEPARTMENT 300 Allstate Parkway Markham, Ontario L3R 0P2 1-877-283-5901 905-479-4411 For warranty information please see the Lim-... -
Page 4: Operating This Unit
Section Operating this unit Head unit Part State Press to pause or resume play- e (pause) back. Press to cycle through all the available sources. Press and hold (source) to turn the source off. Button Button Display indication h (eject) (clock) a/b/c/d Disc loading slot... -
Page 5: Basic Operations
Section Operating this unit Important Use and care of the remote ! Do not store the remote control in high tem- control peratures or direct sunlight. ! The remote control may not function properly Using the remote control in direct sunlight. 1 Point the remote control in the direction of the ! Do not let the remote control fall onto the front panel to operate. -
Page 6: Storing And Recalling Stations For Each Band
Section Operating this unit Note Removing the front panel to protect your unit from When this unit’s blue/white lead is connected to theft 1 Press the detach button to release the front the vehicle’s auto-antenna relay control terminal, panel. the vehicle’s antenna extends when this unit’s 2 Push the front panel upward and pull it toward source is turned on. -
Page 7: Function Settings
Section Operating this unit Function settings Displaying text information Selecting the desired text information After selecting, perform the following proce- 1 Press dures to set the function. Scrolling the text information to the left 1 Press and hold (best stations memory) Notes BSM (best stations memory) automatically stores the ! Depending on the version of iTunes used to... -
Page 8: Audio Adjustments
Section Operating this unit Automatically enhances compressed audio and re- (source level adjustment) stores rich sound. (Source Level Adjustment) lets you adjust the vo- 1 Press a or b to select your favorite setting. lume level of each source to prevent radical changes (off)—... -
Page 9: Displaying The Clock
Section Operating this unit Displaying the clock # The clock display disappears temporarily when you perform other operations, but the clock display appears again after 25 seconds. Using an AUX source # AUX cannot be selected unless the auxiliary setting is turned on. For more details, refer to (auxiliary input) on the previous page. -
Page 10: Installation
Section Installation — Disconnect the negative terminal of the Connections battery before installation. — Secure the wiring with cable clamps or ad- WARNING ! Use speakers over 50 W (output value) and be- hesive tape. Wrap adhesive tape around tween 4 W to 8 W (impedance value). Do not wiring that comes into contact with metal use 1 W to 3 W speakers for this unit. -
Page 11: Power Cord
Section Installation g Red This unit Connect to terminal controlled by ignition switch (12 V DC). h Blue/white Connect to system control terminal of the power amp or auto-antenna relay control terminal (max. 300 mA 12 V DC). Note 1 Antenna input 2 Fuse (10 A) With a 2 speaker system, do not connect anything 3 Power cord input... -
Page 12: Din Front/Rear-Mount
Section Installation ! The semiconductor laser will be damaged if it overheats. Install this unit away from hot places such as near the heater outlet. ! Optimum performance is obtained when the unit is installed at an angle of less than 60°. 60°... -
Page 13: Securing The Front Panel
Section Installation Removing the unit Securing the front panel The front panel can be secured with the sup- plied screw. 1 Screw 1 Trim ring 2 Notched tab ! Releasing the front panel allows easier ac- cess to the trim ring. ! When reattaching the trim ring, point the side with the notched tab down. -
Page 14: Additional Information
Handling guideline Discs and player Use only discs featuring either of following two logos. Error messages When you contact your dealer or your nearest Pioneer Service Center, be sure to note the error message. Message Cause Action The disc is dirty. -
Page 15: Compressed Audio Compatibility
Appendix Additional Information Compressed audio Use only conventional, fully circular discs. Do not use shaped discs. compatibility File extension: .wma Do not insert anything other than a CD into the CD Bit rate: 48 kbps to 320 kbps (CBR), 48 kbps to 384 loading slot. -
Page 16: Sequence Of Audio Files
Appendix Additional Information or other networks or in other electronic con- File system: ISO 9660 Level 1 and 2, Romeo, Joliet tent distribution systems, such as pay-audio or Multi-session playback: Yes audio-on-demand applications. An indepen- dent license for such use is required. For de- Packet write data transfer: No tails, please visit Regardless of the length of blank section between the... - Page 17 Appendix Additional Information Frequency ....1 kHz Gain ......±12 dB Treble Frequency ....10 kHz Gain ......±12 dB System .......... Compact disc audio system Usable discs ......Compact disc Signal-to-noise ratio ....94 dB (1 kHz) (IHF-A net- work) Number of channels ....
- Page 18 Col.Lomas de Chapultepec, Mexico, D.F. 11000 TEL: 55-9178-4270 (02) 2521-3588 901-6 (0852) 2848-6488 Published by Pioneer Corporation. Copyright ©2010 by Pioneer Corporation. All rights reserved. Printed in Thailand Publié par Pioneer Corporation. Copyright ©2010 par Pioneer Corporation. Tous droits réservés. Imprimé en Thaïlande <KNAZX> <10F00000>...
- Page 19 REGLEMENT DES CONFLITS AUX ETATS·UNIS • Si un conflil se produit entre vous et Pioneer apres la reponse a une demande initiale faite au service de Soutlen ala clientele, vous pouvez avoir recours au Programme de resolution des plaintes de Pioneer pour resoudre Ie con flit. Ce programme vous est offert sans frals. Vous devez avoir recours au Programme de resolution des plalntes avant de vous prevaloir de vos droits ou de chercher reparation en vertu du Titre I de la loi Magnuson-Moss Warranty-Federal Trade Commission Improvement Act, 15 U.S.C.
- Page 20 Within 40 days of receiving your complaint, Pioneer will investigate the dispute and will either: (1) respond to your complaint in writing informing you what action Pioneer will take, and in what time period, to resolve the dispute; or (2) respond to your complaint in writing informing you why it will not take any action.