Table of Contents
Advertisement
QQ
3 7 63 1515 0
CD RECEIVER
DEH-1300MP
DEH-1350MP
DEH-1350MP
DEH-1350MPG
DEH-1350MP
TE
L 13942296513
DEH-1390MP
This service manual should be used together with the following manual(s):
Model No.
CX-3269
CRT4488
www
For details, refer to "Important Check Points for Good Servicing".
.
PIONEER CORPORATION
PIONEER ELECTRONICS (USA) INC. P.O. Box 1760, Long Beach, CA 90801-1760, U.S.A.
PIONEER EUROPE NV Haven 1087, Keetberglaan 1, 9120 Melsele, Belgium
PIONEER ELECTRONICS ASIACENTRE PTE. LTD. 253 Alexandra Road, #04-01, Singapore 159936
PIONEER CORPORATION 2010
http://www.xiaoyu163.com
Order No.
Mech. Module
S11.1COMP
x
ao
y
i
1-1, Shin-ogura, Saiwai-ku, Kawasaki-shi, Kanagawa 212-0031, Japan
http://www.xiaoyu163.com
8
DEH-1300MP/XNUC
/XNES
/XNES1
/XNES
Q Q
3
6 7
1 3
/XNCN5
/XNID
CD Mech. Module : Circuit Descriptions, Mech. Descriptions, Disassembly
u163
.
2 9
9 4
2 8
1 5
0 5
8
2 9
9 4
Remarks
m
co
K-ZZZ. JULY 2010 Printed in Japan
9 9
ORDER NO.
CRT4588
/XNUC
2 8
9 9
Advertisement
Table of Contents

Related Manuals for Pioneer DEH-1350MP


Summary of Contents for Pioneer DEH-1350MP
- Page 1 PIONEER CORPORATION 1-1, Shin-ogura, Saiwai-ku, Kawasaki-shi, Kanagawa 212-0031, Japan PIONEER ELECTRONICS (USA) INC. P.O. Box 1760, Long Beach, CA 90801-1760, U.S.A. PIONEER EUROPE NV Haven 1087, Keetberglaan 1, 9120 Melsele, Belgium PIONEER ELECTRONICS ASIACENTRE PTE. LTD. 253 Alexandra Road, #04-01, Singapore 159936 PIONEER CORPORATION 2010 K-ZZZ.
-
Page 2: Safety Information
http://www.xiaoyu163.com SAFETY INFORMATION 3 7 63 1515 0 CAUTION This service manual is intended for qualified service technicians; it is not meant for the casual do-it-yourselfer. Qualified technicians have the necessary test equipment and tools, and have been trained to properly and safely repair complex products such as those covered by this manual. -
Page 3: Http://Www.xiaoyu163.Com 6 7
http://www.xiaoyu163.com 3 7 63 1515 0 Laser diode characteristics Wave length : 785 nm to 814 nm Maximum output : 1 190 µW(Emitting period : unlimited) Additional Laser Caution Transistors Q101 in PCB drive the laser diodes. When Q101 is shorted between their terminals, the laser diodes will radiate beam. If the top cover is removed with no disc loaded while such short-circuit is continued, the naked eyes may be exposed to the laser beam. - Page 4 http://www.xiaoyu163.com 3 7 63 1515 0 [Important Check Points for Good Servicing] In this manual, procedures that must be performed during repairs are marked with the below symbol. Please be sure to confirm and follow these procedures. 1. Product safety Please conform to product regulations (such as safety and radiation regulations), and maintain a safe servicing environment by following the safety instructions described in this manual.
-
Page 5: Table Of Contents
http://www.xiaoyu163.com CONTENTS 3 7 63 1515 0 SAFETY INFORMATION .............................2 1. SERVICE PRECAUTIONS..........................6 1.1 SERVICE PRECAUTIONS .........................6 1.2 NOTES ON SOLDERING...........................7 2. SPECIFICATIONS.............................8 2.1 SPECIFICATIONS ............................8 2.2 DISC/CONTENT FORMAT........................10 2.3 PANEL FACILITIES ..........................11 2.4 CONNECTION DIAGRAM........................12 3. BASIC ITEMS FOR SERVICE ........................13 3.1 CHECK POINTS AFTER SERVICING .....................13 3.2 PCB LOCATIONS.............................14 3.3 JIGS LIST ..............................15... -
Page 6: Service Precautions
http://www.xiaoyu163.com 1. SERVICE PRECAUTIONS 3 7 63 1515 0 1.1 SERVICE PRECAUTIONS 1. You should conform to the regulations governing the product (safety, radio and noise, and other regulations), and should keep the safety during servicing by following the safety instructions described in this manual. -
Page 7: Notes On Soldering
http://www.xiaoyu163.com 1.2 NOTES ON SOLDERING 3 7 63 1515 0 For environmental protection, lead-free solder is used on the printed circuit boards mounted in this unit. Be sure to use lead-free solder and a soldering iron that can meet specifications for use with lead-free solders for repairs accompanied by reworking of soldering. -
Page 8: Specifications
http://www.xiaoyu163.com 2. SPECIFICATIONS 3 7 63 1515 0 2.1 SPECIFICATIONS L 13942296513 u163 DEH-1300MP/XNUC http://www.xiaoyu163.com... - Page 9 http://www.xiaoyu163.com 3 7 63 1515 0 L 13942296513 u163 DEH-1300MP/XNUC http://www.xiaoyu163.com...
-
Page 10: Disc/Content Format
http://www.xiaoyu163.com 3 7 63 1515 0 L 13942296513 2.2 DISC/CONTENT FORMAT u163 DEH-1300MP/XNUC http://www.xiaoyu163.com... -
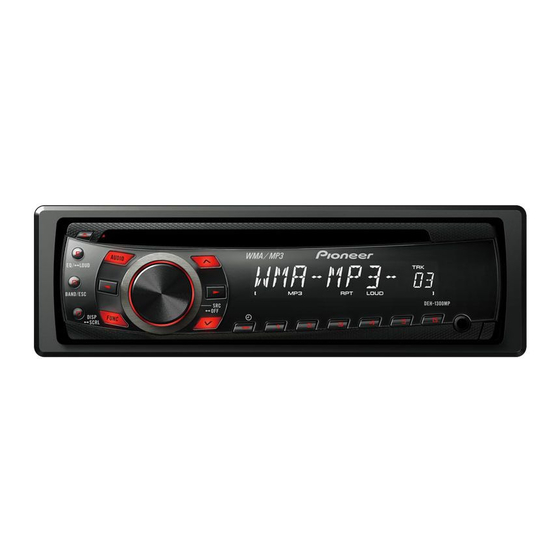
Page 11: Panel Facilities
http://www.xiaoyu163.com 2.3 PANEL FACILITIES 3 7 63 1515 0 L 13942296513 u163 DEH-1300MP/XNUC http://www.xiaoyu163.com... -
Page 12: Connection Diagram
http://www.xiaoyu163.com 2.4 CONNECTION DIAGRAM 3 7 63 1515 0 L 13942296513 u163 DEH-1300MP/XNUC http://www.xiaoyu163.com... -
Page 13: Basic Items For Service
http://www.xiaoyu163.com 3. BASIC ITEMS FOR SERVICE 3 7 63 1515 0 3.1 CHECK POINTS AFTER SERVICING To keep the product quality after servicing, please confirm following check points. r i f Confirm whether the customer complain has The customer complain must not be been solved. -
Page 14: Pcb Locations
3.2 PCB LOCATIONS 3 7 63 1515 0 CD Core Unit (S11.1Comp) Tuner Amp Unit Keyboard Unit A : DEH-1300MP/XNUC B : DEH-1350MP/XNES L 13942296513 C : DEH-1350MP/XNES1 D : DEH-1350MPG/XNES E : DEH-1350MP/XNCN5 F : DEH-1390MP/XNID Unit Number... -
Page 15: Jigs List
http://www.xiaoyu163.com 3.3 JIGS LIST 3 7 63 1515 0 - Jigs List Name Jig No. Remarks 15P FFC GGD1177 Tuner Amp Unit - CD Core Unit Test Disc TCD-782 Checking the grating L.P.F. Checking the grating (Two pieces) - Grease List Name Name Grease No. -
Page 16: Block Diagram
http://www.xiaoyu163.com 4. BLOCK DIAGRAM 3 7 63 1515 0 4.1 BLOCK DIAGRAM TUNER AMP UNIT SYS+B SWVDD3V ANTENNA JA401 IC901 EEPROM TANK MIX / IF / PLL ELECTRONIC SOURCE SE TUNL FM/AM TUNER UNIT IN2_L IC20 PML01 CD-Lch IN1_L L 13942296513 REGULATOR IC IC911 BA49181-V12... - Page 17 http://www.xiaoyu163.com 3 7 63 1515 0 SYSTEM MICRO COMPUTER IC601 (1/2) JA251 PN5043A RCA OUT P251 RCAG Q251 SL-IN SL62 IF_INA IF_INB REFA FREFA REFB FREFB LDET LOCK JA901 TUNDI TUNCK B.UP ASENS Q921 TUNDO ASENS SLOUT L_OUT B.UP POWER CONNECTOR IC301 PAL007E...
-
Page 18: Lcd
http://www.xiaoyu163.com 4.2 LCD 3 7 63 1515 0 LCD(CAW2008) L 13942296513 u163 DEH-1300MP/XNUC http://www.xiaoyu163.com... -
Page 19: Diagnosis
http://www.xiaoyu163.com 5. DIAGNOSIS 3 7 63 1515 0 5.1 OPERATIONAL FLOWCHART Power ON VDD = 5 V Pin 8 BSENS Pin 36 BSENS = L ASENS Pin 35 ASENS = L DSENS Pin 34 DSENS = L L 13942296513 Starts communication with Grille microcomputer. -
Page 20: Error Code List
http://www.xiaoyu163.com 5.2 ERROR CODE LIST 3 7 63 1515 0 Error codes When the CD drive does not work or stops during operation due to an error, the CD drive enters the Error mode and displays the causes of the error by number. This is intended to reduce nonsense calls from users and supplement the analysis and repair performed by service members. - Page 21 http://www.xiaoyu163.com Remarks 3 7 63 1515 0 Errors are not displayed for the individual mecha unit (since CD is turned off at mecha error). When TOC cannot be read, it is not recognized as an error but the operation is continued accordingly. When designing a new head unit, be sure to follow the display examples.
-
Page 22: Connector Function Description
http://www.xiaoyu163.com 5.3 CONNECTOR FUNCTION DESCRIPTION 3 7 63 1515 0 REAR ANTENNA OUTPUT 15 13 11 9 7 5 3 1 16 14 12 10 8 6 4 2 1 FL+ 9 NC 2 FR+ 10 NC 11 NC 3 FL- 12 NC 4 FR- 13 ACC... -
Page 23: Service Mode
http://www.xiaoyu163.com 6. SERVICE MODE 3 7 63 1515 0 6.1 DISPLAY TEST MODE Display test mode (1)/(2) confirm ROM correction information and the lighting of all segments of a LCD display. [To operate] Display test mode (1) Press “LEFT” and “DOWN” keys simultaneously to start resetting. Then, perform the following key operation. - Page 24 http://www.xiaoyu163.com 3 7 63 1515 0 Press “LEFT” + “DOWN” keys LCD check mode B (oblique lines) Press “AUDIO” key Press “FUNCTION” key Press “ ” key Color of key illumination : Lit in a color set as an initial value. : All off Icons Press “...
- Page 25 http://www.xiaoyu163.com [Test items] 3 7 63 1515 0 Key Illumination Icon Start display test mode. (Press " " + " " keys simultaneously to start resetting.) * Initial All off condition Turn on AUX source. (Hold down "SOURCE" key) On (an initial value) On (lighting condition of normal times) ROM correction information is displayed.
-
Page 26: Cd Test Mode
http://www.xiaoyu163.com 6.2 CD TEST MODE 3 7 63 1515 0 - Flow Chart [Key] [4] + [6] + Reset or [4] + [6] + BU + ACC Contents Test Mode In Display [CD] or [SOURCE] Source On [BAND] Power On Power On RF AMP SPINDLE... -
Page 27: Disassembly
http://www.xiaoyu163.com 7. DISASSEMBLY 3 7 63 1515 0 While the photograph shown is slightly different from this model in shape, the disassembly procedure is the same. Removing the Panel Assy (Fig.1) Remove the two hooks. Remove the two hooks and then remove the Panel Assy. Fig.1 Panel Assy Removing the CD Mechanism Module (Fig.2, 3, 4) - Page 28 http://www.xiaoyu163.com 3 7 63 1515 0 Removing the Tuner Amp Unit (Fig.5) Remove the two screws. Remove the two screws. Straighten the tabs at two locations indicated and then remove the Tuner Amp Unit. Fig.5 Tuner Amp Unit Attention of removing (Fig.6) Don't remove this screws excluding the dismantlement of the CD Mechanism Module.
- Page 29 http://www.xiaoyu163.com 3 7 63 1515 0 Disassembling the Panel Part (Fig.7, 8) 1. Remove the arm while bending the rib of the panel upward. Fig.7 2. Press the upside hook and the bottom side hook of the button at the same time, and pull out the button. Fig.8 L 13942296513 Assembling the Panel Part (Fig.9, 10, 11)
- Page 30 http://www.xiaoyu163.com 3. Fit the spring in the groove at the position shown in the figure. 3 7 63 1515 0 4. Fit the boss on the lower side of the arm in the lower hole of the panel, and then warp the rib on the panel in the direction shown in the figure and fit the boss of the arm in the panel.
- Page 31 http://www.xiaoyu163.com 3 7 63 1515 0 How to carry the mecha unit 1. Hold the designated points (shown with dashed lines) of the upper chassis and the front/rear bracket. 2. Be careful not to hold the solid line portions or the CRG mecha part or insert foreign substances, to prevent distortion. 3.
- Page 32 http://www.xiaoyu163.com How to remove the PU unit 3 7 63 1515 0 1. Create an empty-clamp state according to “How to create empty clamp state (motor drive)”. 2. Hook the feeding screw biasing spring to a tentative hooking portion (Fig 2b). Be careful not to get injured by the spring edge.
- Page 33 http://www.xiaoyu163.com 3 7 63 1515 0 L 13942296513 u163 DEH-1300MP/XNUC http://www.xiaoyu163.com...
-
Page 34: Each Setting And Adjustment
http://www.xiaoyu163.com 8. EACH SETTING AND ADJUSTMENT 3 7 63 1515 0 8.1 CD ADJUSTMENT 1) Cautions on adjustments 2) Test mode In this product the single voltage (3.3 V) is used for the This mode is used to adjust the CD mechanism module. regulator. -
Page 35: Checking The Grating After Changing The Pickup Unit
http://www.xiaoyu163.com 8.2 CHECKING THE GRATING AFTER CHANGING THE PICKUP UNIT 3 7 63 1515 0 Note : The grating angle of the PU unit cannot be adjusted after the PU unit is changed. The PU unit in the CD mechanism module is adjusted on the production line to match the CD mechanism module and is thus the best adjusted PU unit for the CD mechanism module. - Page 36 http://www.xiaoyu163.com 3 7 63 1515 0 Grating waveform Ech -> Xch 20 mV/div, AC Fch -> Ych 20 mV/div, AC 0 degrees 30 degrees 45 degrees 60 degrees L 13942296513 75 degrees 90 degrees u163 DEH-1300MP/XNUC http://www.xiaoyu163.com...
-
Page 37: Pcl Output Confirmation
http://www.xiaoyu163.com 8.3 PCL OUTPUT CONFIRMATION 3 7 63 1515 0 - PCL output Check that square wave of 1 Hz is output from BU_HSFLG (43 Pin) of IC601 by flipping TEST IN (112 Pin) of the same IC601 to ‘H’ while the product is operating normally (when stand-by state is released with ACC on). If clock signal is out of this range, this resonator (X601) must be changed for a new one. -
Page 38: Exploded Views And Parts List
http://www.xiaoyu163.com 9. EXPLODED VIEWS AND PARTS LIST 3 7 63 1515 0 OTES : Parts marked by " * " are generally unavailable because they are not in our Master Spare Parts List. The > mark found on some component parts indicates the importance of the safety factor of the part. Therefore, when replacing, be sure to use parts of identical designation. - Page 39 CEG-127 16-3 Service Network See Contrast table (2) Screw See Contrast table (2) Screw TRZ50P080FTC (2) CONTRAST TABLE DEH-1300MP/XNUC, DEH-1350MP/XNES, DEH-1350MP/XNES1, DEH-1350MPG/XNES, DEH-1350MP/XNCN5 and DEH-1390MP/XNID are constructed the same except for the following: Mark Description DEH-1300MP/XNUC DEH-1350MP/XNES DEH-1350MP/XNES1 Polyethylene Bag...
-
Page 40: Exterior
http://www.xiaoyu163.com 9.2 EXTERIOR 3 7 63 1515 0 L 13942296513 u163 DEH-1300MP/XNUC http://www.xiaoyu163.com... - Page 41 CNS7068 Label See Contrast table (2) Cover QNM3029 Panel QNS3126 L 13942296513 (2) CONTRAST TABLE DEH-1300MP/XNUC, DEH-1350MP/XNES, DEH-1350MP/XNES1, DEH-1350MPG/XNES, DEH-1350MP/XNCN5 and DEH-1390MP/XNID are constructed the same except for the following: Mark Description DEH-1300MP/XNUC DEH-1350MP/XNES DEH-1350MP/XNES1 Tuner Amp Unit QWM3162 QWM3163...
-
Page 42: Cd Mechanism Module
http://www.xiaoyu163.com 9.3 CD MECHANISM MODULE 3 7 63 1515 0 ( C ) ( C ) ( C ) ( A ) ( A ) L 13942296513 ( D ) ( A ) ( D ) ( C ) ( B ) ( D ) ( A ) ( A ) - Page 43 http://www.xiaoyu163.com CD MECHANISM MODULE SECTION PARTS LIST Mark No. Description Part No. Mark No. Description Part No. 3 7 63 1515 0 Damper CNW1198 ..Screw BSZ20P040FTC CNW1726 Screw(M2 x 4) CBA1835 Motor Unit(LOAD/CRG)(M2) CXC4026 Washer CBF1038 Screw Unit CXC8894 Spring CBH3010 Arm Assy...
-
Page 44: Schematic Diagram
SCH diagram CD:+0.6 dBs FM(3 Guide page Detailed page FM(30%): -24 dBs AM(30%): -24 dBs L 13942296513 ANTENNA PN5043A DEH-1300MP/XNUC DEH-1350MP/XNES DEH-1350MP/XNES1 VOLTAGE(V) DESTINATION R680 R681 DEH-1350MPG/XNES OPEN (P. Down) 0.00 (0.00 - 0.41) B,C,D,F DEH-1350MP/XNCN5 0.88 (0.42 - 1.23) DEH-1390MP/XNID 3.08... - Page 45 http://www.xiaoyu163.com 3 7 63 1515 0 TUNER AMP UNIT CD:+0.6 dBs FM(30%): -10.9 dBs AM(30%): -9.9 dBs CD:+5.7 dBs AUX:+5.3 dBs FM(30%): -5.9 dBs AM(30%): -4.9 dBs CD:+10.7 dBs AUX:+10.3 dBs > REAR OUTPUT L 13942296513 600 uH Fuse > YEK5001 (10A) 1SR154-400...
- Page 46 http://www.xiaoyu163.com 3 7 63 1515 0 L 13942296513 u163 DEH-1300MP/XNUC http://www.xiaoyu163.com...
- Page 47 http://www.xiaoyu163.com 3 7 63 1515 0 L 13942296513 u163 DEH-1300MP/XNUC http://www.xiaoyu163.com...
- Page 48 http://www.xiaoyu163.com 3 7 63 1515 0 L 13942296513 u163 DEH-1300MP/XNUC http://www.xiaoyu163.com...
- Page 49 http://www.xiaoyu163.com 3 7 63 1515 0 L 13942296513 u163 DEH-1300MP/XNUC http://www.xiaoyu163.com...
-
Page 50: Keyboard Unit
S1816 KST1 RIGHT DOWN KDT2 DGND S1806 S1808 S1813 KDT3 S1805 S1809 S1814 KST4 KST0 V1801 CAW2008 LED COLOR R1808 R1809 R1810,R1811,R18 A,B,C 1K(1/4W) 1.8K(1/4W) 2.7K(1/4W) GREEN D,E,F 390(1/4W) 390(1/4W) 560(1/4W) DEH-1300MP/XNUC DEH-1350MP/XNES DEH-1350MP/XNES1 DEH-1350MPG/XNES DEH-1350MP/XNCN5 DEH-1390MP/XNID u163 DEH-1300MP/XNUC http://www.xiaoyu163.com... - Page 51 http://www.xiaoyu163.com 3 7 63 1515 0 KEYBOARD UNIT SWVDD 5.1V DGND SW5V SWVDD ILMGND R1816 CN1801 CKS6230 JA1801 CKN1082 ILMGND CD EJECT DGND S1812 ROT1 KYDT R1817 S1824 ROT0 CSD1168 ILM+B DPDT ILM+B S1817 S1820 ILMCLR CN801 AUXR SOURCE AUXG 5.1V D1838 SW5V...
-
Page 52: Cd Mechanism Module(Guide Page)
http://www.xiaoyu163.com 10.3 CD MECHANISM MODULE(GUIDE PAGE) 3 7 63 1515 0 CXX1942 V3R3 PICKUP UNIT(P10.5) (SERVICE) E:P5+P10 F:P1+P6 R106 Q102 LTA123JUB Q101 R104 2SA1577(QR) 2.2k R221 PU+3V R222 10k P5+P10 C216 R225 3300p/50 REFO1 C218 P1+P6 0.047u/16 ATEST ATEST VREF A.VDD1 C217 0.1u/10... - Page 53 http://www.xiaoyu163.com 3 7 63 1515 0 CD CORE UNIT(S11.1Comp) SIGNAL LINE FOCUS SERVO LINE TRACKING SERVO LINE CARRIAGE SERVO LINE SPINDLE SERVO LINE 1608:PARTS Parts with Polarity C201 C207 C212 C230 IC201 IC202 IC301 C307 C308 D101 RFOK SVMON3 C706 C730 Q101 Q102 Q201 LOCK SVMON2...
- Page 54 http://www.xiaoyu163.com 3 7 63 1515 0 L 13942296513 u163 DEH-1300MP/XNUC http://www.xiaoyu163.com...
- Page 55 http://www.xiaoyu163.com 3 7 63 1515 0 L 13942296513 u163 DEH-1300MP/XNUC http://www.xiaoyu163.com...
- Page 56 http://www.xiaoyu163.com 3 7 63 1515 0 L 13942296513 u163 DEH-1300MP/XNUC http://www.xiaoyu163.com...
- Page 57 http://www.xiaoyu163.com 3 7 63 1515 0 L 13942296513 u163 DEH-1300MP/XNUC http://www.xiaoyu163.com...
-
Page 58: Waveforms
http://www.xiaoyu163.com 10.4 WAVEFORMS 3 7 63 1515 0 - CD CORE UNIT Note : 1. The encircled numbers denote measuring points in the circuit diagram. 2. Reference voltage REFO1(1.65 V) DSCSNS 5 V/div 500 ms/div DSCSNS 5 V/div 500 ms/div 1 V/div 1 s/div LOEJ... - Page 59 http://www.xiaoyu163.com 3 7 63 1515 0 RFAGC 1 V/div 500 µs/div RFAGC 1 V/div 2 ms/div RFAGC 1 V/div 200 ms/div 500 mV/div 500 mV/div 1 V/div 500 mV/div 500 mV/div 1 V/div 2 V/div 10 Tracks Jump waveform 32 Tracks Jump waveform Search operation (Outter to Inner) Ref : Ref :...
-
Page 60: Pcb Connection Diagram
http://www.xiaoyu163.com 11. PCB CONNECTION DIAGRAM 3 7 63 1515 0 11.1 TUNER AMP UNIT NOTE FOR PCB DIAGRAMS TUNER AMP UNIT 1.The parts mounted on this PCB include all necessary parts for several destination. For further information for respective destinations, be sure to check with the schematic dia- JA941 gram. - Page 61 http://www.xiaoyu163.com 3 7 63 1515 0 SIDE A > P 251 (A,8,131) Fuse 3 A CEK1286 IC301 POWER L902 CONNECTOR Q751 Q752 JA901 C312 C752 Q301 C753 C335 C901 R333 R334 R331 R332 C331 C332 R853 ANTENNA D901 C333 C334 R855 C902 R852...
- Page 62 http://www.xiaoyu163.com 3 7 63 1515 0 TUNER AMP UNIT L 13942296513 u163 DEH-1300MP/XNUC http://www.xiaoyu163.com...
- Page 63 http://www.xiaoyu163.com 3 7 63 1515 0 SIDE B L 13942296513 u163 DEH-1300MP/XNUC http://www.xiaoyu163.com...
-
Page 64: Keyboard Unit
http://www.xiaoyu163.com 11.2 KEYBOARD UNIT 3 7 63 1515 0 KEYBOARD UNIT SIDE A D1825 D1806 D1826 D1807 D1827 D1808 D1828 D1809 D1829 D1812 L 13942296513 D1830 D1811 D1831 D1810 D1834 D1832 D1816 D1814 D1813 D1835 D1821 u163 D1805 DEH-1300MP/XNUC http://www.xiaoyu163.com... - Page 65 http://www.xiaoyu163.com 3 7 63 1515 0 KEYBOARD UNIT SIDE B VA1820 C1803 L 13942296513 R1824 R1822 Q1801 R1810 R1828 R1807 R1825 R1811 u163 DEH-1300MP/XNUC http://www.xiaoyu163.com...
-
Page 66: Cd Core Unit(S11.1Comp)
http://www.xiaoyu163.com 11.3 CD CORE UNIT(S11.1COMP) 3 7 63 1515 0 CD CORE UNIT(S11.1COMP) SIDE A PICKUP UNIT(P10.5 )(SERVICE) CN101 LOADING/CARRIAGE TH201 HOME MOTOR C102 C203 C250 C251 S901 C216 R203 R221 R222 SPINDLE D101 C218 MOTOR C217 C220 CN704 C213 C219 C221 C224... - Page 67 http://www.xiaoyu163.com 3 7 63 1515 0 CD CORE UNIT(S11.1COMP) SIDE B C110 Q101 C105 C111 C106 R104 Q102 R214 R107 R216 R108 R236 R227 C223 R291 C239 R229 R106 C293 R232 C222 C228 R228 C306 C305 C209 L 13942296513 R235 C215 C212 C601...
-
Page 68: Electrical Parts List
Part No. Circuit Symbol and No. Part No. A : DEH-1300MP/XNUC Q 803 (A,117,42) Transistor LSA1576UB Q 921 (A,127,106) Transistor LSC4081UB B : DEH-1350MP/XNES D 301 (A,97,128) Diode CRG03 D 302 (A,99,128) Diode CRG03 C : DEH-1350MP/XNES1 D 751 (A,137,134) Diode RKZ8.2KG(B2) -
Page 69: Ao Y U163
http://www.xiaoyu163.com Circuit Symbol and No. Part No. Circuit Symbol and No. Part No. R 207 (A,95,108) RS1/16SS681J R 802 (A,119,42) RS1/16SS103J 3 7 63 1515 0 R 213 (A,95,110) RS1/16SS331J R 803 (A,111,40) RS1/16SS472J R 221 (A,95,109) RS1/16SS223J R 222 (A,95,111) RS1/16SS223J R 804... - Page 70 http://www.xiaoyu163.com Circuit Symbol and No. Part No. Circuit Symbol and No. Part No. C 612 (A,124,70) CKSSYB104K10 D 1802 (A,6,34) LED(A,B,C) SML-D12V8W(PQ) 3 7 63 1515 0 (A,6,34) LED(D,E,F) SML-D12P8W(KL) C 613 (A,103,55) Capacitor CEVW471M10 C 614 (A,152,93) CKSSYB102K50 D 1803 (A,6,22) LED(A,B,C) SML-D12V8W(PQ) C 615...
- Page 71 http://www.xiaoyu163.com Circuit Symbol and No. Part No. Circuit Symbol and No. Part No. R 1823 (B,49,30) RS1/10SR473J R 310 (A,58,37) RS1/16SS183J 3 7 63 1515 0 R 1828 (B,58,13) RS1/4SA271J R 701 (A,37,22) RS1/16SS221J CAPACITORS R 702 (A,23,23) RS1/16SS221J CAPACITORS C 1801 (B,97,24) CKSRYB105K10...