Table of Contents
Advertisement
Advertisement
Table of Contents

Related Manuals for SoundCraft MH2


Summary of Contents for SoundCraft MH2
- Page 1 MH2 User Guide MH2 User Guide MH2 User Guide MH2 User Guide MH2 User Guide...
- Page 2 Soundcraft shall not be liable for any loss or damage whatsoever arising from the use of information or any error contained in this manual.
-
Page 3: Table Of Contents
Monitor and Headphones Outputs 2-Track Replay Input Master Section Rear Connector Panel VCA Master Faders Assignment controls Mute Groups Power Down Settings Clearing The Internal Memory MH2 Typical Specifications Mark-up Sheets MIDI Implementation Mutes Solos Channel Number / MIDI Note Number Listing Warranty... -
Page 4: Important Safety Instructions
IMPORTANT SAFETY INSTRUCTIONS Read these instructions. Keep these instructions. Heed all warnings. Follow all instructions. Do not use this apparatus near water. Clean only with a dry cloth. Do not block any ventilation openings. Install in accordance with the manufacturer’s instructions. Do not install near any heat sources such as radiators, heat registers, stoves, or other apparatus (including amplifiers) that produce heat. - Page 5 Note: It is recommended that all maintenance and service on the product should be carried out by Soundcraft or its authorised agents. Soundcraft cannot accept any liability whatsoever for any loss or damage caused by service, maintenance or repair by unauthorised personnel.
-
Page 6: Safety Symbol Guide
For your own safety and to avoid invalidation of the warranty please read this section carefully. SAFETY SYMBOL GUIDE For your own safety and to avoid invalidation of the warranty all text marked with these symbols should be read carefully. WARNINGS The lightning flash with arr The lightning flash with arr... -
Page 7: Introduction
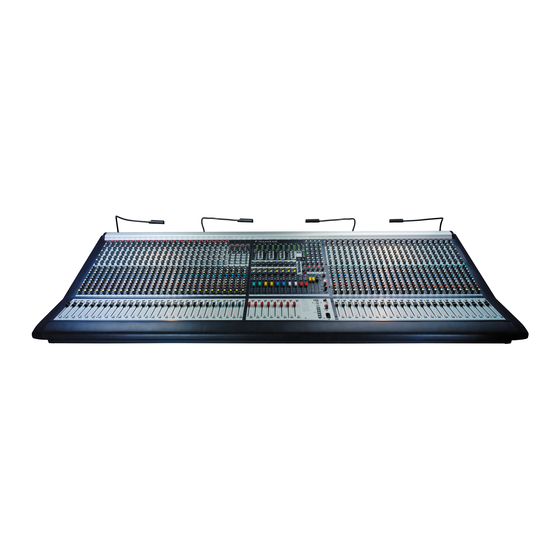
Intr Intr oduction Intr oduction oduction oduction Intr Intr oduction... - Page 8 The key features of the MH2 are: · 24+4, 32+4, 40+4 and 48+4 Ch frames. · Mic amp with 50dB range plus -20dB level shift and separate 1/4” Line input. · Sweep high-pass filter and EQ (4 band sweep EQ).
-
Page 9: Installation
Installa Installa tion Installa tion tion tion Installa Installa tion For your own safety and to avoid invalidation of the warranty please read this section carefully. -
Page 10: Mains Installation
General Wiring Procedures To take full advantage of the excellent signal to noise ratio and low distortion of Soundcraft consoles, care must be taken to ensure that incorrect installation and wiring does not degrade the performance of the desk. Hum, buzz, instability and Radio Frequency interference can usually be traced to earth loops and inferior earthing systems. -
Page 11: Initial Wiring Considerations
Initial Wiring Considerations For optimum performance, it is essential for the earthing system to be clean and noise free, as all signals are referenced to this earth. A central point should be decided on for the main earth point system, and all earths should be 'star fed' from this point. -
Page 12: Connecting An Optional Dps-4 Power Supply Unit
Read the instuctions which are supplied with the DPS-4. Using the cable supplied with the DPS-4 connect the “console” connector of the DPS-4 to the “DPS-4” connector (marked “ONLY connect to DPS-4 PSU”) of the MH2. WARNING: DO NOT ATTEMPT TO CONNECT ANY OTHER... -
Page 13: Removing And Refitting The Internal Power Supply Module
Power Supply Module The MH2 is powered by a removable Power Supply Module that allows mains power to be connected directly to the console. The Power Supply Module uses the latest switched-mode technology to provide very high efficiency, minimising unwanted heat generation inside the console. -
Page 14: Audio Connector Pinouts
Audio Connector Pinouts... -
Page 15: Dimensions
Dimensions... - Page 17 Bloc Bloc k Dia Bloc k Dia k Dia g g g g g r r r r r ams k Dia Bloc Bloc k Dia...
- Page 25 Using Using T T T T T he Console Using he Console he Console he Console Using Using he Console...
-
Page 26: Mono Input Channels
EQ and HI-PASS Filter This new design retains the traditional Soundcraft response, but incorporates steeper slopes on the HF stage focussing the control where you want it, and some carefully tailored overshoot on the LF band, which automatically controls the muddy lower-mid frequencies when boosting lows. - Page 27 Mix Bus Routing and Pan controls The signal is sent to the stereo mix bus and the mono (C) bus using the MIX (20) and C (21) switches. The PAN control (22), which gives 3dB centre drop, operates on the stereo mix bus signal, unless LCR panning is engaged.
-
Page 28: Jumper Options
cleared with a single button press at the master section. The solo buttons also feature automatic momentary operation, by pressing and holding for more than 0.5 sec. Jumper Options Function Options Default Direct switch UP = Pre-fade DOWN = Post fade operation UP = Pre-filter, DOWN= Post-EQ. -
Page 29: Stereo Input Channels
Stereo Input Channels Four stereo input channels are fitted as standard to all MH2 frame sizes. Input stage A stereo version of the Mono input’s high performance pre-amp offers the same gain range of +15dBu to +60dBu (1) and a 20dB PAD switch (2). It also has Phantom Power switching (3), and polarity reverse on the left channel (4). - Page 30 busses. The C (mono) bus is always fed directly with a mono sum of the stereo post-fader signal. Fader A high-quality long-throw 100mm fader (21) controls the level to all busses, and has 10dB of gain when fully up as well as an expanded scale around the critical unity gain area for maximum resolution.
- Page 31 Jumper Options None Input and Output Levels L, R MIC INPUTS (electronically balanced) Gain range +15dB to +60dB (-5dB to +40dB with -20 switch) maximum input level +26dBu input impedance 2kohms L, R LINE INPUTS (electronically balanced) Gain range -5dB to +40dB maximum input level +26dBu input impedance...
-
Page 32: Output & Master Section - Overview
Output & Master Section - Overview The Output & Master Section is made up of 3 distinct areas of control: · Group/Aux 1-8 & FX returns · Aux 9-10 & Matrix 1-4 · Master Outputs & Monitors & TB/Osc... -
Page 33: Grp/Aux 1-8 & Fx Returns
Grp/Aux 1-8 & FX Returns The key to the dual-purpose capability of the MH2 is the reversible signal path which allows either the Group or the Aux Output signal to be controlled by a linear fader, and have access to an insert point. - Page 34 Rotary Output Section Each of the 8 Rotary master sections is equipped with a colour-coded rotary fader (10), AFL solo (11) and MUTE (12) controls. (AFL stereo linking is not available on the rotary output section.) Aux Path –SWAP not pressed AUX AFL Also linked to Swap (a) and (b) MUTE...
-
Page 35: Notes On Output Solo Logic
Notes on Output Solo logic Both Group and Aux AFL switches behave as follows with regard to input priority, autocancel and solo clear: · If INPUT PRIORITY mode is enabled on its own, then any active input SOLOs will replace the output AFL signal, and the output will not be heard until the inputs are un- SOLOed. -
Page 36: Aux 9-10 Output Section
Aux 9-10 Output Section From LR Mntr section LR Mntr or Aux 9-10 meter 9-10 TB/OSC A9-10 MUTE 4-band A9-10 A9-10 O/P Aux 9-10 Outputs have their own dedicated output section and are always controlled by linear faders. Each fader (1) feeds the Aux signal to balanced rear-panel XLR outputs. There is a pre-fade insert point with separate jacks, and TB (osc)(2), Mute (3) and AFL (4) buttons are provided. -
Page 37: Matrix 1-4 Output Section
Matrix 1-4 Output Section Matrix 1-4 Output Section TB/OSC MTX AFL Postfade +10dB from MUTE Grps 1-8, L,R, C, MTX Master MTX O/P An 11x4 Matrix section is located above and to the right of the Aux 9-10 Outputs. Each of the (1), with TB (osc)(2) (2), Mute (3) (3), and AFL (4) -
Page 39: Master Section
Master Section The Master section contains the main L, R and C output faders, a sine wave test oscillator, and internal talkback functions. This section also contains the monitor outputs, 2-Track return and monitor source controls. Main Output Faders Three 100mm high quality faders (1) control the Stereo Mix Left and Right and Centre (Mono) Mix output levels. These are fed to balanced XLRs on the rear panel. -
Page 40: Monitor And Headphones Outputs
Monitor and Headphones Outputs Separate level controls (9 & 10) are provided for engineer’s monitor speakers and headphones. The signal source for these outputs is common and can be selected from the post-fade MIX signal (11), the Centre (mono) MIX signal (to both L and R outputs)(12), or the 2TK replay inputs (13), and may be summed by simultaneous selection if required. -
Page 41: Master Section Rear Connector Panel
Master Section Rear Connector Panel Input and Output Levels –Output and Master Section INSERT SENDS (Impedance Balanced) nominal level 0dBu maximum output level +21dBu into 2Kohms output impedance <75ohms GROUP/AUX, MNTR L/R Outputs (Impedance balanced) nominal level 0dBu maximum output level +21dBu into 2Kohms output impedance <75ohms... - Page 42 Rear Connectors INSERT SENDS, INSERT RETURNS (1/4" TSR Jack) Signal Hot Ring Signal Cold Sleeve Ground GROUP/AUX, MIX L/R, CENTRE, OSC, MNTR L/R Outputs (3 pin male XLR) Pin 1 Ground Pin 2 Signal Hot Pin 3 Signal Cold TB Mic Input (3 pin female XLR) Pin 1 Ground Pin 2 Signal Hot Pin 3 Signal Cold...
-
Page 43: Vca Master Faders
VCA Master Faders The fader area below the output and master modules contains the master faders and Mute and SOLO switches for the 8 VCA groups. The SOLO switches are also used for programming VCA assignments, when the console is in VCA Assign mode. The VCA master fader (1) controls the levels of any channel VCAs assigned to that group. -
Page 44: Assignment Controls
Assignment controls VCA ASSIGN The VCA ASSIGN switch selects VCA Assign mode. To assign channels to VCAs, first press the VCA Assign Mode switch, then the SOLO buttons on one or more VCA master faders -these SOLO buttons start flashing. Then press the SOLO buttons of any channels required to be part of those groups. -
Page 45: Mute Groups
Mute Groups Mute Group Master switches Up to 6 Mute Groups can be created and controlled from the 6 Mute Master switches. To store a Mute Group, first switch on the Channel Mutes required, then hold down the STORE switch immediately above the Mute Master switches and press the desired Mute Master switch. -
Page 46: Power Down Settings
Power Down Settings The following settings are saved to EPROM on power down and will be restored when the console is powered back up: Active mutes Manual mute status Active Mute Groups Active VCA Groups VCA Assign Membership Active safes Output AFL 'pairing' Clearing The Internal Memory This procedure clears out all data from the internal memory and restores factory default settings. - Page 47 MH2 T T T T T ypical Specif ypical Specif ypical Specif ica ypical Specif ica tions tions tions tions ypical Specif tions...
-
Page 49: Mh2 Typical Specifications
MH2 Typical Specifications Frequency Response XLR input to any output +0/-1dB, 20Hz-20kHz T.H.D. & Noise All measurements at 0dBu XLR in to Mix Out <0.03% @1kHz <0.03% @10kHz Mic Input E.I.N. <-128dBu (150 Ohm source) 22Hz-22kHz bandwidth, unweighted Residual Noise -90dBu Mix Output;... -
Page 51: Mark-Up Sheets
Mar k-up Sheets k-up Sheets k-up Sheets k-up Sheets k-up Sheets... -
Page 55: Midi Implementation
MIDI Implementa MIDI Implementa tion MIDI Implementa tion tion tion MIDI Implementa MIDI Implementa tion... -
Page 56: Mutes
Mutes The MH2 does not have built-in mute scene automation, but incorporates direct MIDI control of channel mutes using MIDI note messages. This can be used with some types of external Show Control software to generate externally-stored mute scenes. When mutes are manually pressed, note data is transmitted on MIDI channel 16, and this data can be recorded into the external PC running Show Control software. -
Page 57: Solos
Sequencer Mode This is called sequencer mode because the Note format allows the events to be viewed more easily when recorded into a sequencer. Pressing Mute switches transmits Note On messages whose velocity determines the Mute state. MIDI messages always transmitted when a mute is pressed. - Page 58 on boot up. Normal MIDI Mode If a BSS Varicurve MIDI loop is not detected on boot up, it will process/transmit MIDI automation data as normal. The MIDI Channel for Transmit & Receive is fixed at channel 16. Running status is also supported for Rx. There are two modes: Sampler (default) &...
-
Page 59: Channel Number / Midi Note Number Listing
Channel Number / MIDI Note Number Listing It is possible to transmit and receive the note data in two different formats, depending on the requirements of the external software. The two formats are essentially the inverse of one another. In “Sampler Mode” (the factory default), a Note On message is transmitted when a mute is switched off (un-muted) and a Note Off message is transmitted when a mute is switched on (muted). -
Page 60: Warranty
Equipment or the defective component should be returned to the Dealer or to Soundcraft and subject to the following conditions the Dealer or Soundcraft will repair or replace the defective components. Any components replaced will become the property of Soundcraft.