Panasonic SC-AK300 Operating Instructions Manual
Cd stereo system model no. sc-ak300; sc-ak200
Hide thumbs
Also See for SC-AK300:
- Operating instructions manual (32 pages) ,
- Operating instructions manual (32 pages)
Table of Contents
Advertisement
CD Stereo System
Operating Instructions
SC-AK300
Model No.
SC-AK200
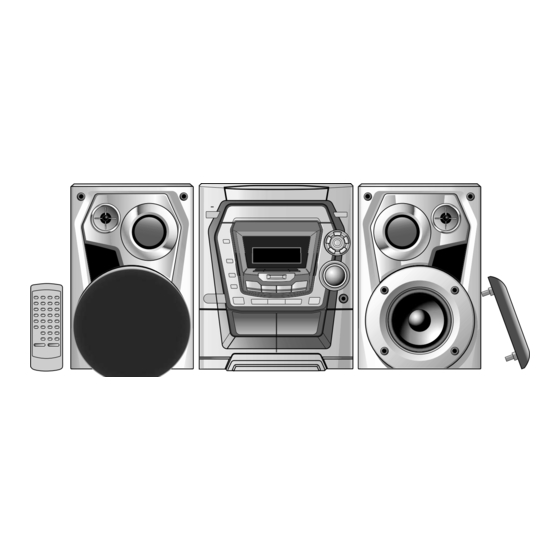
The illustrations show SC-AK300.
E
EB EE GN
Note:
"EB" on the packaging indicates the United
Kingdom.
Before connecting, operating or adjusting this pro-
duct, please read these instructions completely.
Please keep this manual for future reference.
RQT6131-1B
Advertisement
Table of Contents

Related Manuals for Panasonic SC-AK300


Summary of Contents for Panasonic SC-AK300
-
Page 1: Operating Instructions
CD Stereo System Operating Instructions SC-AK300 Model No. SC-AK200 The illustrations show SC-AK300. Note: “EB” on the packaging indicates the United Kingdom. Before connecting, operating or adjusting this pro- duct, please read these instructions completely. Please keep this manual for future reference. -
Page 2: Supplied Accessories
Please check and identify the carefully. supplied accessories. These operating instructions are applicable to the following system. These operating instructions, however, fundamentally explain the op- AC mains lead ..........1 pc. eration of system SC-AK300. For United Kingdom For Continental Europe System (RJA0044-3C) (RJA0043-1C) -
Page 3: Table Of Contents
Table of contents Safety precautions Before using Placement Supplied accessories ..........2 Set the unit up on an even surface away from direct sunlight, high temperatures, high humidity, and excessive vibration. These Safety precautions ........... 3 conditions can damage the cabinet and other components, thereby Caution for AC Mains Lead ........ -
Page 4: Caution For Ac Mains Lead
Caution for AC Mains Lead WARNING: DO NOT CONNECT EITHER WIRE TO (For United Kingdom) THE EARTH TERMINAL WHICH IS MARKED WITH THE LETTER E, BY THE EARTH SYMBOL (“EB” area code model only) COLOURED GREEN OR GREEN/YELLOW. For your safety, please read the following text carefully. THIS PLUG IS NOT WATERPROOF—KEEP DRY. -
Page 5: Concerning The Remote Control
Concerning the remote control For SC-AK300: Australia and New Zealand For SC-AK200: United Kingdom, Continental Europe, Battery installation Australia and New Zealand R6, AA, UM-3 Use of batteries • Align the poles (+ and –) properly when inserting the batteries. -
Page 6: Connections
Connections Basic connections (for supplied accessories) • Plug the AC mains lead into a household mains socket only after all other connections have been made. • To prepare the antenna wires and speaker cords, twist the vinyl cover tip and pull off. To household Connect the FM indoor antenna. -
Page 7: Optional Antenna Connections
When units other than those described are to be connected, please consult your audio dealer. Connecting digital equipment to the optical fiber out terminal (For SC-AK300 except Russia, Ukraine, Australia and New Zealand) Rear panel of this unit Connect this unit to other digital equipment with an optical fibre terminal, such as a receiver or digital surround processor. -
Page 8: Front Panel Controls
Front panel controls Main unit Name Ref. page 1 AC supply indicator (AC IN) This indicator lights when the unit is connected to the AC mains supply. 2 Standby/on switch (f/I) Press to switch the unit from on to standby mode or vice versa. In standby mode, the unit is still consuming a small amount of power. - Page 9 Front panel controls Remote control Buttons such as 2 function in exactly the same way as the buttons SLEEP SLEEP CL CLOCK PLAY AUTO OFF TO OFF TIMER TIMER on the main unit. Name Ref. page DISC DISC ; Sleep timer/auto off button (SLEEP, –AUTO OFF) ..........
-
Page 10: Turning The Demo Function Off
Press and hold [ Notes • You cannot turn demo function off when the unit is on. • DEMO (SC-AK300) DEMO function cannot be turned on in Full-Dim mode. • (SC-AK200) DEMO function cannot be turned on when Dimmer is on. Convenient functions... -
Page 11: Auto-Off Function
Auto-off function Remote control only When CD or tape is selected as the source SLEEP –AUTO OFF To save power, the unit turns off if it is left unused for ten minutes. Note This function does not work if the source is tuner or AUX. Press and hold [–AUTO OFF]. -
Page 12: Listening To Radio Broadcasts
Listening to radio broadcasts Press [TUNER/BAND] to select band. The unit comes on automatically. Every time you press the button: DISPLAY Press [PLAY MODE] on the remote control to select “MANUAL”. Every time you press the button: MANUAL PRESET Press [g/REW/3] or [4/FF/f] to select the frequency of the required station. -
Page 13: Presetting Radio Broadcasts
Presetting radio broadcasts Remote control only There are two methods of presetting stations. Automatic presetting : All the stations the tuner can receive are preset. Manual presetting : You can select the stations to preset and the order they are preset in. Up to 15 stations each can be set in the FM and AM bands. -
Page 14: Concerning Compact Discs
Concerning compact discs With this system, you can only play compact discs having this mark. However, do not use irregularly shaped CDs. CDs of the sort can damage the unit. XXXX XXXX XXXXX XXXX XX XXXX XXXX XXXXX XXXX XXXX XXXXX XXXX XXXX Handling precautions •... -
Page 15: Listening To Compact Discs
Listening to compact discs This unit can play CD-DA (digital audio) format audio CD-R and CD-RW that have been finalized (a process that enables CD-R/CD-RW players to play audio CD-R and CD-RW) upon completion of recording. It may not be able to play some CD-R or CD-RW due to the condition of the recording. -
Page 16: Program Play
Listening to compact discs Program play Remote control only by remote control only You can program up to 24 tracks.by remote control only Press [CD :/ J] and then [L]. Press [PROGRAM]. 1 • 7 Press [DISC]. (within 10 seconds or so) Press [1] –... -
Page 17: To Listen To Specific Cds And Tracks (Cd Play Mode Function)
Listening to compact discs To listen to specific CDs and tracks (CD Play Mode function) Remote control only This function makes it easier for you to select specific CDs and tracks from those loaded in the player. There are 5 disc/track selection modes. 1 •... -
Page 18: Direct Access Play
Listening to compact discs Direct access play Remote control only Press [DISC]. (within 10 seconds or so) Press [1] – [5] to select the disc you want. Press the numeric button to select the desired track number. The CD will be played from the selected track to the last track of the disc. -
Page 19: Listening To Tapes
Listening to tapes You can use either deck 1 or deck 2 for tape playback. Use normal position tapes. High position and metal position tapes can be played, but the unit will not be able to do full justice to the characteristics of these tapes. Press [TAPE :]. -
Page 20: Before Recording (Deck 2 Only)
Before recording (Deck 2 only) Types of tapes which can be recorded correctly To protect tapes against further recording Use normal position tapes. High position and metal position tapes can be used, but this unit will not be able to record or erase them correctly. Side A Erasure prevention The illustration shows how to remove the tabs to prevent recording. -
Page 21: Recording From Compact Discs
Recording from compact discs You can use 1-DISC/ALL-DISC/1-SONG mode (A page 17) to make recordings. Preparations: • Do the preparatory steps (A page 20). • Insert the disc(s) you want to record (A page 15). 1-DISC/ALL-DISC recording Do steps 1 to 4 on page 17. Ensure CD is stopped. -
Page 22: Tape-To-Tape Recording
Tape-to-tape recording The recording level will be recorded as it is on the tape being played back. Preparations: • Do the preparatory steps (A page 20). • Press [TAPE :] then [L/–DEMO] to select tape as the source. Press [c DECK 1 OPEN] and insert the tape you want to record. -
Page 23: Using The Timers
Using the timers Using the play/record timer Remote control only The timer has two functions. It can be set to on at a certain time to wake you up, or it can be set to record the radio or from the aux source. - Page 24 Using the timers Using the play/record timer PLAY/ Remote control only To change the timer Press [rPLAY/REC] to select the desired timer. CLOCK/ TIMER Every time the button is pressed the setting changes as follows. PLAY (OFF) To check settings While the unit is on and the “rPLAY”...
-
Page 25: Using The Sleep Timer
Using the timers Using the sleep timer Remote control only This timer turns your system OFF at the set time (Max. 2 hours, set at SLEEP 30-minute intervals). It lets you fall asleep listening to music. – AUTO OFF Preparations: Switch on the power. -
Page 26: Troubleshooting Guide
Troubleshooting guide Before requesting service, make the checks below. If you can’t fix the system as described below, or if something not listed here occurs, refer to the enclosed directory to locate an Authorized Service Center convenient to you or contact your dealer. Reference pages are shown as black circled numbers 6. -
Page 27: Specifications
Specifications AMPLIFIER SECTION SC-AK300 CASSETTE DECK SECTION SPEAKER SECTION SB-AK200 (For Europe) Track system 4 track, 2 channel Type 2 way speaker system RMS Power output Heads Speaker(s) 10% Total harmonic distortion Record/playback Solid permalloy head Woofer 12 cm cone type... - Page 28 FOR Å REDUSERE FAREN FOR BRANN, ELEKTRISK STØT ELLER SKADER PÅ PRODUKTET, MÅ DETTE APPARATET IKKE UTSETTES FOR REGN, FUKTIGHET, VANNDRÅPER ELLER VANNSPRUT. MÅ HELLER IKKE PLASSERES GJENSTANDER FYLT MED VANN, SLIK SOM BLOMSTERVASER, OPPÅ APPARATET. Matsushita Electric Industrial Co., Ltd. Web Site: http://www.panasonic.co.jp/global/ RQT6131-1B G1101TS1022 RQT5666...