Microtek ScanMaker 9800XL Installing And Getting Started
Hide thumbs
Also See for ScanMaker 9800XL:
- Reference manual (166 pages) ,
- User manual (68 pages) ,
- Supplementary manual (13 pages)
Advertisement
Quick Links
Advertisement

Related Manuals for Microtek ScanMaker 9800XL


Summary of Contents for Microtek ScanMaker 9800XL
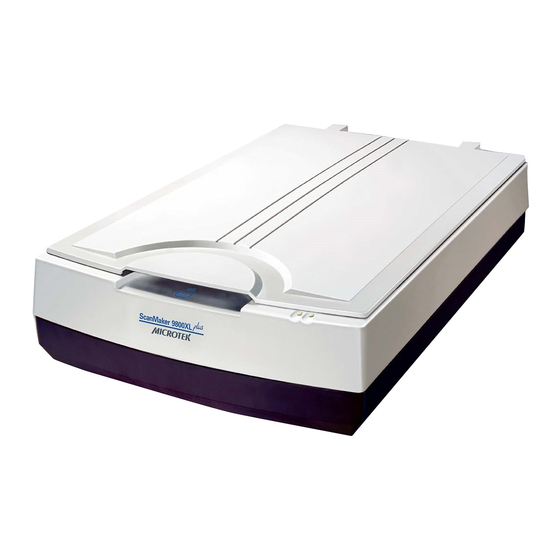
- Page 2 The ScanMaker 9800XL is a 48-bit color flatbed scanner that supports tabloid-sized (A3 or B-size) scanning for corporate users or designers. This scanner scans images up to 12" x 17" at an optical resolution of 1600 x 3200 dpi (12800 x 12800 dpi interpolated).
- Page 3 • ScanMaker 9800XL unit • FireWire card • FireWire cable • USB cable • Kodak Q-60R1 color target (Reflective) • Documentation- includes ScanMaker 9800XL Installing and Getting Started, ScanWizard Pro User's Guide, ScanWizard Pro Quick Reference, Unlock card, and other inserts.
- Page 4 Your scanner has a locking screw to protect the scanner carriage mechanism during shipping. Before you operate the scanner, you need to disengage the locking screw. 1. Turn the scanner on its side and locate the locking screw at the bottom of the scanner. 2.
- Page 5 1. Turn on your computer. 2. Insert the Microtek CD-ROM into your CD-ROM drive. When the Microtek CD-ROM icon appears on your Macintosh desktop, double- click on this icon to open it. The software installer screen should appear, and click each software program on the screen to install all the software components.
- Page 6 The ScanMaker 9800XL comes with three built-in interfaces: FireWire, USB, and SCSI. You may choose any of the three interfaces to make the connection between the scanner and computer. (You should use only one interface at a time.) Before connecting the scanner, check to see if your computer system is FireWire- ready.
- Page 7 2. Connect the scanner to your computer, using the provided FireWire cable. Connect one end of the FireWire cable to your computer’s FireWire port, and connect the other end of the cable to the scanner’s FireWire port. 3. Turn the scanner's power switch to “On”, and wait for the green light on the scanner's front panel to stop blinking and stay on steady.
- Page 8 Before connecting the scanner, check to see if your computer system has a built-in SCSI interface or an installed SCSI card. If you need help on installing the SCSI card, please refer to the “SCSI Installation Guide” on a separate documentation included with your scanner package, or refer to the documentation that came with the SCSI card.
- Page 9 4. Set the scanner’s terminator switch to the “ON” position. If you have multiple devices on your SCSI chain, make sure the scanner is the last device on the chain and that the scanner is terminated (i.e., scanner's terminator switch is set to ON).
- Page 10 5. Connect the power cord to your scanner. Plug the power cord into the back of the scanner, and plug the other end into a power source (power surge protector highly recommended). 6. Turn the scanner's power switch to “On”, and wait for the green light on the scanner's front panel to stop blinking and stay on steady.
- Page 11 Before connecting the scanner, check to see if your computer system has a built-in USB port. The latest Macintosh computers (i.e., G3, G4, etc.) are equipped with a built-in USB port, and usually labeled with the USB “ ” logo. Follow the steps below to make the USB connection.
- Page 12 3. Turn the scanner's power switch to “On”, and wait for the lights on the scanner's front panel to stop blinking and stay on steady. 4. Your system will detect the scanner automatically.
- Page 13 3. Lower the scanner lid. To scan transparency materials (positive or negative films) with the ScanMaker 9800XL, you should have an optional Transparent Media Adapter (TMA1600). For more details on the TMA1600, contact Microtek Customer Service.
- Page 14 1. Launch ScanWizard Pro from your image editing application. To do this, choose the Import or Acquire command from the File menu of your image editing application, then select ScanWizard Pro. To operate ScanWizard Pro in the stand-alone "batch" mode in Macintosh systems, go to the Apple menu, and choose the Batch Scan command.
- Page 15 4. Select the Scan Frame tool from the Toolbar in the Preview window, and choose the area to be scanned by dragging a rectangle around it. You will see a flashing frame (marquee) around the selected area. 5. Click the Prescan button to start an overview, and you will see the thumbnail image appear in your Scan Job Queue window.
- Page 16 ICC profile tailored exclusively for the scanner you are using under ScanWizard Pro. The Microtek Scanner ICC Profiler utility is included in the CD-ROM that contains ScanWizard Pro. Select the Microtek Scanner ICC Profiler option to install.
- Page 17 2. Launch the Microtek Scanner ICC Profiler calibration program. In Macintosh, locate the Microtek ICC Profile folder and double-click the ICC Profile icon. In Windows, select the Start menu, Programs, Microtek ScanWizard Pro for Windows, then Microtek Scanner ICC Profiler.
- Page 18 4. Give a file name to save the created ICC profile. For details, refer to the help file of your Scanner ICC Profiler program. 5. When done, click the Close button to exit Scanner ICC Profiler program. Once the profile has been produced, follow the steps below to load the profile you just created.
- Page 19 Operating temperature: 50° to 104°F (10° to 40°C) Relative humidity: 20% to 85% Additional documentation is provided in the Microtek CD-ROM that contains ScanWizard Pro, Scanner ICC Profiler, troubleshooting, etc. If you encounter problems with hardware or software, you can open the file that you wish to view with...
- Page 20 This equipment has been tested and found to comply with the limits for a Class B digital device, pursuant to Part 15 of the FCC rules. These limits are designed to provide reasonable protection against harmful interference in a residential installation. This equipment generates, uses and can radiate radio frequency energy and, if not installed and used in accordance with the instructions, may cause harmful interference to radio communications.