Minolta DIMAGE EX Instruction Manual
Hide thumbs
Also See for DIMAGE EX:
- Software gebruikershandleiding (53 pages) ,
- Software instruction manual (53 pages) ,
- Instruction manual (64 pages)
Table of Contents
Advertisement
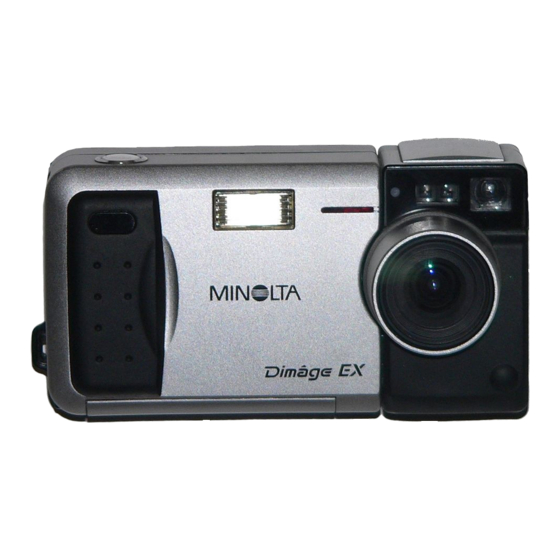
Thank you for purchasing this Minolta product. Your new digital camera has
extraordinary features that expand your image capturing horizons.
Megapixel (1.5 million pixels), progressive scan Sony Wfine CCD™ with primary
•
color filter.
• High quality 2 inch color LCD monitor with Live View display.
• Digita™ Operating Environment from FlashPoint Technology.
• Uses removable CompactFlash™ cards for storage, so there's no limit on how
many shots you can take.
• Detatchable, compact lens unit. The Zoom 1500 lens unit features a focal length
of 7 - 21mm (approximate equivalent to 38 - 115mm in 35mm format) with Macro
capability. The Wide 1500 is a 5.2mm f/1.9 lens until (approximate equivalent to
28mm in 35mm format).
• Fast capture speed, capable of 3.5 frames per second in Burst mode.
• IrDA version 1.0 wireless communication with your IrDA-capable personal
®
computer (running Windows 95
or Windows 98
This device complies with Part 15 of the FCC Rules.
Operation is subject to the following two conditions:
(1) This device may not cause harmful interference,
and (2) this device must accept any interference
received, including interference that may cause unde-
sired operation.
Tested by the Minolta Corporation
101 Williams Drive, Ramsey, New Jersey 07446, U.S.A.
This Class B digital apparatus complies with Canadian ICES-003.
Cet appareil numérique de la classe B est conforme à la norme NMB-003 du Canada.
Do not remove the ferrite cores from the video and serial cables.
* Wfine CCD™ is a trademark or registered trademark of Sony Corporation.
* Digita™ and the Digita™ logo are licensed trademarks or registered trademarks of FlashPoint
Technology, Inc. in the U.S. and other countries.
* Other corporate names and product names are the trademarks or registered trademarks of their
respective companies.
®
).
TABLE OF CONTENTS
For Proper and Safe Use . . . . . . . . . . . . . . . . . . . . . . . . . . .4
Before You Begin . . . . . . . . . . . . . . . . . . . . . . . . . . . . . . . . .5
Preparation . . . . . . . . . . . . . . . . . . . . . . . . . . . . . . . . . . . .6
Recording . . . . . . . . . . . . . . . . . . . . . . . . . . . . . . . . . . . . .6
Play/Review . . . . . . . . . . . . . . . . . . . . . . . . . . . . . . . . . . . .8
Deleting . . . . . . . . . . . . . . . . . . . . . . . . . . . . . . . . . . . . . . .9
Camera Body - Front . . . . . . . . . . . . . . . . . . . . . . . . . . . .11
Camera Body - Back . . . . . . . . . . . . . . . . . . . . . . . . . . . .12
LCD Monitor . . . . . . . . . . . . . . . . . . . . . . . . . . . . . . . . . .14
Viewfinder . . . . . . . . . . . . . . . . . . . . . . . . . . . . . . . . . . . .14
Attaching the Strap . . . . . . . . . . . . . . . . . . . . . . . . . . . . .16
Inserting Batteries . . . . . . . . . . . . . . . . . . . . . . . . . . . . . .17
Low Battery Indicator . . . . . . . . . . . . . . . . . . . . . . . . . .18
Auto Power Off . . . . . . . . . . . . . . . . . . . . . . . . . . . . . .18
Setting the Date/Time . . . . . . . . . . . . . . . . . . . . . . . . . . . .19
Compact Flash Card . . . . . . . . . . . . . . . . . . . . . . . . . . . .21
Adjusting the LCD Monitor . . . . . . . . . . . . . . . . . . . . . . . .23
Turning the LCD Monitor On/Off . . . . . . . . . . . . . . . . . .23
Adjusting the LCD Monitor Brightness . . . . . . . . . . . . .23
Adjusting the Camera Display . . . . . . . . . . . . . . . . . . . . .24
Overlay Button . . . . . . . . . . . . . . . . . . . . . . . . . . . . . . .24
Status Button . . . . . . . . . . . . . . . . . . . . . . . . . . . . . . . .25
Record Mode Screen . . . . . . . . . . . . . . . . . . . . . . . . . . . .27
Taking Pictures . . . . . . . . . . . . . . . . . . . . . . . . . . . . . . . .27
Burst Image Capture . . . . . . . . . . . . . . . . . . . . . . . . . . . .31
Timelapse . . . . . . . . . . . . . . . . . . . . . . . . . . . . . . . . . . . .33
Focus . . . . . . . . . . . . . . . . . . . . . . . . . . . . . . . . . . . . . . .36
Continued on next page.
1
Advertisement
Chapters
Table of Contents

Related Manuals for Minolta DIMAGE EX


Summary of Contents for Minolta DIMAGE EX
-
Page 1: Table Of Contents
TABLE OF CONTENTS Thank you for purchasing this Minolta product. Your new digital camera has extraordinary features that expand your image capturing horizons. For Proper and Safe Use ......4 Before You Begin . - Page 2 TABLE OF CONTENTS RECORD MODE - CONTINUED PLAY MODE MENUS Focus Lamp/No Focus Indicator ....36 Slideshow ........70 Focus Range .
-
Page 3: For Proper And Safe Use
Read and understand all warnings and cautions before using this product. Check the packing list before you begin. If some parts are missing, contact your camera dealer or a Minolta Service Facility listed on the WARNING back cover of this manual. -
Page 4: Getting Started Right Away Preparation
GETTING STARTED RIGHT AWAY Press the Display button to turn PREPARATION - See pages 17 and 21 for detailed information. on the LCD monitor. Insert the batteries. Frame the image in either the LCD monitor or viewfinder. Insert the compact flash card. •... -
Page 5: Play/Review
GETTING STARTED RIGHT AWAY - CONT’D PLAY/REVIEW Press the Left and Right buttons - See pages 64 and 83 for detailed information. to scroll through the images. Turn the camera on. DELETING - See pages 84 – 85 for detailed information. Set the camera to Play mode. -
Page 6: Names Of Parts
GETTING STARTED RIGHT AWAY - CONT’D NAMES OF PARTS Press the Menu button. CAMERA BODY - FRONT • The Review mode menu screen will appear. * Do not touch. Flash sensor* Self-timer lamp AF window* Flash Viewfinder IrDA window window* Press the Left or Right button until the Edit menu is displayed, then press the Down button until... -
Page 7: Camera Body - Back
NAMES OF PARTS - CONT’D CAMERA BODY - BACK Soft keys 4-way controller Viewfinder Shutter-release button Focus lamp LCD Monitor (green) Up button Right button Down button Flash lamp (orange) Left button Mode switch Main switch Lock button Display button Power lamp Brightness- Main switch... -
Page 8: Lcd Monitor
NAMES OF PARTS - CONT’D LCD MONITOR Overlay Bar Record Mode Screen (p. 27) Play Mode Screen (p. 64) BEFORE RECORDING Soft Key Label Menu Screen Example Review Mode Screen (p. 74) Soft Key Label VIEWFINDER Close-framing Guides If using the viewfinder to frame sub- jects that are less than 1m (3.3 ft.) away, use the close-framing guides Focus... -
Page 9: Attaching The Strap
ATTACHING THE STRAP INSERTING THE BATTERIES Insert the smaller loop of the Your camera uses four AA-size alkaline batteries. Four AA-size Nicad, Ni-MH, or lithium batteries can also be used. strap through the strap eyelet. Open the battery-chamber cover by sliding it in the direction indicated, then open the cover. -
Page 10: Low Battery Indicator
INSERTING THE BATTERIES - CONT’D SETTING THE DATE AND TIME LOW-BATTERY INDICATOR This camera records the date and time an image was captured. For your reference, set the date and time for accuracy. A warning message will appear in the top Turn the camera on, then slide overlay bar when the battery power is low. -
Page 11: Compact Flash Card
SETTING THE DATE AND TIME - CONT’D COMPACT FLASH CARD Use the up and down buttons to Your camera requires a CompactFlash card to be inserted before capturing images. highlight the desired format. • The currently selected format has a next to it. -
Page 12: Adjusting The Lcd Monitor
COMPACT FLASH CARD - CONT’D ADJUSTING THE LCD MONITOR Close the card-chamber cover TURNING THE LCD MONITOR ON/OFF and slide it shut until it clicks. Reduce battery consumption by turning off the LCD monitor when not needed. Press the Display button to turn the LCD monitor on or off. -
Page 13: Adjusting The Camera Display
ADJUSTING THE CAMERA DISPLAY OVERLAY BUTTON STATUS BUTTON The Overlay button shows or hides the overlay bar and soft key label in each The Status screen quickly gives a display of camera status information when the mode, enabling an unobstructed view of the image. camera is in Record mode. -
Page 14: Record Mode - Continued
TAKING PICTURES Once batteries and a CompactFlash card have been inserted into the camera, it is ready to take pictures. When the camera is turned on, the flash will be set to autoflash and the image capture type will be Still (normal). Record Mode Screen Indicates if camera Approximate number... - Page 15 TAKING PICTURES - CONT’D Press the Display button to turn Press the shutter-release button on the LCD monitor if desired. the rest of the way down to take • The LCD monitor’s Live View feature will the picture. continuously update and display what the •...
-
Page 16: Burst Image Capture
TAKING PICTURES - CONT’D BURST IMAGE CAPTURE If Delete is pressed: Burst image capture is similar to the motor drive or continuous-drive mode on conventional cameras. The camera will continuously take pictures while the shutter-release button is held down. Up to 7 full-size images and 15 1/4 size •... -
Page 17: Timelapse
BURST IMAGE CAPTURE - CONT’D TIMELAPSE and hold the shutter- Press In Timelapse image capture, the camera will take a series of pictures at regular time intervals. This feature is useful for capturing events over time, such as the release button all the way down. opening of a flower. - Page 18 TIMELAPSE - CONT’D Frame the picture as instructed If Instant Review is ON: in “Taking Pictures”, steps 4 After the Timelapse series is complete, the through 6. last image will appear on the LCD monitor • Place the camera on a tripod or steady and Save and Delete will appear in the soft surface if necessary.
-
Page 19: Focus
FOCUS The Zoom 1500 and Wide 1500 lens units have a precise, high-speed SPECIAL FOCUSING SITUATIONS autofocusing system, just like those found in quality compact cameras. Some scenes or subjects are difficult for the autofocus system to lock on to. When the focus will not lock, FOCUS HOLD on another object the FOCUS LAMP/NO FOCUS INDICATOR same distance from you as your main subject,... -
Page 20: Built-In Flash
BUILT-IN FLASH When the camera is turned on, the flash is automatically set to autoflash. The FLASH RANGE other flash modes can be set by using the center soft key. To ensure proper exposure, make sure your subject is positioned within the flash range. -
Page 21: Digital Scene Selector
DIGITAL SCENE SELECTOR The Digital Scene Selector sets the optimum flash mode, light metering, white CHANGING THE DIGITAL SCENE SELECTOR MODE balance, and image processing for specific scene types. When the camera is turned on, the scene selection mode is set to Auto. Press the right soft key until the icon for the desired mode appears. -
Page 22: Macro (Zoom 1500 Lens Only)
MACRO (ZOOM 1500 LENS ONLY) EXPOSURE COMPENSATION The Macro Photography function on the Zoom 1500 lens allows you to fill the The exposure can be adjusted to make the final image lighter or darker. Exposure frame with a business-card size object. The minimum focus distance in Macro is can be adjusted as much as +/–... -
Page 23: Record Mode Menus
RECORD MODE MENUS The Record Mode menus allow you to change the default settings for image capturing, like Image Size and Image Quality settings. They also give additional function options for more advanced operation, such as using the self-timer or bracketing. -
Page 24: Selecting The Image Size
SELECTING THE IMAGE SIZE SELECTING IMAGE QUALITY Select the image size before recording the image. The image size is a factor in Image quality is determined by how much the image is compressed. Little or no determining how many images fit onto a CompactFlash card (pp. 104 – 105). There compression means high image quality, but large file sizes. -
Page 25: Selecting Color Or B&W
SELECTING IMAGE QUALITY - CONT'D SELECTING COLOR OR B&W The default setting is color image capture. It is possible to capture images in black Press the Up or Down button to & white only. B&W images use less storage space than full color images. Consider highlight Quality. -
Page 26: Self Timer
SELF TIMER The self-timer delays release of the shutter for approximately 10 seconds after the Press the Exit soft key. shutter-release button is pressed. • The camera will return to the Media Settings menu. • The Default soft key will return all the settings on the screen to their default In Record mode, press the Menu setting. -
Page 27: Selecting The Burst Capture Rate
SELECTING BURST CAPTURE RATE TIMELAPSE INTERVAL AND TOTAL IMAGES The speed of the burst capture can be adjusted. There are three burst capture rate Select the desired number of images and the amount of time between image options; Fast (3.5 frames per second approximately), Medium (2.5 fps aprox.), captures for Timelapse. -
Page 28: White Balance
TIMELAPSE INTERVAL AND TOTAL IMAGES - CONT’D WHITE BALANCE Press the Up or Down button to White Balance is the camera’s ability to make different types of lighting appear neutral. The effect is similar to selecting daylight film or tungsten film. The default highlight Interval. -
Page 29: Bracket
BRACKET The bracketing feature allows you to capture a set of three frames, one with Frame your subject, then press normal exposure, one below normal exposure, and one above normal exposure. and hold the shutter the shutter- Select a half stop exposure bracket or a full stop exposure bracket. release button down. -
Page 30: Instant Review
INSTANT REVIEW SYSTEM SOUNDS Instant Review is the feature that keeps the captured image on the screen, Turn the system sounds off or on as desired. The system sounds are the tones allowing the user to select Save or Delete. When instant review is on, the captured heard when certain buttons are pressed. -
Page 31: Counter Reset
COUNTER RESET CAMERA NAME The image counter can be set two different ways. The image counter assigns a The camera name appears at bottom of the Review Screen when viewing images. chronological number to recorded images. This number will appear with the image A total of 31 characters, including numbers, symbols, and spaces, can be entered. -
Page 32: Formatting Compact Flash Cards
FORMATTING COMPACT FLASH CARDS Formatting the compact flash card removes all the protected and unprotected images on the card. Images cannot be recovered once the card is formatted. Go to the Preferences menu (p. 45). Press the Up or Down button until Format Card is highlighted. -
Page 33: Play Mode Screen
PLAYBACK Press the Right button to display The captured images are viewed full screen in Play mode. It is possible to view the the next image. images with or without the capture data. Press the Left button to display Play Mode Screen the previous image. -
Page 34: Zoom In - Zoom Out
ZOOM IN - ZOOM OUT EXPAND/COLLAPSE - OPEN/CLOSE Press the Zoom soft key to see a Burst, Timelapse, and Group images are represented by only the first image in the set. It is possible to expand the set so that all the images can be viewed. The magnified view of the image. -
Page 35: Play Button
PLAY BUTTON Burst, Timelapse, and Group images can be played back like an automatic slide show. The Play mode also has a slideshow function that allows more control (p. 70) Scroll through the images until the desired image is on the screen (p. -
Page 36: Slideshow
SLIDESHOW Create and run a slideshow using the slideshow menu. The slideshow parameter If Category is selected: Press the options are: Up or Down button to highlight Content the category list, then press the All images in the camera or the images in a selected category. Left or Right button to select the Duration desired category. -
Page 37: Playback Rate
PLAYBACK RATE Set the playback rate for the Play button (p. 68). The playback rate is set for each image type; Burst, Timelapse, and Group. The rate can be selected between 1 and 10 seconds. In Play mode, press the menu button. -
Page 38: Review Mode Screen
REVIEWING/SELECTING IMAGES Reviewing/Selecting Images Review mode makes it fast and easy to review the images on the compact flash card by displaying mini previews of the images. This mode also allows the images to be categorized or marked. Turn the camera on. While pressing the lock button, Review Mode Screen slide the mode switch to REV. -
Page 39: Marking Images
MARKING IMAGES UNMARK / UNMARK ALL Marked images have a ‘notch’ on the bottom right corner. Mark multiple images to perform one of the following actions on them: Press the Left or Right button to Category p. 78 Group p. 86 select the desired image. -
Page 40: Category
CATEGORY REMOVING IMAGES FROM A CATEGORY The Category function allows you to add images to preset categories, represented by icons. A single, selected image can be added to a category or a set of marked Remove a single image from a category. images can be categorized. -
Page 41: Expand/Collapse - Open/Close
EXPAND/COLLAPSE - OPEN/CLOSE Burst, Timelapse, and Group images are represented in the Review screen by a COLLAPSE/CLOSE single thumbnail image. It is possible to have all the thumbnails displayed for viewing by expanding the set. This also allows individual images within a set to be The Collapse soft key label will appear when an expanded set of images is Marked, Deleted, etc. -
Page 42: Review Mode Menus
REVIEW MODE MENUS The Review mode menus allow you to delete unwanted images and protect the important ones. They also give function options for more advanced operation, such as searching for images or organizing images into groups. Turn the camera on and slide the mode switch to REV. -
Page 43: Deleting Images
DELETING IMAGES Delete unwanted images from the CompactFlash card in the camera. Use caution Press the Delete soft key. when deleting images. Images cannot be recovered once deleted. It is • A confirmation screen will appear. recommended that important images be protected before starting the delete •... -
Page 44: Group
GROUP CREATING A NEW GROUP Press the Create New soft key • The Create New Group menu will appear. Create and name groups of images to aid in organization. An image can belong to only one group, but it can belong to a Category at the same time. Turn the camera on and slide the Mode switch to REV. -
Page 45: Adding To A Group
GROUP - CONT’D ADDING TO A GROUP DISSOLVING A GROUP Add images to a group that already exists. Remove all the images from the group and delete the group name from the Group list. The images will remain on the compact flash card in the camera. Follow steps 1 through 5 for “Creating a Group”. -
Page 46: Protecting Images
Protected images cannot be removed from the compact flash card using the Delete use the Digita operating system and have IrDA interfaces. These instructions function. assume both the sending and receiving camera is a Minolta Dimâge EX. Turn the camera on and slide the Mode switch to REV. PREPARATION •... - Page 47 TRANSFER - CAMERA TO CAMERA CONT’D Press the Receive soft key. Press the Send soft key. • Waiting for Connection... will appear in the • A confirmation screen will appear. monitor. The Done key returns the camera to the The Done soft key returns the camera to Review screen.
-
Page 48: Find By Date
FIND - BY DATE The find function lets you view images in the Review screen that were taken Press the Up or Down button to between certain dates. select a number, then press the Right button to set the character and move to the next space. -
Page 49: Find By Category
FIND - BY CATEGORY LANGUAGE The find function lets you view images in the Review screen that belong to a Cameras purchased in Europe have multiple languages available for the interface. certain categories. Turn the camera on and slide the Mode switch to REV. Follow steps 1 - 3 from Find - By Date (p. -
Page 50: Video Mode
VIDEO MODE It is possible to view images in the camera on your television. This camera has a Press the Left or Right button to video-out terminal which allows you to connect the camera to your television using select the desired mode. the Video Cable VC-EX1. -
Page 51: Appendix
ACCESSORIES There are various accessories sold separately for this camera. For more information, please contact your camera dealer, PC dealer, or a Minolta Service Facility. Dimâge EX WIDE 1500 Lens Unit The Dimâge EX WIDE 1500 f/1.9, 28mm (35mm equivalent) detachable lens unit featuring 1.5 million pixel progressive scan,... -
Page 52: Custom Scripts
For more information on scripts, loaded onto your camera using a CF card. These applications add functions to contact a Minolta Service facility or visit the FlashPoint Technology, Inc. world wide your camera, such as applying a filter effect on recorded images or connecting web site. -
Page 53: File Size
FILE SIZE CARD CAPACITY The file size of the image is determined by the selected Image Size and Image The number of images that can fit on a compact flash card is determined by the Quality. size of the card (such as 4MB, 8MB, 16MB, or 32MB) and the file size of the There are two options for Image Size;... -
Page 54: Troubleshooting
Refer to these pages to determine the cause of a problem you are experiencing Problem Cause Solution with the camera. If the information does not cover the problem which you are experiencing, contact a Minolta Service Facility. Press the main switch The camera will not Problem Cause Solution The camera is off. -
Page 55: Care And Storage
• If the LCD display blinks continuously or no longer works at all, it is time to removing or inserting a replace the monitor. Take the camera to your dealer or a Minolta Service Facility CompactFlash card. listed on the back cover of this manual. - Page 56 QUESTIONS AND SERVICE • If you have questions about your camera, contact your local camera dealer or write to the Minolta distributor in you area. • Before shipping your camera for repair, please contact a Minolta Service Facility for details.
-
Page 57: Technical Details
TECHNICAL DETAILS TYPE Compact digital camera with autofocus (AF), autoexposure (AE), FLASH Guide number: 11 (ISO 125) auto white balance (AWB), detachable lens unit, built-in LCD, Coverage: 28mm angle of view (35mm format equivalent) Digita™ Operating Environment, and built-in flash Flash modes: autoflash, fill-flash, flash cancel, autoflash with red-eye reduction, and fill-flash with red-eye reduction 1/2 inch, square pixels, progressive scan Sony Wfine CCD™... - Page 58 MEMO...
- Page 59 MEMO...
- Page 60 MEMO...
-
Page 61: User Technical Support
Please contact your dealer for additional information. If your dealer is unable to help you, contact us. Technical Support WWW: http://www.minoltausa.com Phone: 1-800-808-4888 (201) 825-4000 Monday - Friday 8:30 AM - 5:00 PM (EST) Address: Minolta Corporation 101 Williams Dr. Ramsey, NJ 07446... -
Page 62: Digital Camera
Room 208, 2/F, Eastern Center, 1065 King’s Road, Quarry Bay, Hong Kong Minolta Singapore (Pte) Ltd. 10, Teban Gardens Crescent, Singapore 608923 © 1998 Minolta Co., Ltd. under the Berne Convention and Universal Copyright Convention Printed in Japan 9222-2760-31 P-B811... - Page 63 • Depending on the contents of a specific script, certain scripts may cause instability in the camera’s operation. • Minolta is not responsible for the results of user-made custom scripts used with the Dimâge EX. CompactFlash Card Maximum Capacity - page 105 ©...
- Page 64 CAMERA INSTRUCTION INFORMATION - CONT’D SOFTWARE INFORMATION FOR WINDOWS DirectX Installation - Windows 98/Windows 95 Camera Malfunction DirectX is necessary to run Digita Desktop™ on a Windows based operating system. When the camera locks-up (‘freezes’), remove and reinsert the batteries or unplug and Please install DirectX before installing Digita Desktop™.
- Page 65 TABLE OF CONTENTS FEATURES FOR Dimâge EX Version 2 1. A Digital Magnification Function Been Added .........2 2. The Burst Rate Has Been Increased ..........3 3. Smoother Motion in Live Images ............3 4. The Internal Flash May be Switched ON/OFF........3 5.
-
Page 66: Features For Dimâge Ex Version 2
FEATURES FOR Dimâge EX Version 2 FEATURES FOR Dimâge EX Version 2 1. A Digital Magnification Function Been Added 2. The Burst Rate Has Been Increased (see User’s Manual P52) After extending optical zoom (telephoto) to 115mm, release the Right button and then The burst rate is increased when [Fast] or press it again to select digital magnification. -
Page 67: A Flash Bracketing Function Has Been Added
FEATURES FOR Dimâge EX Version 2 FEATURES FOR Dimâge EX Version 2 5. A Flash Bracketing Function Has Been Added 6. Custom Settings for White balance Have Been Added (see User’s Manual P55) By changing the flash illumination in steps the exposure for the background not reached In addition to the preset white balance, the Dimâge EX allows custom setting of white by the flash remains unchanged, while the exposure for the subject illuminated by the balance in accordance with the user’s own white balance sample. -
Page 68: The Custom Script Function Has Been Improved
Flash Compensation • Minolta takes no responsibility for the results of running a custom script, and is not The flash illumination may be controlled for exposure compensation using a script. This liable for compensation for losses (e.g. loss of image data) incurred as a result of compensation differs from the exposure compensation in which the brightness of the running such a script. -
Page 69: Important Information
• Depending on the contents of a specific script, certain scripts may cause instability in images from the compact flash card. the camera’s operation. • Minolta is not responsible for the results of user-made custom scripts used with the Dimâge EX. Compact Flash Card Maximum Capacity - page 105 It is recommended that the maximum number of images recorded on a Compact Flash card in the Dimâge EX does not exceed 200. -
Page 70: Battery Life
P113 of the User’s Manual. As shown in the following tables, the number of images which may be taken depends Battery Life (as determined by Minolta tests) on the combination of image size, image quality, compact flash card capacity. -
Page 71: Software Information For Windows
IMPORTANT INFORMATION IMPORTANT INFORMATION SOFTWARE INFORMATION FOR WINDOWS SOFTWARE INFORMATION FOR MACINTOSH DirectX Installation - Windows 98/Windows 95 Installation of QuickTime 3.0 DirectX is necessary to run Digita Desktop on a Windows based operating system. QuickTime 3.0 is necessary to run the Digita Desktop software on the Macintosh. - Page 72 Room 208, 2/F, Eastern Center, 1065 King’s Road, Quarry Bay, Hong Kong Minolta Singapore (Pte) Ltd. 10, Teban Gardens Crescent, Singapore 608923 © 1999 Minolta Co., Ltd. under the Berne Convention and Universal Copyright Convention 9229-2760-71 P-A905 Printed in Japan...