Table of Contents
Troubleshooting

Related Manuals for EdgeStar PAC801W


Summary of Contents for EdgeStar PAC801W
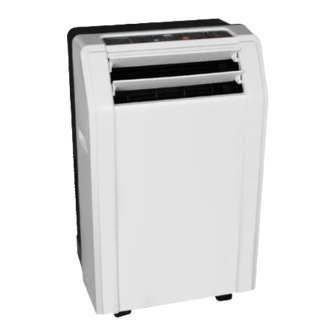
- Page 1 Portable Air Conditioner This manual covers models: PAC801W, PAC1201W & PAC1401W This manual contains important information regarding safety precautions, and the proper installation, use and maintenance of your portable air conditioner. Owner’s Manual...
-
Page 2: Important Safety Information
Important Safety Information Improper handling can cause serious damage to the appliance and/or to the user. Please read the following safety information. Electrical Safety This unit is designed for indoor use only. Do not use the unit in extremely humid or wet environments. ... -
Page 3: Table Of Contents
Table of Contents IMPORTANT SAFETY INFORMATION ..............I INTRODUCTION ....................1 PARTS IDENTIFICATION ..................2 ......................2 ......................2 RONT INSTALLING THE CARBON FILTER ..............3 WINDOW KIT INSTALLATION INSTRUCTIONS ..........4 .......... -
Page 4: Introduction
Introduction Thank you for purchasing this portable air conditioner. This manual contains important information regarding the proper installation, use and maintenance of your portable air conditioner. Following this manual will ensure that your product will work at its peak performance and efficiency. Please save the original product packaging in case you need to safely transport your portable air conditioner. -
Page 5: Parts Identification
Parts Identification Front View Window Plate Window Plate with Hole Control Panel Oval Window Kit Adapter Front Air Vent/ Louvers Exhaust Hose Handle Caster Back View Pre-filter Air Intake Exhaust Outlet Upper Drain Valve Air Intake/ Compressor pre-filter Lower Drain Valve Portable Air Conditioner... -
Page 6: Installing The Carbon Filter
Installing the Carbon Filter Your portable air conditioner ships with a pre-filter and an activated carbon filter. The carbon filter will help remove contaminates and odors from the air. It is recommended you replace the carbon filter every two to three months, or as needed. It is necessary to clean the pre-filter periodically. -
Page 7: Window Kit Installation Instructions
Window Kit Installation Instructions You must vent your portable air conditioner when running in it Preparations for installing cooling mode. Your unit includes a window exhaust kit that can be the window kit used to vent the unit out a window. Before you begin, make sure you have all the parts necessary for installation. -
Page 8: Installing The Window Plates
Installing the window plates 1. Open your window and place the window kit with grooved side facing outward on the window sill. Then, slide the window kit plate to fit the width of the window. You can use screws to secure the window kit plate from sliding. ... -
Page 9: Attaching The Oval Adapter To The Exhaust Hose
Attaching the oval adapter to the exhaust hose 3. Attach the oval adapter to the hose: A. Extend the end of the exhaust hose B. Thread the duct connector onto the hose by turning it clockwise until it stops. Caution: The unit is designed to be used indoors and freestanding, and not be... -
Page 10: Connecting The Exhaust Hose To The Unit
Connecting the exhaust hose to the unit 5. Align the slots on the hose connector to the tabs and snap into the back of the unit. Connecting the oval adapter to the window kit 6. Push the oval adapter through the window kit hole until it snaps in place. -
Page 11: Notes About The Exhaust Hose
Your portable air conditioner is designed to exhaust condensate Notes about the Exhaust water that is collected from the air. This water, in either gaseous or hose droplet form, will be expelled out the exhaust port of the unit. Please take this into account when deciding how to vent it. 1. -
Page 12: Draining The Unit
Draining the Unit The unit will need to be drained if set to dehumidify mode. When the portable air conditioner is in cooling mode, it will remove moisture from the air. The condensed water from the air will be collected in an internal reservoir and will be evaporated and exhausted out of the exhaust hose. -
Page 13: Control Panel Overview
Control Panel Overview Indicator Down Infrared Lights Button Button Sensor Swing Button LED Display SWING A UT O C OO L ME D H E AT D R Y T I M E R O N F A N S L E E P M O D E M O D E L O W... -
Page 14: Operating The Control Panel
Operating the Control Panel Use the Power button to turn the portable air conditioner on and off. Power Auto-Restart: If power to the unit is interrupted, the air conditioner will restart itself in its last used mode/settings once power is restored. The compressor will restart after 3 minutes. -
Page 15: Fan Button
The Fan button is used to change the fan speed between High Medium, Fan Button Low and Auto while in Cooling and Fan Only modes. Press the Fan button to select the fan speed. The LED indicator light next to the High, Medium, or Low will light up. The Automatic Fan speed setting does not have a light. -
Page 16: Using The Remote Control
Using the Remote Control The remote control can be used instead of the control panel to remotely operate your portable air conditioner. The functions on the remote are the same as on the control panel. NOTES: Be careful not drop Up Button the remote control. -
Page 17: Normal Sounds
Normal Sounds Your new portable air conditioner may make sounds that are not familiar to you. Most of the sounds that are made are normal. Hard surfaces like the floor, walls can make the sounds seem louder than they actually are. The following describes the kinds of sounds that might be new to you and what may be making them. -
Page 18: Cleaning The Unit
2-3 needed. Allow the pre-filter to air dry in a cool and shaded place. months or as needed. Contact Dry thoroughly before reinstalling. EdgeStar retailers for replacement filters. Warning: Never operate the unit without the filters. Preparation for Storage... -
Page 19: Troubleshooting
Troubleshooting Follow the troubleshooting guide below to resolve common issues. Issue Possible Cause Solution My air conditioner is Unit is not receiving Make sure the unit is not functioning at all power plugged in LCDI power cord is Press the Reset button tripped on the LCDI cord Insufficient power... -
Page 20: Troubleshooting Continued
Troubleshooting continued Issue Possible Cause Solution My air conditioner is Unit is not operating in Set the unit to be in not cooling at all cooling mode cooling mode, and lower the set temperature (pg. 11) The compressor is not The compressor may take up to 3 minutes to turn on, or longer if it is... -
Page 21: Specifications
Specifications Description of Portable Air Conditioner Portable Air Conditioner Portable Air Conditioner product: Model: PAC801W PAC1201W PAC1401W Voltage/Frequency: AC 115V~60Hz AC 115V~60Hz AC 115V~60Hz Input Power: 940W 1340W 1480W Current: 8.2A 11.9A 13.1 Color: White and Gray White and Gray... -
Page 22: Limited Warranty
EdgeStar authorized repair facility. PARTS: For a period of ONE (1) YEAR from the date of original purchase, EdgeStar will supply new, rebuilt, or refurbished parts free of charge. EdgeStar may request a defective part be returned in exchange for the replacement part. - Page 23 Register your product, download owner’s manuals, access additional troubleshooting resources, and obtain more information on other great EdgeStar & KoldFront products on the web at: http://www.edgestar.com Product contents and specifications may change without notice. Copyright © 2010 Living Direct, Inc.