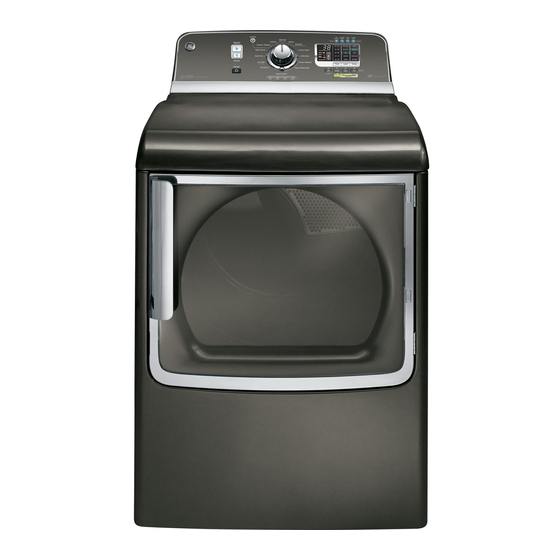
GE GTDS825GD0MC Installation Instructions Manual
Gas dryer
Hide thumbs
Also See for GTDS825GD0MC:
- Installation instructions manual (19 pages) ,
- Installation instructions manual (16 pages)
Table of Contents
Advertisement
Quick Links
Installation
Instructions
GGs
rger
Questions on Installation?
Call: 1-800-GECARES (US)
or Visit our Web site at: www.GEAppliunces.com
(US)
1
BEFORE YOU BEGIN
Read these instructions
completely
and carefully.
- IMPORTANT-
Save
these
instructions
forlocal inspector's
use.
- IMPORTANT-
Observe all
governing codes and ordinances.
- Note to Installer-
Be sure to
leave these instructions
with the
customer.
Note to Customer
- Keep
these instructions
with gour Use
& Core Book for future reference.
Before the old drger is removed
from
service
or discorded,
remove the dryer door.
Service information
and the
wiring
diagram
ore located
in
the control
console.
Do not allow children
on or in
the appliance.
Close supervision
of children is necessurg when the
appliance
is used near children.
Install the dryer where the
temperature
is above 50°F for
satisfactory
operation
of the
dryer
control
system.
Fire Hazard
I G
To reduce the risk of severe injury or death,
follow oil installation instructions.
Clothes dryer installation must be performed
by a qualified installer.
Install the clothes dryer according to these
instructions and in accordance with local codes.
, California
Safe Drinking
Water and Toxic Enforcement
Act
This oct requires the governor
of California to publish o list of substances
known to the
state to cause cancer, birth defects
or other reproductive
harm and requires businesses
to worn
customers
of potential
exposure
to such
substances.
Gas appliances
con
cause minor exposure
to four of these substances,
namely
benzene,
carbon
monoxide,
formoldehgde
and soot, caused
primarily bg the incomplete
combustion
of natural gas
or LP fuels. Properlg adjusted
drgers will minimize incomplete
combustion.
Exposure to
these substances
con be minimized further bg properly venting the dryer to the outdoors.
- This dryer must be exhausted
to the outdoors.
- Use only rigid metal 4" diameter
ductwork
inside the dryer cabinet and use only UL
approved
transition
ducting between
the dryer and the home duct.
- DO NOT install o clothes
dryer with flexible plastic ducting materials.
If flexible metal
(semi-rigid or foil-tgpe) duct is installed, it must be UL listed and installed in accordance
with the instructions
found in "Connecting
The Dryer To House Vent" on pages 4-5 of this
manual. Flexible venting materials
ore known to collapse, be easily crushed,
and trap lint.
These conditions
will obstruct
drger airflow and increase
the risk of fire.
- Do not install or store this appliance
in ong location where it could be exposed
to water
and or weather.
- To reduce the risk of severe injury or death, follow oil installation
instructions.
- Save these instructions.
(Installers: Be sure to leave these instructions
with the customer).
In the state
of Massachusetts:
Installation must be performed by a qualified or licensed contractor,
plumber or gosfitter qualified or licensed bg the state.
• When using ball-type gas shut-off valves,they shall be the T-handle type.
• A flexible gas connector, when used,most not exceed 3 feet.
_lk This is the safety alert symbol. This symbol alerts you to
potential hazards that con kill or hurt you and others.
Allsafety messageswill follow the safety alert symbol and the word
"DANGER" " WARNING"or "CAUTION". These words ore defined as:
Indicates o hazardous
situation which, if not
avoided, will result in death
or serious injury.
Indicates o hazardous
situation which, if not
avoided, could result in
death or serious injury.
Indicates o hazardous
situation which, if not
avoided, could result in
minor or moderate injury.
GER
I
, WAR
CAUTIO
G
Fire Hazard
A WA
I G
• No washer con completely remove oil.
• DO NOTdry anything that has ever had any type of oil
on it (including cooking oils).
Items containing foam, rubber or plastic must be dried
on a clothesline or by using on Air Dry cycle.
• Failureto follow this instructions con resulton death or fire
Electrical
Shock Hazard
Explosion
Hazard
Plug into a grounded 5 prong outlet.
DO NOT remove ground prong.
DO NOT use an adapter.
DO NOT use an extension cord.
Failureto do so can result in death, fire,or electrical shock.
• Keep flammable materials and vapors, such as
gasoline, away from @yen
• Place dryer at least 18 inches (/46cm) above the floor
for a garage installation.
Failure to do so can result in death, explosion, or fire.
DO NOTallow children on or inthe appliance. Close
supervision of children is necessary when the appliance
is used near children.
NOTE:Installation and service of this dryer requires basic mechanical and
electrical skills, tt is your responsibility to contact a qualified installer to
make the electrical connections.
254D!755PO02
Rev. 5 51-16699
Advertisement
Table of Contents

Related Manuals for GE GTDS825GD0MC


Summary of Contents for GE GTDS825GD0MC
- Page 1 Installation Instructions rger Questions on Installation? Call: 1-800-GECARES (US) or Visit our Web site at: www.GEAppliunces.com (US) To reduce the risk of severe injury or death, BEFORE YOU BEGIN follow oil installation instructions. Read these instructions Clothes dryer installation must be performed completely and carefully.
-
Page 2: Tools You Will Need
Installation Instructions Minimum Clearance in Alcove or Closet Installation Minimum clearance to combustible surfaces and for air opening are: 0 in. clearance both sides, 3 in. front, 7 in. top and 3 in. rear. Consideration must be given to provide adequate clearance for installation and service TOOLS YOU WILL NEED MATERIALS YOU WILL NEED (x2) - Page 3 Installation Instructions [_ PREPARING FOR INSTALLATION [_ GAS REOUIREMENTS OF NEW DRYER AWAR FireHazard TIP: Install your dryer before installing your washer. This will allow better access when installing dryer exhaust. • The installation must conform with local codes, or in the absence DISCONNECTING of local codes, with the National Fuel Gas Code, ANSI Z223.!/NFPA 54, or the Natural Gas and Propane Installation Code, CSA B149.!.
- Page 4 Installation Instructions [-_ RECONNECTING Listed connector ANSI Z21.24 / CSA 6.10 APPLYPIPECOMPOUND TOALL MALETHREADS. 1/8" NPT PIPE PLUG FOR NEW METAL FLEXIBLE GAS INLETPRESSURE LINECONNECTOR ADAPTER 3/8" NPT ELBOW AT LEAST1/2" ITEMSNOTSUPPLIED NOTE:The connector and fittings (]re designed for use onlg on the origin(]l installation and (]re not to be reused for (]nother (]ppli(]nce or (]t another Ioc(]tion.
- Page 5 Installation Instructions [] ELECTRICAL CONNECTION INFORMATION ELECTRICAL CONNECTION INFORMATION ENSURE PROPER EXISTS TO REDUCE THE RISK OF FIRE, GROUND BEFORE ELECTRICAL SHOCK, AND PERSONAL INJURY: "DO NOT USE AN EXTENSION CORD OR AN ADAPTER PLUG WITH THIS APPLIANCE. The dryer must be electrically grounded in accordance IF LOCAL CODES PERMIT, with local codes, or in the absence of local codes, with AN EXTERNALGROUND...
- Page 6 Installation Instructions EXHAUST INFORMATION (cont.) EXHAUST SYSTEM CHECK LIST NORMAL VENT HOOD OR WALL CAP EXHAUST LENGTH • Terminate in a manner to prevent back drafts or entrg of birds RECOMMENDEDMAXIMUM LENGTH or other wildlife. Exhaust HoodTypes • Termination should present minimal resistance to the exhaust air flow and shouldrequirelittleor no maintenoceto preventclogging Recommended Useonlg for short...
- Page 7 Installation Instructions STANDARD REAR EXHAUST CONNECTION [7]EXHAUST {Vented atfloor level} For straight line installation, connect the drger exhaust to the external exhaust hood using duct tape or clamp, EXTERNAL D UCT Fire Hazard TO REDUCE THE RISK OF FIRE OR PERSONAL INJURY: ,This clothes dryer must be exhausted to the outdoors.
-
Page 8: Alcove Or Closet Installation
Installation Instructions • For many applications, installing elbows atboth the dryer LEVELING AND STABILIZING YOUR and the wall is highly recommended (seeillustrations below). DRYER Elbows allow the dryer to sit close to the wall without kinking and Stand the dryer upright near the final location and adjust or crushing the transition duct, maximizing drying performance. - Page 9 Installation Instructions Detach and remove the bottom or left side knockout as IT6] BATHROOM OR BEDROOM INSTALLATION desired. Remove the screw inside the drger exhaust duct ,The drger MUSTbe vented to the outdoors. See EXHAUST and save. Pull the duct out of the drger. Protect sharp edges INFORMATION section 6.
- Page 10 Installation Instructions ADDING ELBOW AND DUCT FOR ADDING COVER PLATE TO REAR OF EXHAUST TO LEFT SIDE OF CABINET CABINET (SIDES AND BOTTOM EXHAUST) . Preossemble 4" elbow with 4" duct. Wrop duct tope oround joint. . Insert duct ossembly, elbow first, through the side opening ond connect the elbow to the dryer internol duct.
-
Page 11: Connecting Inlet Hoses
Installation Instructions CONNECTING INLET HOSES I_ CONNECTING INLET HOSES (cont.) (on some models) 7. Using pliers, tighten (]ll the couplings with on (]ddition(]l To produce steam, the dryer must connect to the cold two-thirds turn. water supply. Since the washer must also connect to the NOTE: Do not overtighten. - Page 12 Installation Instructions ABOUT REVERSING THE DOOR Remove the bottom screw from each hinge (right side) ond portiolly insert them into the top left side hinge holes. SWING NOTE:All 4 front punel hinge screws will now be in the top hinge holes - 2 on the left ond 2 on the right. IMPORTANT NOTES: •...
- Page 13 Installation Instructions Remove and swap the 2 cover caps and door handle _When the cover caps and door handle in place, mount from the outer door: the inner door back into the outer door with the screws removed in step 4. Make sure you mount the hinges on A.
-
Page 14: Reversing The Door Swing
Loosen the bottom 2 right side hinge screws. Remove the door (]nd pl(]ce it on (] protected, fl(]t surf(]ce to (]void SOLID DOOR MODELS (]ng d(]m(]ge. Remove both the Blind Pl(]te (]nd the Strike WITH COVER CAPS: Pl(]te (]nd inst(]ll them in opposite positions. - Page 15 Installation Instructions Remove and swap the cover cap and door handle from _When the cover cap and door handle in place, mount the outer door: the inner door back into the outer door with the screws removed in step a,.Make sure you mount the hinges on the side opposite the handle.
- Page 16 THE DOOR SWING Loosen the bottom 2 right side hinge screws. Remove the door (]nd pl(]ce it on (] protected fl(]t surf(]ce to (]void (]ng GLASS PANEL DOOR MODELS: d(]m(]ge. Remove both the Blind Pl(]te (]nd the Strike Pl(]te (]nd GHDS835EDOP1C GTDS820EDOWS inst(]ll them in opposite positions.
- Page 17 Installation Instructions Remove and swap the 2 cover caps and door handle _When the cover caps and door handle in place, mount from the outer door: the inner door back into the outer door with the screws removed in step 4. Make sure you mount the hinges on the side opposite the handle.
- Page 18 Notes...