
Related Manuals for Teac AI-3000


Summary of Contents for Teac AI-3000
- Page 1 AI-3000 INTEGRATED AMPLIFIER OWNERS MANUAL MODE D’EMPLOI MANUAL DEL USUARIO BEDIENUNGSANLEITUNG MANUALE DI ISTRUZIONI...
-
Page 2: Important Safety Instructions
IMPORTANT SAFETY INSTRUCTIONS 1) Read these instructions. 2) Keep these instructions. 3) Heed all warnings. CAUTION: TO REDUCE THE RISK OF ELECTRIC SHOCK, DO NOT 4) Follow all instructions. REMOVE COVER (OR BACK). NO USER-SERVICEABLE PARTS 5) Do not use this apparatus near water. INSIDE. - Page 3 THE ELECTRONICS. NO USER SERVICEABLE PARTS ARE INSIDE. IF YOU ARE EXPERIENCING PROBLEMS WITH THIS PRODUCT, CONTACT TEAC FOR A SERVICE REFERRAL. DO NOT USE THE PRODUCT UNTIL IT HAS BEEN REPAIRED. USE OF CONTROLS OR ADJUSTMENTS OR PERFORMANCE OF PROCEDURES OTHER THAN THOSE SPECIFIED HEREIN MAY RESULT IN HAZARDOUS RADIATION EXPOSURE.
- Page 4 For European customers Disposal of electrical and electronic equipment (a) All electrical and electronic equipment should be disposed of separately from the municipal waste stream via collection facilities designated by the government or local authorities. (b) By disposing of electrical and electronic equipment correctly, you will help save valuable resources and prevent any potential negative effects on human health and the environment.
- Page 5 Contents Before Using the Unit Thank you for choosing TEAC. Read this manual carefully to Read before operation get the best performance from this unit. Be careful to avoid injury when moving the unit, due to its weight. Before Using the Unit ..........5 Get someone to help you if necessary.
-
Page 6: Front Panel
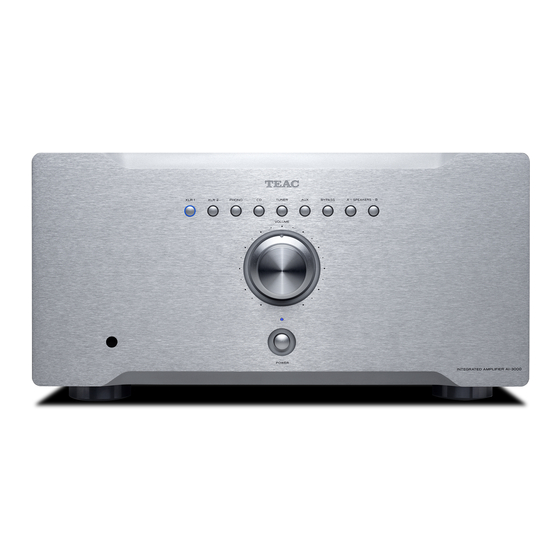
Identifying the Parts (1) Front panel XLR1 signal selector Remote control receiver XLR2 signal selector VOLUME knob PHONO signal selector POWER indicator CD signal selector POWER button TUNER signal selector AUX signal selector BYPASS signal selector A/B SPEAKER selector (group A) A/B SPEAKER indicator (group B) - Page 7 Rear panel XLR1 signal input terminal AUX signal input terminals XLR2 signal input terminal BYPASS input terminals Right channel speaker output terminals (group A) PRE OUT output terminals Right channel speaker output terminals (group B) Left channel speaker output terminals (group A) Grounding terminal Left channel speaker output terminals (group B) PHONO signal input terminal...
- Page 8 Identifying the Parts (2) MUTE Remote control SPEAKER selector (group A) INPUT k (Next input selector) INPUT j (Previous input selector) SPEAKER selector (group B) VOLUME + VOLUME -...
-
Page 9: Battery Installation
Note before using the remote control Battery installation Press the AMP button to switch to the AMP mode before operating the unit by using the remote control. The effective range of the remote control is no greater than 10m and an angle no greater than 30 degrees. Buttons that are not listed or mentioned in the remote control diagram are not used for this unit. -
Page 10: Volume Adjustment
Basic Operation Power ON / OFF Output protection Connect the power cord and signal cable of the unit. When the output of the power amplifier is overloaded, the relay of Then, press the POWER button on the front panel to turn the unit on the protection circuit of the power amplifier will be disconnected at [R]. - Page 11 Power output ....... . . 200 W + 200 W (8 Ω) a problem, contact your dealer or TEAC customer service/technical 300 W + 300 W (4 Ω)
- Page 12 N'exposez pas cet appareil aux gouttes ni aux éclaboussures. Ne placez pas d'objet rempli de liquide sur l'appareil, comme par exemple un vase. N’installez pas cet appareil dans un espace confiné comme une bibliothèque ou un meuble similaire. L’appareil tire un courant nominal de veille de la prise secteur quand son interrupteur POWER ou STANDBY/ON n’est pas en position ON.
- Page 13 Sommaire Avant d'utiliser l'unité Nous vous remercions d’avoir choisi TEAC. Lisez ce mode À lire avant utilisation. d'emploi avec attention pour tirer les meilleures performances de cette unité. En raison du poids de l'unité, prenez garde à ne pas vous blesser quand vous la déplacez.
- Page 14 Identification des parties (1) Face avant Sélecteur de signal XLR1 Récepteur de télécommande Sélecteur de signal XLR2 Bouton de VOLUME Sélecteur de signal PHONO Voyant d'alimentation POWER Sélecteur de signal CD Interrupteur d'alimentation POWER Sélecteur de signal TUNER Sélecteur de signal AUX Sélecteur de signal BYPASS Sélecteur d'enceintes A/B SPEAKER (groupe A) Sélecteur d'enceintes A/B SPEAKER (groupe B)
- Page 15 Face arrière Prises XLR1 d'entrée de signal Prises d'entrée de signal AUX Prises XLR2 d'entrée de signal Prises d'entrée BYPASS Borne de sortie du canal droit pour enceinte (groupe A) Prises de sortie de préampli Borne de sortie du canal droit pour enceinte (groupe B) Borne de sortie du canal gauche pour enceinte (groupe A) Borne de masse Borne de sortie du canal gauche pour enceinte (groupe B)
- Page 16 Identification des parties (2) Télécommande MUTE (coupure du son) Sélecteur d'enceintes (groupe A) INPUT k (sélecteur d'entrée suivante) INPUT j (sélecteur d'entrée précédente) Sélecteur d'enceintes (groupe B) VOLUME + VOLUME -...
- Page 17 Note avant utilisation de la télécommande Mise en place des piles Appuyez sur la touche AMP pour passer en mode AMP avant de piloter l'unité depuis la télécommande. La portée de fonctionnement de la télécommande ne dépasse pas 10 m et un angle de 30 degrés. Les touches qui ne sont ni listées ni mentionnées dans le schéma de la télécommande ne servent pas pour cette unité.
-
Page 18: Coupure Du Son
Fonctionnement de base Mise sous/hors tension Protection de sortie Branchez le cordon d'alimentation et le câble de signal de l'unité. Quand la sortie de l'amplificateur de puissance est saturée, le relais Ensuite, appuyez sur l'interrupteur d'alimentation POWER de du circuit de protection de l'amplificateur de puissance se coupe la face avant pour allumer l'unité... - Page 19 300 W + 300 W (4 Ω) clientèle/technique de TEAC (coordonnées au dos de la couverture). Réponse en fréquence ..... . 10 Hz - 30 kHz (-0,5 dB) Rapport signal/bruit .
- Page 20 Do not expose this apparatus to drips or splashes. Do not place any objects filled with liquids, such as vases, on the apparatus. Do not install this apparatus in a confined space such as a book case or similar unit. The apparatus draws nominal non-operating power from the AC outlet with its POWER or STANDBY/ON switch not in the ON position.
- Page 21 Índice Antes de usar la unidad Gracias por elegir TEAC. Lea este manual con atención para Lea esto antes de llevar a cabo ninguna obtener el mejor rendimiento de esta unidad. operación Antes de usar la unidad ......... 21 •...
-
Page 22: Panel Frontal
Identificación de las partes (1) Panel frontal Selector de señal "XLR1" Receptor de la señal del mando a distancia Selector de señal "XLR2" Mando de volumen “VOLUME” Selector de señal "PHONO" (plato giradiscos) Indicador de encendido “POWER” Selector de señal “CD” Botón de encendido Selector de señal “TUNER”... -
Page 23: Panel Posterior
Panel posterior Terminales de entrada de señal "XLR1" Terminales de entrada de señal “AUX” (auxiliar) Terminales de entrada de señal "XLR2" Terminales de entrada de señal “BYPASS” (paso de señal) Terminales de salida de altavoz canal derecho "R" (grupo A) Terminales de salida “PRE OUT”... - Page 24 Identificación de las partes (2) MUTE (silenciamiento) Mando a distancia Selector de altavoces (grupo A) INPUT k (selector de entrada siguiente) INPUT j (selector de entrada anterior) Selector de altavoces (grupo B) VOLUME + (subir el volumen) VOLUME - (bajar el volumen) AMP (amplificador)
- Page 25 Instalación de las pilas Nota antes de utilizar al mando a distancia Pulse el botón AMP para entrar en el modo de “amplificador” antes manejar la unidad usando el mando a distancia. El rango de alcance efectivo del mando a distancia no es mayor de 10 metros y su ángulo de efectividad no es mayor de 30 grados.
- Page 26 Funcionamiento básico Encendido/Apagado Protección de salida Connect the power cord and signal cable of the unit. Cuando la salida del amplificador está sobrecargada, el relé del A continuación, pulse el botón POWER en el panel frontal para circuito de protección del amplificador se desconectará enseguida. encender la unidad [R].
- Page 27 Respuesta de frecuencias ....10 Hz - 30 KHz (-0.5 dB) cliente de TEAC (los encontrará en la contraportada). Relación señal/ruido ..... . . 102 dB (ponderados A) Distorsión armónica total .
- Page 28 Netz, wenn sich der POWER- oder STANDBY/ON- Schalter nicht in der ON-Position befindet. Der Betriebsort des AI-3000 sollte in der Nähe der Wand steck- dose sein, so dass Sie jederzeit den Netzstecker erreichen. Der Netzstecker dient als Verbindungs-/Trennglied zur Span- nungs versorgung.
- Page 29 Technische Daten ..........35 abstand verbleiben. Stellen Sie KEINE Gegenstände auf den Verstärker. Die Spannung, an der der AI-3000 betrieben wird, sollte den Anga- ben auf der Geräterückseite entsprechen. Falls Sie diesbezüglich Zweifel haben, kontaktieren Sie einen Elektrofachmann.
- Page 30 Bedienelemente und Anschlüsse (1) Frontansicht XLR1-Direktwahltaste Fernbedienungssensor XLR2-Direktwahltaste Lautstärkeregler PHONO-Direktwahltaste Netzanzeige CD-Direktwahltaste Netzschalter (POWER) TUNER-Direktwahltaste AUX-Direktwahltaste BYPASS-Direktwahltaste A/B SPEAKERS-Lautsprecherwahltaste (SPEAKERS A) A/B SPEAKERS-Lautsprecherwahltaste (SPEAKERS B)
- Page 31 Rückansicht Symmetrische XLR1-Eingänge AUX-Eingänge Symmetrische XLR2-Eingänge BYPASS-Eingänge Lautsprecheranschlüsse für den rechten Kanal (Gruppe A) PRE OUT-Vorverstärkerausgänge Lautsprecheranschlüsse für den rechten Kanal (Gruppe B) Lautsprecheranschlüsse für den linken Kanal (Gruppe A) Masseanschluss Lautsprecheranschlüsse für den linken Kanal (Gruppe B) PHONO-Eingänge CD-Eingänge TUNER-Eingänge Netzanschluss (mit Sicherung)
- Page 32 Bedienelemente und Anschlüsse (2) MUTE-Taste (Stummschaltung) Fernbedienung Lautsprecherdirektwahltaste Gruppe A (SPEAKERS A) INPUT k (wählt den nächsten Eingang) INPUT j (wählt den vorherigen Eingang) Lautsprecherdirektwahltaste Gruppe B (SPEAKERS B) VOLUME + (Wiedergabelautstärke erhöhen) VOLUME – (Wiedergabelautstärke vermindern) AMP-Taste (wählt den Verstärker als zu steuerndes Gerät)
- Page 33 Hinweise: Einsetzen der Batterien Betätigen Sie die AMP-Taste und wählen Sie „AMP“, bevor Sie die Fernbedienung weiter verwenden. Der effektive Betriebsradius der Fernbedienung beträgt maximal zehn Meter und der Richtwinkel beträgt maximal 30 Grad. Tasten der Fernbedienung, die hier nicht erklärt werden, besitzen keine Funktion zur Steuerung des Tuners.
- Page 34 Minimalwert zurückgeregelt. sich im normalen Betriebs modus. Schalten Sie den AI-3000 aus und beheben Sie die Ursache(n) der Überlastung. Schalten Sie den Verstärker nach ungefähr fünf Minuten Betätigen Sie zum Ausschalten ebenfalls den Netzschalter. Der Schalter wieder ein und überprüfen Sie, ob er wieder ordnungsgemäß...
- Page 35 Wählen Sie die korrekte Signalquelle/den Eingang aus. abweichen. e Die Überlastschutzschaltung wurde aktiviert. Schalten Sie den AI-3000 aus. Beheben Sie die Ursache für das Ansprechen der Schutzschaltung (beispielsweise: Kurzschluss in den Laut- sprecherkabeln, Lautsprechersysteme mit falscher Impedance angeschlossen). Warten Sie fünf Minuten, bevor Sie den Verstär-...
- Page 36 Non esporre questo apparecchio a gocce o spruzzi d’acqua. Non appoggiare sopra l'apparecchio oggetti contenenti acqua o liquidi di altro genere. Non installare questo apparecchio in uno spazio ristretto come una libreria o luoghi simili. L'apparecchio consuma una insignificante quantità di corrente con l'alimentazione POWER o STANDBY/ON non in posizione Questo apparecchio deve essere collocato sufficientemente vicino alla presa di corrente affinché...
-
Page 37: Table Of Contents
Indice Prima dell’uso Grazie per aver scelto TEAC. Leggere attentamente questo Leggere qui prima di effettuare operazioni manuale per ottenere le migliori prestazioni con questa unità. Fare attenzione a evitare lesioni quando si sposta l’unità, a causa Prima dell’uso ..........37 del suo peso. -
Page 38: Identificazione Delle Parti
Identificazione delle parti (1) Pannello frontale Selettore del segnale XLR1 Sensore del telecomando Selettore del segnale XLR2 Manopola VOLUME Selettore del segnale PHONO Indicatore POWER Selezione del segnale CD Pulsante POWER Selezione del segnale TUNER Selezione del segnale AUX Selezione del segnale BYPASS Selettore A/B SPEAKER (gruppo A) Selettore A/B SPEAKER (gruppo B) -
Page 39: Pannello Posteriore
Pannello posteriore Terminali di ingresso del segnale XLR1 Terminali di ingresso del segnale AUX Terminali di ingresso del segnale XLR2 Terminali di ingresso BYPASS Terminali di uscita altoparlanti canale destro (gruppo A) Terminali di uscita PRE OUT Terminali di uscita altoparlanti canale destro (gruppo B) Terminali di uscita altoparlanti canale sinistro (gruppo A) Terminale di messa a terra Terminali di uscita altoparlanti canale sinistro (gruppo B) - Page 40 Identificazione delle parti (2) MUTE Telecomando Selettore SPEAKER (gruppo A) INPUT k (Selettore dell’ingresso precedente) INPUT j (Selettore dell’ingresso successivo) Selettore SPEAKER (gruppo B) VOLUME + VOLUME -...
- Page 41 Installazione delle batterie Nota prima di utilizzare il telecomando Premere il pulsante AMP per passare alla modalità AMP, prima di utilizzare il telecomando per operare sull'unità. La portata effettiva del telecomando è di 10 metri entro un angolo di 30 gradi. I pulsanti che non sono elencati o menzionati nel disegno del telecomando non vengono utilizzati per questa unità.
-
Page 42: Operazioni Di Base
Operazioni di base Accensione/spegnimento Protezione dell’uscita Collegare il cavo di alimentazione e il cavo del segnale dell'unità. Quando l’uscita dell’amplificatore di potenza è sovraccarica, il Premere il pulsante di accensione del pannello frontale [R] per relè del circuito di protezione dell’amplificatore di potenza verrà accendere l'unità. -
Page 43: Risoluzione Dei Problemi
Potenza di uscita......200 W + 200 W (8 Ω) contattare il rivenditore o il servizio clienti/assistenza tecnica TEAC 300 W + 300 W (4 Ω) - Page 44 Phone: (323) 726-0303 TEAC CANADA LTD. 5939 Wallace Street, Mississauga, Ontario L4Z 1Z8, Canada Phone: (905) 890-8008 TEAC MEXICO, S.A. DE C.V. Río Churubusco 364, Colonia Del Carmen, Delegación Coyoacàn, CP 04100, México DF, México Phone: (5255) 5010-6000 TEAC UK Ltd.