Table of Contents
Advertisement
Quick Links
Advertisement
Table of Contents

Related Manuals for dbx TR1616


Summary of Contents for dbx TR1616
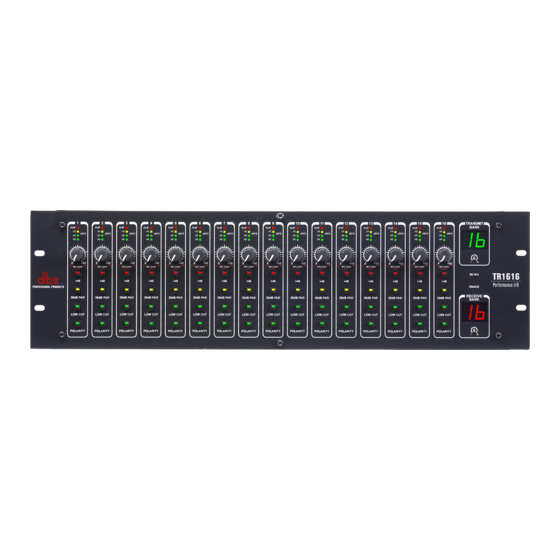
- Page 1 TR1616 P e r f o r m a n c e I / O Owner’s Manual...
-
Page 2: Important Safety Instructions
IMPORTANT SAFETY INSTRUCTIONS WARNING FOR YOUR PROTECTION READ THE FOLLOWING: KEEP THESE INSTRUCTIONS HEED ALL WARNINGS The symbols shown above are internationally accepted symbols that warn of FOLLOW ALL INSTRUCTIONS potential hazards with electrical products. The lightning flash with arrowpoint in the apparatus shall not be exposed to dripping or splashing liquid and no object filled an equilateral triangle means that there are dangerous voltages present within with liquid, such as vases, shall be placed on the apparatus. -
Page 3: Electromagnetic Compatibility
8760 S. Sandy Parkway Sandy, Utah 84070, USA Date: November 14, 2012 European Contact: Your local dbx Sales and Service Office or Harman Signal Processing 8760 South Sandy Parkway Sandy, Utah... - Page 4 After expiration of the warranty, a reasonable charge will be made for parts, labor, and packing if you choose to use the factory service facility. In all cases, you are responsible for transportation charges to the factory. dbx will pay return shipping if the unit is still under warranty.
- Page 5 In no event shall dbx or its dealers be liable for special or consequential damages or from any delay in the performance of this warranty due to causes beyond their...
-
Page 7: Table Of Contents
Analog Inputs ..........................8 Analog Outputs .......................... 8 APPLICATIONS �����������������������������������������������������������������������������������������������������������������������������10 Personal Monitoring w/dbx PMC16s ..................... 10 16 x 16 Digital Snake w/Personal Monitoring ................12 32 x 32 Digital Snake w/Personal Monitoring ................14 32 Channel BSS Soundweb London On-Ramp/Off-Ramp ..............16 OPERATING INSTRUCTIONS ������������������������������������������������������������������������������������������������������������18... -
Page 8: Introduction
BLU link and BLU link to analog audio interface. By providing a modular yet simple solution, the TR1616 is highly expandable and extremely easy to configure. With 16 precision dbx mic preamps and combo style input jacks, the TR1616 accepts line level or mic level signals. -
Page 9: Package Contents
FOR RACK MOUNT USE ONLY. Install the TR1616 in your rack with the provided rack screws. When installed in a rack, the TR1616 must be positioned with one empty rack space above and below the unit to allow for proper ventilation. The TR1616 should not be mounted above or below anything that generates excessive heat. -
Page 10: Panel Descriptions
This dual 7-segment display shows which bank on the BLU link network the TR1616 is transmitting its audio on. Each bank consists of 16 channels. Each TR1616 on the network must have a unique TRANSMIT BANK selected. The desired TRANSMIT BANK can be selected by adjusting the slotted control below the display. - Page 11 8� 96 kHz LED This LED will light when the 96 kHz button on the back panel of the TR1616 is engaged, indicating the TR1616 is configured to clock to a BLU link signal operating at a 96 kHz sampling rate. When the 96 kHz button is disengaged, the sample rate of the TR1616 is 48 kHz.
-
Page 12: Rear Panel
BLU link audio network. 3� AC Power Inlet Provides power to the TR1616 using the provided IEC type AC power cord. A fuse drawer provides access to the fuse. Replace with same type fuse only. 4� ETHERNET Port This port allows for future expansion of the TR1616’s feature set. - Page 13 SNAKE IN port on the receiving TR1616 device. 9� SNAkE ENABLE Button When this button is engaged, the TR1616 will transmit and receive BLU link audio through the SNAKE IN and SNAKE OUT ports. Engage this button on two TR1616s which carry and receive the signal between the front of house and stage locations.
-
Page 14: Making Connections-Cabling
Connect the included IEC power cable to this fused AC inlet. Connect the other end to an available AC power outlet. The TR1616 does not have a power switch. An AC power strip or power conditioner can be used for switching power to the TR1616 on and off. -
Page 15: Link Connections
TR1616s on both sides of the snake connection must complete the BLU <--S link ring. If using a single TR1616 on either side of the snake connection and no other BLU link devices are connected, such as PMC16s, the LOOP OUT port should be connected to the LOOP IN port to close the BLU link ring, as shown below. -
Page 16: Applications
Personal Monitoring w/dbx PMC16s Recommended for: • Small Performance Venues • Portable Live Sound • Houses Of Worship • Rehearsal Spaces FRONT OF HOUSE Mixer Outputs <--BLU link LOOP IN Receive Bank: 1 Transmit Bank: 1 Receive Bank: N/A Transmit Bank: 1 BLU link LOOP OUT-->... - Page 17 • Up to 16 channels can be received at the PMC16s on stage from front of house. • Up to 60 PMC16s can be connected to the network. • System can be further expanded in the future if needed. STAGE <--To TR1616 LOOP IN Powered Powered Powered...
-
Page 18: 16 X 16 Digital Snake W/Personal Monitoring
OUT port to the LOOP IN port. However, it is also possible to close the BLU link ring without using this extra cable connection. To do this, leave the snake mode disabled on the #1 TR1616 and make the following connections: •... - Page 19 • Up to 60 PMC16s can be connected to the network. • Although this diagram does not show it, the main mixer outputs could be connected to the #1 TR1616 and then fed to the #2 TR1616 for feeding the amplifiers or loudspeaker management processor for the main PA speakers.
-
Page 20: 32 X 32 Digital Snake W/Personal Monitoring
From Instruments From Instruments Outputs On Stage On Stage Transmit Bank: 1 Transmit Bank: 2 Receive Bank: 3 Receive Bank: 4 TR1616 TR1616 <--BLU link LOOP OUT to LOOP IN BLU link LOOP OUT to LOOP IN--> TR1616 Owner’s Manual... - Page 21 TR1616s. • Although this diagram does not show it, the main mixer outputs could be connected to the #2 TR1616 and then fed to the #4 TR1616 for feeding the amplifiers or loudspeaker management processor for the main PA speakers.
-
Page 22: 32 Channel Bss Soundweb London On-Ramp/Off-Ramp
To Destinations Analog Inputs To Destinations Transmit Bank: 2 Transmit Bank: 3 Receive Bank: N/A Receive Bank: N/A TR1616 TR1616 BLU link LOOP OUT to LOOP IN--> <--BLU link LOOP OUT to BLU link IN) Legend BLU-800 BLU link Connection... - Page 23 Points: • Allows for easy analog audio connection to BSS Audio Soundweb London systems, due to the TR1616’s combo (1/4” and XLR) inputs and XLR outputs, eliminating the need to make special Phoenix fitted cables. • TR1616s can easily be added to pre-existing BLU link compatible Soundweb London systems with no additional hardware required.
-
Page 24: Operating Instructions
TR1616 at the front of house position (instead of straight to the mixing console). The TR1616 could then pass the analog signals out to the mixing console through the XLR outputs and out to the PMC16s on stage via BLU link. -
Page 25: Blu Link Status Indicators
BLU link IN is connected to another BLU link IN. • The TRANSMIT BANK dot on the #1 TR1616 in the example set up on page 12 would not illuminate if there were no path connecting the #1 TR1616’s LOOP OUT to LOOP IN. -
Page 26: Tr1616 Preamp Setup
LED barely lights and the CLIP LED does not. 6� Repeat step 5 for each channel. If a source causes one of the TR1616’s inputs to clip when the <MIC GAIN> knob is all the way down, engage the <20dB PAD> button for the channel and then complete step 5. -
Page 27: Firmware Updates
The firmware in the TR1616 is updatable via the USB port. Available firmware updates can be downloaded from www.dbxpro.com. The Firmware Updater application for the TR1616 requires a Windows ® To perform a firmware update: 1� Download the Firmware Updater application from www.dbxpro.com. -
Page 28: Block Diagram
TR1616 Owner’s Manual... -
Page 29: Dimensions
5.745 0.125 5.250 TR1616 Owner’s Manual... -
Page 30: Specifications
112dB unweighted, 115dB A-weighted Frequency Response: 10Hz to 40kHz, +/- 0.25dB at 96kHz 10Hz to 20kHz, +/- 0.25dB at 48kHz THD+N: Typically 0.006% at 1kHz, 0dBu output Interchannel Crosstalk: <-100dB, 22Hz to 22kHz DAC Latency: 29/Fs (0.60msec at 48kHz) TR1616 Owner’s Manual... - Page 31 1.6A 250V Timelag Hi Brk Rack Unit: Dimensions: 5.25” (H) x 19” (W) x 6.25” (D) 133.4 mm (H) x 482.6 mm (W) x 158.8 mm (D) Weight: 9.6 lb (4.4 kg) Shipping Weight: 11.3 lb (5.1 kg) TR1616 Owner’s Manual...
- Page 32 8760 South Sandy Parkway Sandy, Utah 84070 PH (801) 566-8800 FAX (801) 566-7005 http://www.dbxpro.com dbx® is a registered trademark of Harman Copyright - Harman TR1616 Owner’s Manual 5035742-A Printed in China...