Table of Contents
Advertisement
Advertisement
Table of Contents

Related Manuals for dbx 386


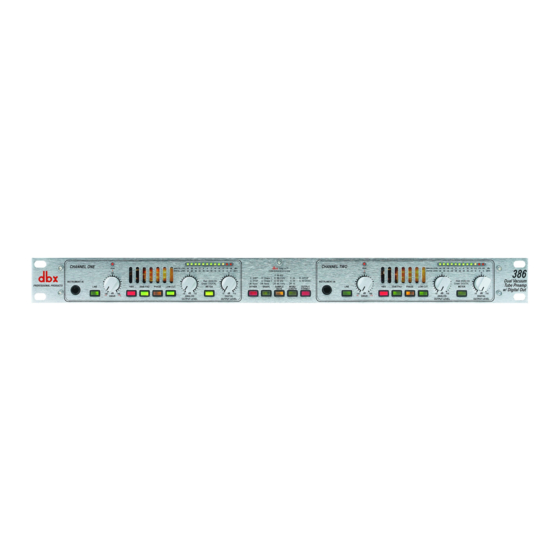
Summary of Contents for dbx 386
- Page 1 ® Dual Vacuum Tube Preamp w/Digital Out User Manual...
-
Page 2: Important Safety Instructions
IMPORTANT SAFETY INSTRUCTIONS C A U T I O N R I S K O F E L E C T R I C S H O C K D O N O T O P E N A T T E N T I O N : R I S Q U E D E C H O C E L E C T R I Q U E - N E P A S O U V R I R W A R N I N G : T O R E D U C E T H E R I S K O F F I R E O R E L E C T R I C... -
Page 3: Lithium Battery
Manufacturer’s Name: dbx Professional Products Manufacturer’s Address: 8760 S. Sandy Parkway Sandy, Utah 84070, USA declares that the product: Product name: dbx 386 Product option: N/A conforms to the following Product Specifications: EMC: EN 55013 (1990) EN 55020 (1991) Supplementary Information:... -
Page 4: Table Of Contents
Introduction 0.1 Defining the 386...i 0.2 Service Contact Info...ii 0.3 Warranty...ii 0.4 Installation Recommendations...iii Section 1 - Getting Started 1.1 Rear Panel Connections ...2 1.2 Front Panel Connections...3 1.3 Type IV™ Conversion System Controls...4 Section 2 - Analog Applications 2.1 Basic Connection...6 2.2 Connection to a Mixing Console...6... - Page 5 INTRODUCTION INTRO CUSTOMER SERVICE INFO 386 DEFINED WARRANTY INFO ®...
-
Page 6: Defining The 386
For over 25 years, dbx has been the industry leader in dynamics processing. With the introduction of the 386, we offer the classic smooth and warmth qualities of tube microphone pre-amplification, combined with the state-of-the-art proprietary dbx Type IV™... -
Page 7: Service Contact Info
In no event shall dbx or its dealers be liable for spe- cial or consequential damages or from any delay in the performance of this warranty due to causes beyond their control. ® Introduction 0.2 Service Contact Info 0.3 Warranty 386 User Manual... -
Page 8: Installation Recommendations
Introduction 0.4 Installation Recommendations Install the 386 in your rack with the provided rack screws. It is essential that when the 386 is being mounted in a rack mounting enclosure, the unit should be positioned with enough room (at least one centimeter at the top and one centimeter at the bottom of the unit) to allow prop- er ventilation. -
Page 9: Section 1 - Getting Started
Section 1 Getting Started Getting Started ®... -
Page 10: Rear Panel Connections
Power Switch Turns the 386 on and off. IEC Power Cord Receptacle This is the power cord receptacle of the 386. An IEC cord is included with the shipped prod- uct. AES/EBU Digital Connector The 386 provides AES/EBU digital output formating through the XLR connector. Be sure to use short lengths of 110Ω... -
Page 11: Front Panel Connections
Line Select Switch This switch, when lit, selects the rear line input or front panel instrument input (when some- thing is connected) as the source signal of the 386. Drive Control This control sets the amount of gain at the input of the vacuum tube stage. The range of gain available is +30 to +60 dB (-15 to +15 dB when LINE INPUT is selected). -
Page 12: Type Iv™ Conversion System Controls
Selects output wordlength of 16, 20, or 24 bits output resolution. The LED will not be lit for 16 bit, GREEN for 20 bit, and RED for 24 bit. Output Format Selects the AES/EBU or S/PDIF digital output format. The LED will be lit red for AES/EBU and green for S/PDIF. ® 386 User Manual... - Page 13 Section 2 ANALOG APPLICATIONS ANALOG APPLICATIONS ®...
-
Page 14: Section 2 - Analog Applications
• Turn off all equipment before making any connections. • Install the 386 in your rack with the provided rack screws. It is essential that when the 386 is being mounted in a rack mounting enclosure, the unit should be positioned with enough room (at least one centimeter at the top and one centimeter at the bottom of the unit) to allow proper ventilation. -
Page 15: Direct Connection To A Recorder
386 is connected. As you increase the setting of the DRIVE control, you should begin to hear the input of the 386 running through the recorder and returning to your console as a tape return. - Page 17 Section 3 DIGITAL APPLICATIONS DIGITAL APPLICATIONS ®...
-
Page 18: Section 3 - Digital Applications
Section 3 Digital Applications 3.1 Digital Output Front Functions of the 386 Dither Switch This switch is used to select the dither type algorithms including: TPDF, SNR 2 , or None. Dither is random noise that is added to the audio signal which effectively eliminates the harmonic distor- tion created by truncation. -
Page 19: Sync Input Sample Rate Selection
BNC connectors are provided for both word clock in and out functions. The 386’s clock chips are dbx custom VCXO chips, designed for low-jitter performance. You may use the 386 as a master clock source, having other equipment slave to the 386, or you may slave the 386’s clock to any other word clock source. -
Page 20: Direct Connection To A Daw (Cpu)
• Connect the source to the desired 1/4” TRS or XLR input. • Connect the AES/EBU or S/PDIF output of the 386 and run into the AES/EBU or S/PDIF input interface of the DAW (CPU). Front Panel Digital Output Features 1). -
Page 21: Direct Connection To A Digital Mixer
Rear Panel Connections • Connect the source to the desired 1/4” TRS or XLR input jack. • Connect the AES/EBU or S/PDIF output of the 386 and run into the AES/EBU or S/PDIF input of the digital mixer. Front Panel Digital Output Features 1). -
Page 22: A/D Conversion
• Connect the source to the desired 1/4” TRS or XLR input. • Connect the AES/EBU or S/PDIF output of the 386 and run into the AES/EBU or S/PDIF input interface of the DAW (CPU). Front Panel Digital Output Features 1). -
Page 23: Multi-Tracking To Digital
• Connect the source to the desired 1/4” TRS or XLR input jack. • Connect the AES/EBU or S/PDIF output of the 386 and run into the AES/EBU or S/PDIF input of the digital mixer. Front Panel Digital Output Features 1). -
Page 24: Analog And Digital Output Applications
Connect the AES/EBU or S/PDIF output of the 386 and run into the AES/EBU or S/PDIF input interface of the DAW (CPU). • Connect the 1/4” TRS or XLR output of the 386 and run into the 1/4” TRS or XLR input of the monitoring device. Front Panel Digital Output Features 1). -
Page 25: Appendix
Appendix APPENDIX APPENDIX Sync Input Info Block Diagram dbx Type IV™ White Paper Noise-Shaping Algorithms Truncation Specifications ®... -
Page 26: Sync Input Info
If you use the 386 with another piece of terminated equipment in tapped configuration, you should unterminate (marked "unterminated" on the circuit board) the 386’s sync input. The same is true if you wish to use several 386’s in a tapped configuration. See Fig. A.1 for the location of termination jumper. -
Page 27: Block Diagram
Appendix B Block Diagram Block Diagram ® 386 User Manual... -
Page 28: Dbx Type Iv™ Conversion System
This, of course, compromises signal- 386 User Manual ®... - Page 29 This mapping is analogous to the signal compression effect that occurs when recording high-level signals onto analog tape. ® Type IV™ White Paper Signal Level dB FS A/D Clip Point Figure 1 - Converted Level vs. Input Level Appendix C Input Signal Level 386 User Manual...
- Page 30 Type IV™ Over Region and never clips. The dashed line indicates the original input signal level. Below the Over Region no mapping occurs, while above this, mapping keeps all peaks of the signal below the A/D clip level, thus preserving the high-frequency content of the signal. 386 User Manual TYPE IV™ Over...
- Page 31 Type IV™ White Paper Amplitude Time Figure 3a - Signal Having Low and High Frequency Content Amplitude A/D Clip Level Time A/D Clip Level Figure 3b - Signal of Fig. 3a Going Beyond the A/D Clip Level ® 386 User Manual...
- Page 32 The dbx Type IV™ Conversion System succeeds in combining the best of the analog and digital worlds to cap- ture the truest essence and fullest dynamic range of audio signals. Who else but dbx would bring you this technology! 386 User Manual High-Frequency Information Completely Lost...
-
Page 33: Noise-Shaping Algorithms
FFT Length= 2048, Sample Rate= 48 Khz, Averages= 32; Graph Steps= 1024. D.2 Truncation (a) 24-Bit word, (b) 16-Bit truncated output, no dither. Parameters: Input -60dBFS, 1 kHz; FFT Length= 2048, Sample Rate= 48 Khz, Averages= 32; Graph Steps= 1024. ® 386 User Manual... -
Page 34: Specifications
Operating Voltage: Power Requirements: Physical Weight: Dimensions: NOTE: 0dBu= -18dBFS, 0dBu = 0.775V rms 386 User Manual Female XLR Pin 2 Hot Electronically balanced/unbalanced 330Ω -9 dBu or +11 dBu with 20 dB pad engaged >40dB, Typically 55dB Typically -120 dBu with a 150Ω source load, 20Hz to 20kHz BW TRS 1/4"... - Page 35 ® A Harman International Company 8760 South Sandy Pkwy. Sandy, Utah 84070 Phone: (801) 568-7660 Fax: (801) 568-7662 Int’l Fax: (603) 672-4246 Questions or comments? E•mail us at: customer@dbxpro.com or visit our World Wide Web home page at: www.dbxpro.com ® 18-0098-A...